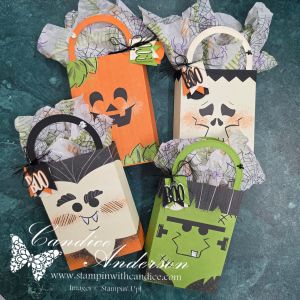
DIY Spooktacular Gift Bag Tutorial for Unique Halloween Treats

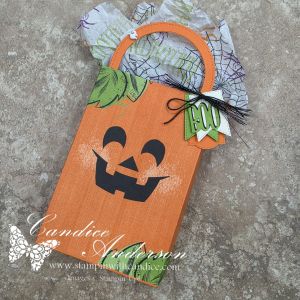
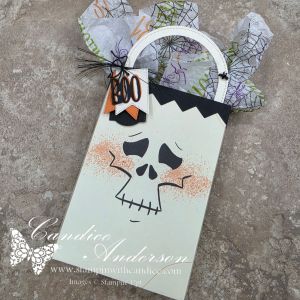
When I first saw the Spooktacular 6″ x 6″ Designer Series Paper, I just knew I had to have it! It was one of the first things from my wish list that I ordered. Of course, it took me a little while to actually find the time to create with it—but it was definitely worth the wait!

I knew I wanted to create some kind of fun Halloween gift box using those adorable monster faces. As I started playing around with the paper and experimenting with different ideas, I actually came up with this gift bag completely by accident.

And I absolutely fell in love with it! 👻🎃

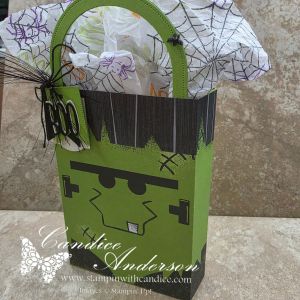
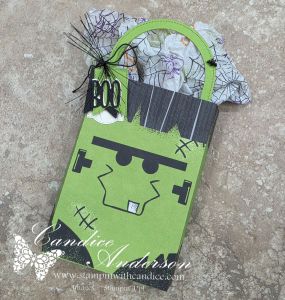
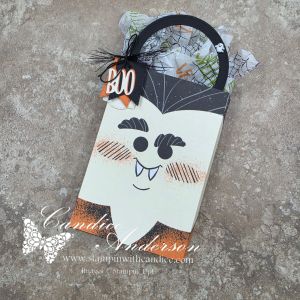
I love how the angled sides let you see even more of that cute Designer Series Paper, while the coordinating handle, layered BOO tag, wispy ribbon, and stamped tissue paper add all those little finishing touches. And because each sheet features a different monster, you can create a whole collection of bags, each with its own personality!

You love it too, right?

And if you don’t already have the Spooktacular Designer Series Paper, I have a feeling it’s going to be on your wish list after seeing these!


Ready to Make Your Own?

I’ve made it easy for you with my Spooktacular Gift Bag Tutorial.

For just $7, you’ll receive a 5-page downloadable PDF tutorial complete with:

  • Step-by-step instructions and photos
  • Cutting and scoring measurements
  • Complete supply list
  • Helpful tips for assembling and embellishing your bag
  • A video tutorial so you can follow along with me from start to finish

Need Supplies?

Want to create the bags but you’re missing some of the supplies? I’ve made that easy too!

Use my Stampin’ Up! project link to see the products I used and add only the items you need directly to your shopping cart.

I Can’t Wait to See Yours!

One of my favorite things about sharing my projects is seeing how they inspire your creativity. Change the colors, embellishments, tags, or treats and make these little bags your own!

When you create your Spooktacular Gift Bag, be sure to tag me when you share it. I always love seeing what my projects have inspired you to create.


No matter where your creative journey takes you, I’m so glad you’re here. Let’s learn, create, connect, and grow together—one project at a time. 🦋

A beautifully crafted Christmas card featuring a window scene that displays a peaceful nativity setting on one side, while the inside is adorned with cozy holiday elements like hanging stockings and warm colors.
💕 Let’s Stay Connected

📺 YouTube 📘 Facebook 📸 Instagram 📌 Pinterest

A Fidget Spinner for Crafters: The Never-Ending Card

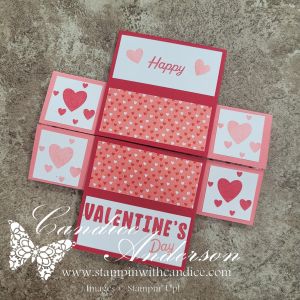
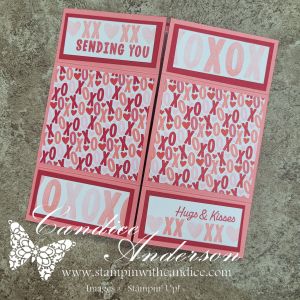
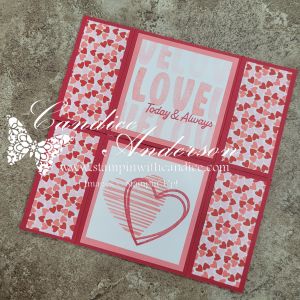
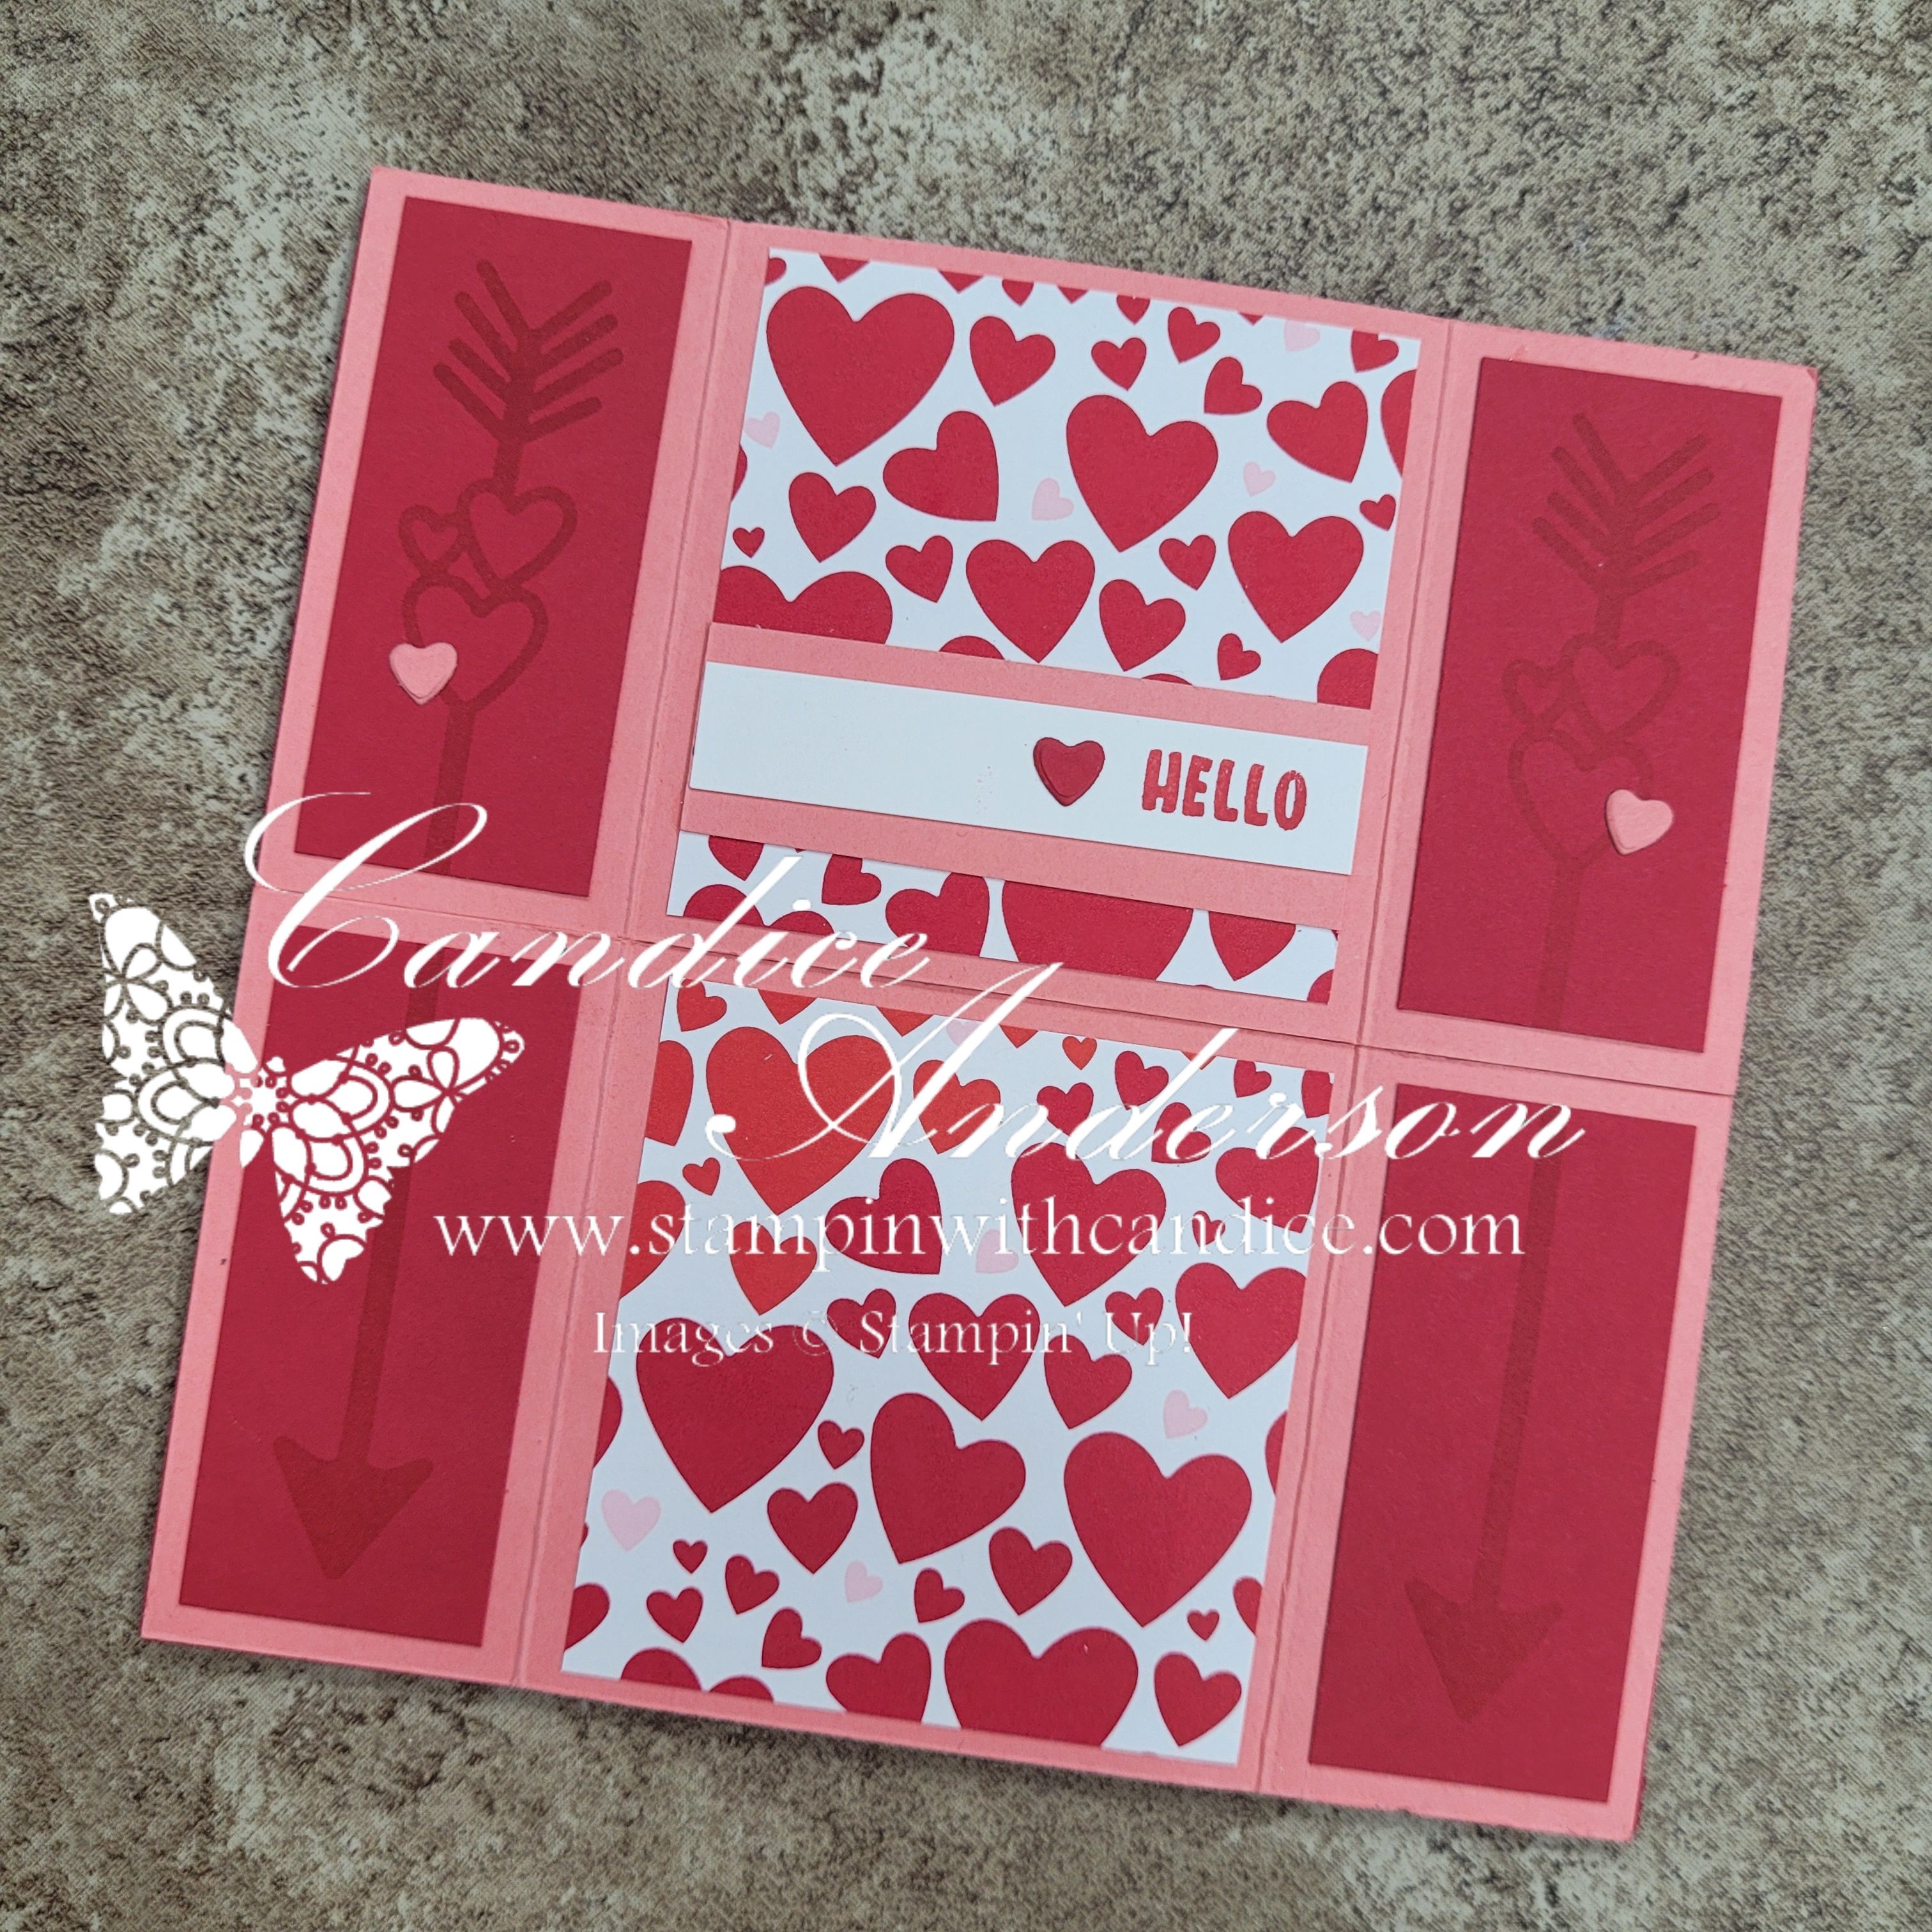
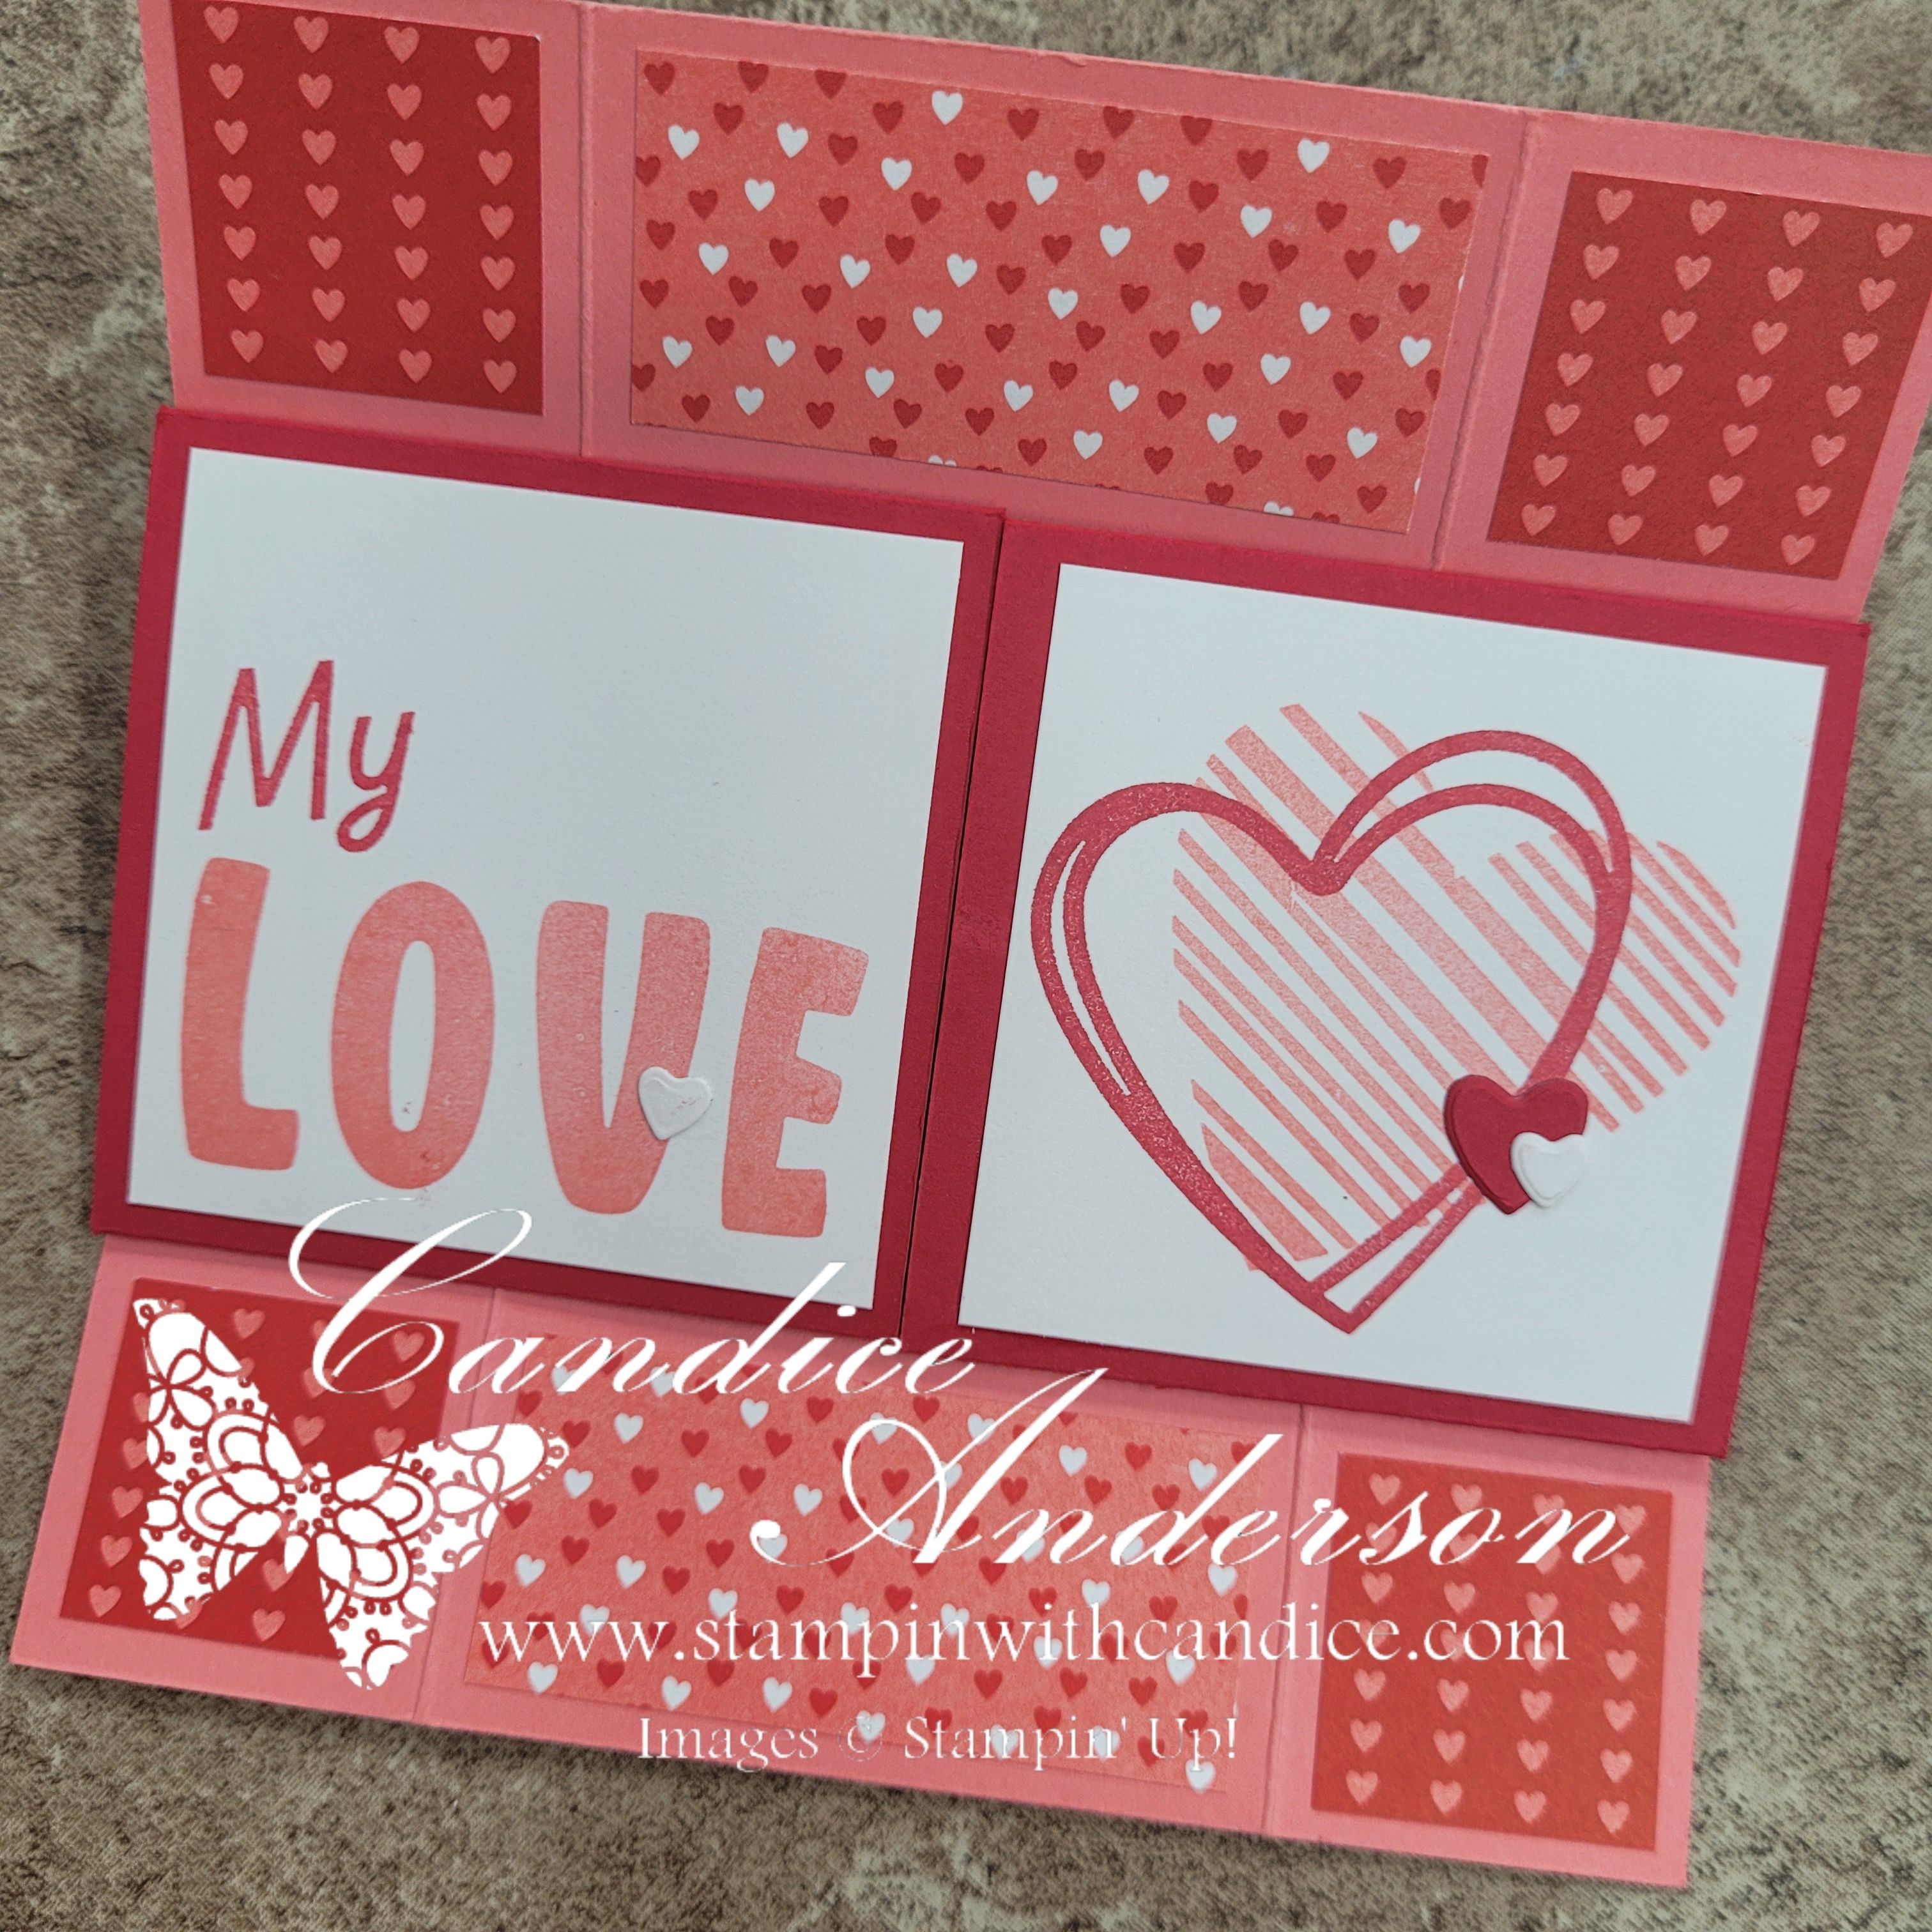
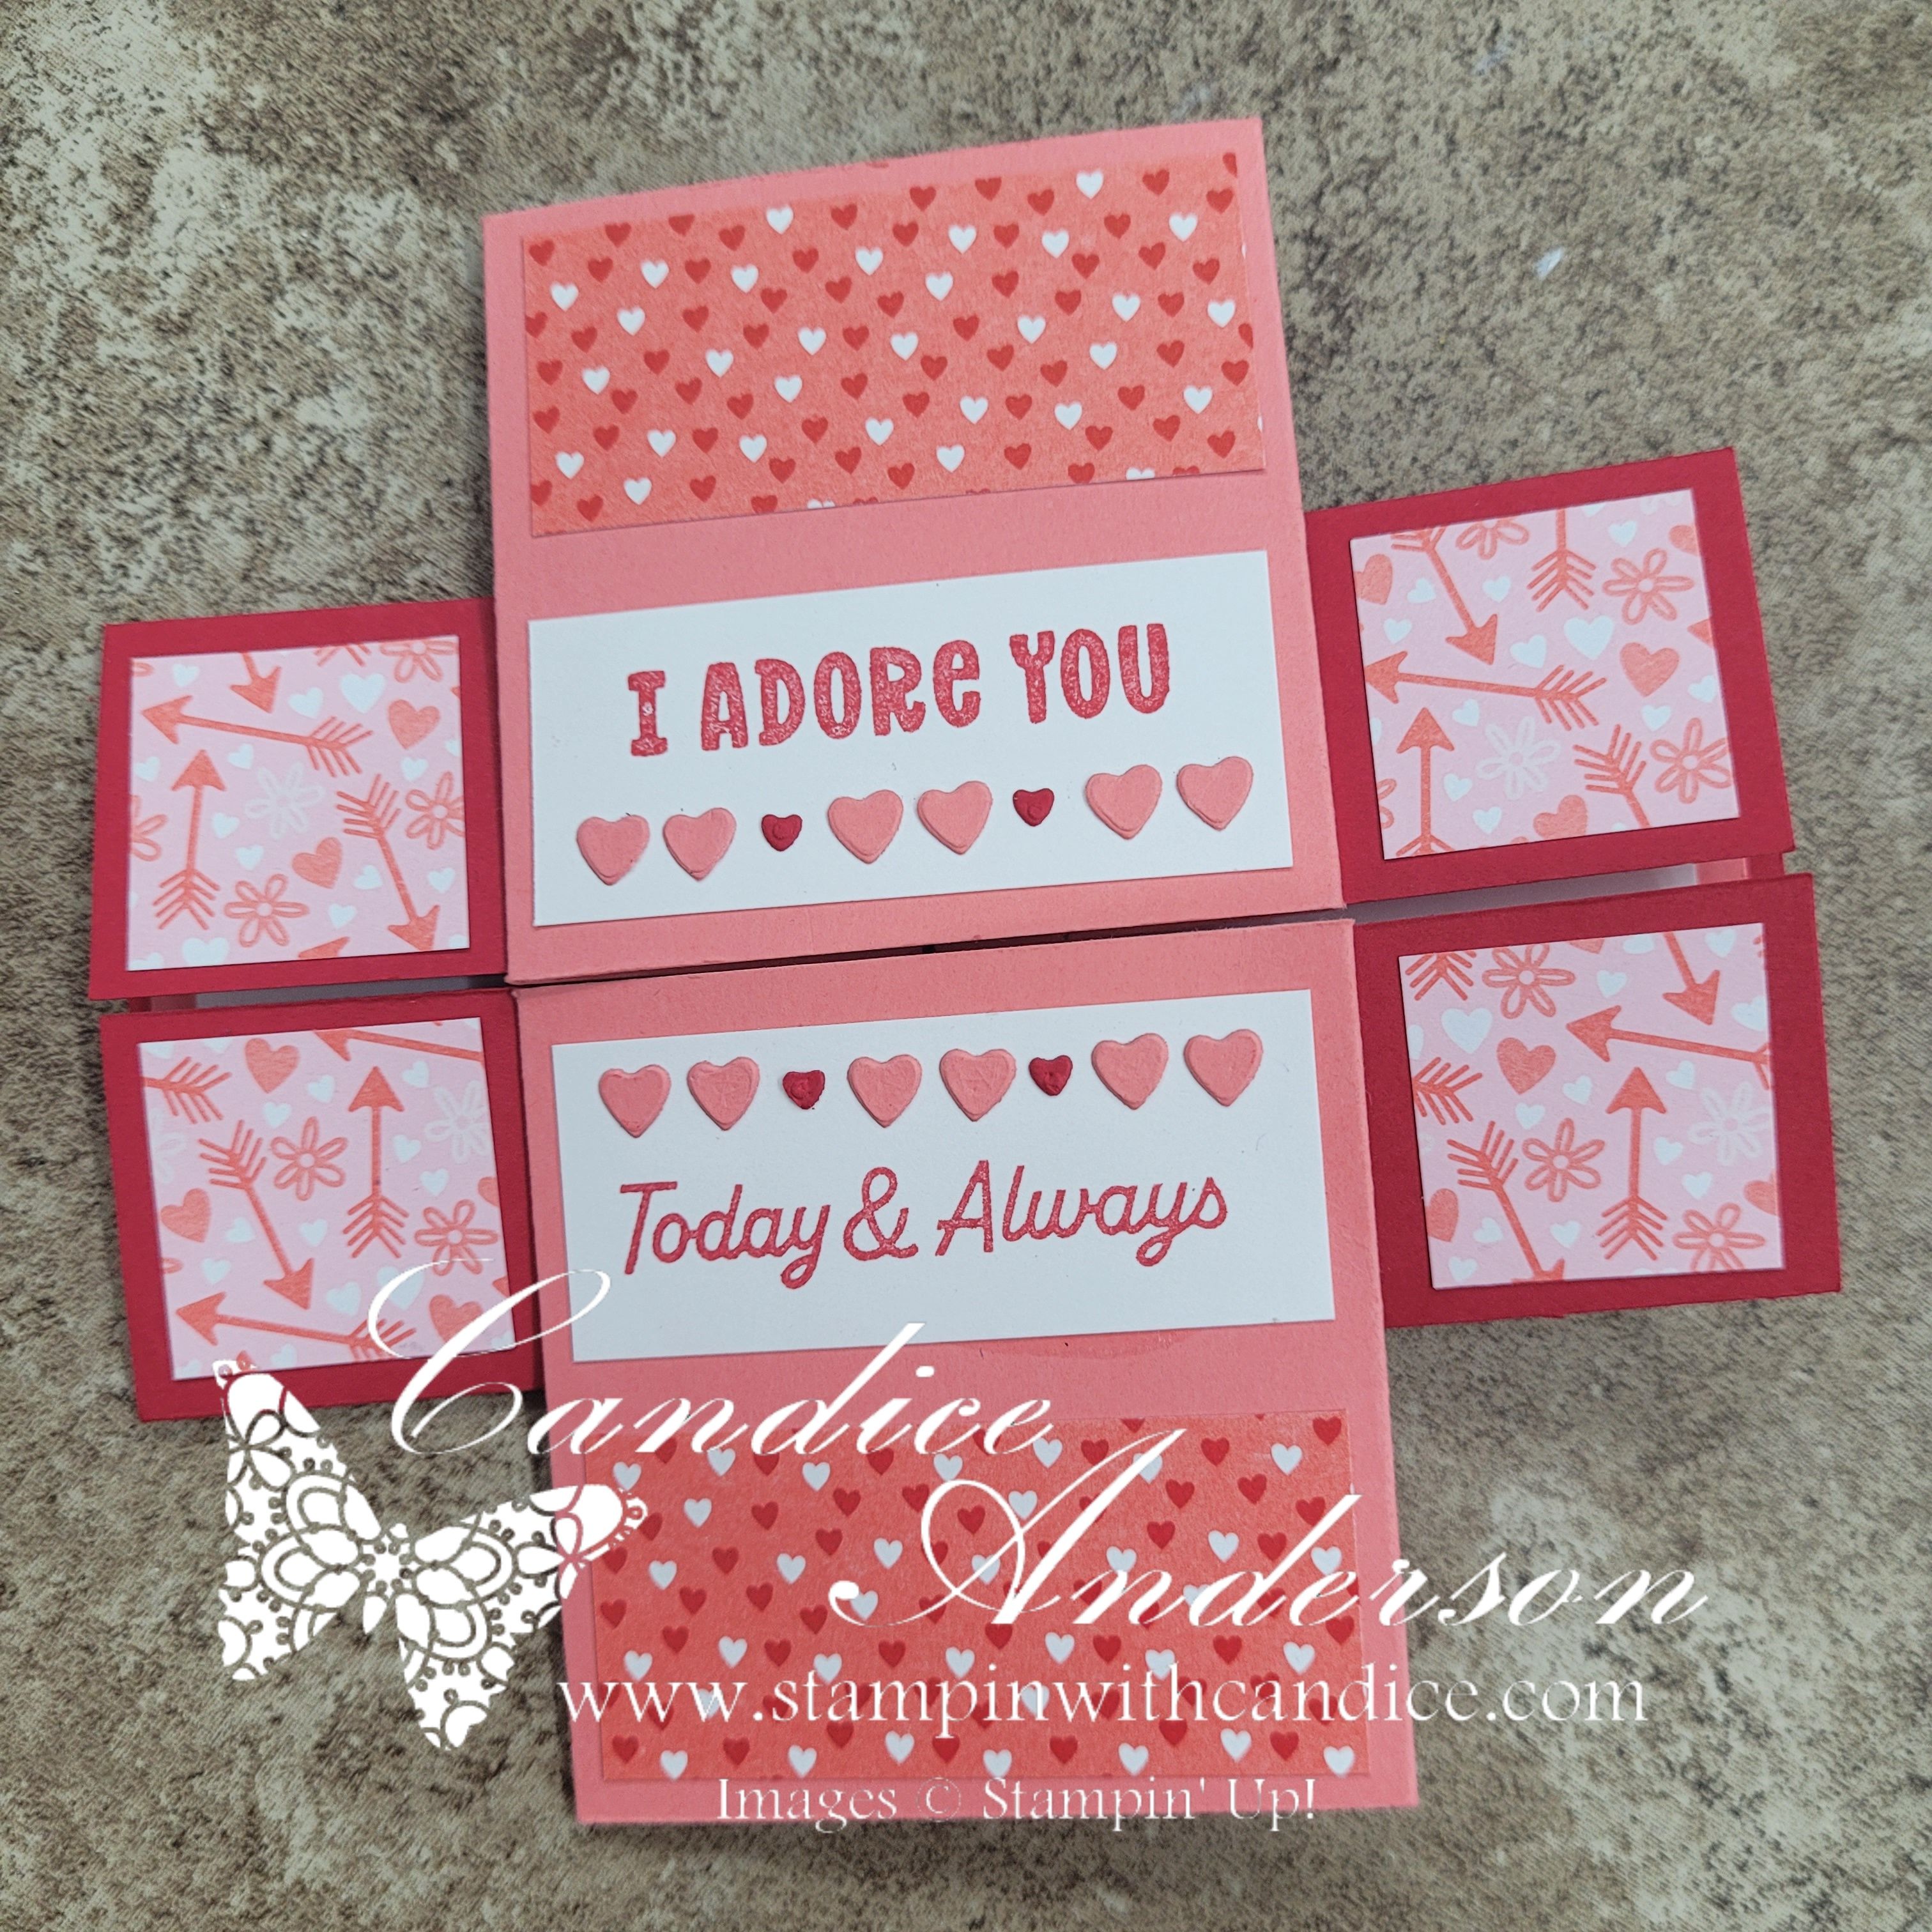
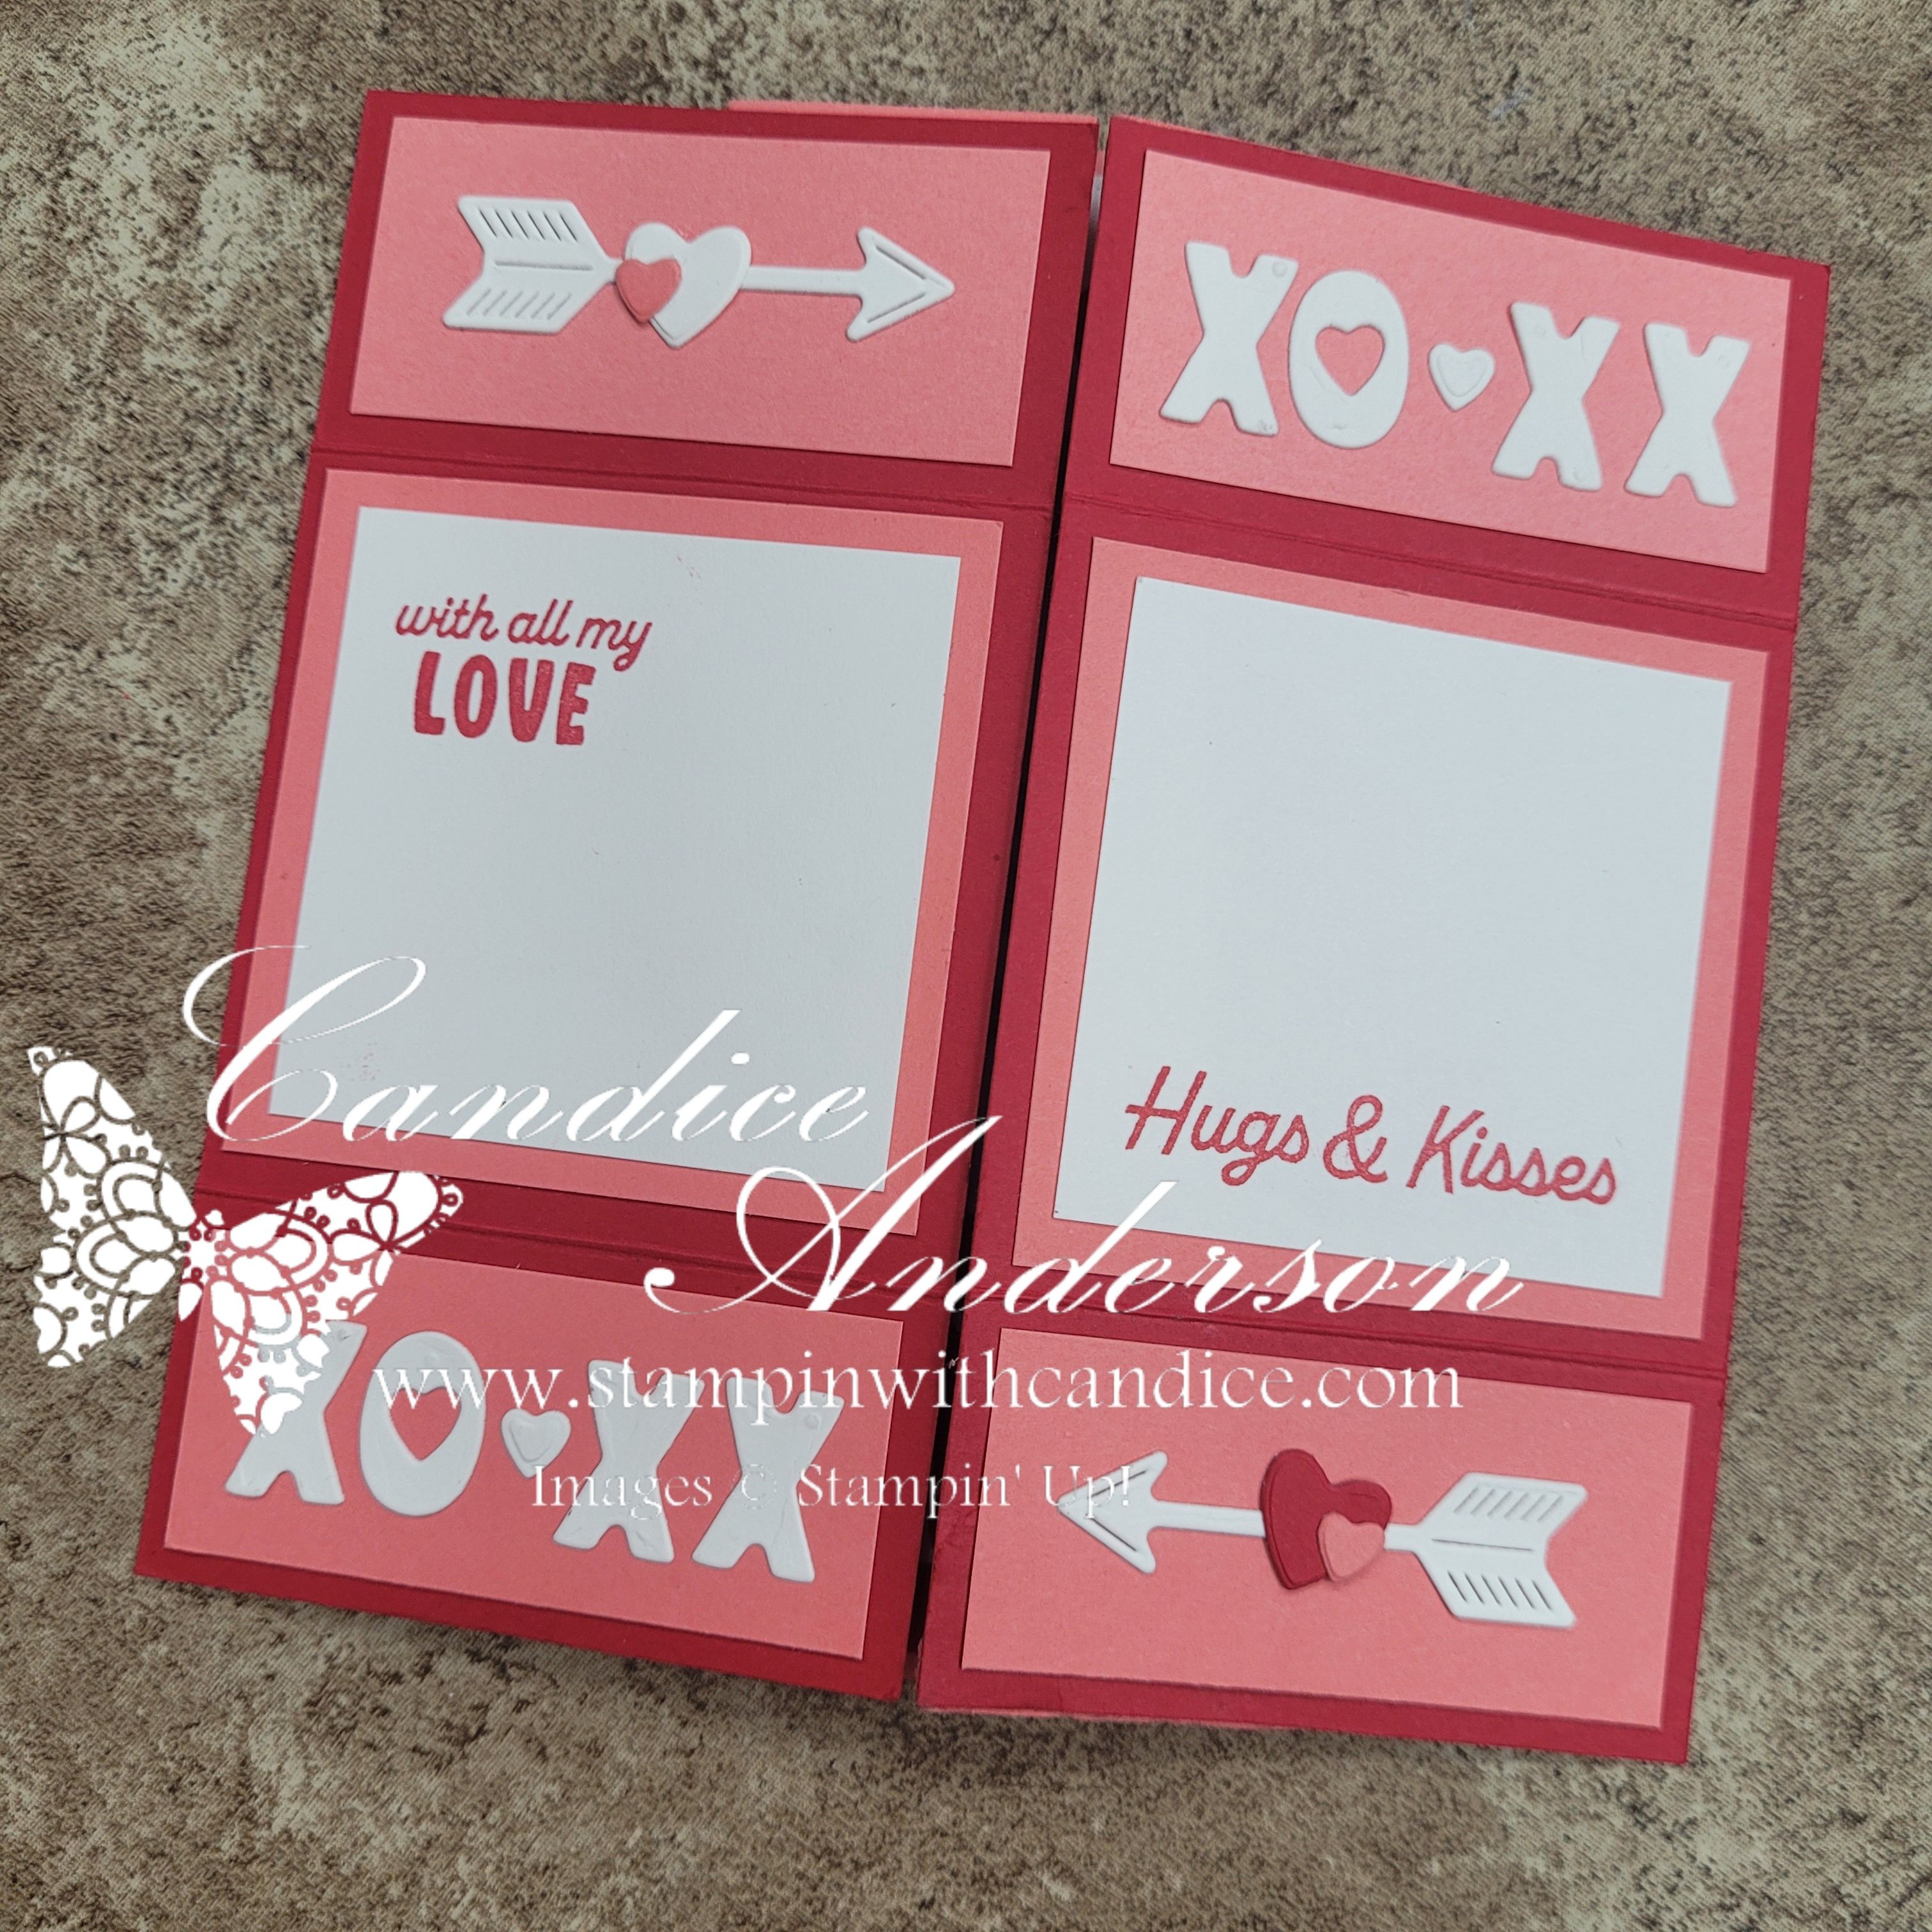
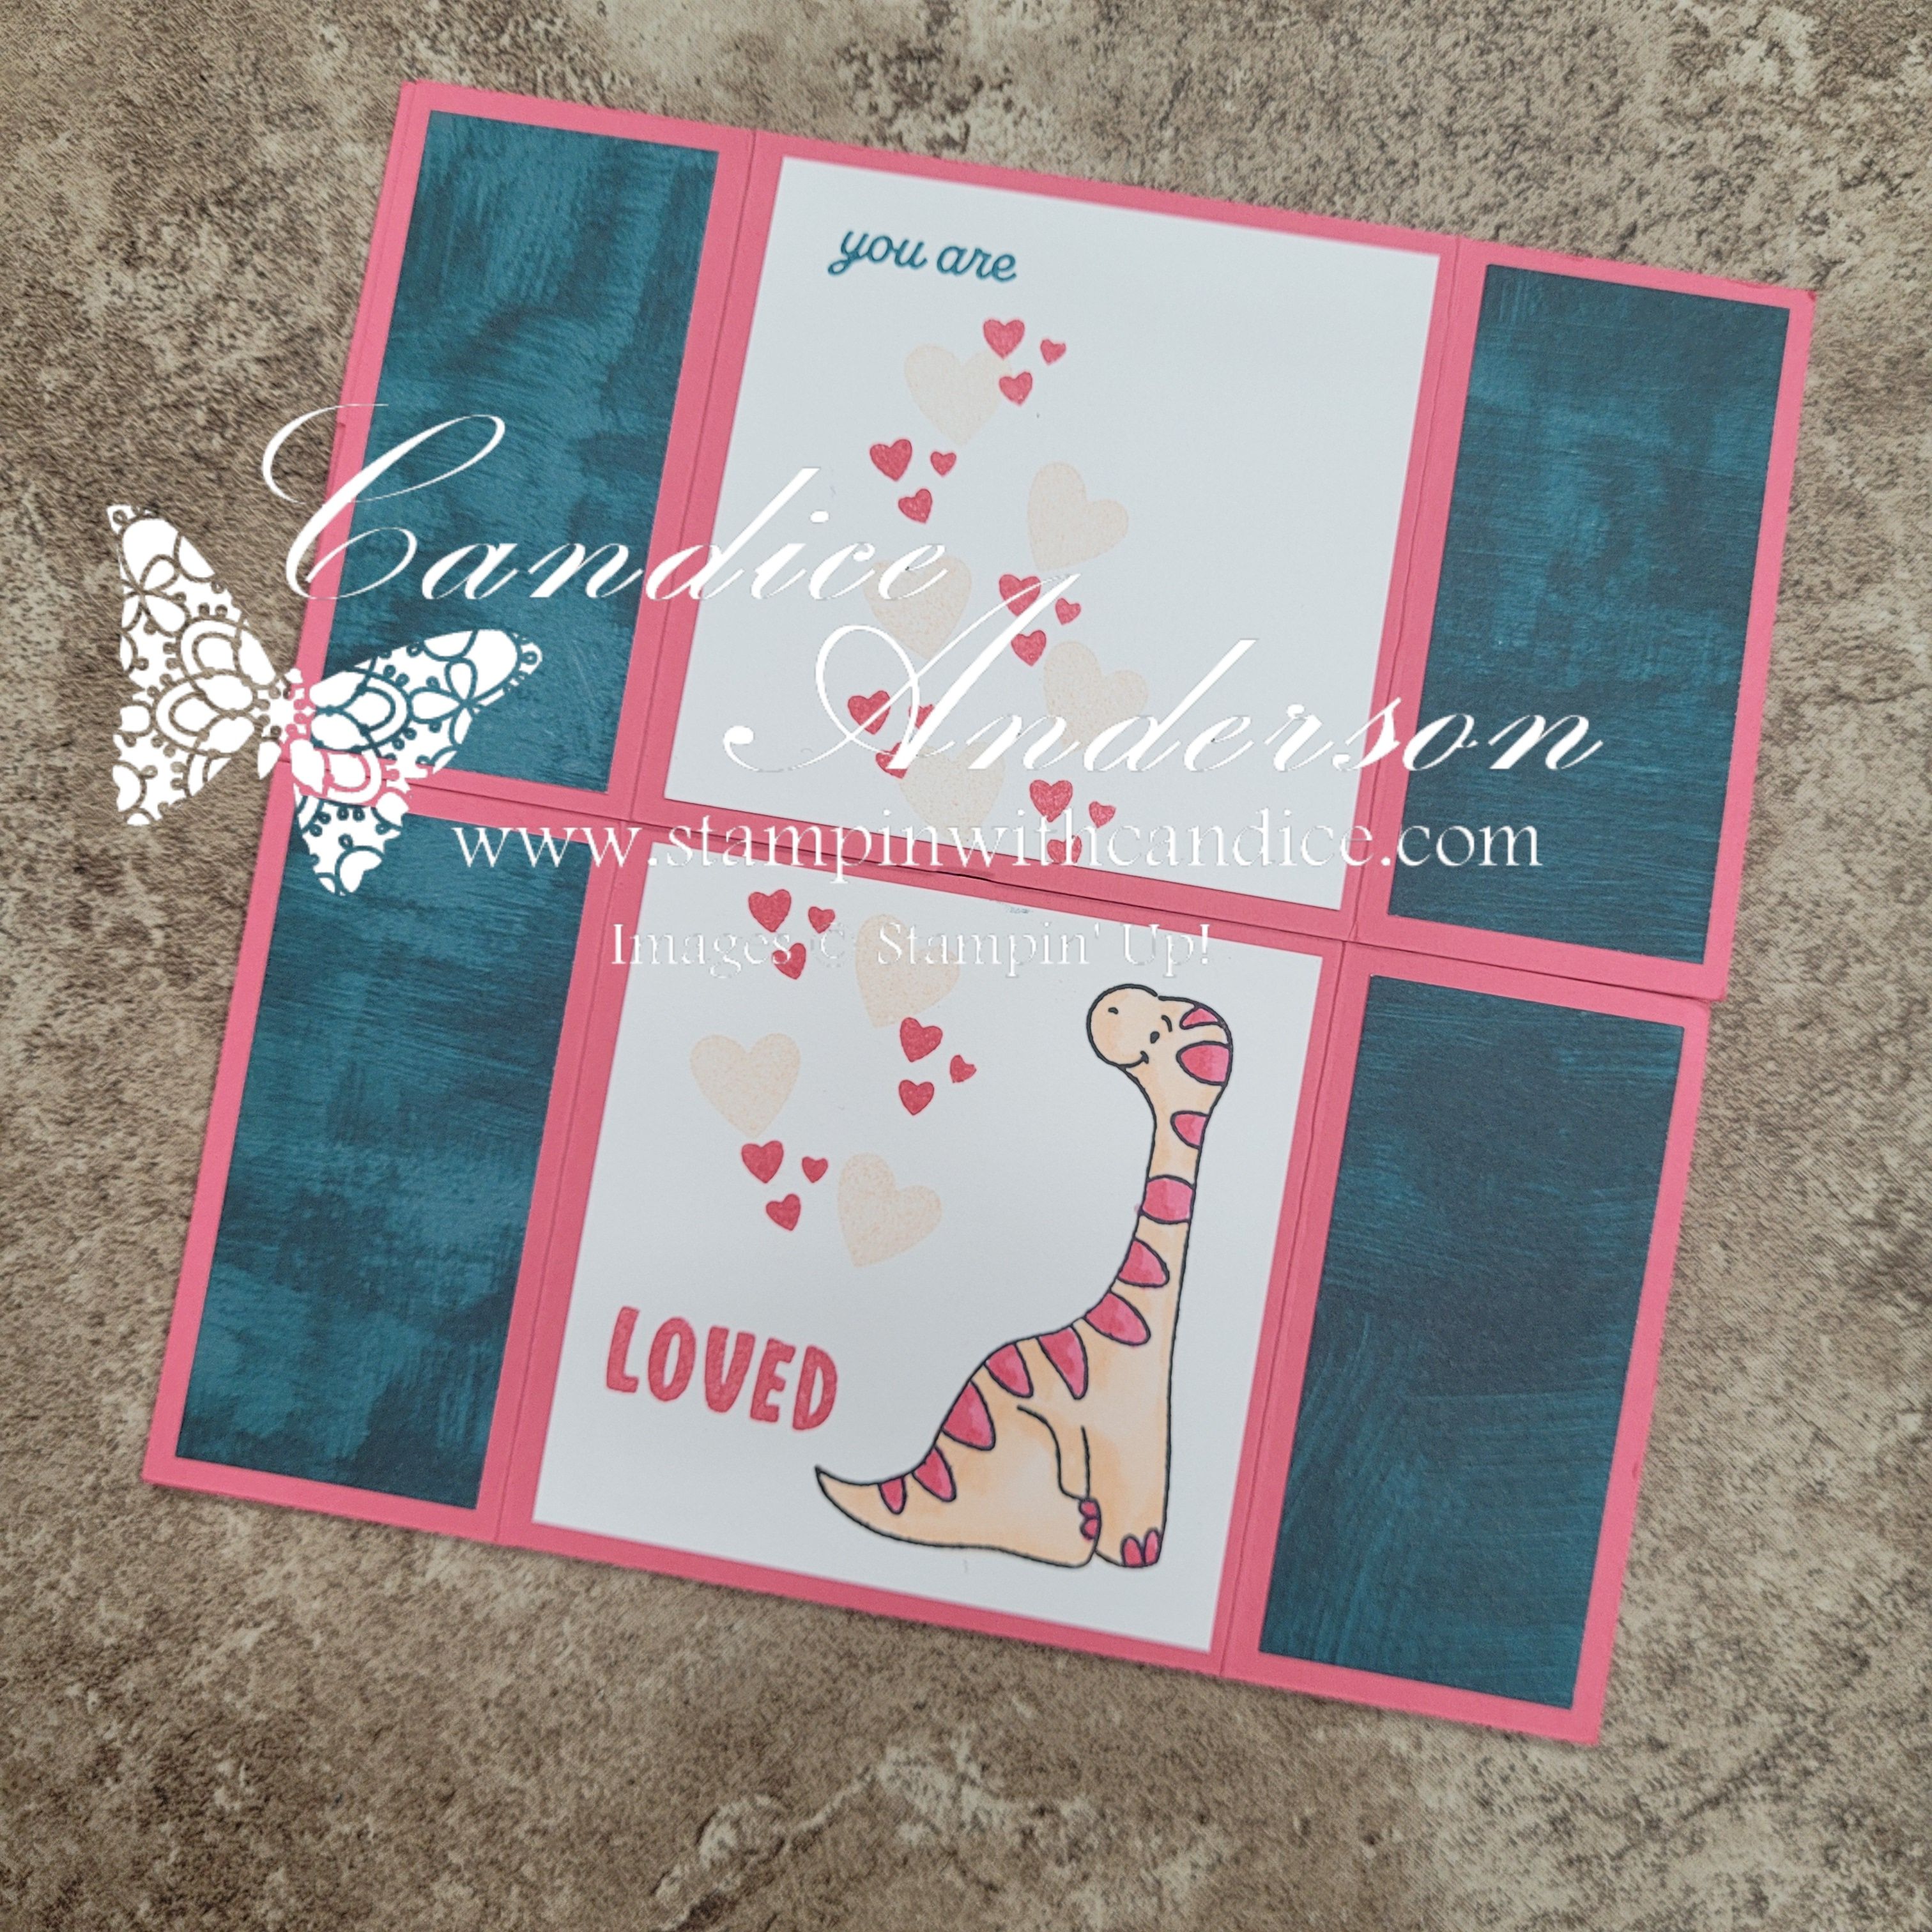
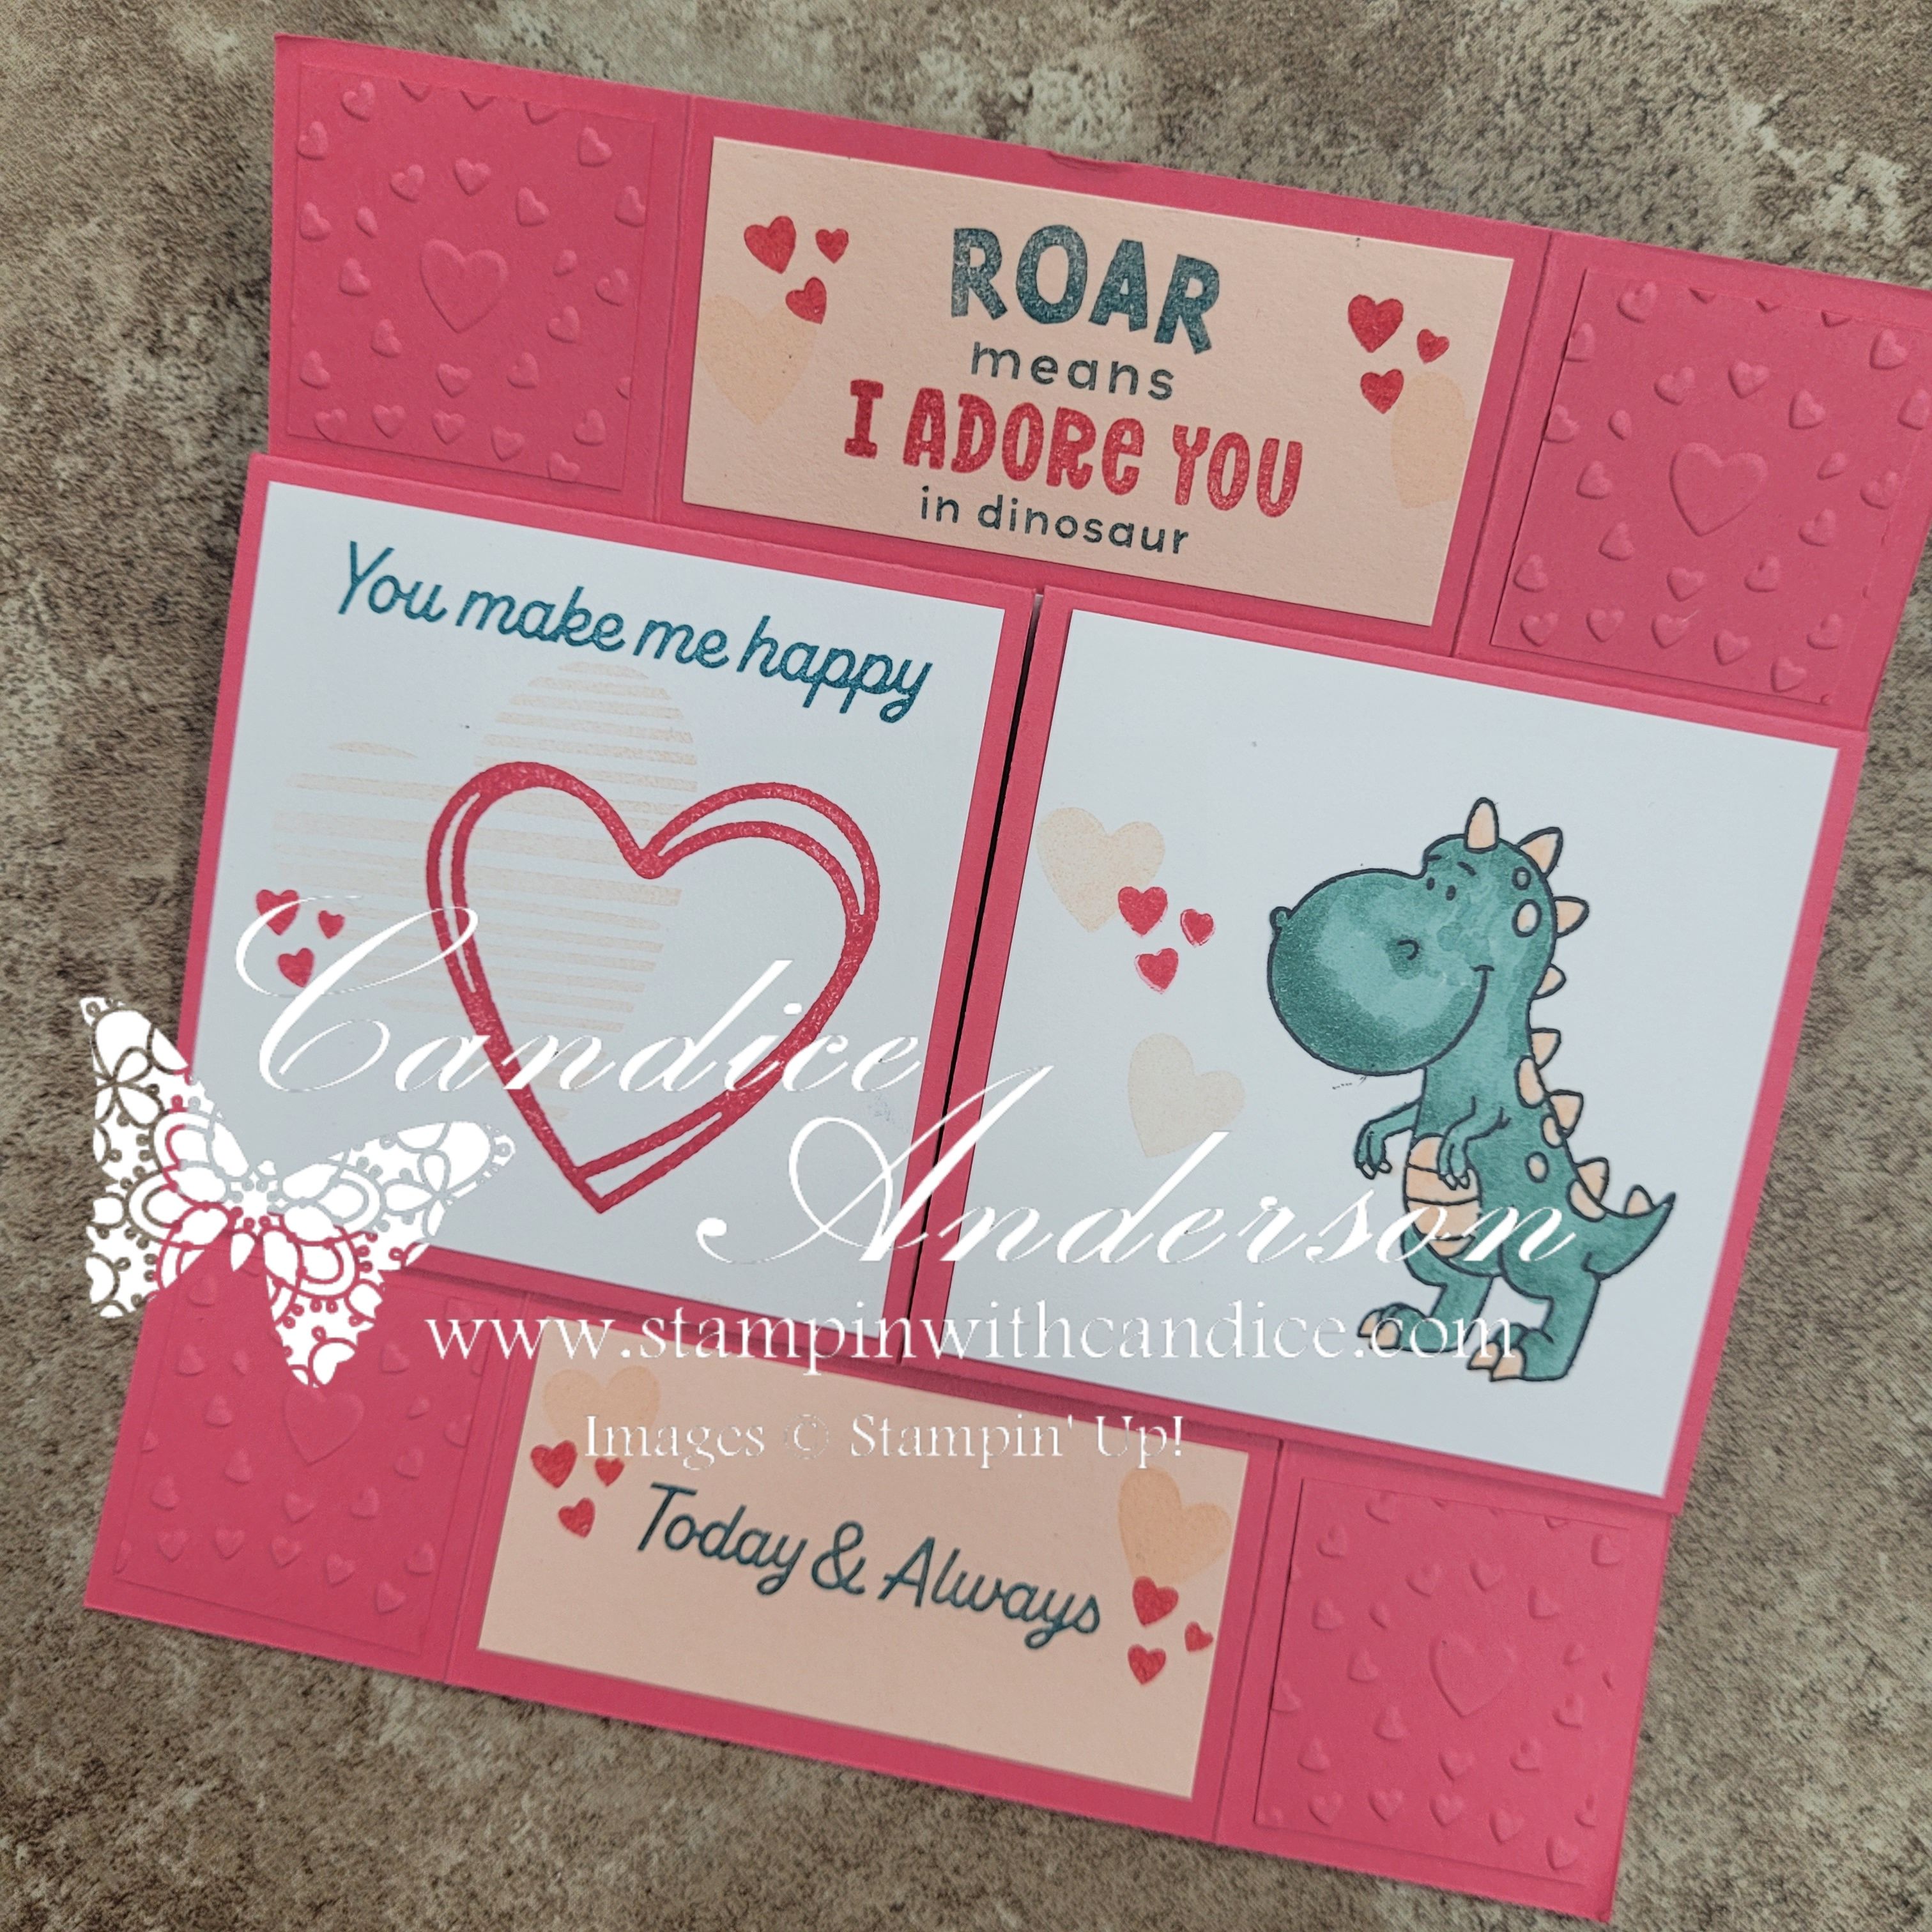
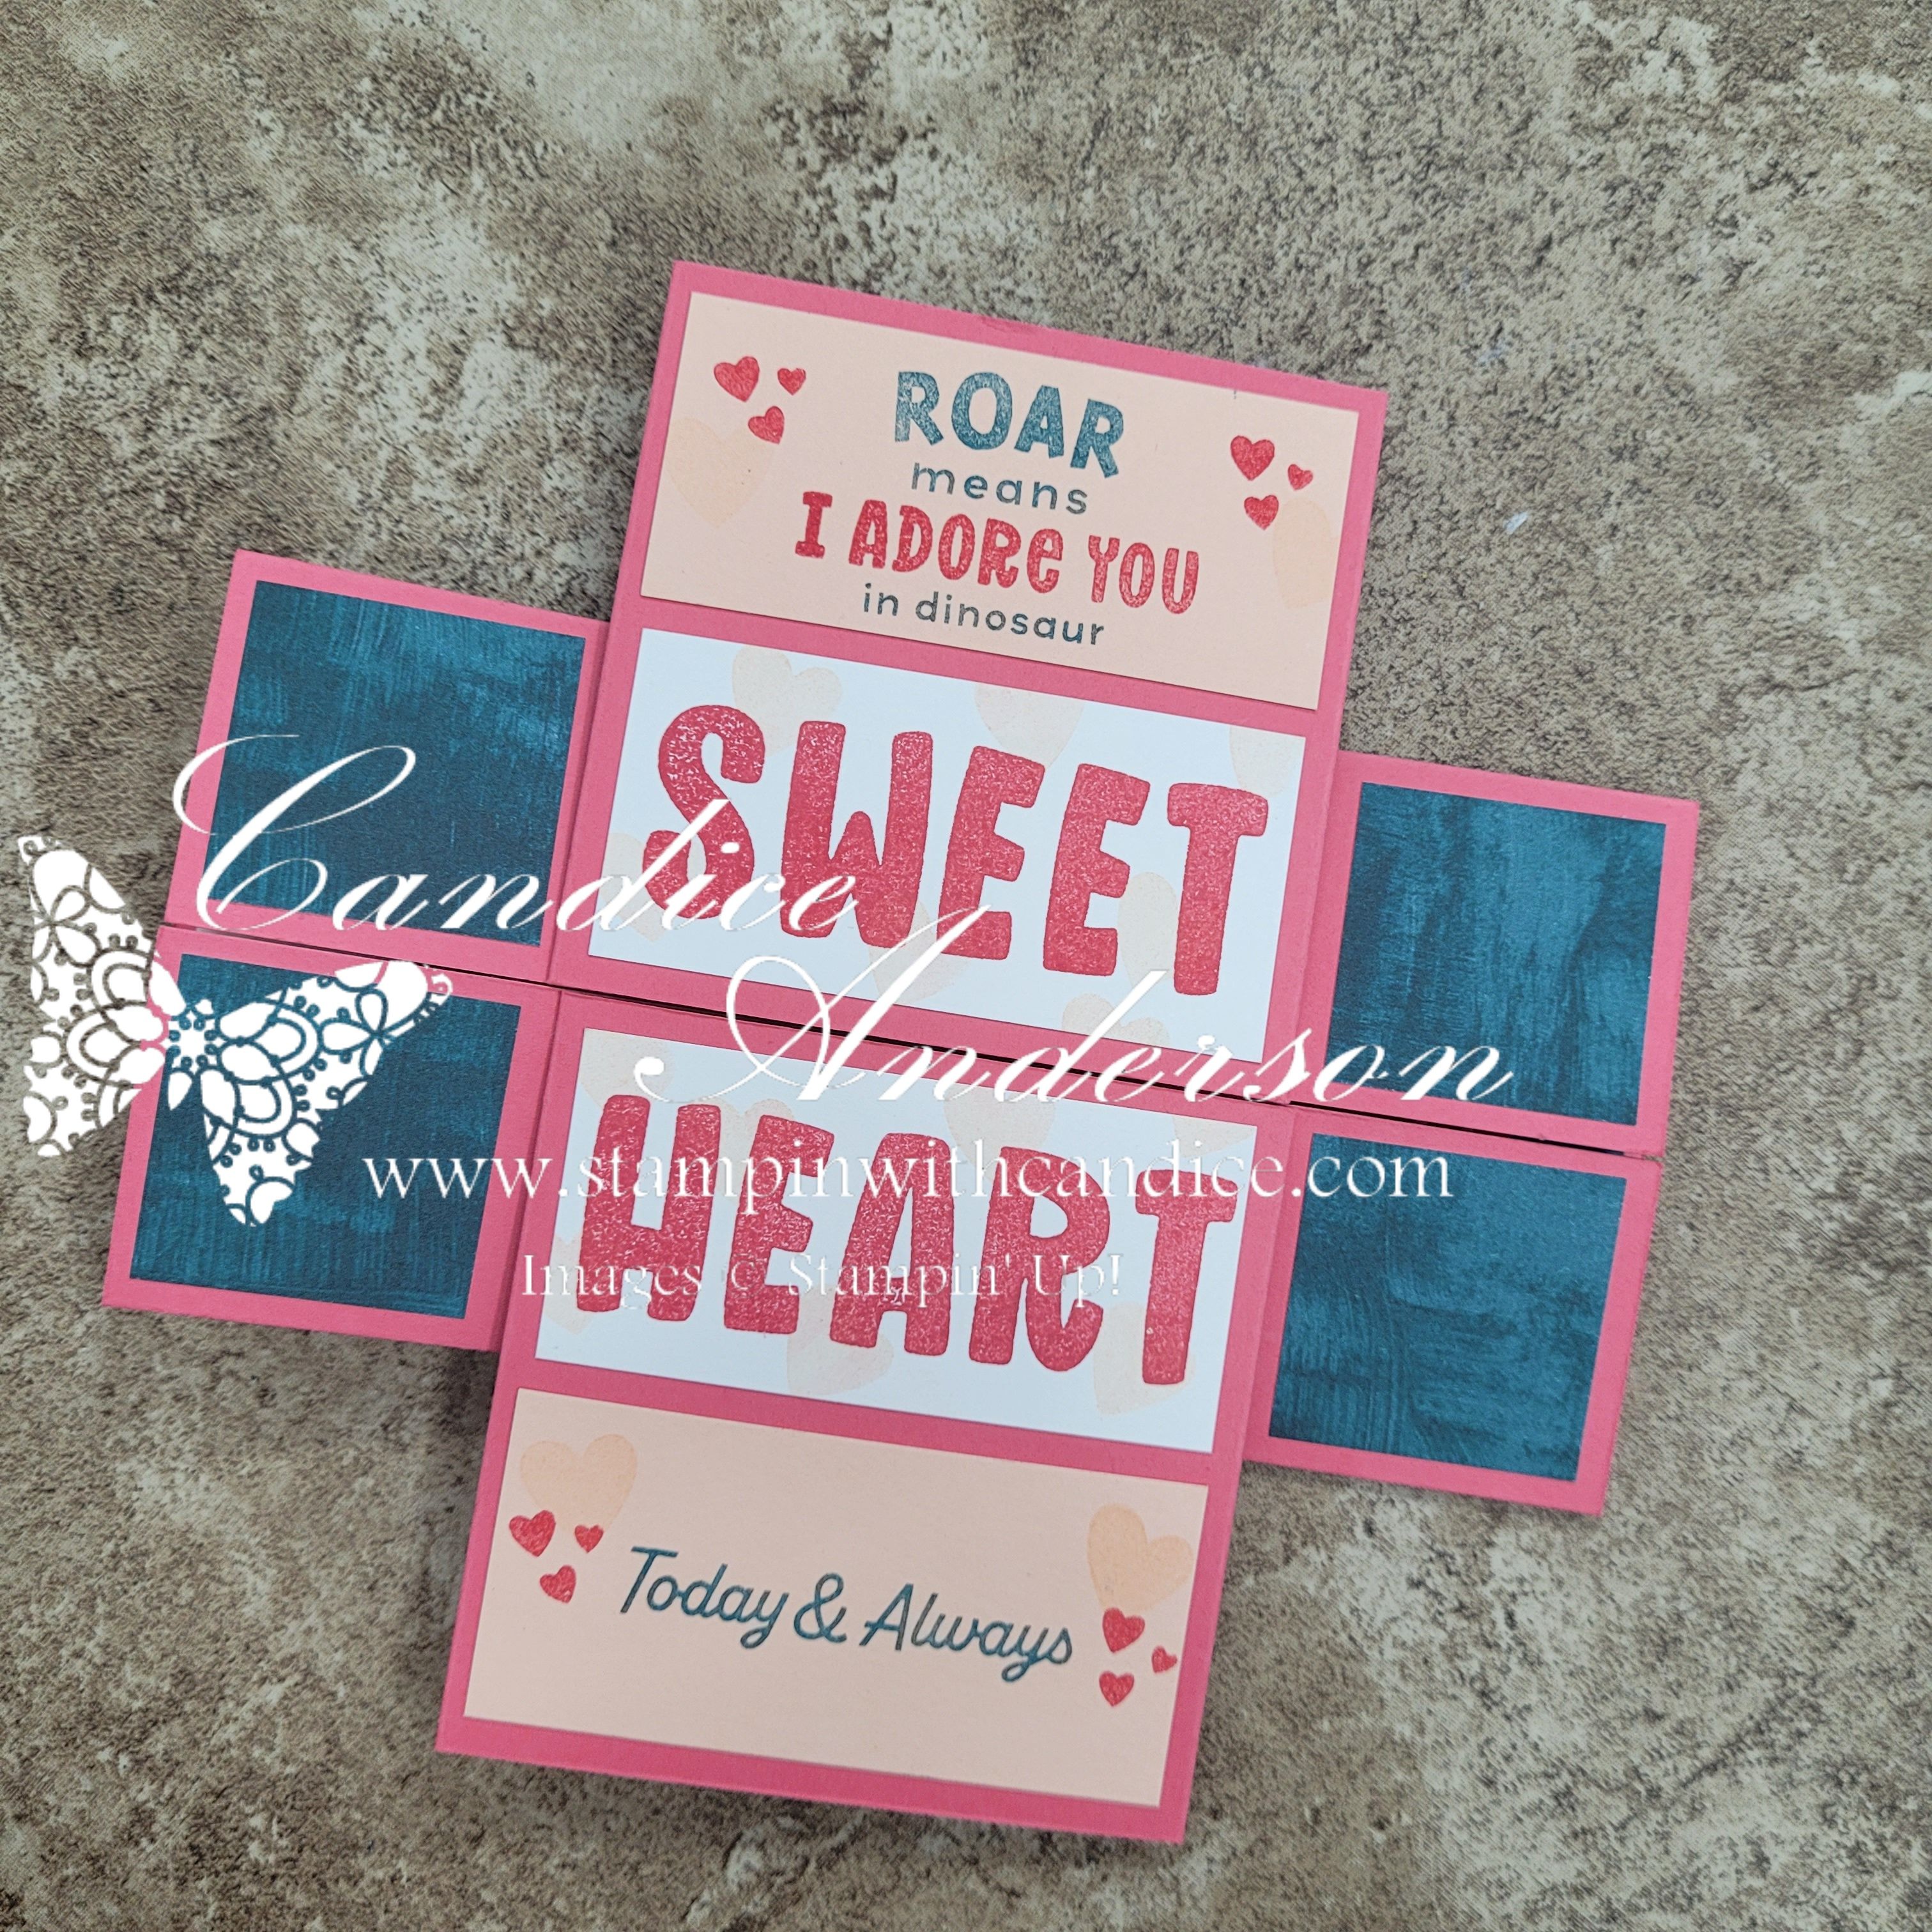
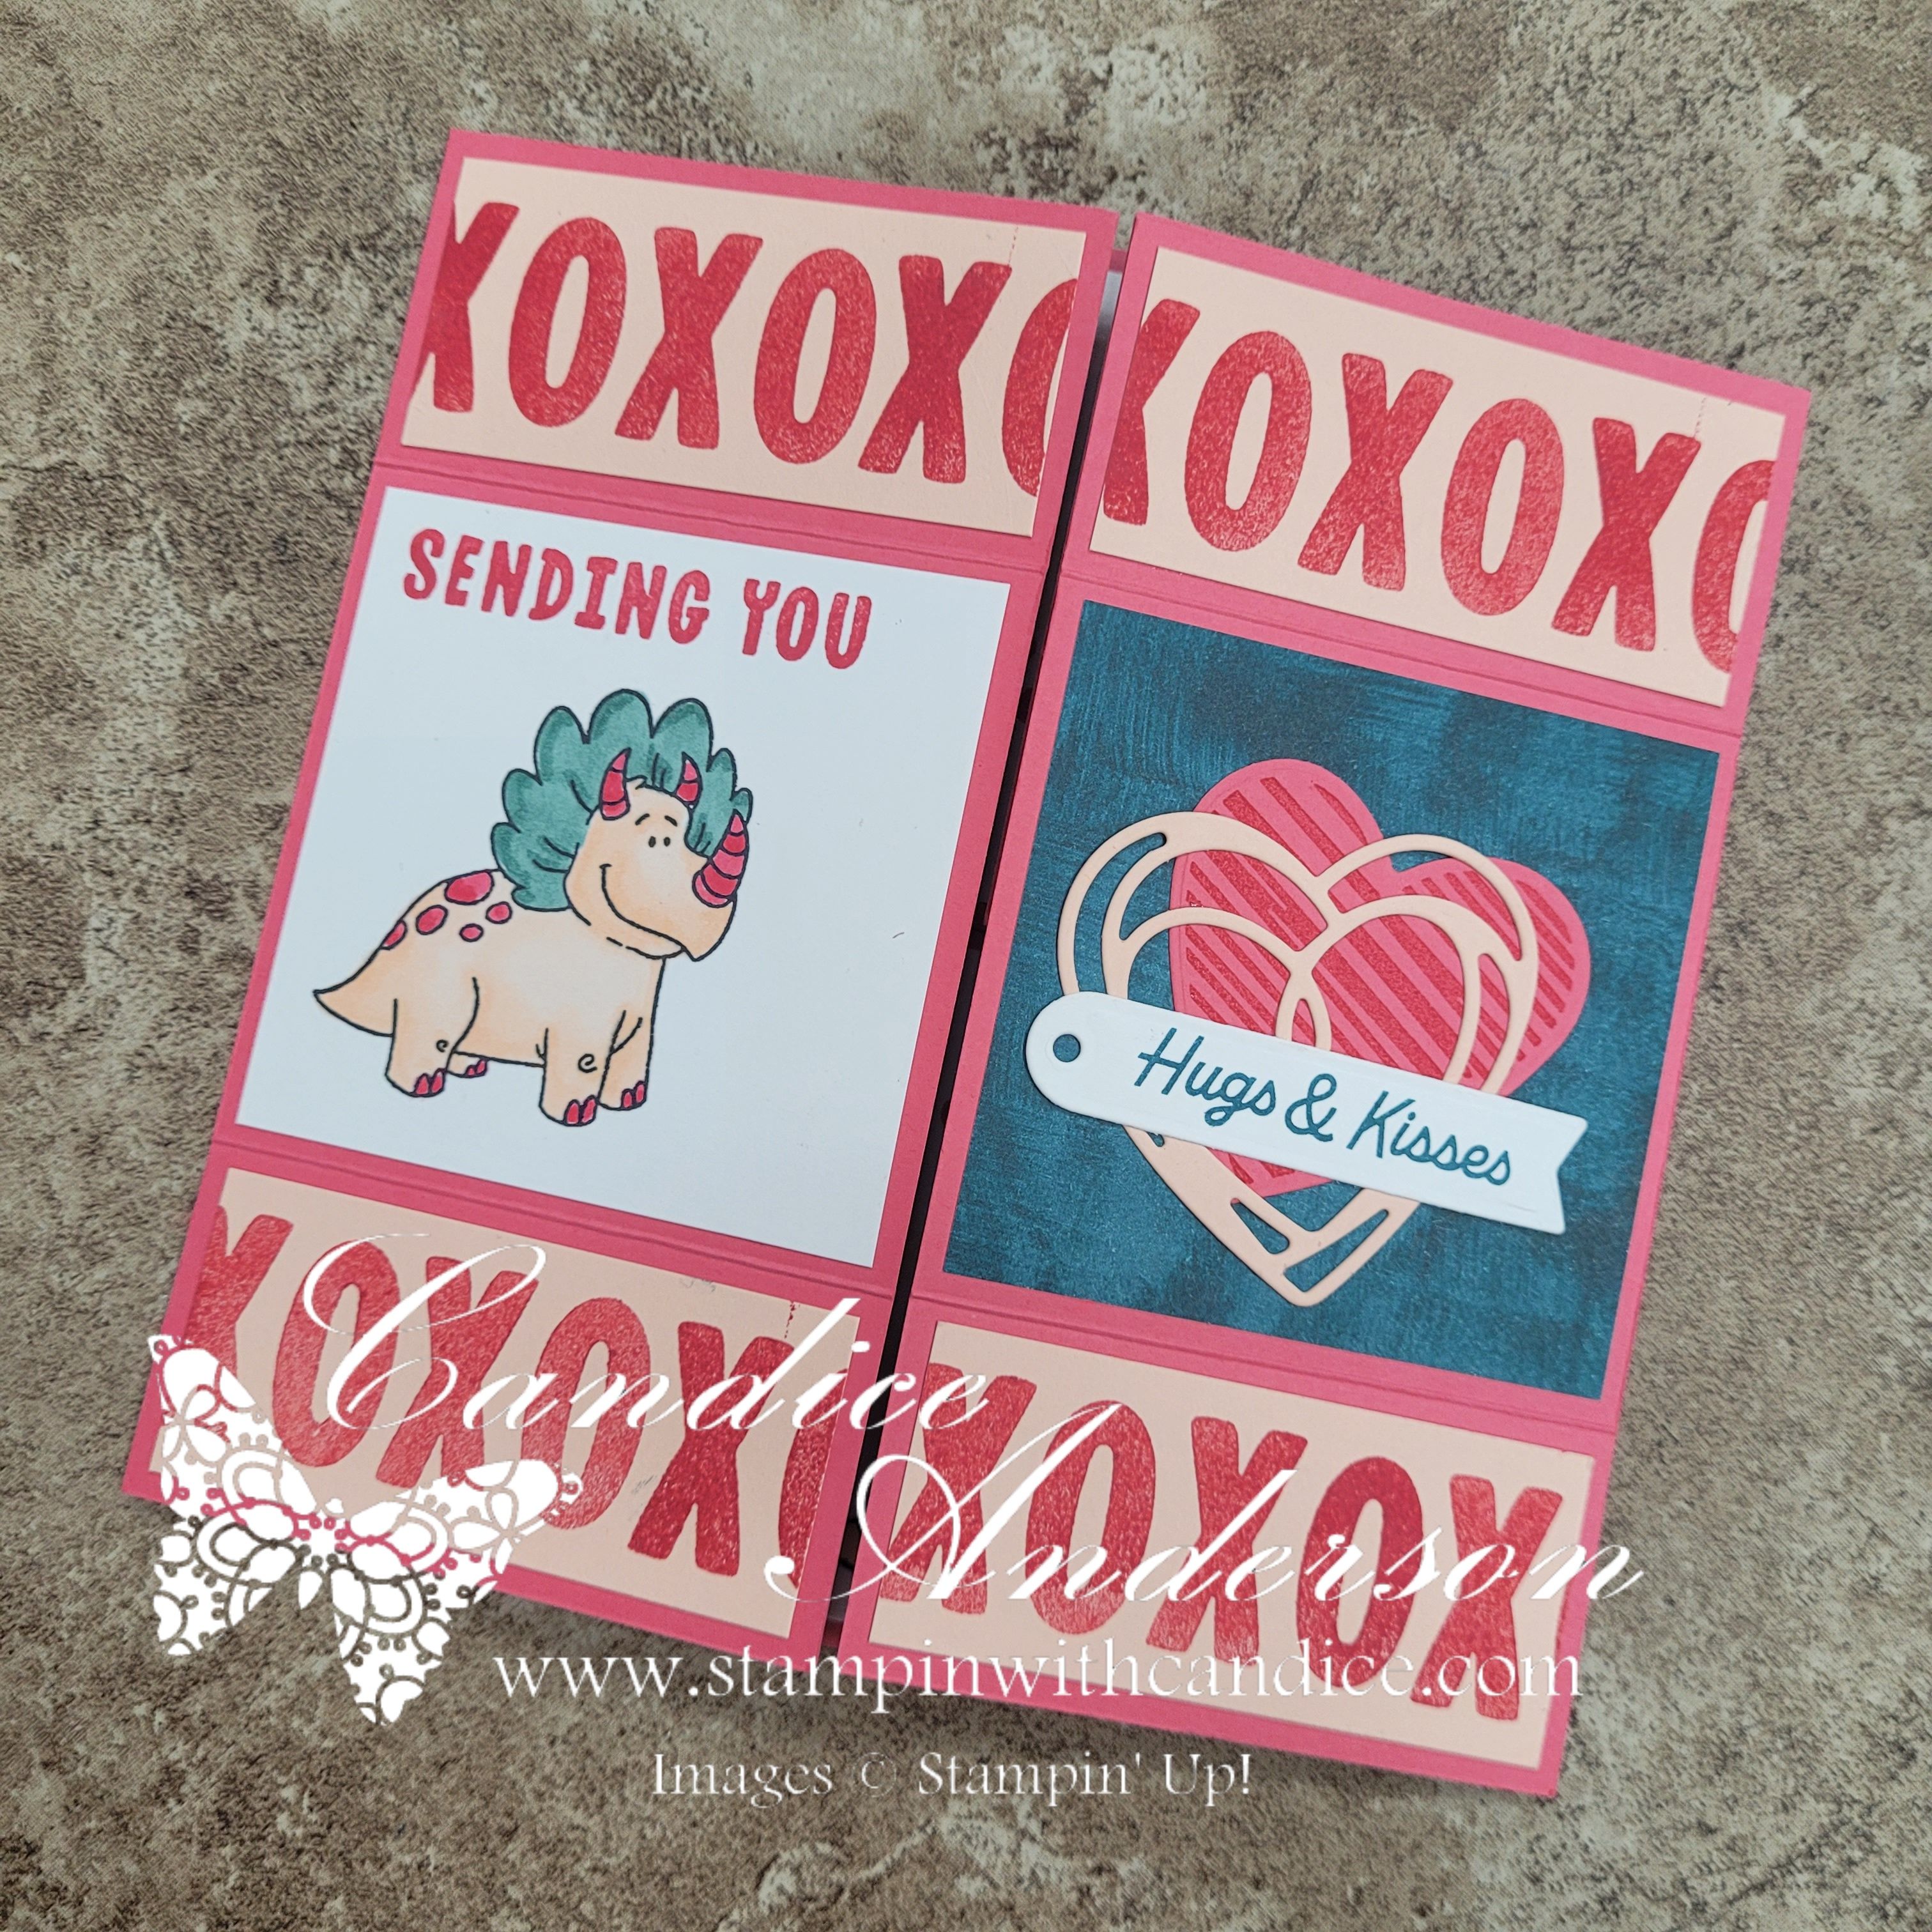
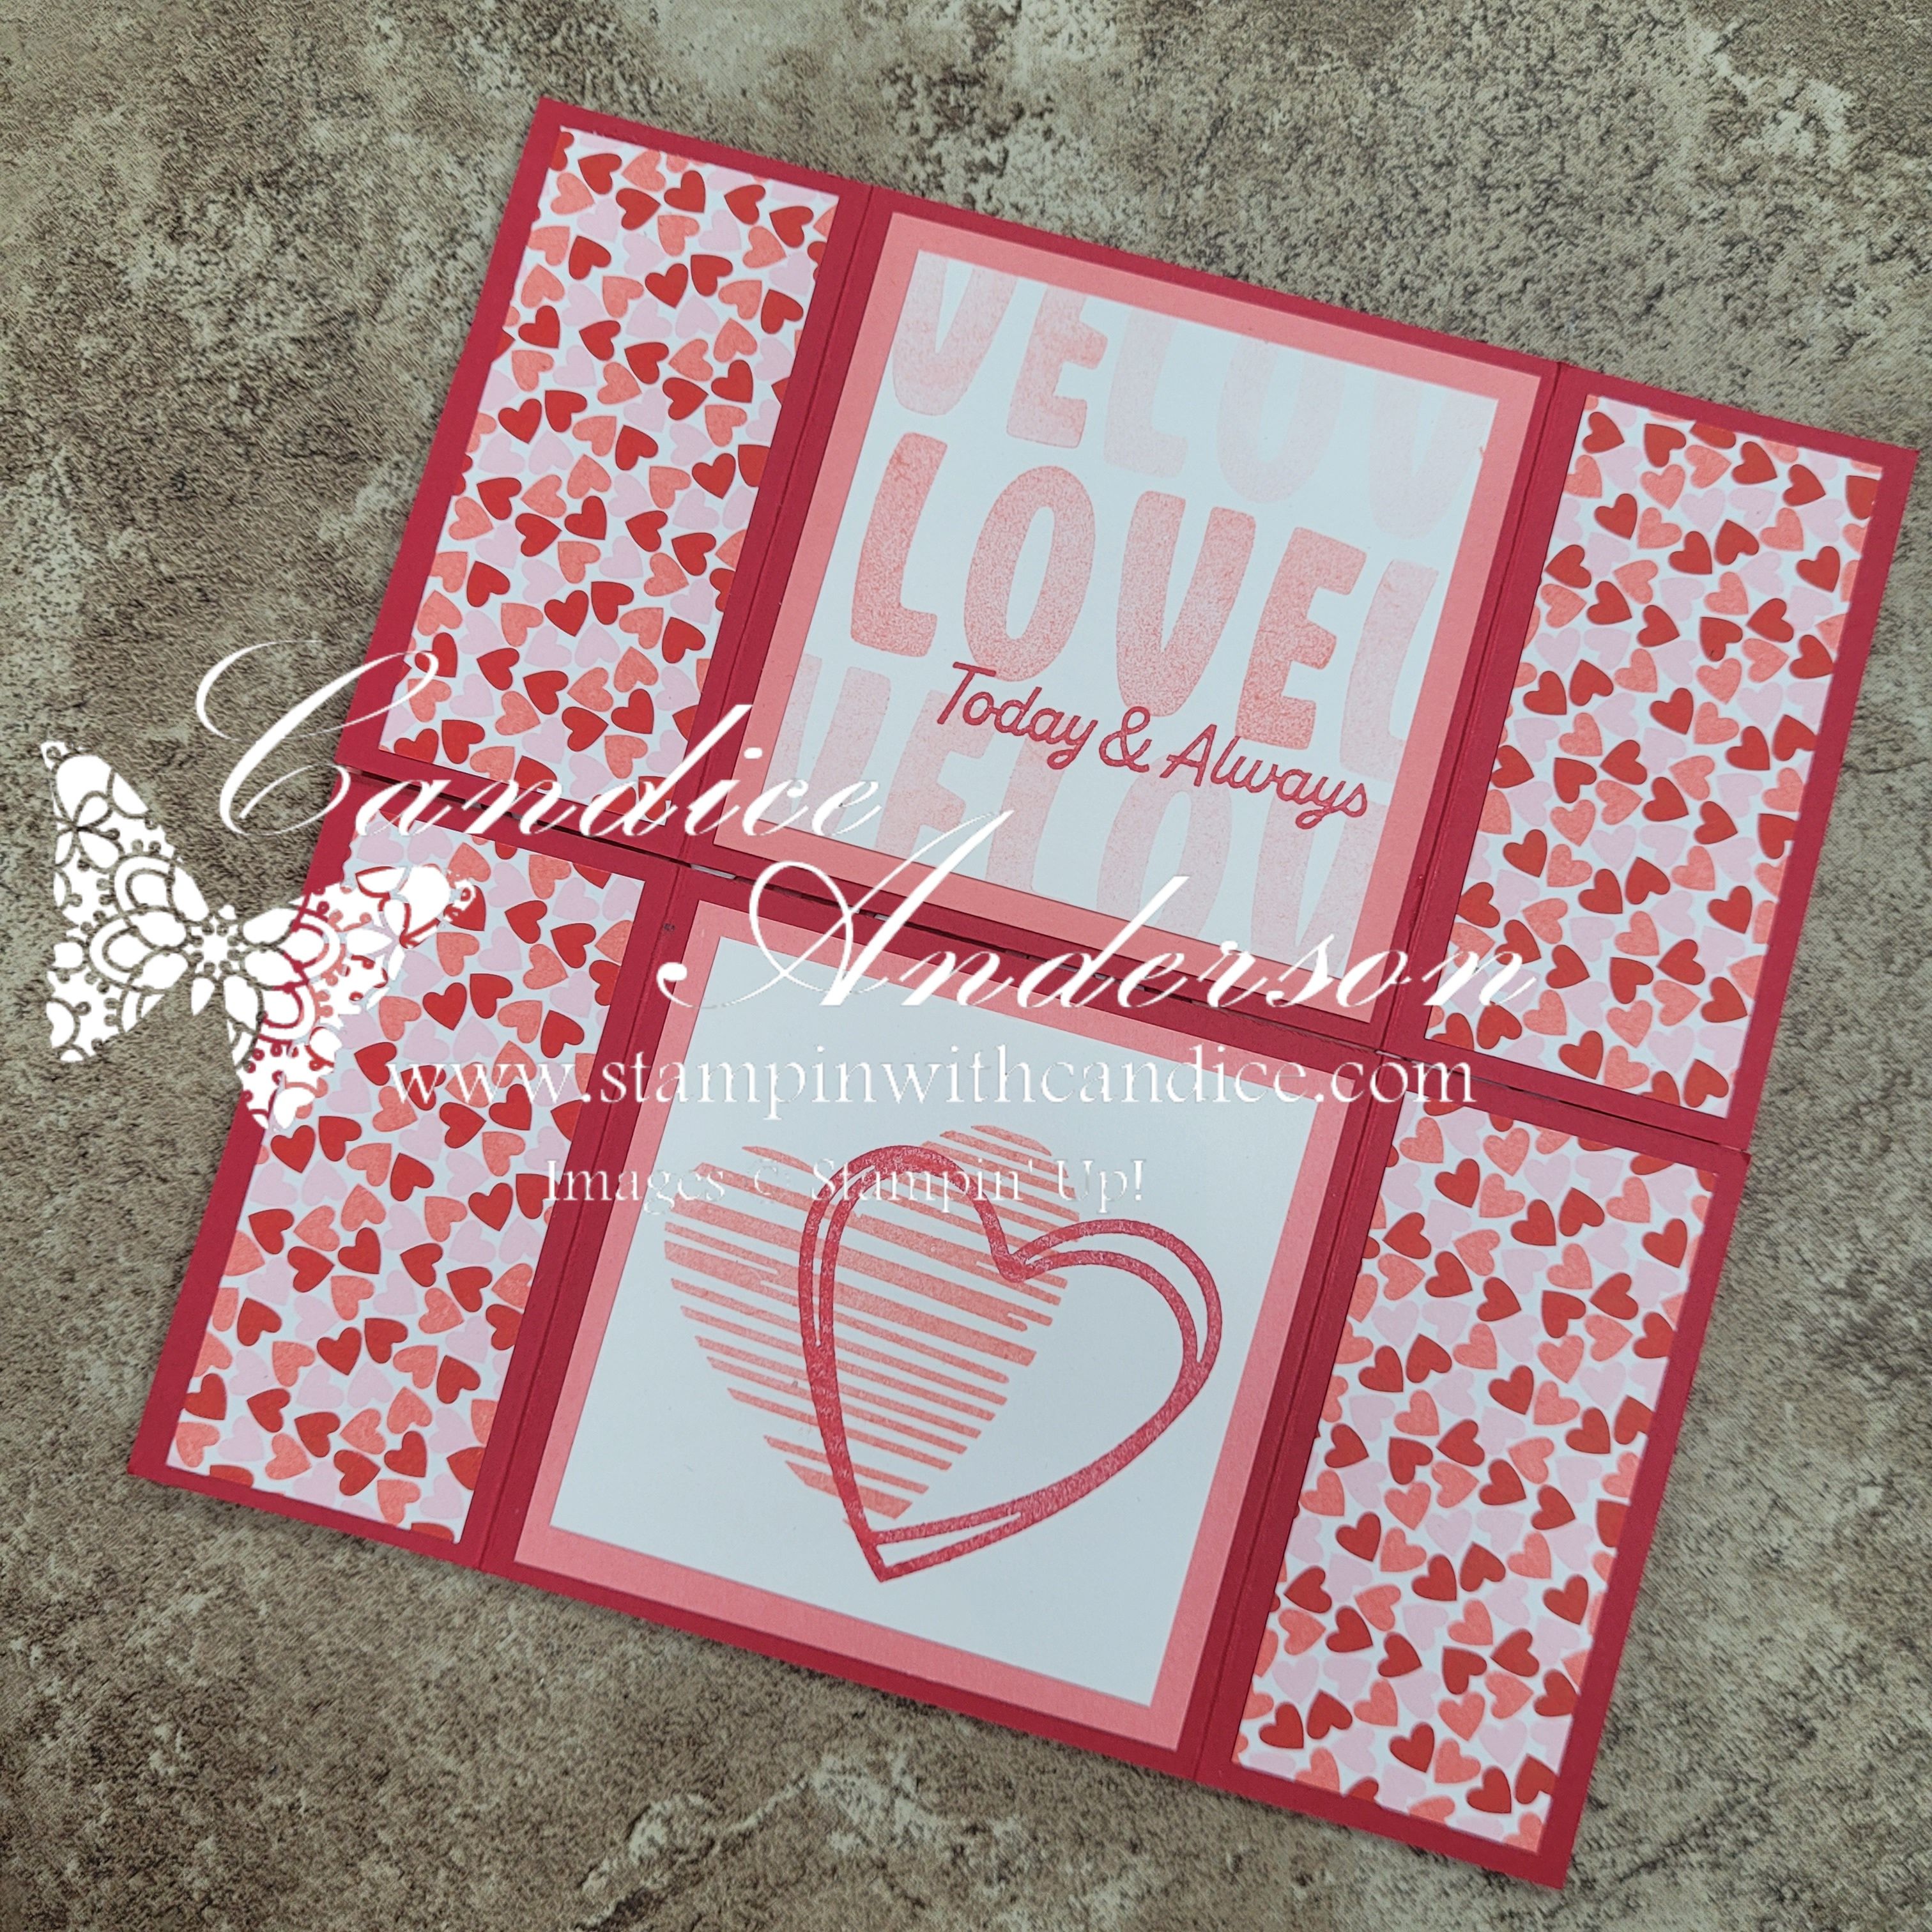
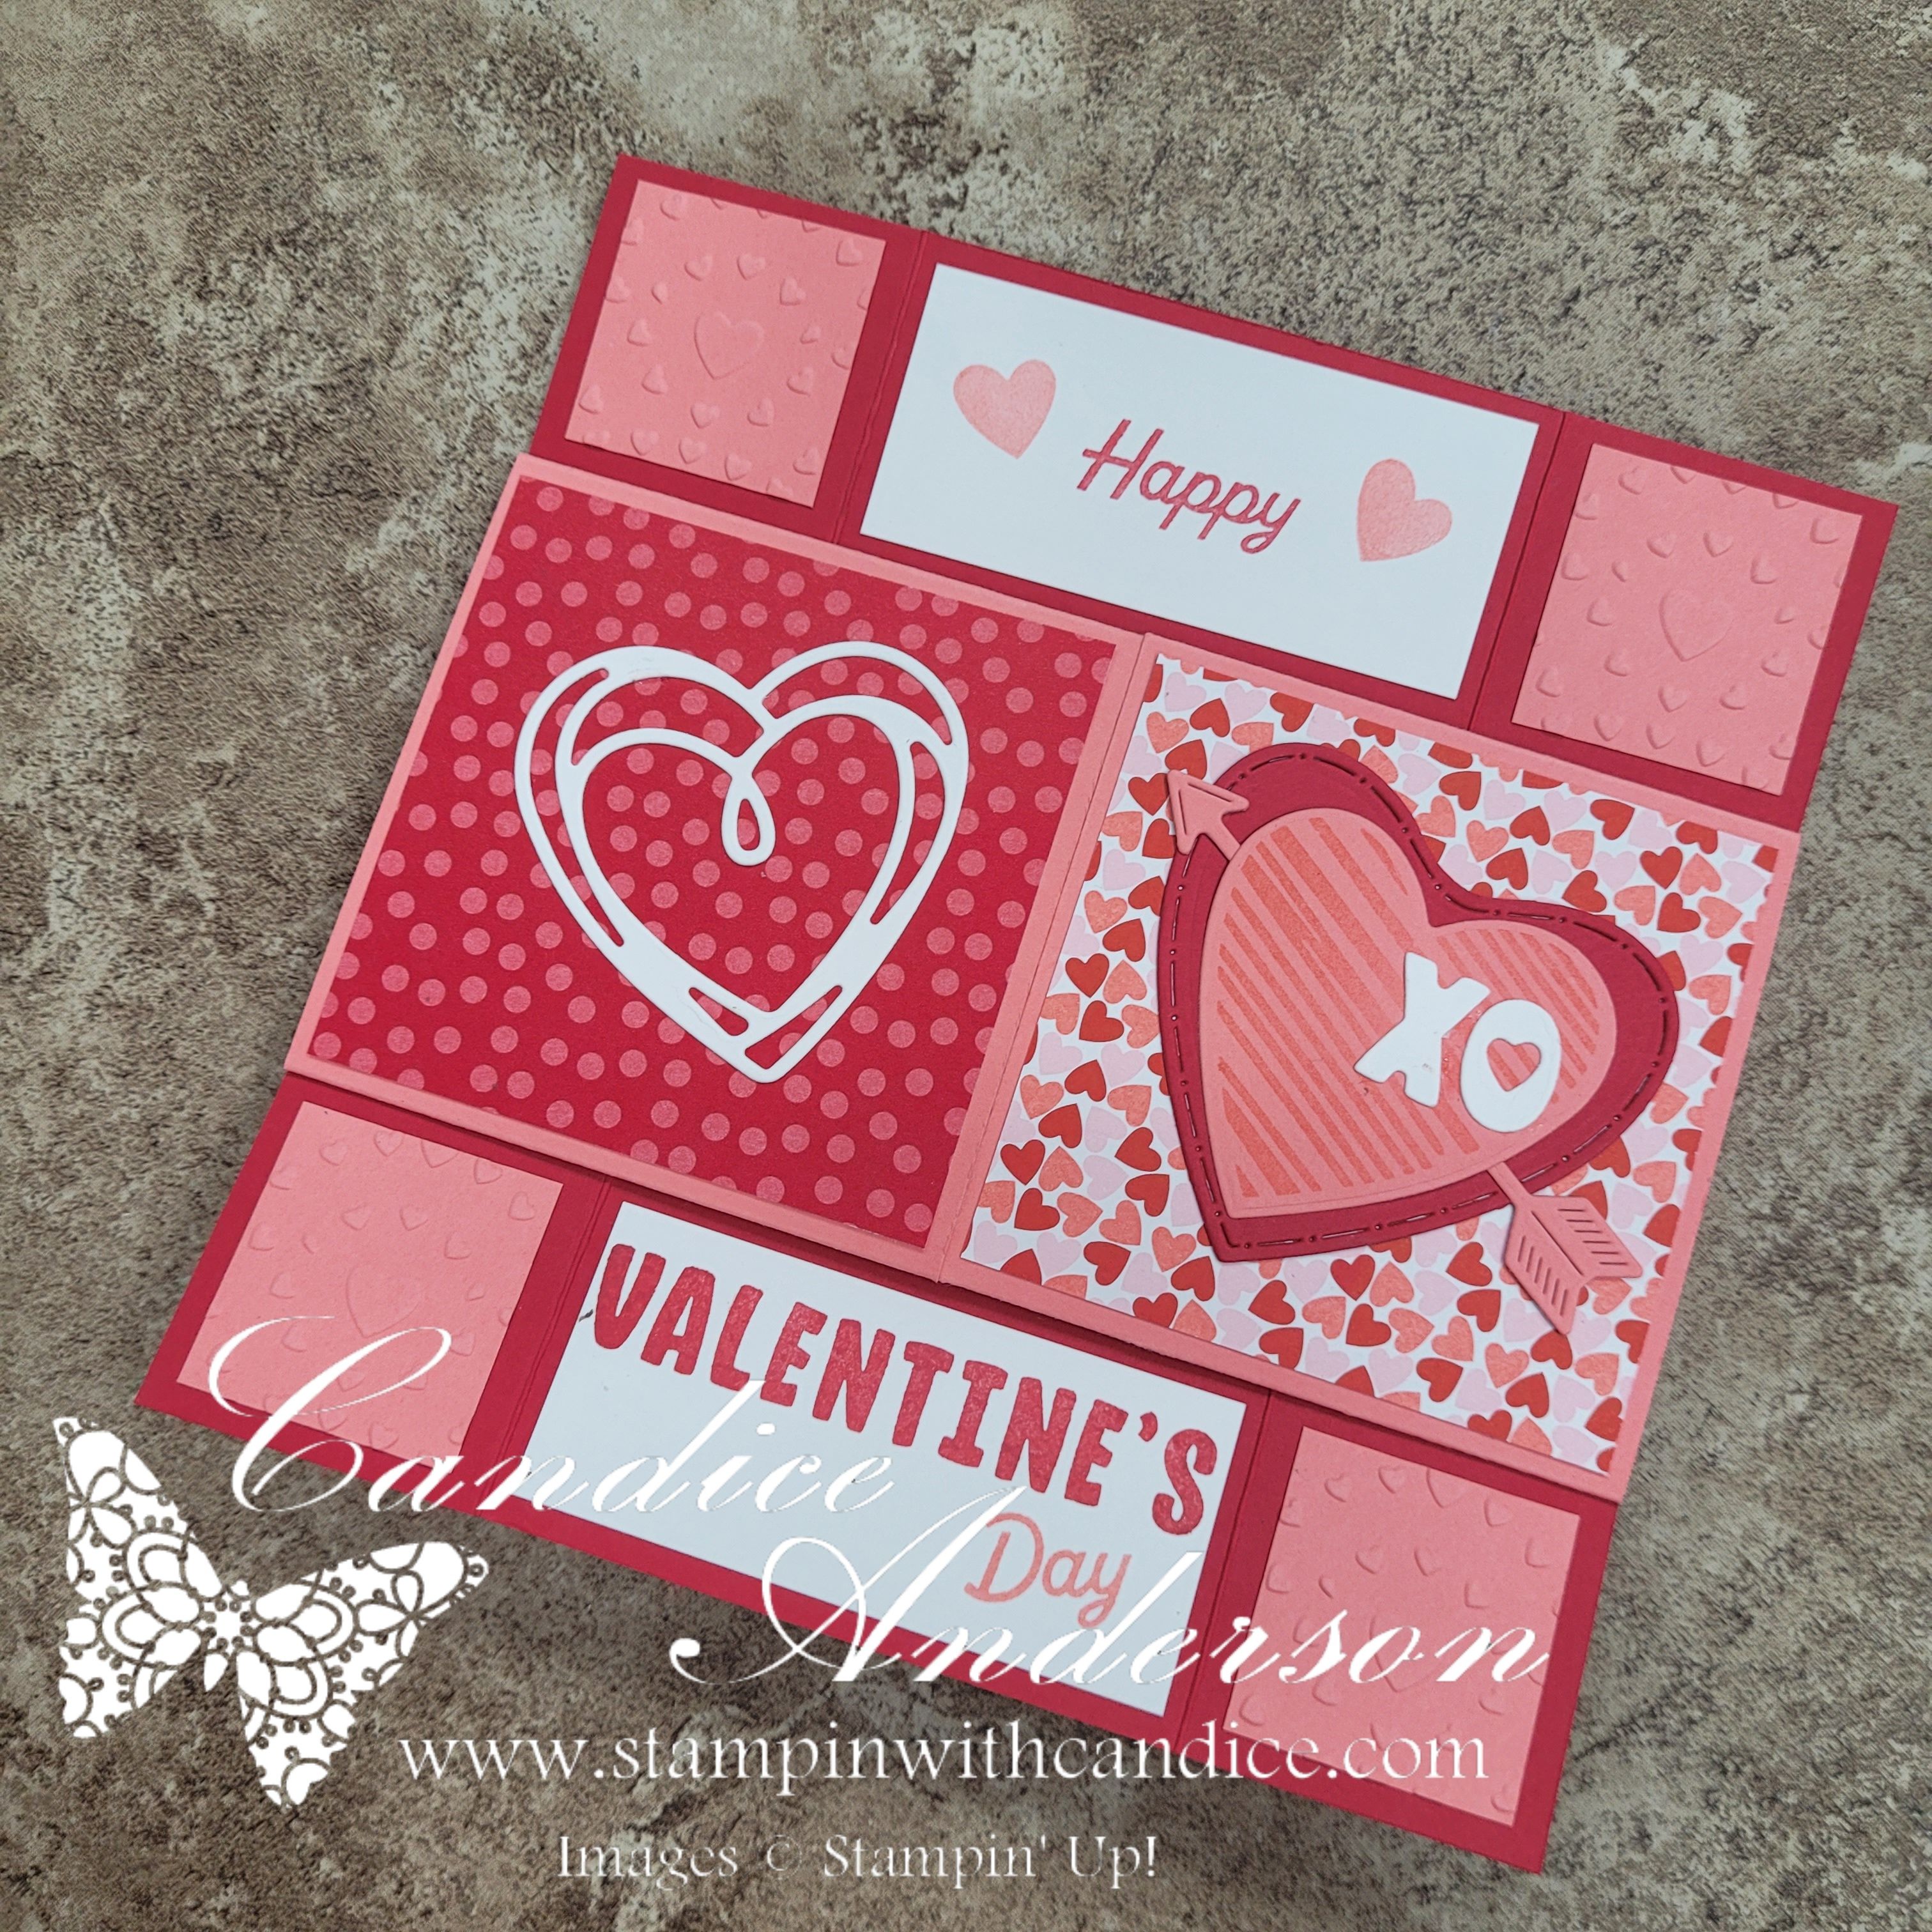
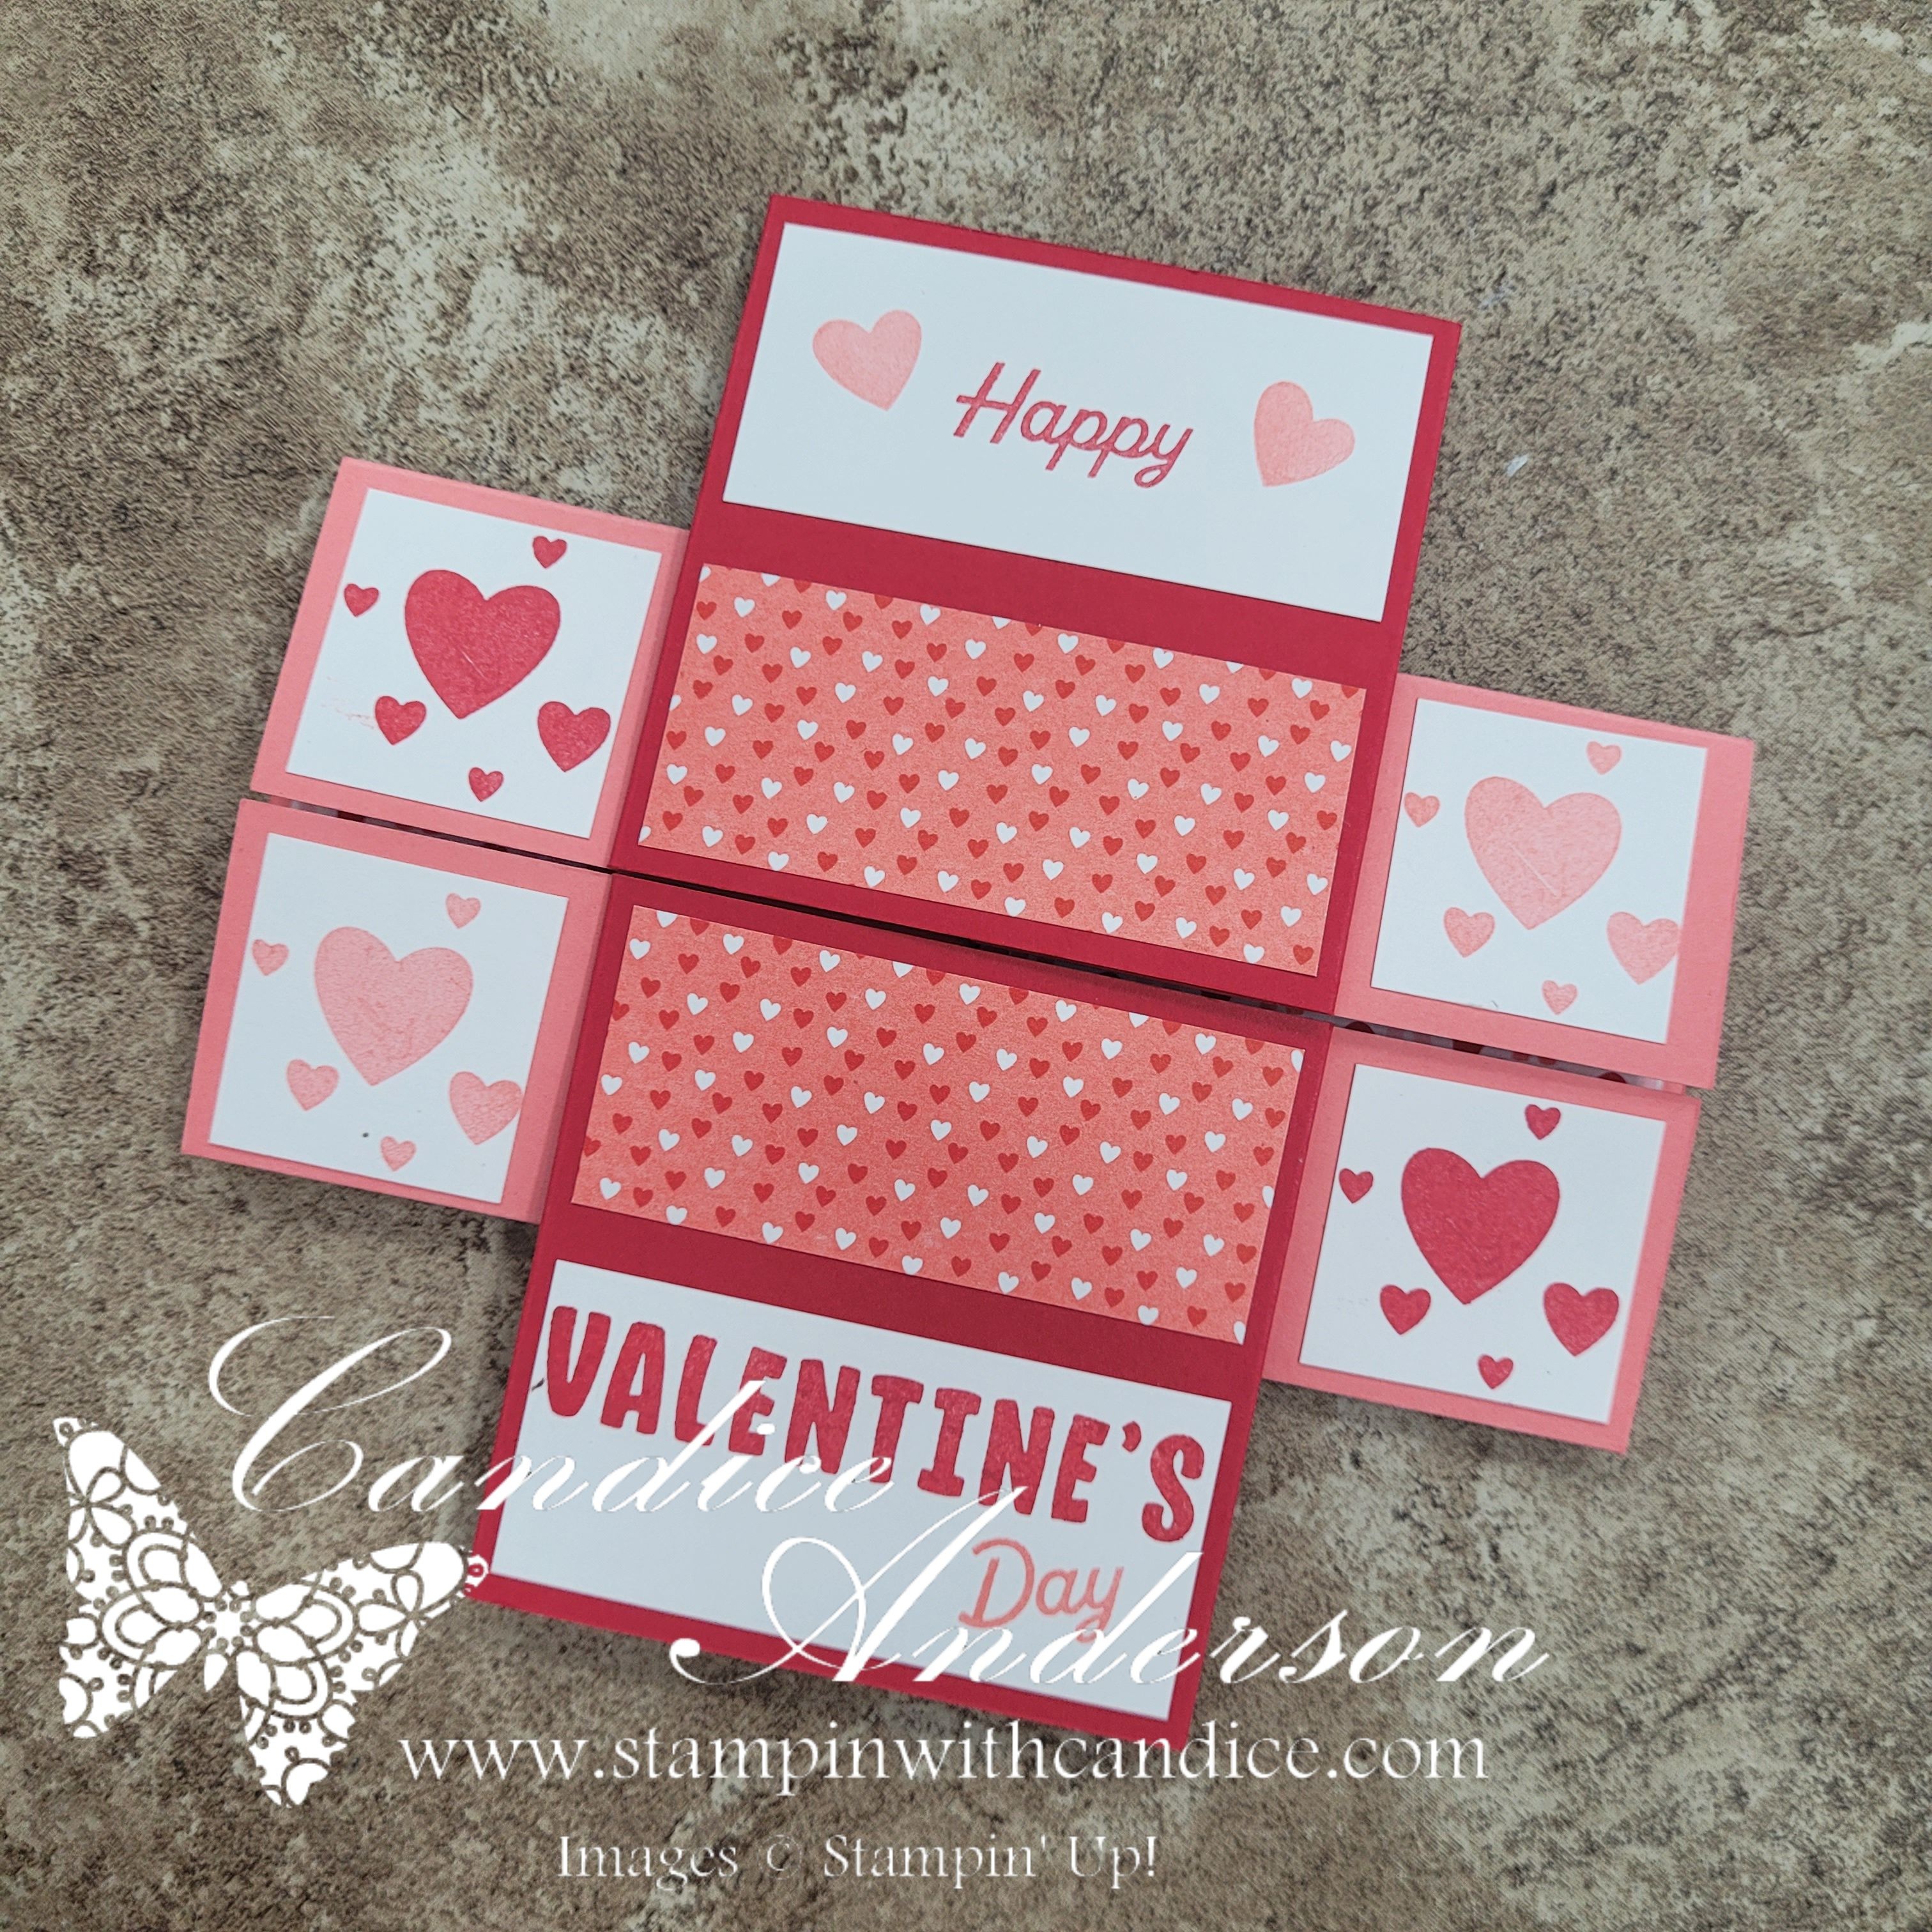
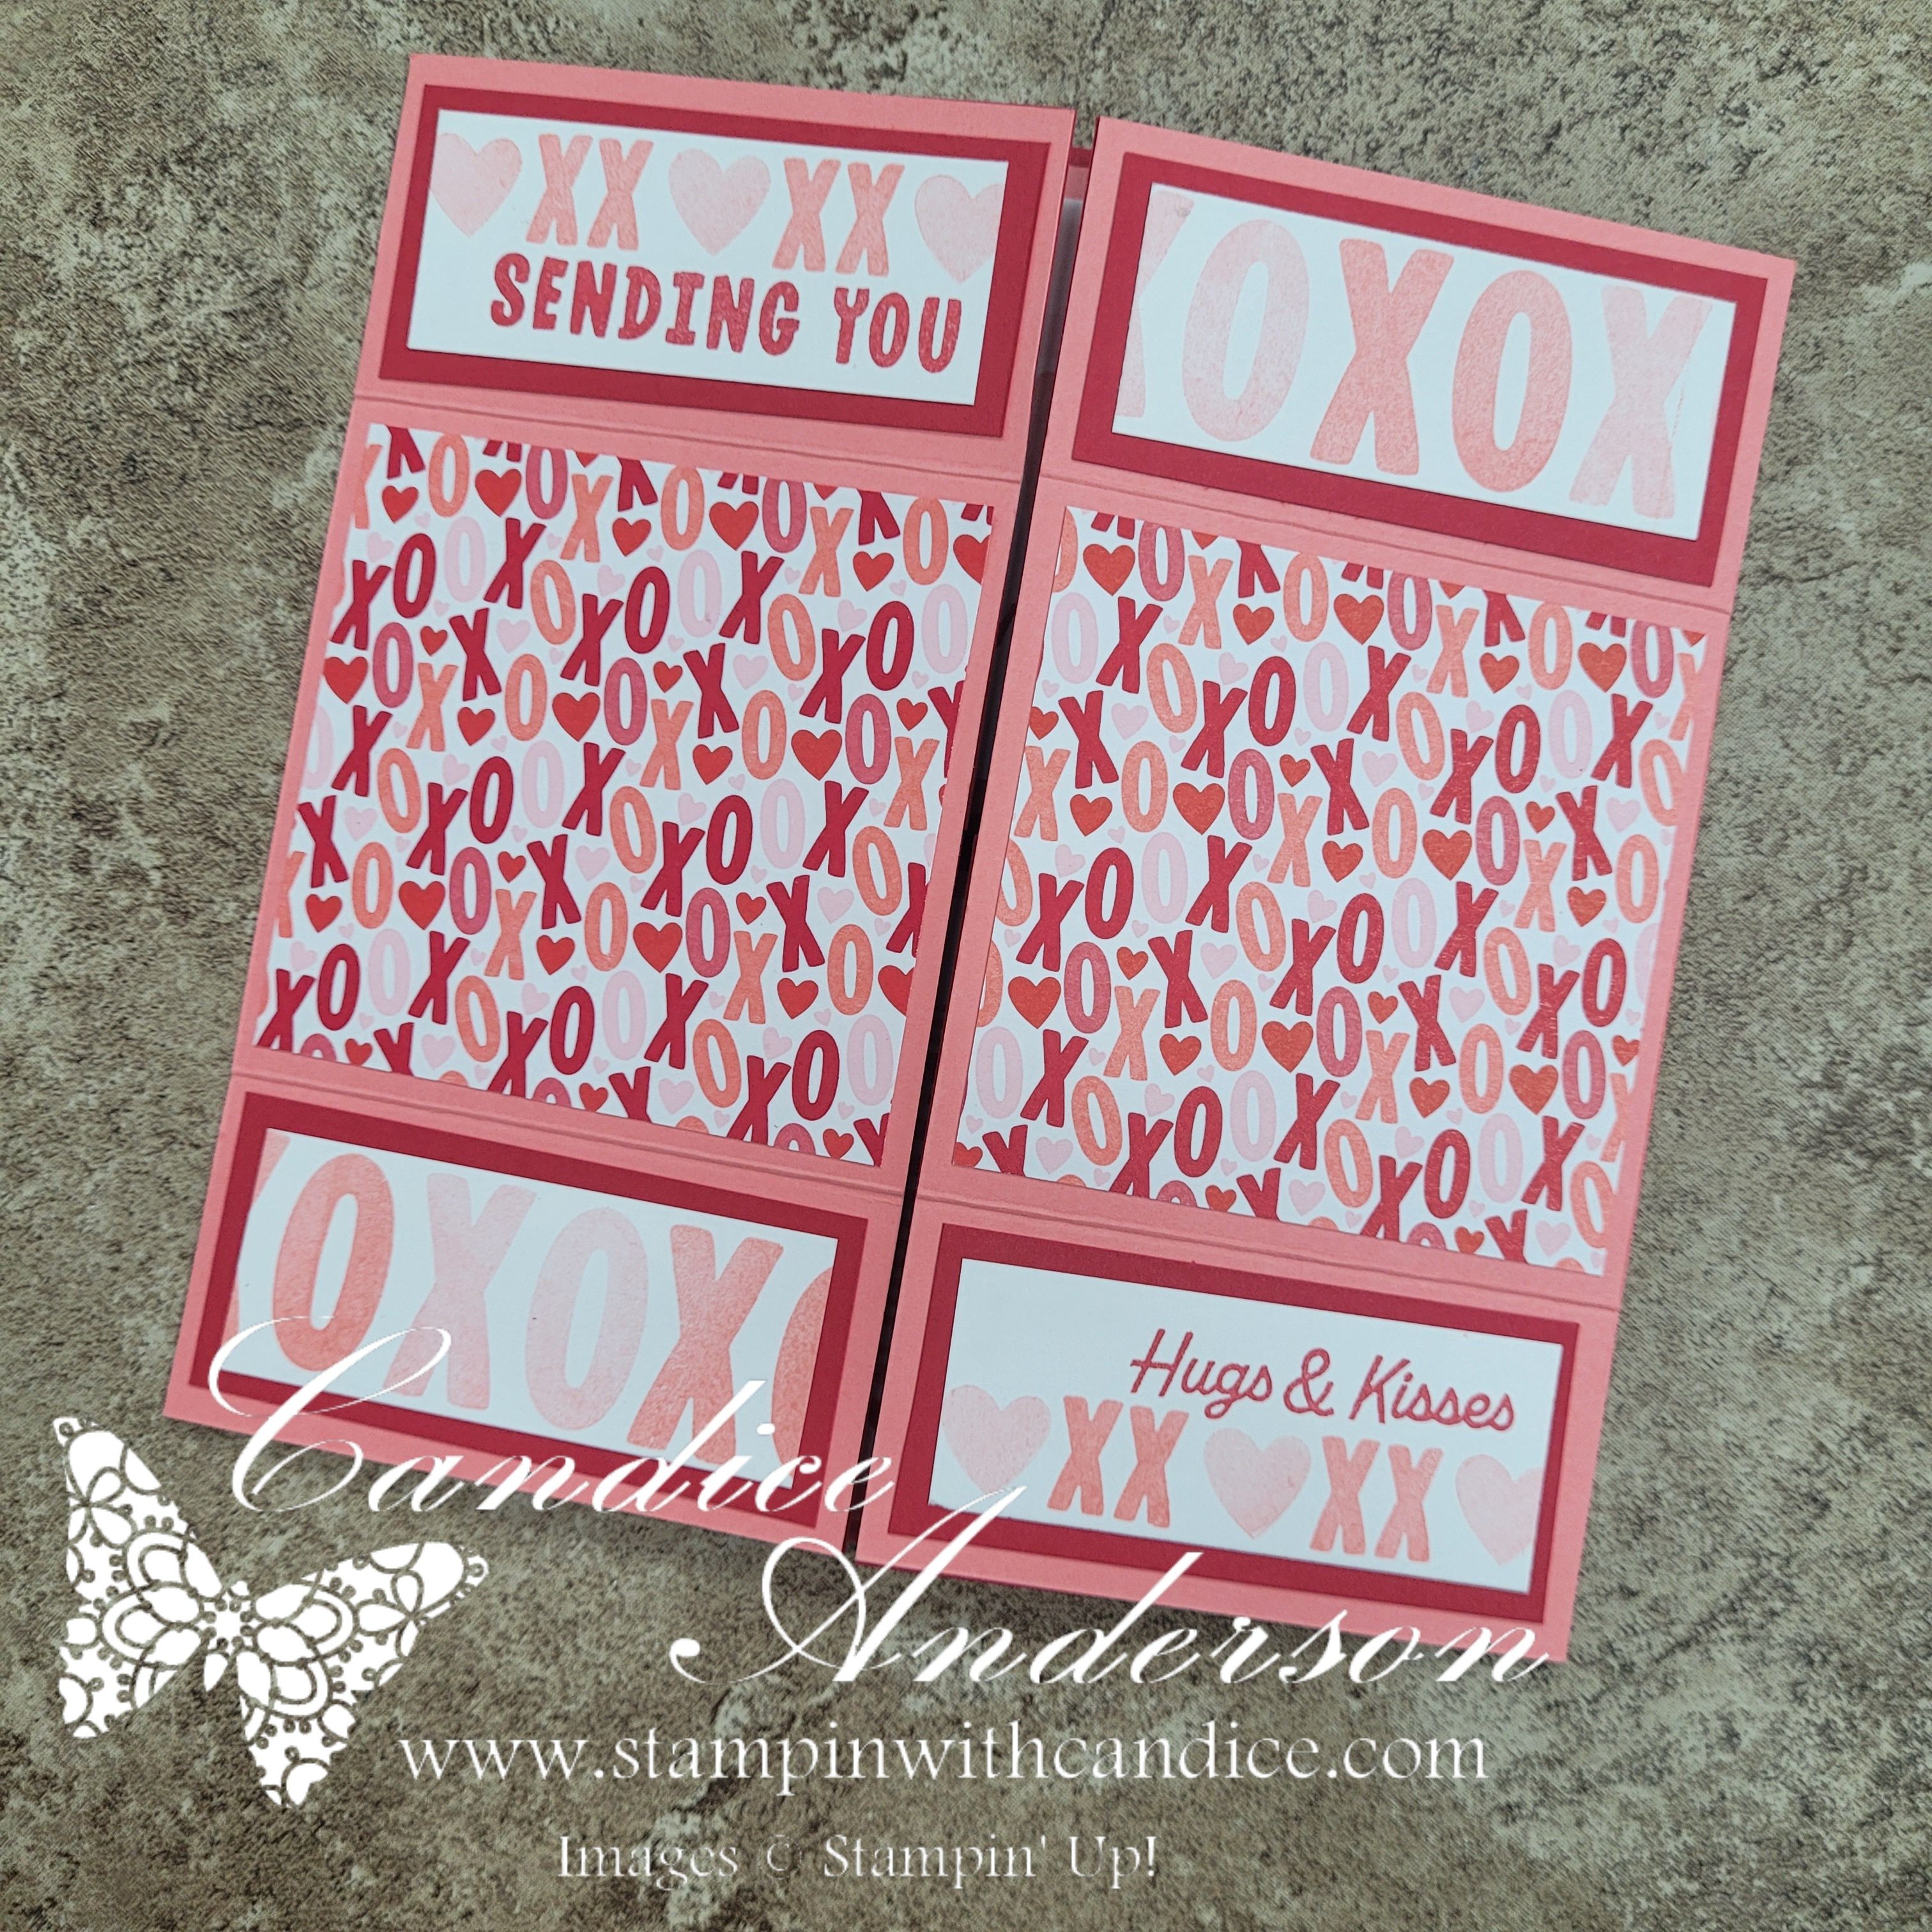
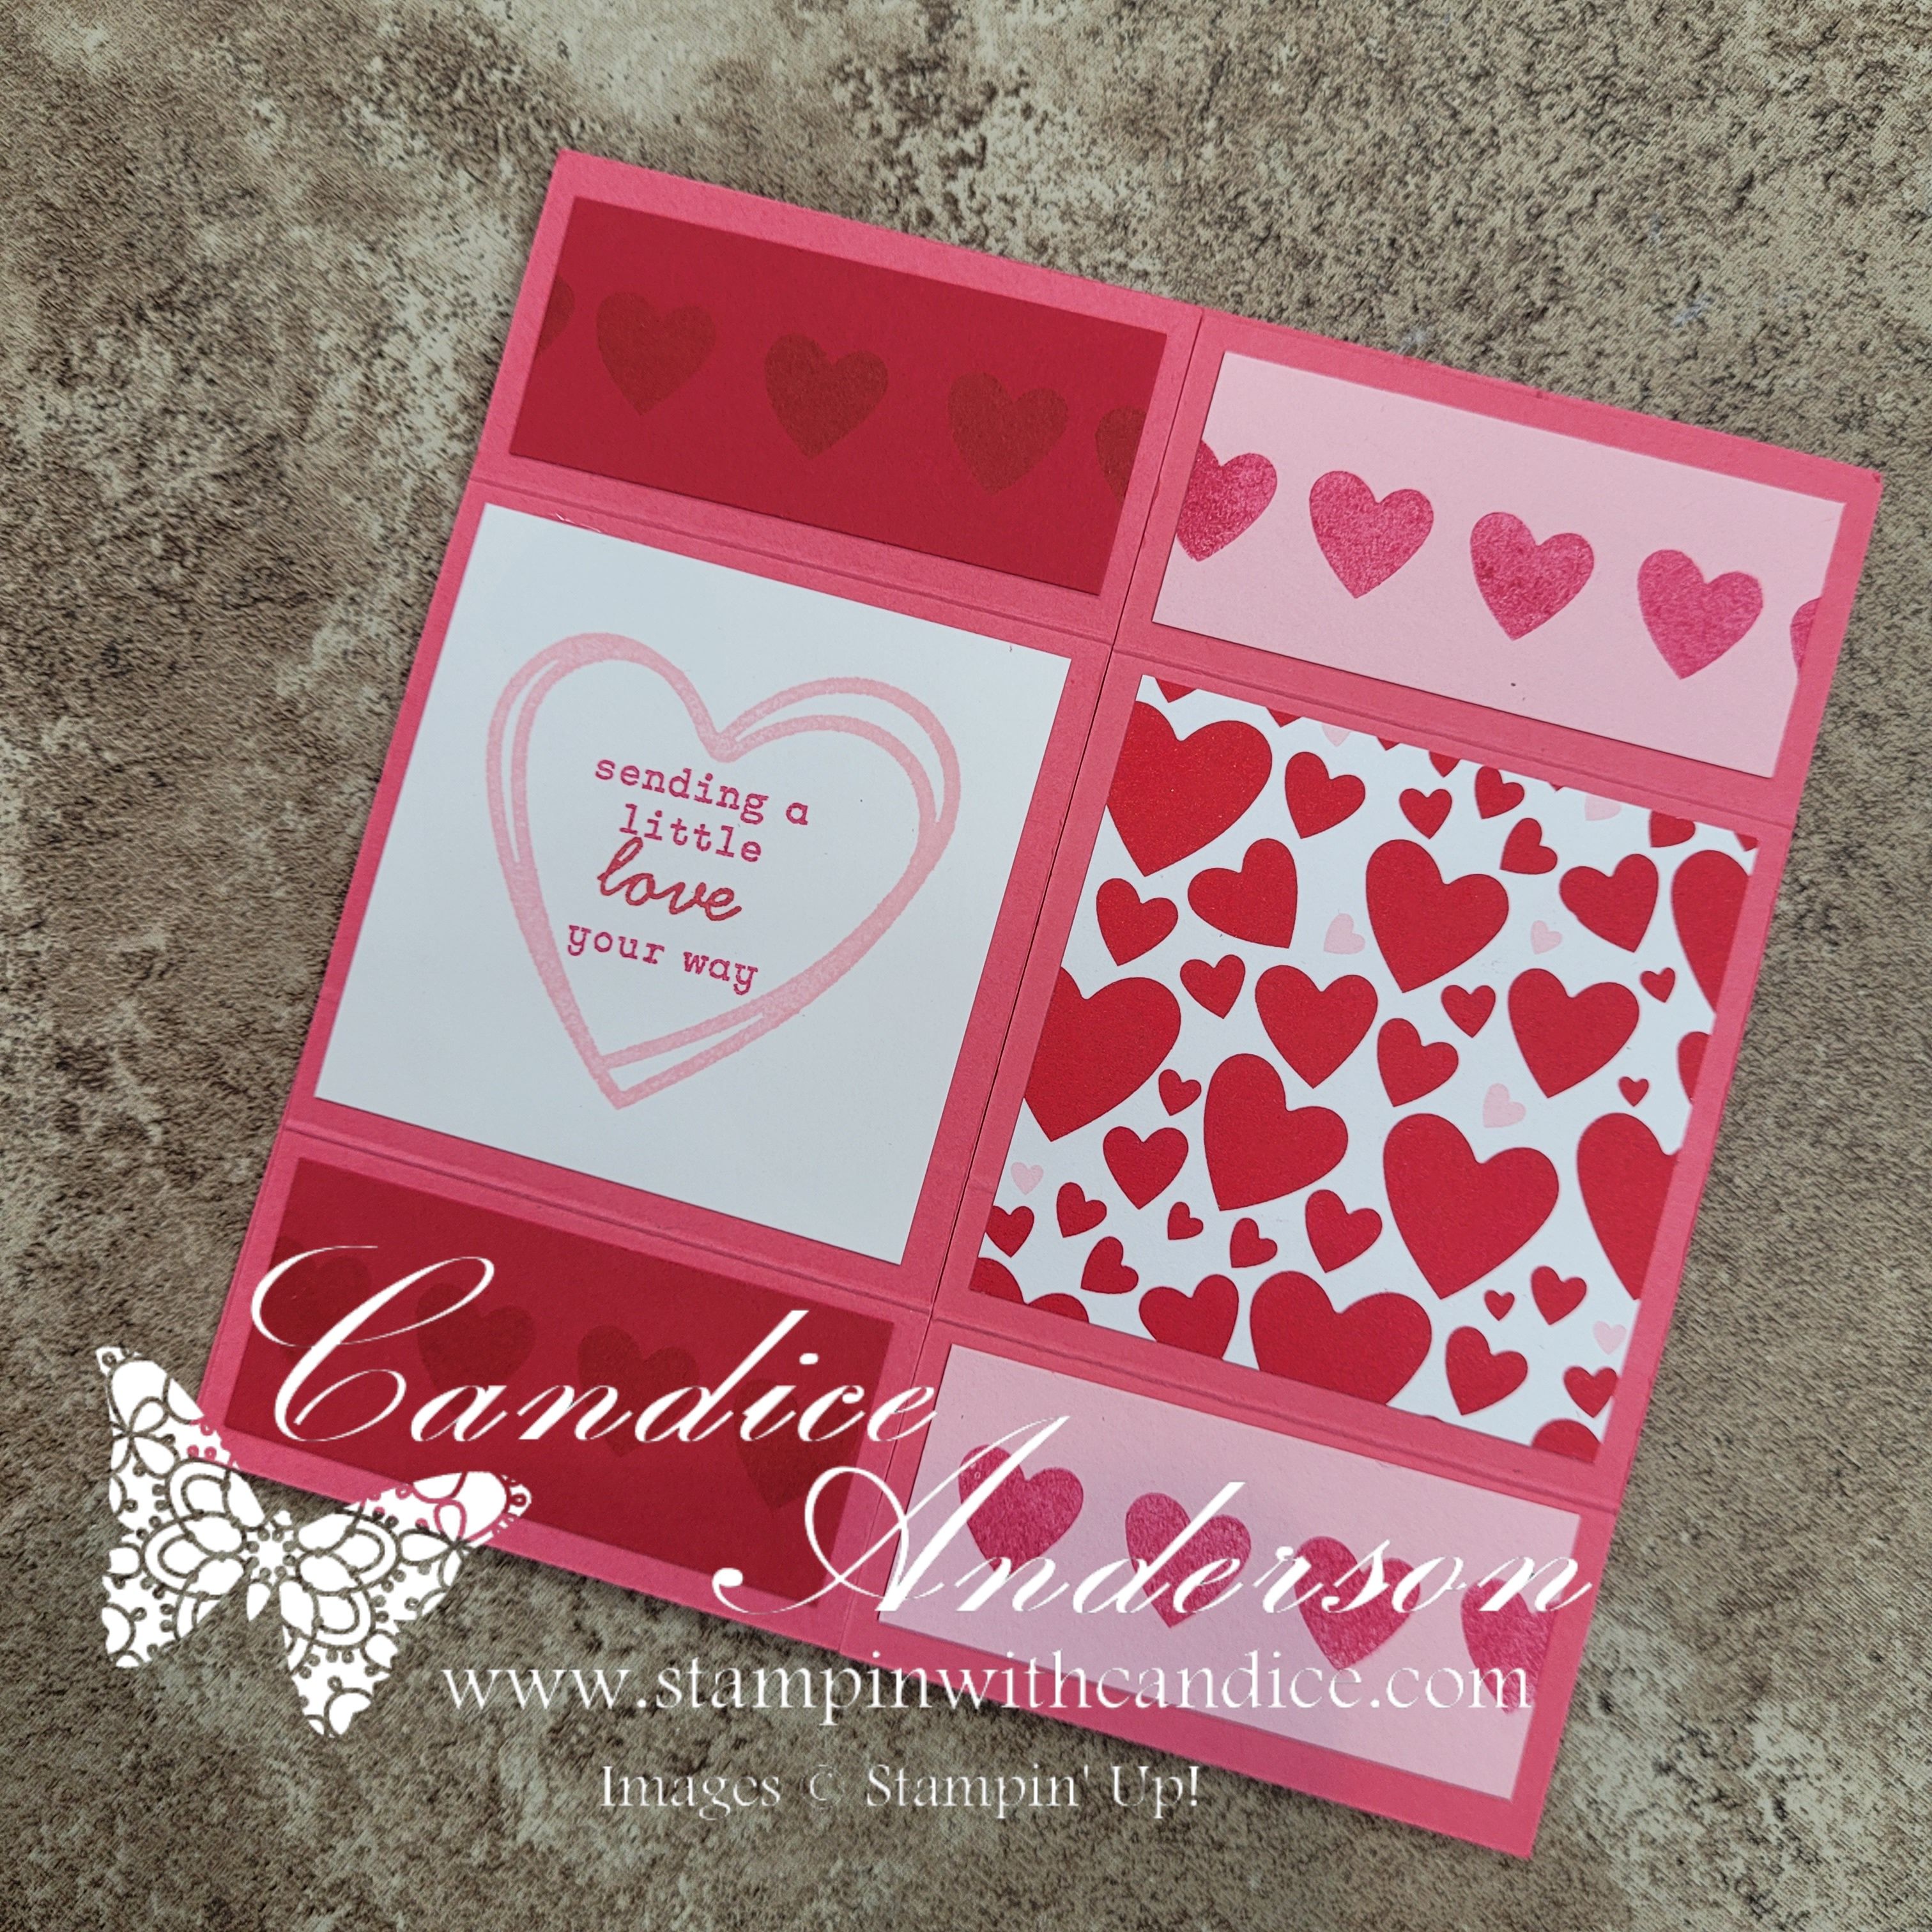
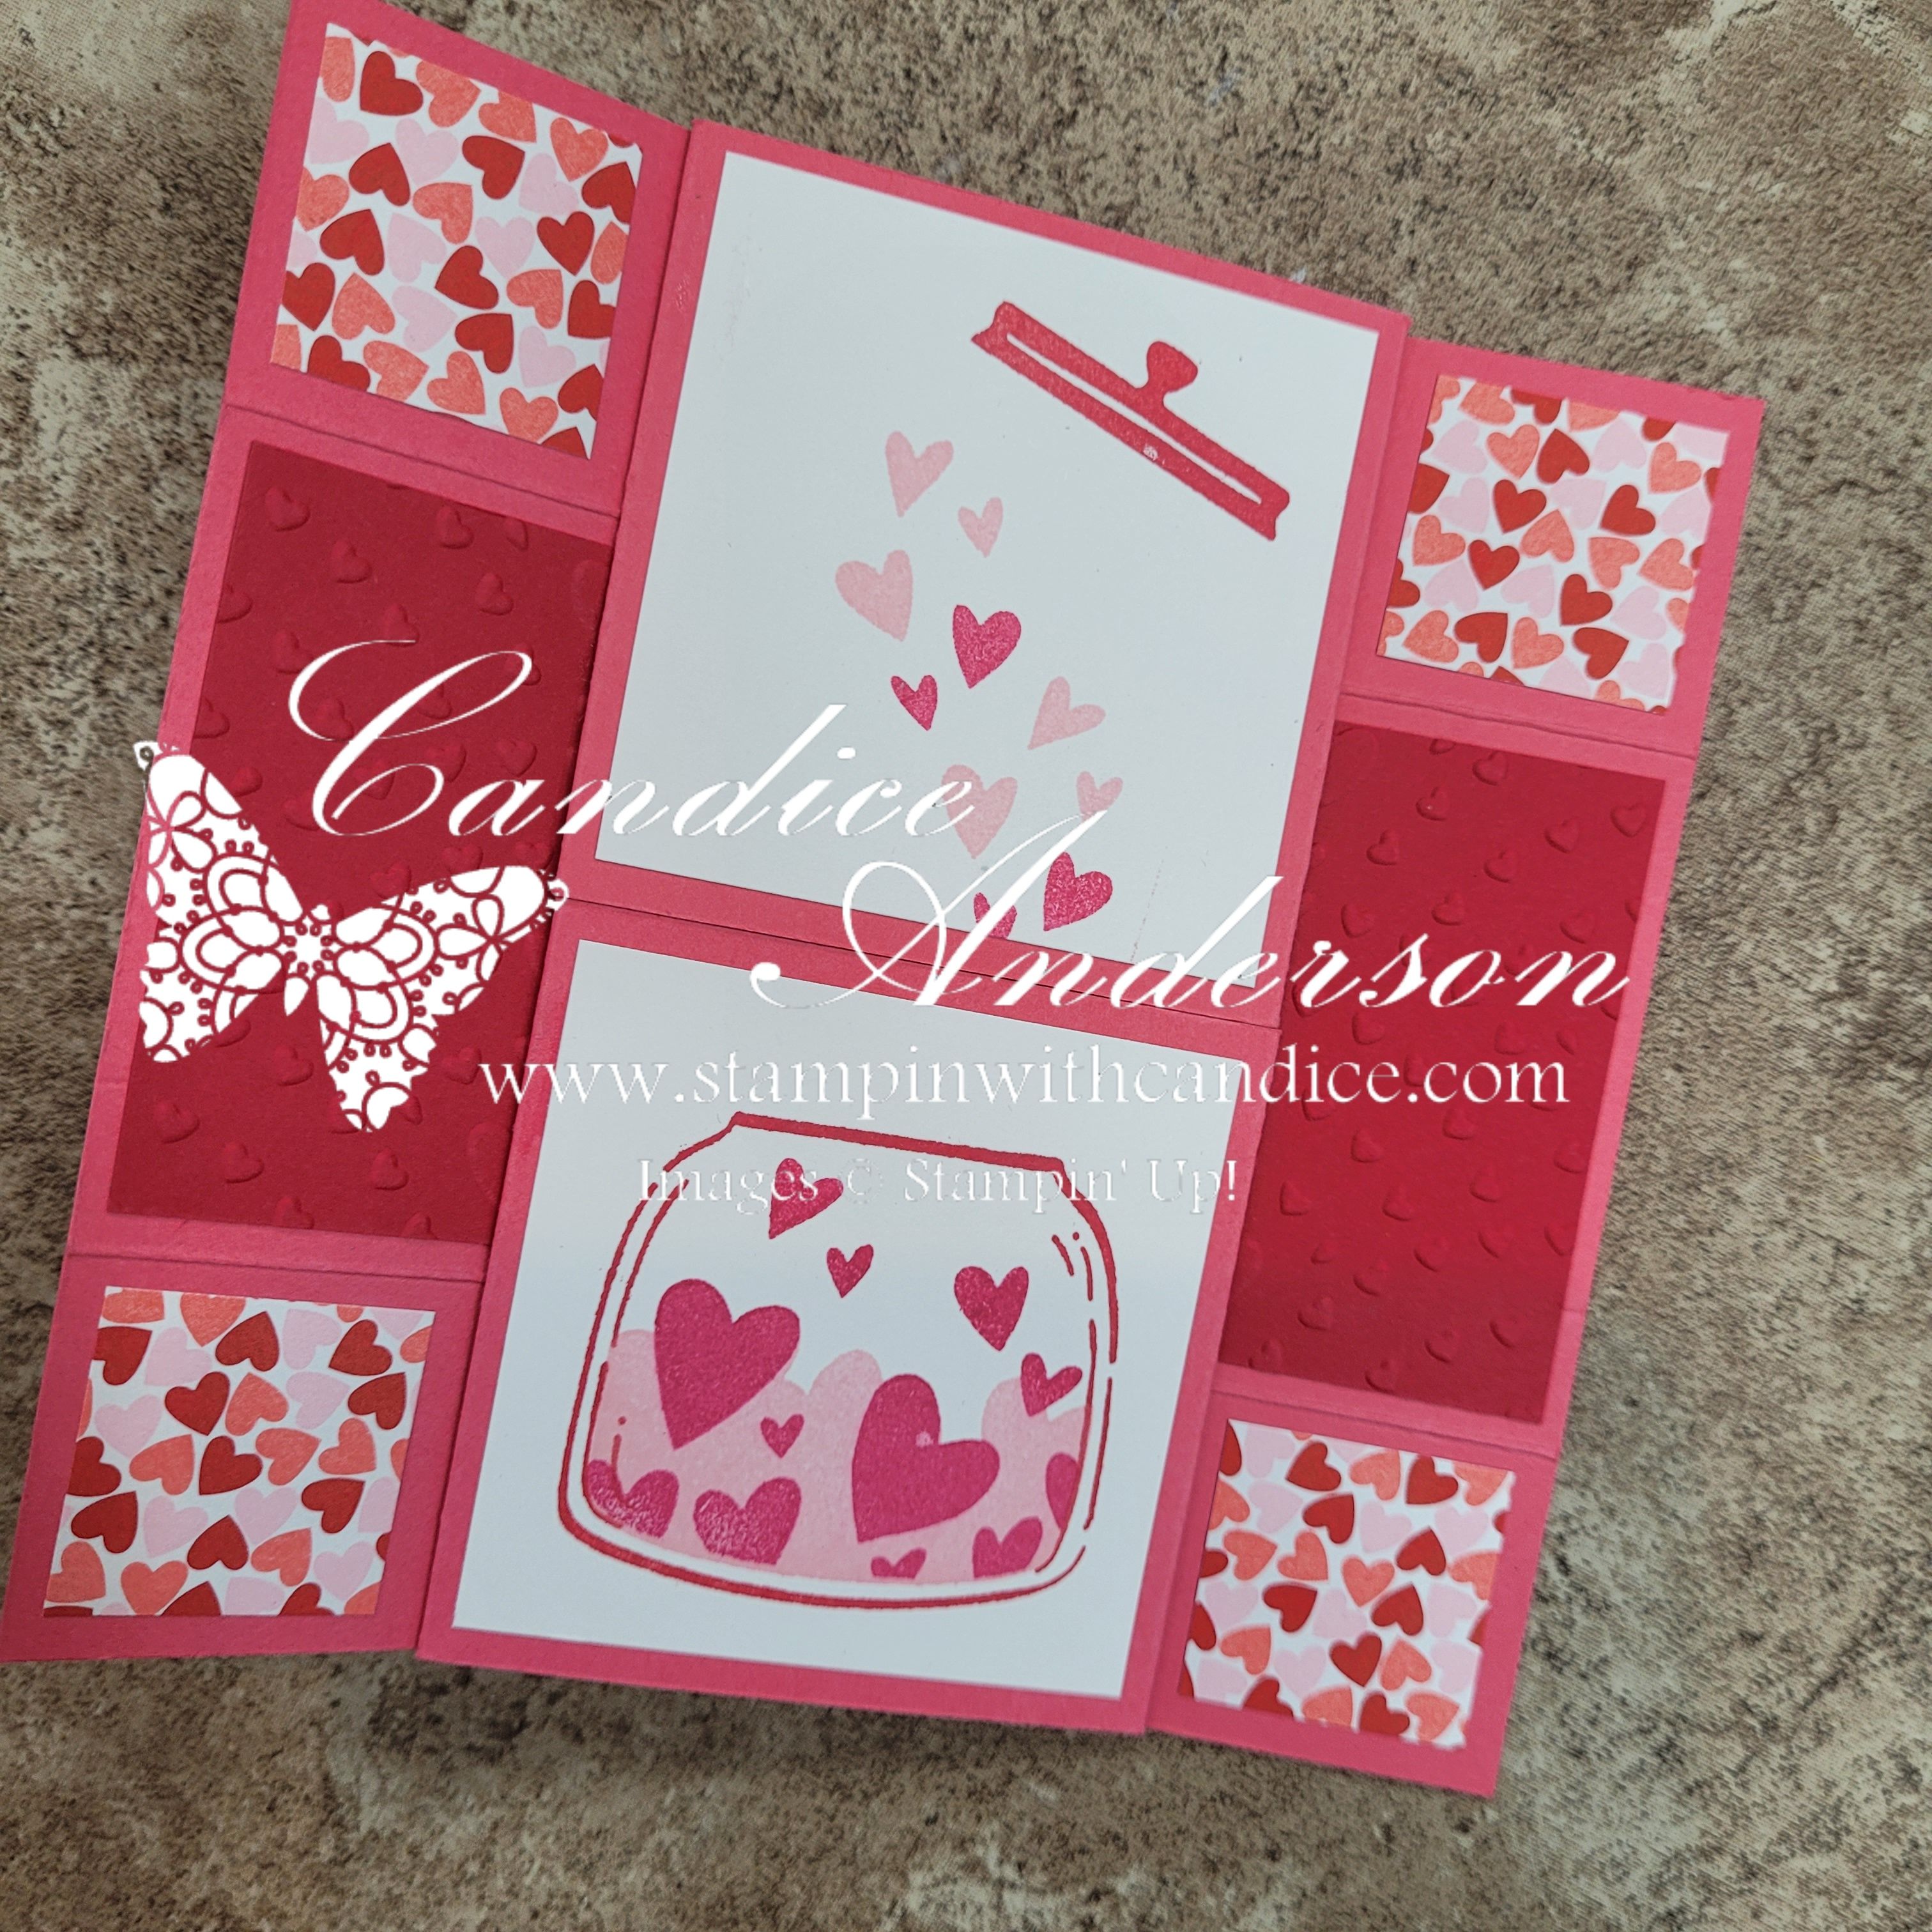
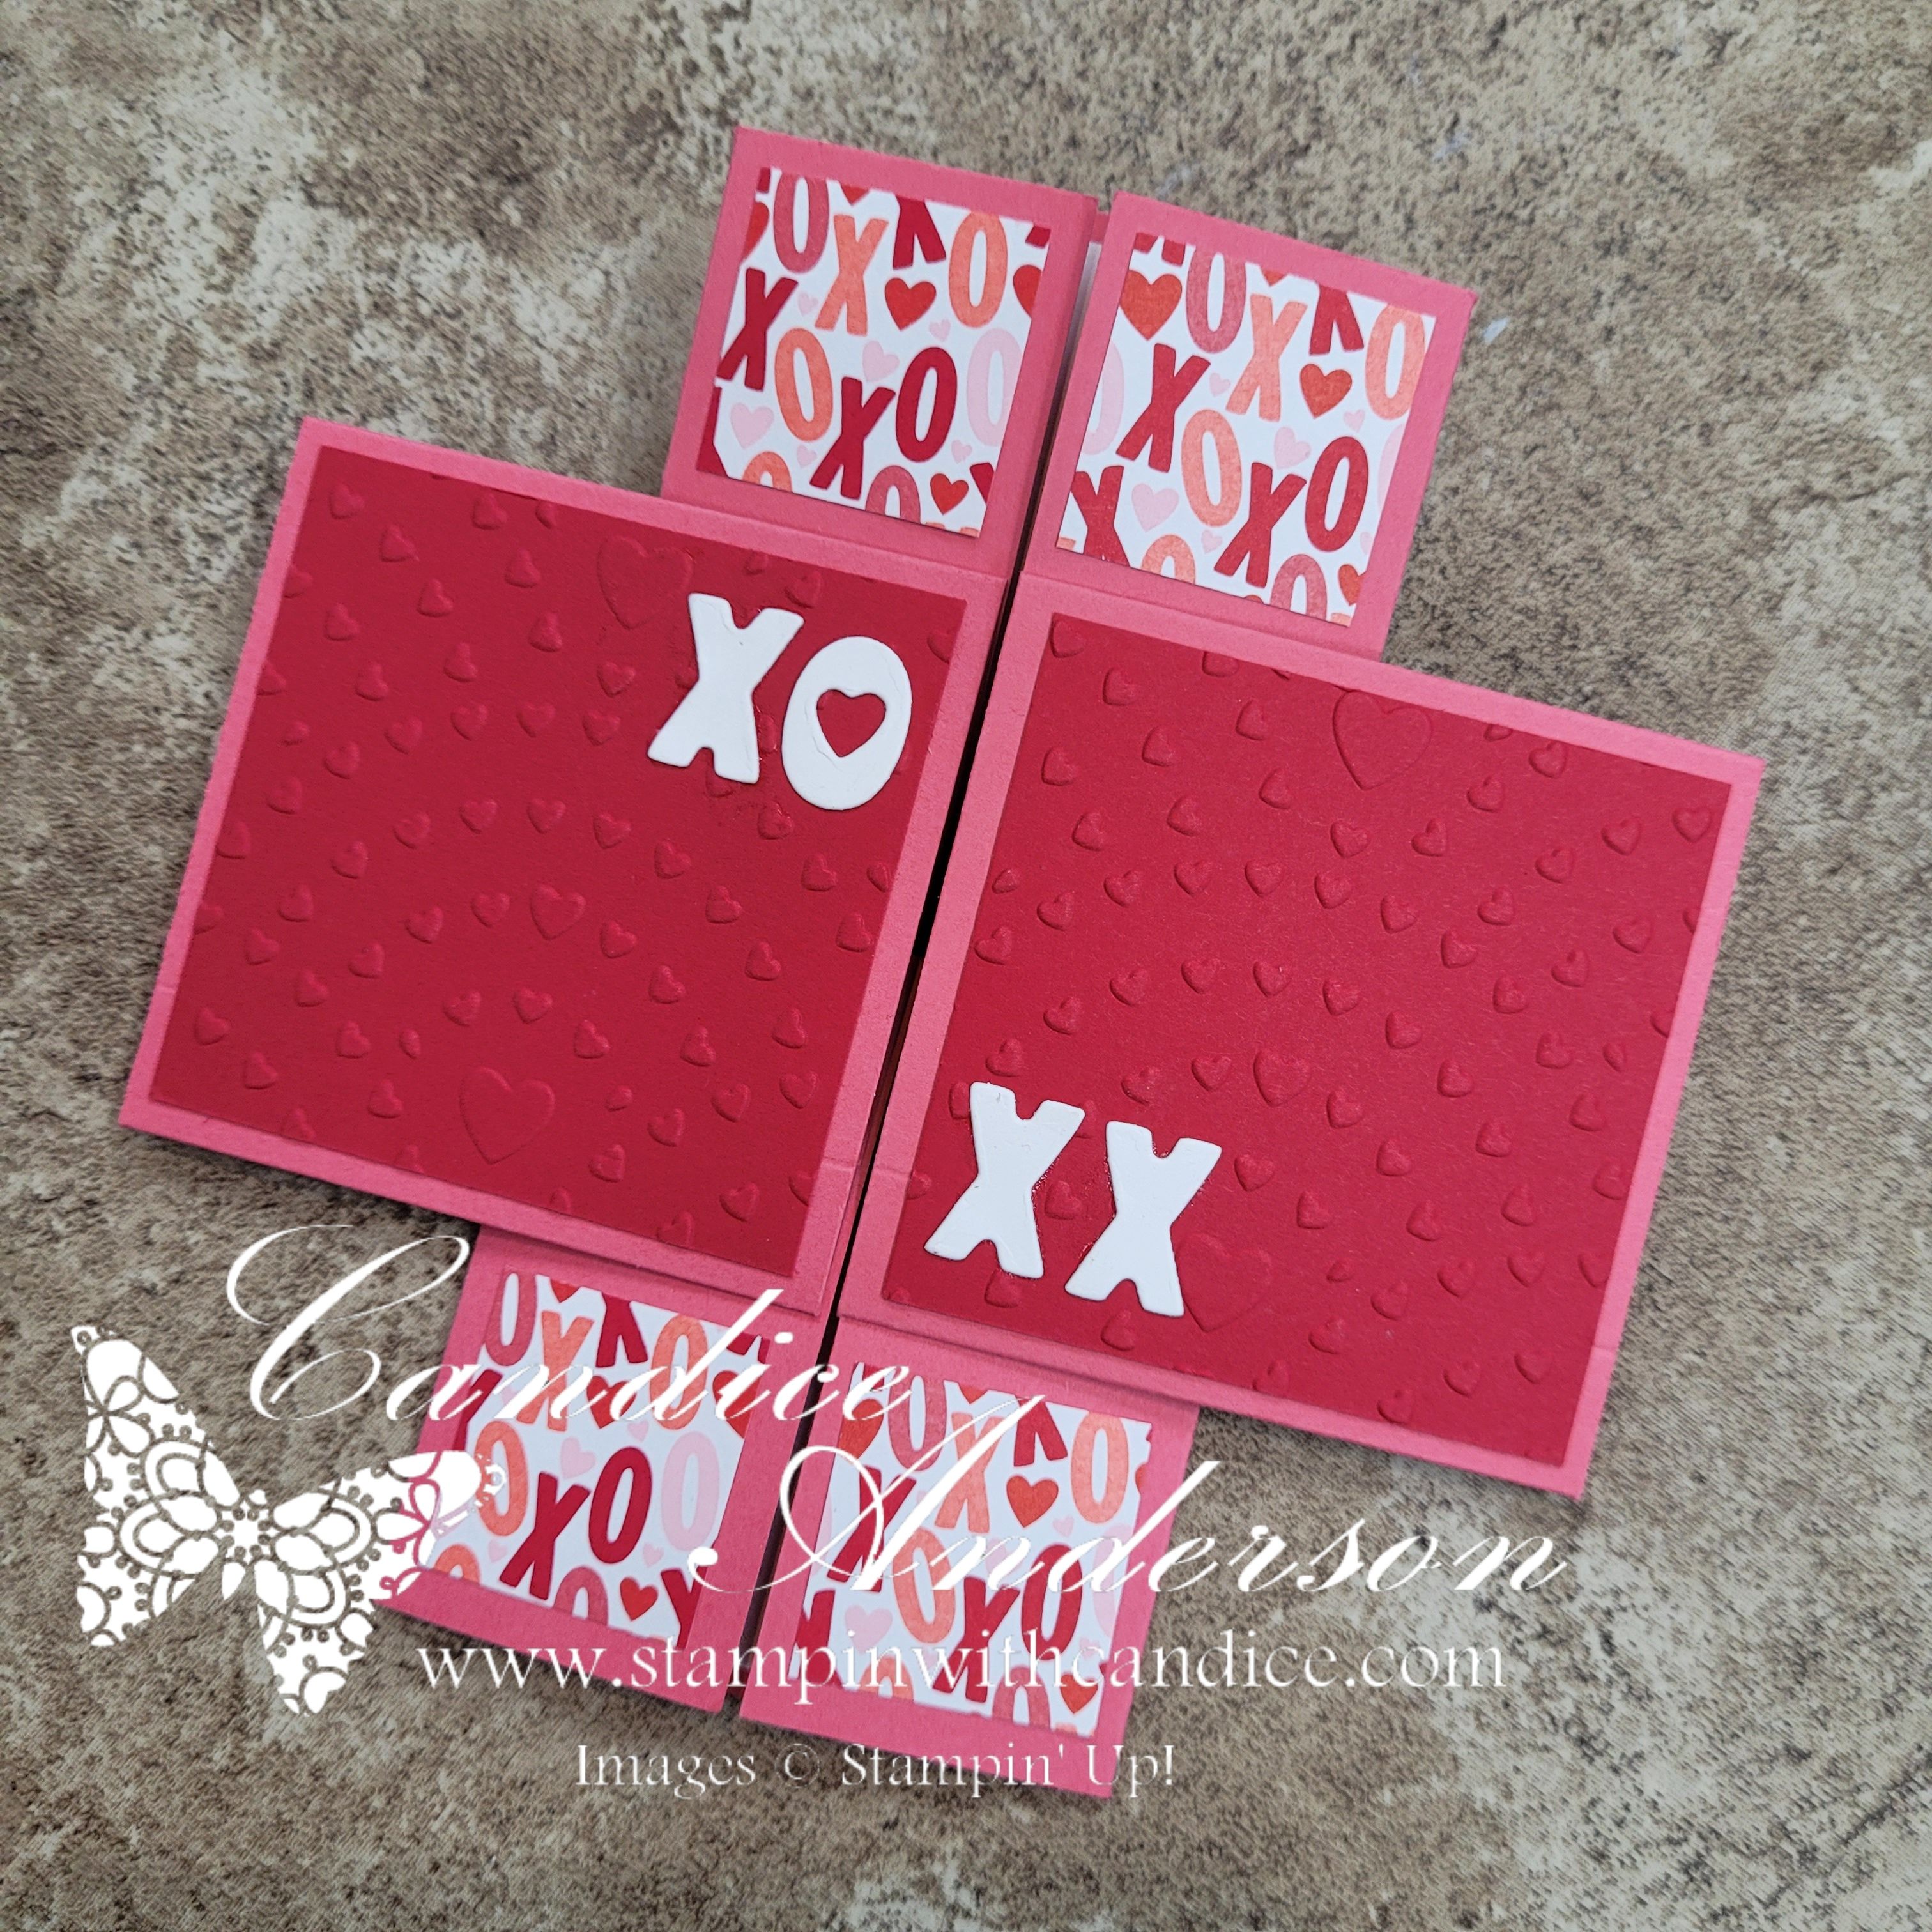
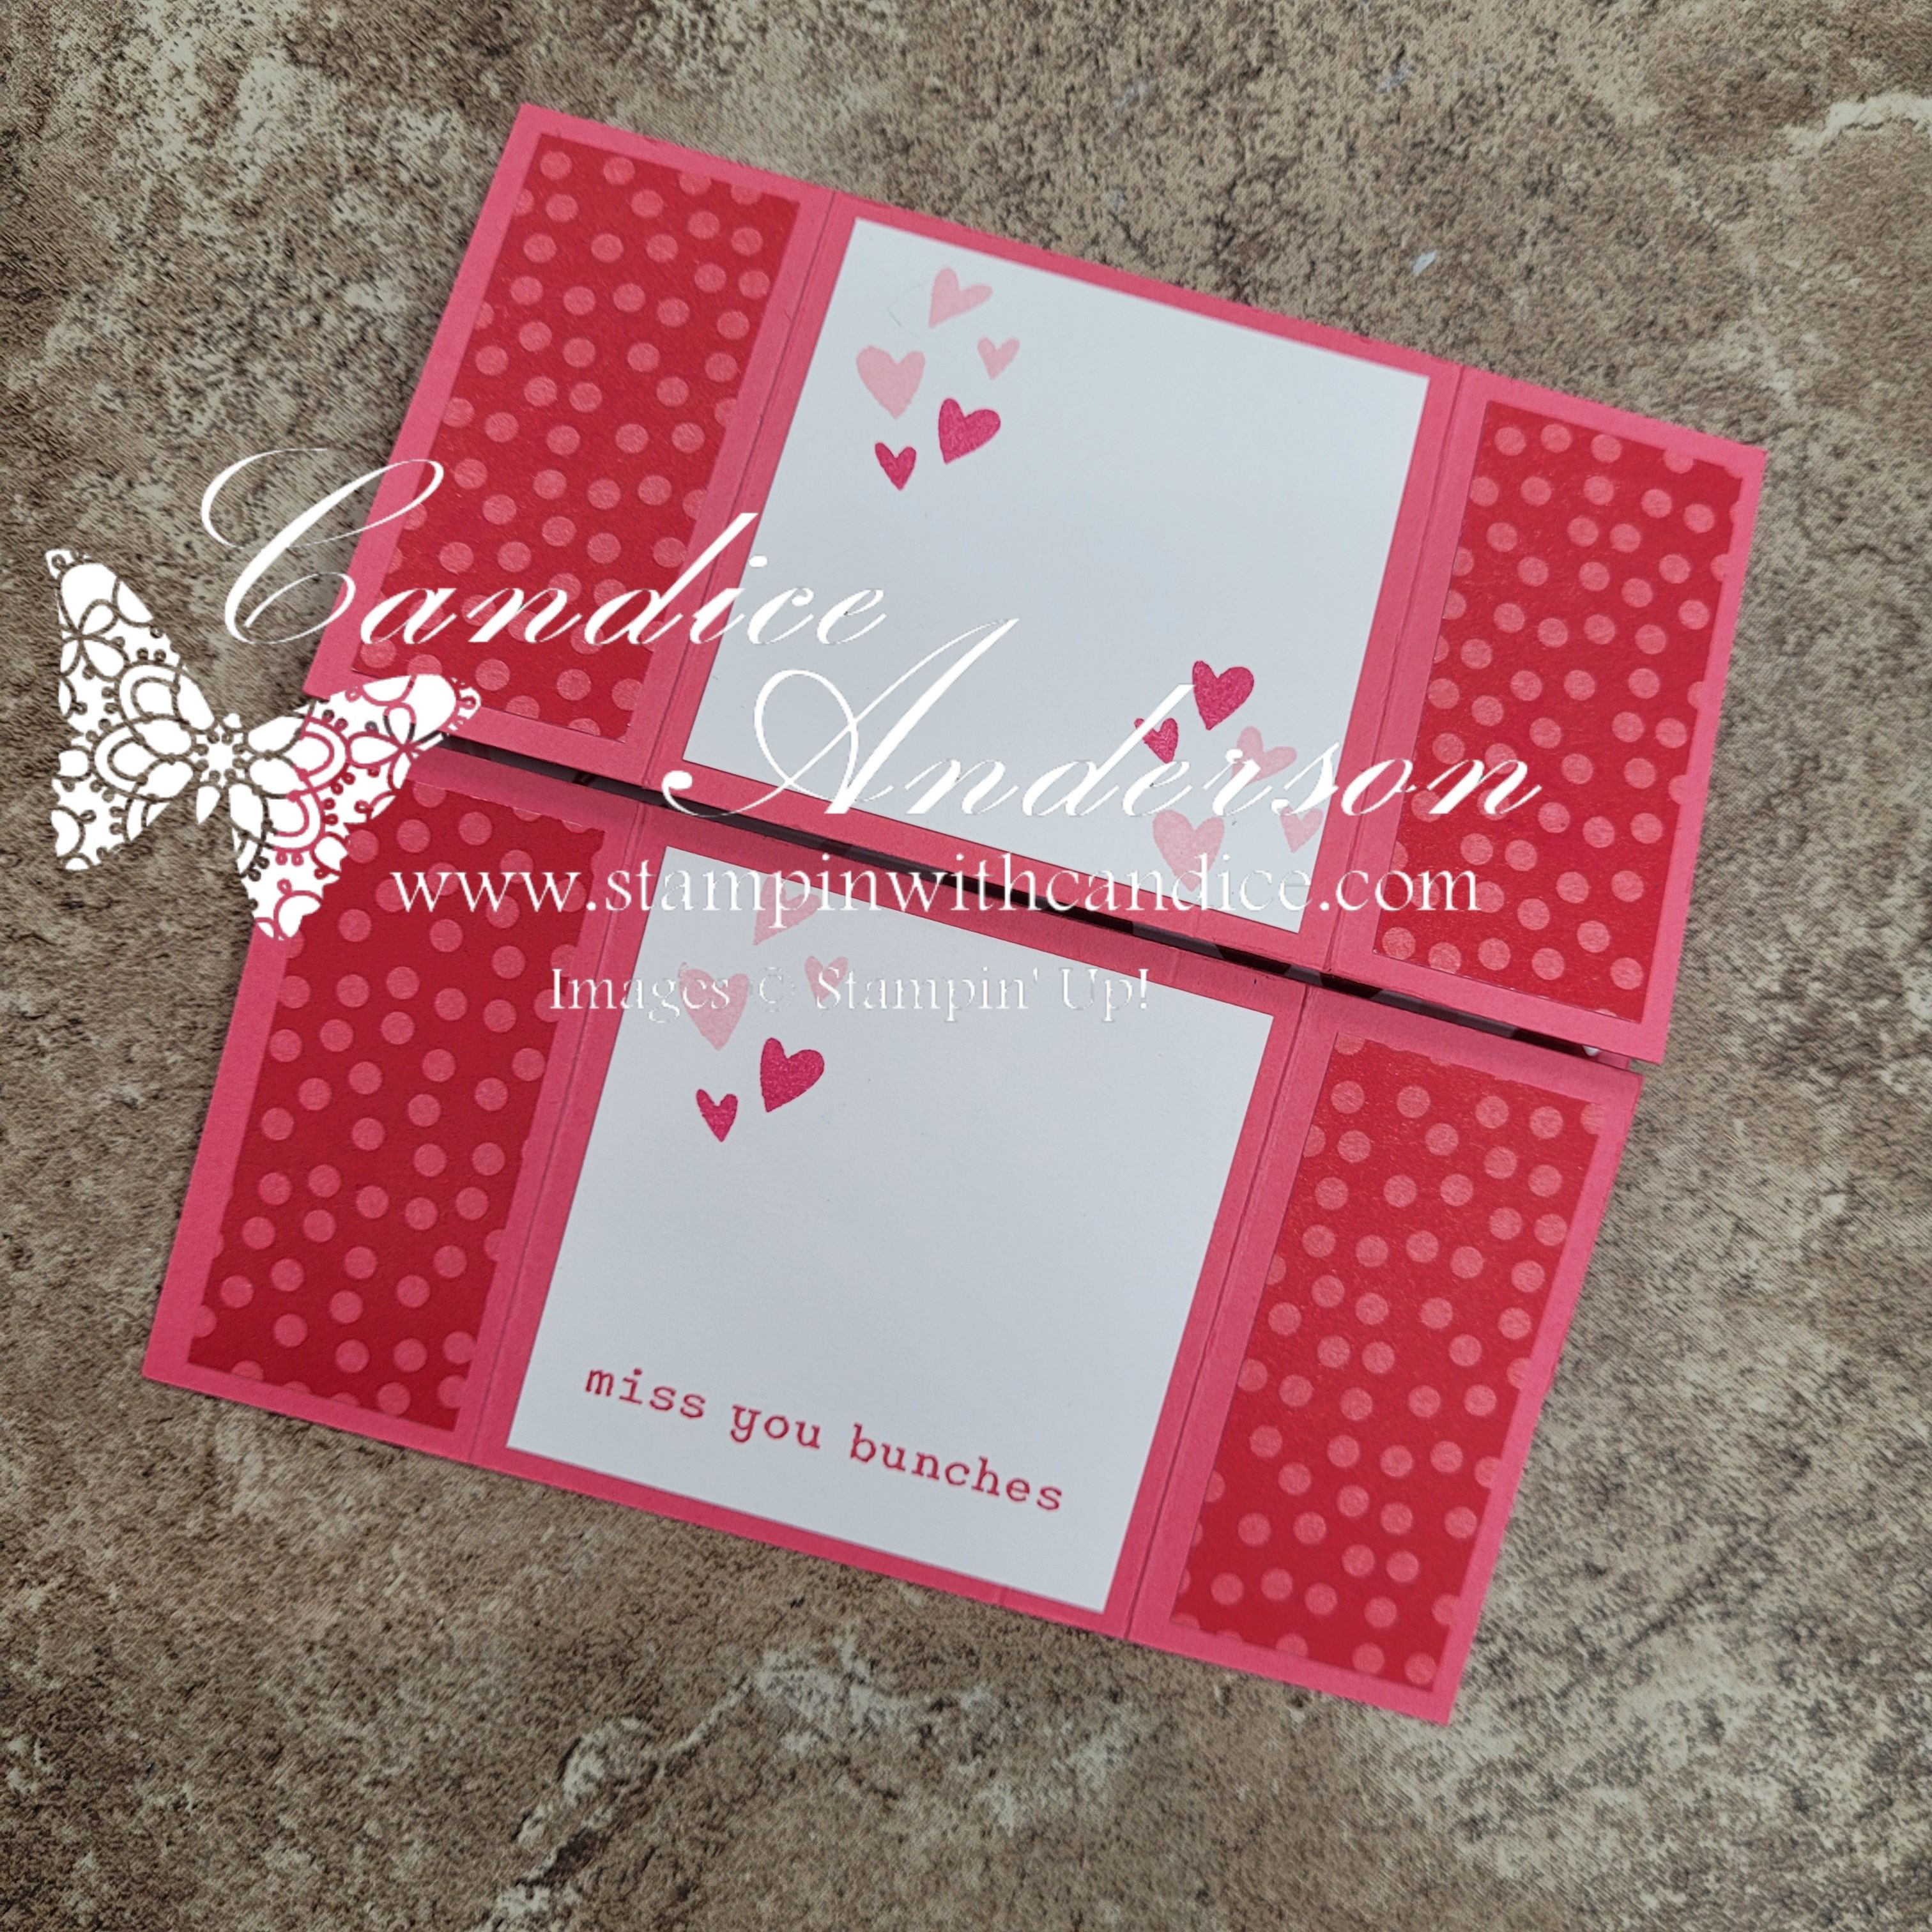
Monday I shared a Never-Ending (Infinity) Card, and let me tell you… this is one of those projects I had seen before but was always a little intimidated to try. Turns out? It’s way easier than it looks—especially thanks to a fantastic tutorial I found by Karey Titus.

For my cards, I featured the Endless Love Stamps & Dies #167062 along with the Made with Love DSP #167054, and I wanted to share a few helpful tips I picked up while making them.
Tips for Making a Never-Ending Card

• Cardstock colors:
You can use two different colors of cardstock or stick with the same color. If you’re worried about keeping track of direction and orientation, I highly recommend using the same color—it makes things much less confusing.

• Practice the folds first:
Before decorating, assemble your base pieces and practice turning the card. This really helps you understand how the card moves and makes it easier to decide what should go on each panel. Keep in mind that if it’s not folding and laying out the way you want try flipping the card as it can change the direction of the fold and cuts.

• Sizing is flexible:
I made two different sizes—a 6″ × 6″ card and then used the leftover 5″ × 5″ pieces to create a smaller version. You can truly make this card in any size, as long as you start with a square.

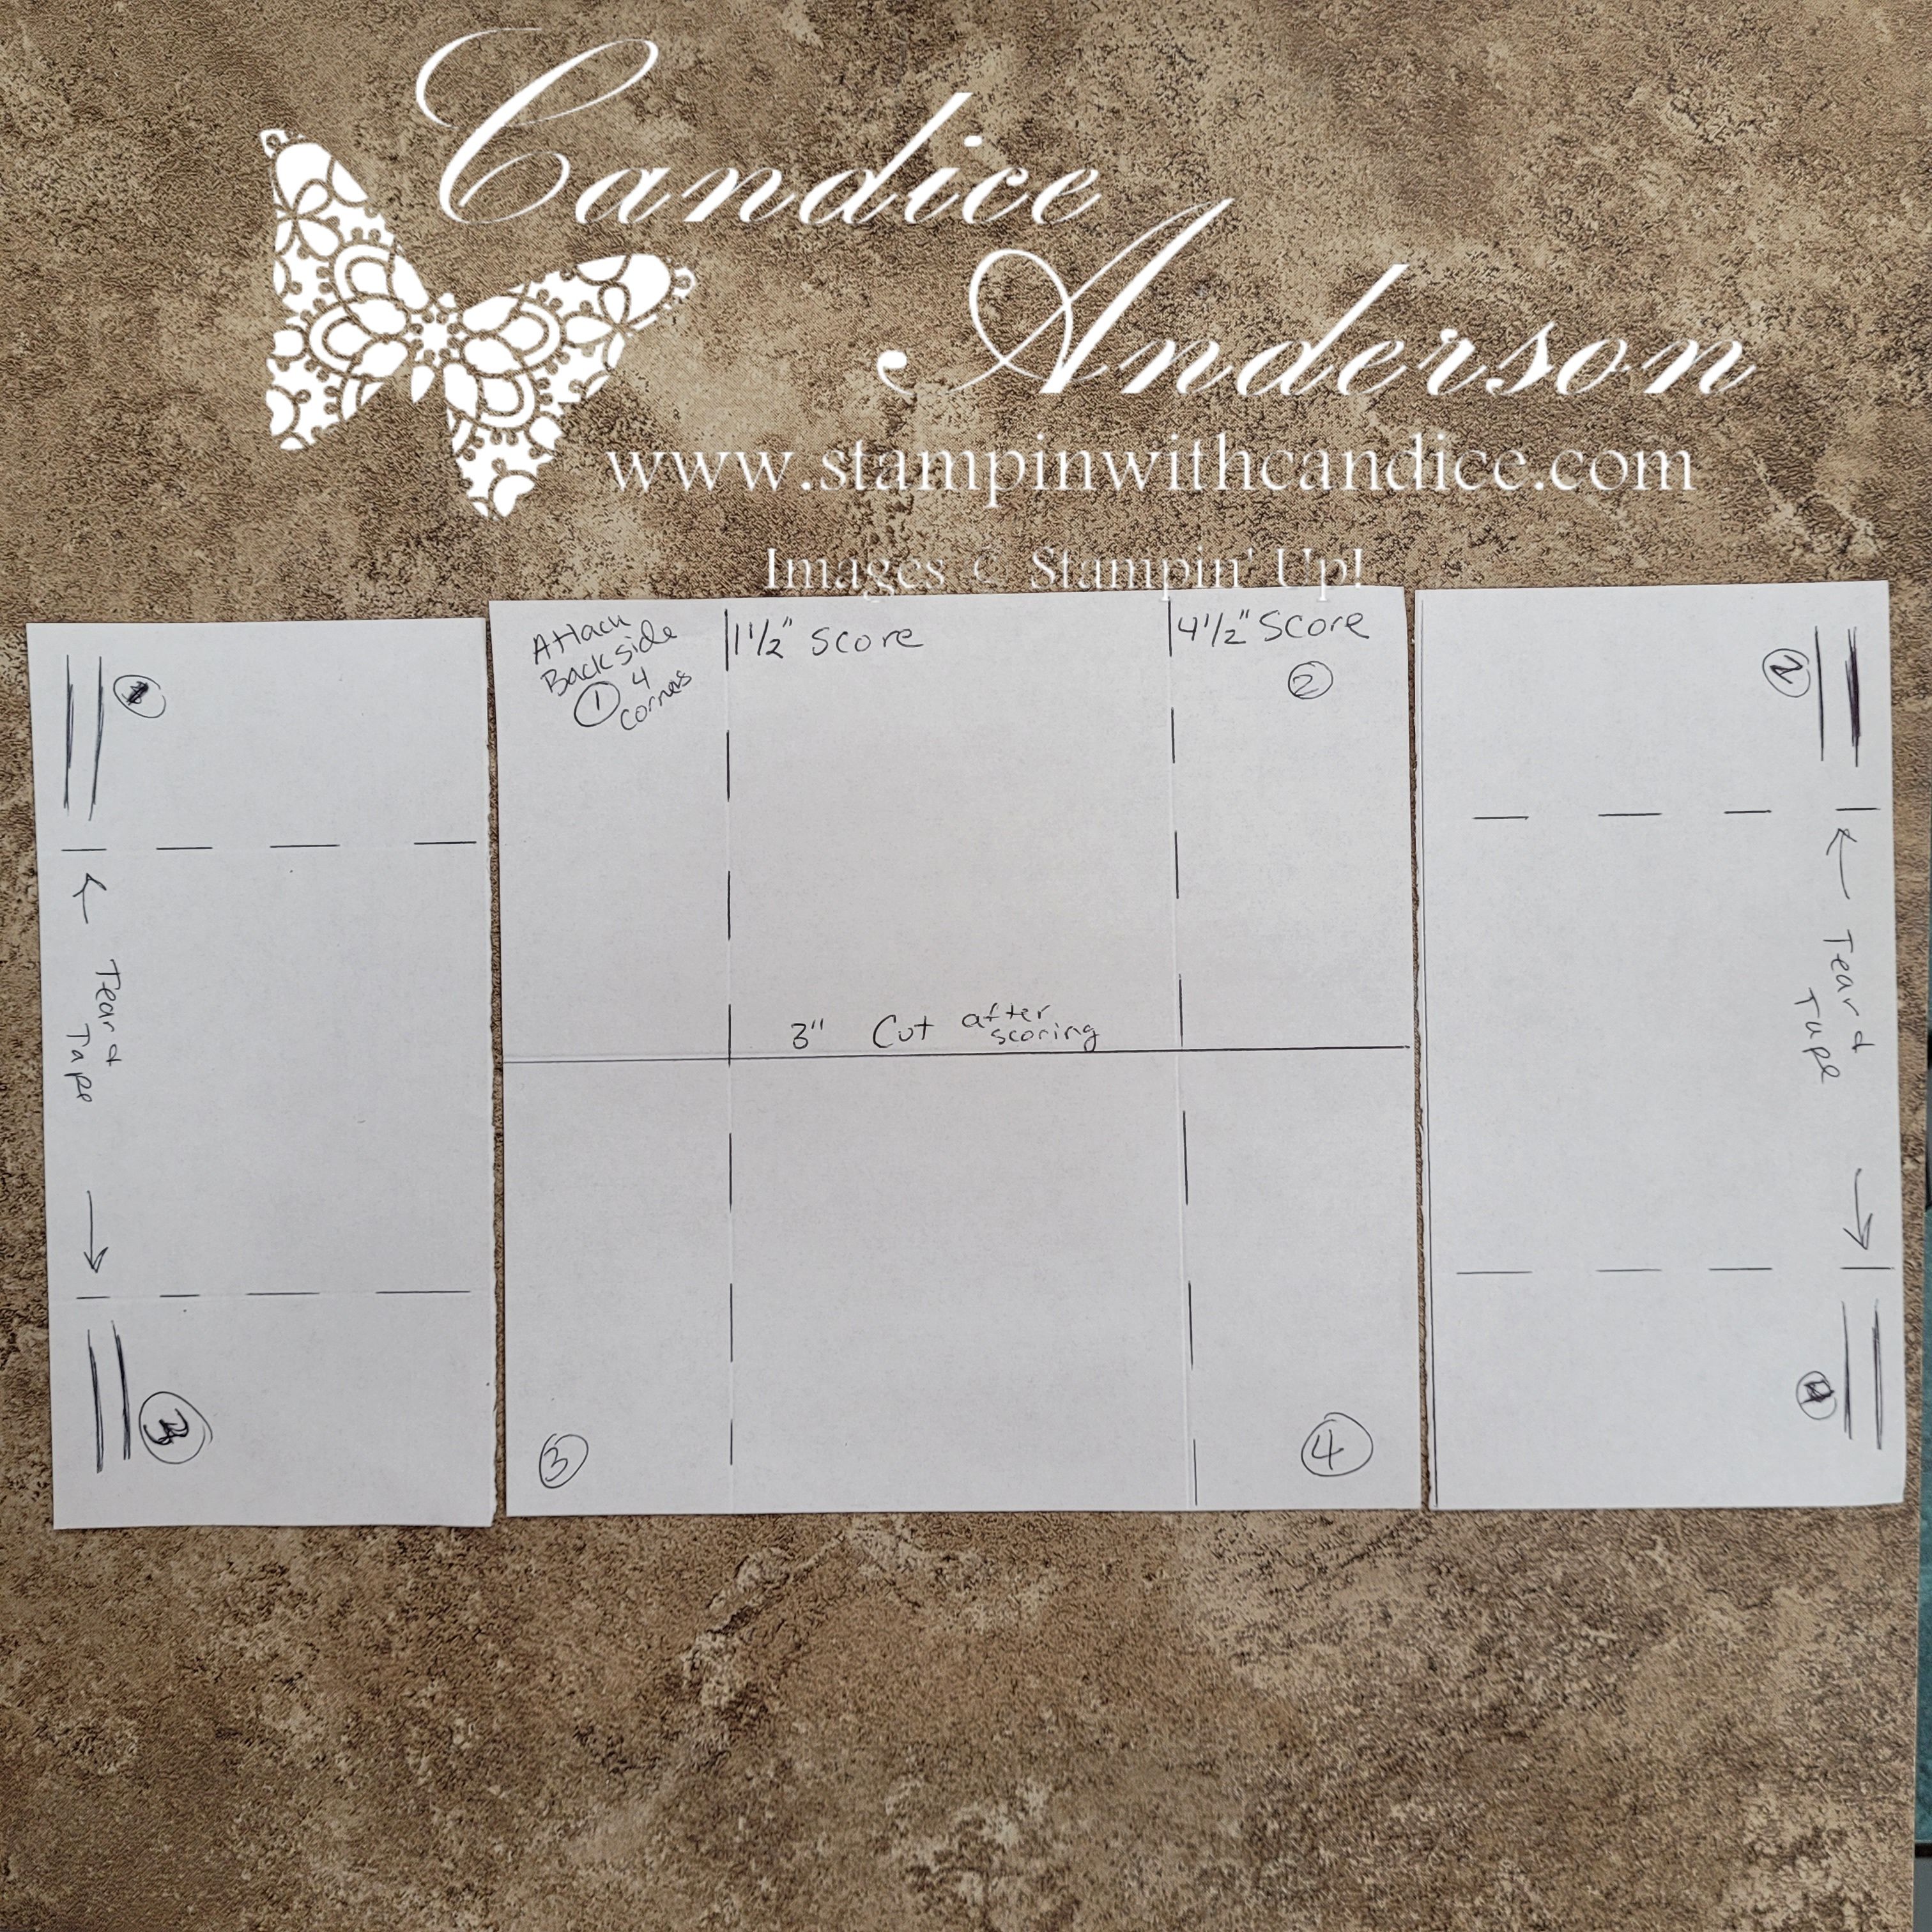
• Scoring measurements:
You’ll score at ¼ of the measurement from each side.

  • For a 6″ × 6″ card, score at 1-1/2″ and 4-1/2″
  • For a 5″ × 5″ card, score at 1-1/4″ and 3-1/4″

This creates an inside panel that’s half the size of the full card (3″ for the 6″ × 6″ and 2-1/2″ for the 5″ × 5″ .)

A layout design with measurement lines and notes on white paper, detailing scoring and cutting instructions for a crafting project.

• Cutting & assembly:
You’ll need two sheets, both scored and then cut in half in opposite directions.
The trickiest part is placing the adhesive correctly so the card can turn smoothly.

I used Tear & Tape #154031 because it’s strong and easy to work with. Place it on the outside corners (top and bottom) of one sheet. Then take the second sheet, turn it 90 degrees, and attach it to those corners.

If you’re more of a visual learner, be sure to watch the video to see how it’s done—it makes the assembly so much easier to follow.

Decorating the Card

Now for the fun part—decorating!
Most of my panels were cut ¼” smaller than the base pieces. Be mindful of the direction each panel will turn. I laid everything out as I went so I could decide where each piece made the most sense.

I had so much fun making these that I decided to try a few more designs, including the smaller version I mentioned in my video. I stuck with the heart theme and added in:

  • Love Story Stamp Set #167065
  • Darling Dinos Stamp Set #164730 (Last Chance)
  • Sweet Jar Stamp Set #165501 (Last Chance)

These cards are so fun, easy, and interactive—and honestly, they’re a little like a fidget spinner for crafters. You just can’t help but keep flipping them! I hope I’ve inspired you to give a never-ending card a try! I’d love to see what you create—be sure to tag me or give me a shout-out when you share your project or drop it in the comments.


A beautifully crafted Christmas card featuring a window scene that displays a peaceful nativity setting on one side, while the inside is adorned with cozy holiday elements like hanging stockings and warm colors.

Please feel free to contact me if you have any questions.

Contact me today to place your order!
435-232-2655 Cell ( Call or Text)
andersoncandice@hotmail.com


💕 Let’s Stay Connected

📺 YouTube
📘 Facebook
📸 Instagram
📌 Pinterest

Easy Fun Fold Gift Card Holder Tutorial

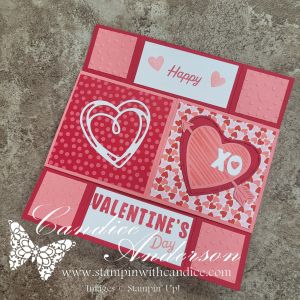
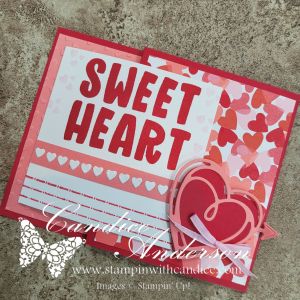
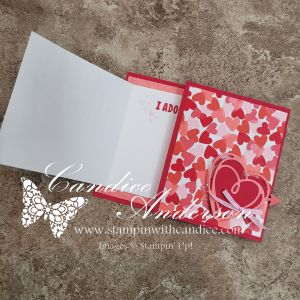
On my Monday Live, I shared an easy-to-make fun fold gift card holder inspired by my recent mini album. This sweet project features brand-new products that were released just yesterday, and I absolutely love how simple yet impressive this design is.

Card Base & Structure

Start with a piece of Real Red cardstock cut to 4-1/4″ x 11″.
Score at 5-1/2″ and 9″.

  • The 5-1/2″ section will be on the left side of the card.
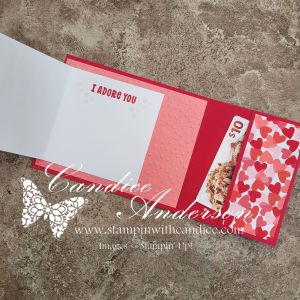
  • Fold the 2″ section inward, then fold again on the 5-1/2″ score line.
  • This creates a pocket on the inside of the card.

Secure the sides of the pocket using Tear & Tape (#154031), leaving the top edge open so you can tuck in a gift card or cash.

Inside Panel

Cut Flirty Flamingo cardstock to 5-1/4″ x 4″ and emboss it using the
Hearts of Love 3D Embossing Folder (#167071).

Attach this to the inside of the card on the 5-1/2″ x 4-1/4″ section.

Designer Series Paper

From the Made with Love Designer Series Paper (#167054), cut:

  • 4″ x 3-1/4″
  • 4″ x 1-3/4″

Place these pieces on:

  • The 3-1/2″ section folded to the front
  • The 2″ section folded inside to form the pocket

Left Folding Panel

Cut Basic White cardstock to 3-1/2″ x 7″ and score in half at 3-1/2″.

Stamp “Sweet Heart” from the Love Story Stamp Set (#167065) on the front and decorate as desired.

Attach this panel centered over the embossed section on the left side of the card base.

For one version, I placed the mini hearts directly on the white panel. For the second card, I added them to a 1/4″ strip of coordinating paper for a slightly different look.

Closure & Finishing Touches

For the closure, cut:

  • One solid heart
  • One lined heart

Using the Endless Love Dies (#167061).
Add arrows if you’d like for extra detail.

Attach the hearts to the front using Stampin’ Dimensionals, creating a small pocket for the folded panel to tuck underneath.

Finish the card with Bubble Bath Faux Linen Ribbon (#167075).


I love how simple and easy this fun fold gift card holder is to make, yet it has such a wow factor. Be sure to check out the video to see the step-by-step process, and I can’t wait to see your ideas using this design and these beautiful new products!


A beautifully crafted Christmas card featuring a window scene that displays a peaceful nativity setting on one side, while the inside is adorned with cozy holiday elements like hanging stockings and warm colors.

Please feel free to contact me if you have any questions.

Contact me today to place your order!
435-232-2655 Cell ( Call or Text)
andersoncandice@hotmail.com


💕 Let’s Stay Connected

📺 YouTube
📘 Facebook
📸 Instagram
📌 Pinterest

🎄Quick & Cute: A Pop-Up Gift Card Holder Anyone Will Love

Merry Christmas! 🎄

I hope you all had a wonderful holiday filled with special moments spent with family and friends. 💛

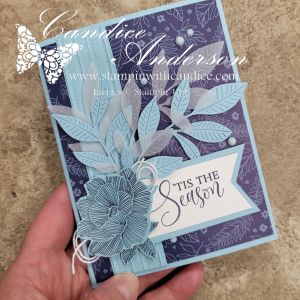
For my Monday Live, I shared an easy pop-up gift card holder that’s perfect for those last-minute gifts—or for anyone who’s just hard to buy for. I also featured this month’s Product of the Month, the True Blue Florals Designer Series Paper (#167970). You can grab this gorgeous paper for just $5 with a $75 purchase—such a great deal!

I chose to give my project a Christmas feel by using a few holiday sentiments, but this card design and layout work beautifully for any occasion. Simply swap out the greeting and embellishments, and you’re good to go.

During the live, I promised I’d share all the measurements so you can recreate this project at home—so let’s dive in!


Card Front Measurements & Supplies

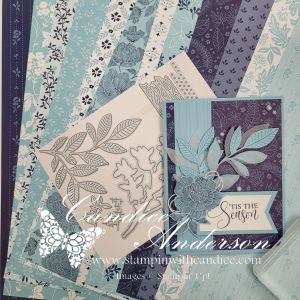
A collection of patterned papers in shades of blue and purple, with a completed card featuring layered leaves and a sentiment that reads 'Tis the Season'.
  • Card Base:
    • Balmy Blue Cardstock – 8-1/2″ x 5-1/2″ (scored at 4-1/4″)
  • Card Front Layers:
    • True Blue Florals DSP – 5-1/4″ x 4″
    • Balmy Blue Cardstock – 5-1/4″ x 4″
      • Embossed with Lovely Striped Embossing Folder (#167179 – available in January)
  • Die Cuts:
    • Leaves cut from Balmy Blue Cardstock and Vellum (#167099)
    • Dies: Nature’s Symphony Dies (#166925 – available in January)
  • Tag:
    • Basic White – 2-1/2″ x 1-1/4″, cut into a tag
    • Stamped with Ornamental Christmas (#165991) in Night of Navy
    • Mat: Balmy Blue – 2-1/4″ x 1-1/2″
  • Embellishments:
    • Flowers fussy-cut from DSP
    • Muted Palette Dots (#165155)
    • White Baker’s Twine (#155475)

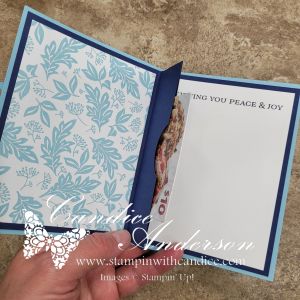
Inside Pop-Up Gift Card Holder

  • Cardstock:
    • Two pieces of Night of Navy Cardstock – 5-1/4″ x 5-1/4″
  • Scoring:
    • Score each piece at 1-1/4″
    • This creates a 1-1/4″ section and a 4″ section
  • Assembly:
    • Attach the two 1-1/4″ sections together (top and bottom) using Tear & Tape (#154031)
    • Use a circle punch to punch a small notch in the outer corner of the 1-1/4″ section
      • This makes it easier to slide the gift card in and out
  • Finishing the Inside:
    • Left side: DSP – 3-3/4″ x 5″
    • Right side: Basic White – 3-3/4″ x 5″
      • Stamp with a coordinating greeting to finish the card
      • Attach the the inside of card.
        • Just a note they are cut so the are centered leaving an 1/8″ border. This helps pull the center apart just slightly and make it easier for the gift card to slide in and out.

Final Thoughts

This card really is super easy to make, and once you’ve made one, you’ll want to make several! It’s perfect for holidays, birthdays, thank-you cards, or any time a gift card is the perfect solution.

If you’d like extra help, be sure to check out my step-by-step video for the full walkthrough. And please—share your creations in the comments! I would absolutely love to see what you come up with.


A beautifully crafted Christmas card featuring a window scene that displays a peaceful nativity setting on one side, while the inside is adorned with cozy holiday elements like hanging stockings and warm colors.

Please feel free to contact me if you have any questions.

Contact me today to place your order!
435-232-2655 Cell ( Call or Text)
andersoncandice@hotmail.com


💕 Let’s Stay Connected

📺 YouTube
📘 Facebook
📸 Instagram
📌 Pinterest


#StampinWithCandice #StamperCandi #HandmadeCards #GiftCardHolder #StampinUp #CardMaking #LastMinuteGifts #Papercrafting #DIYCards #CreativeInspiration #ProductOfTheMonth #HolidayCrafting

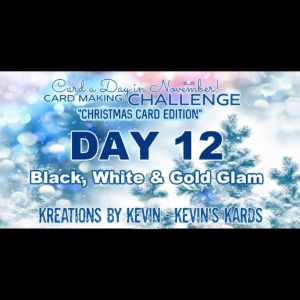
🖤✨ Day 12 – Black, White & Gold Glam Meets Reindeer Games

Day 12 brought a touch of elegant glam to my Christmas Card Challenge with the theme Black, White & Gold Glam + Reindeer Games!

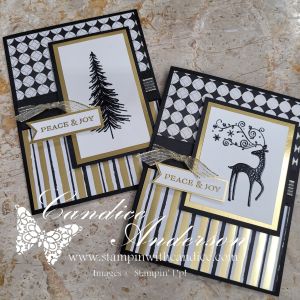
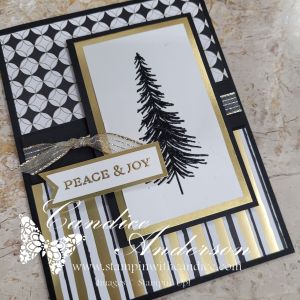
The Modern Christmas Suite was the perfect go-to for today’s challenge. I wanted to keep things simple yet striking, so I designed a classic dual–Designer Series Paper layout with a bold focal image and a clean, elegant greeting layered right on top.

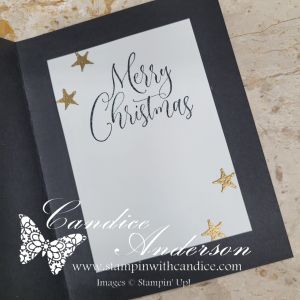
A bit of ribbon and a mix of black and gold embossing added just the right touch of sparkle and sophistication. Since the card base itself is black, I made sure to stamp the inside on white cardstock, leaving plenty of space for a heartfelt holiday message. 💛

To tie in the Reindeer Games theme, I also created an additional card using the same layout — this time featuring one of my all-time favorite retired sets, Dasher, as the focal point. The elegant reindeer image paired beautifully with the black, white, and gold color scheme for a timeless Christmas look. 🦌✨

This card came together quickly but makes a stunning impression — proof that minimal color and elegant accents can create a truly glamorous Christmas card!


Measurements Guide

Want to recreate this design?
I’ve included a quick measurement guide to make it easy!
Save or screenshot for easy crafting later! ✨

  • Card Base – Basic Black – 8-1/2 x 5-1/2 – Scored at 4-1/4
  • Top DSP (patterned) – 2×4
  • Bottom DSP (stripped) – 2-1/4×4
  • Ribbon Strip – Black – 1×4
  • Words – Gold 5/8×2-1/2 (trim to fit) and White 1/2×3 (Punched)
  • Inside – White 3×4-1/4
  • Image – Tree
    • White – 2×3-1/2
    • Gold – 2-1/4 x 3-3/4
    • Black – 2-1/2 x 4
  • Image – Deer
    • White – 2-1/4 x 2-3/4
    • Gold – 2-1/2 x 3
    • Black – 2-3/4 x 3-1/4

👉 You can shop current Stampin’ Up! supplies and tools here:
Shop with Me Here

✨ Products Used

  • Ornamental Christmas Stamp Set (#165991)
  • Modern Christmas Specialty Designer Series Paper (#165990)
  • Three Banner Punch (#167050)
  • Gold Striped Ribbon (#165599)
  • Metallics WOW Embossing Powder (Gold) (#165678)
  • Basics WOW Embossing Powder (Black) (#165679)
  • Gold Foil Sheets (#132622)

🎥 Here’s a quick video showing how I created it!


A beautifully crafted Christmas card featuring a window scene that displays a peaceful nativity setting on one side, while the inside is adorned with cozy holiday elements like hanging stockings and warm colors.

Please feel free to contact me if you have any questions.

Contact me today to place your order!
435-232-2655 Cell ( Call or Text)
andersoncandice@hotmail.com


💕 Let’s Stay Connected

📺 YouTube
📘 Facebook
📸 Instagram
📌 Pinterest

#StampinWithCandice #StamperCandi #CreativeSkills #StampinUp #ACardADayInNovember2025 #30DayChristmasCardMakingChallenge #ChristmasCards #HandmadeCards #OrnamentalChristmas #BlackWhiteAndGold #ReindeerGames #ElegantDesign #HolidayCrafting #WOWEmbossingPowder #GoldFoil #ModernChristmasDSP #CardMakingCommunity

☃️ Day 10 – Snowman Shenanigans & a Magical Color Twist

I had such a blast sharing today’s card during my live! This fun fold card is bursting with sparkle and holiday cheer — from the unexpected color combo of purples and greens to the whimsical twist on Snowman Shenanigans, I think you’re going to fall in love with this one just like I did. 💜💚✨

This card came together with a mix of creativity, experimentation, and a few surprises along the way. I used a lot of different products — including one very unexpected element!

I pulled pieces from the Darling Dinos (#164728) set again, but this time instead of dino-deer, I used them in a whole new way. Combined with the Light & Wonder Dies (#165762), I created the sweetest little snowman that’s sure to melt your heart. ☃️💖

To bring in more holiday magic, I added details and greetings from:
🎄 A Little Cheer Stamp Set (#166121)
🎅 Pine Tree Trimmings Stamp Set (#166040)
🌟 Pine Tree Trimmings Dies (#166046)


🎨 Color Palette Magic

For my color palette, I experimented with two different combos to capture the challenge colors — Concord and 9th —Plumberry, Rainforest, and Lilac.

As these are not Stampin’ Up! colors I had to adjust a bit. I started with my first color combo but after seeing some of the challenge samples, I decided to tweak the colors a bit to better match the prompt.

Which one is your favorite?

💜 First Combo: Mossy Meadow, Petunia Pop, and Berry Burst

  • Spooky Sweet DSP (#166191)

💚 Second Combo (used in my live): Blackberry Bliss, Pretty Peacock, and Fresh Freesia

  • Season of Elegance DSP (#164144)

Both versions share some fun common touches — I used Pool Party for the snow and Pecan Pie for the tree trunks and snowman twigs. ✨

To finish off the sparkle, I added:

  • Wink of Stella (#141897) for shimmer
  • Petunia Pop Iridescent Ribbon (#166203) for a soft, festive glow
  • Frosted Iridescent Dots (#165766) for a frosty finishing touch

These details gave the card just the right amount of shine and magic!


📏 I’ve included a picture of the measurements if you’d like to recreate this easy yet enchanting fun fold card yourself — it’s simple, sparkly, and so much fun to make!

A hand-drawn template showing measurements and scoring instructions for a fun fold card, labeled with dimensions and cut lines.

✨ If you missed my live, be sure to catch the replay and see how it all came together step-by-step! Plus you’ll want to catch the magic in action to see how this fun fold card opens to add surprise and delight to the receiver.


👉 You can shop current Stampin’ Up! supplies and tools here:
Shop with Me Here

A beautifully crafted Christmas card featuring a window scene that displays a peaceful nativity setting on one side, while the inside is adorned with cozy holiday elements like hanging stockings and warm colors.

Please feel free to contact me if you have any questions.

Contact me today to place your order!
435-232-2655 Cell ( Call or Text)
andersoncandice@hotmail.com


💕 Let’s Stay Connected

📺 YouTube
📘 Facebook
📸 Instagram
📌 Pinterest

#StampinWithCandice #StamperCandi #CreativeSkills #StampinUp #ACardADayInNovember2025 #30DayChristmasCardMakingChallenge #ChristmasCards #FunFoldCard #SnowmanShenanigans #DarlingDinos #LightAndWonder #ALittleCheer #PineTreeTrimmings #WinkOfStella #PetuniaPop #PrettyPeacock #BlackberryBliss #FreshFreesia #HandmadeCards #HolidayCrafting #StampingInspiration