Day 25 – Yule Be Amazed – Color combo

Playful Woodland Critters + Witty Wordplay + Color Challenge #5

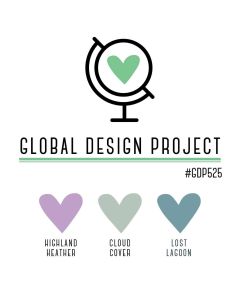
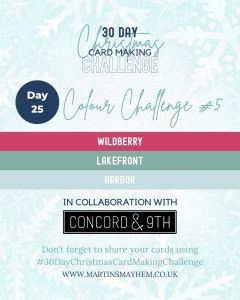
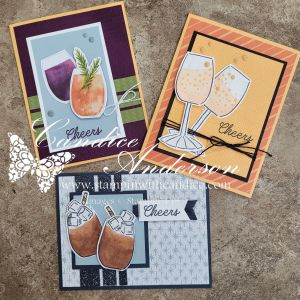
Today’s challenge brought together two fun themes: Yule Be Amazed—full of playful woodland critters and witty wordplay—and Color Challenge #5 using the Concord & 9th palette of Wildberry, Lakefront, and Harbor.

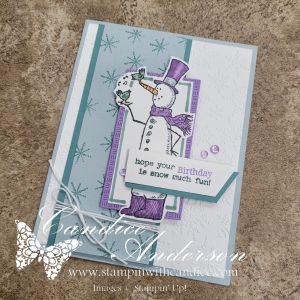
To match this with Stampin’ Up! colors, I chose a bright, cheerful combination of Lost Lagoon, Balmy Blue, and Melon Mambo. At first, I wasn’t sure how to bring both themes into one card. Woodland critters made me think browns and greens… not exactly what this color combo offers!

So I turned to my wall of retired stamp sets in search of inspiration—and that’s when the answer practically jumped off the shelf.


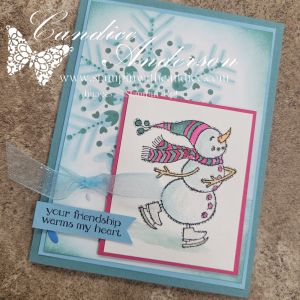
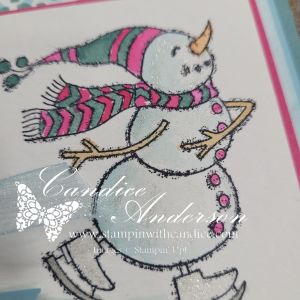
⛄️ When Snowmen Become Woodland Critters

I spotted the retired Spirited Snowmen Set (#148072) and instantly thought of one of my favorite children’s books—
“Snowmen at Night” by Caralyn Buehner, illustrated by Mark Buehner.

In the story, the snowmen come to life and play outside in the woods after dark. And that’s when it hit me:
If snowmen can play in the woods at night… why can’t they count as playful woodland critters?

With that little spark, everything fell into place.


🎨 Coloring the Scene

To get a soft, playful look, I stamped the snowman in Black StazOn (#101406) on Watercolor Paper (#149612).

Then I used my Water Painters (#168253) and the ink pads in my three challenge colors to bring him to life. Watercoloring gave the image a gentle, whimsical feel—perfect for the theme—and made it easy to blend shadowing under him so it looks like he’s skating on ice.

For additional details, I used:

  • Pumpkin Pie (nose)
  • Pecan Pie (arms)
  • Basic Gray (skates)

A touch of Wink of Stella on the snowman and skates added the perfect shimmer.


❄️ Building the Background

To create the snowy nighttime feel, I used the Snowy Delights Decorative Masks (#165808) with a blending brush. The soft Balmy Blue and Lost Lagoon inks blended beautifully behind the snowman and tied the entire color combo together.


🎀 Finishing Touches

The final details pulled everything together:

  • Balmy Blue Sheer Ribbon (#165767)
  • Three Banner Punch (#167050) for the sentiment
  • A soft matting layer in challenge colors

The finished card is sweet, whimsical, and full of playful charm—perfect for sharing a little holiday cheer.


👉 You can shop current Stampin’ Up! supplies and tools here:
Shop with Me Here

A beautifully crafted Christmas card featuring a window scene that displays a peaceful nativity setting on one side, while the inside is adorned with cozy holiday elements like hanging stockings and warm colors.

Please feel free to contact me if you have any questions.

Contact me today to place your order!
435-232-2655 Cell ( Call or Text)
andersoncandice@hotmail.com


💕 Let’s Stay Connected

📺 YouTube
📘 Facebook
📸 Instagram
📌 Pinterest

#StampinWithCandice #StamperCandi #ACardADayInNovember2025 #30DayChristmasCardMakingChallenge #ChristmasCards #HandmadeCards #CreativeTechniques #HolidayCrafting #cardmaker #cardmaking #christmascards #handmadecards #papercraft #christmaschallenge

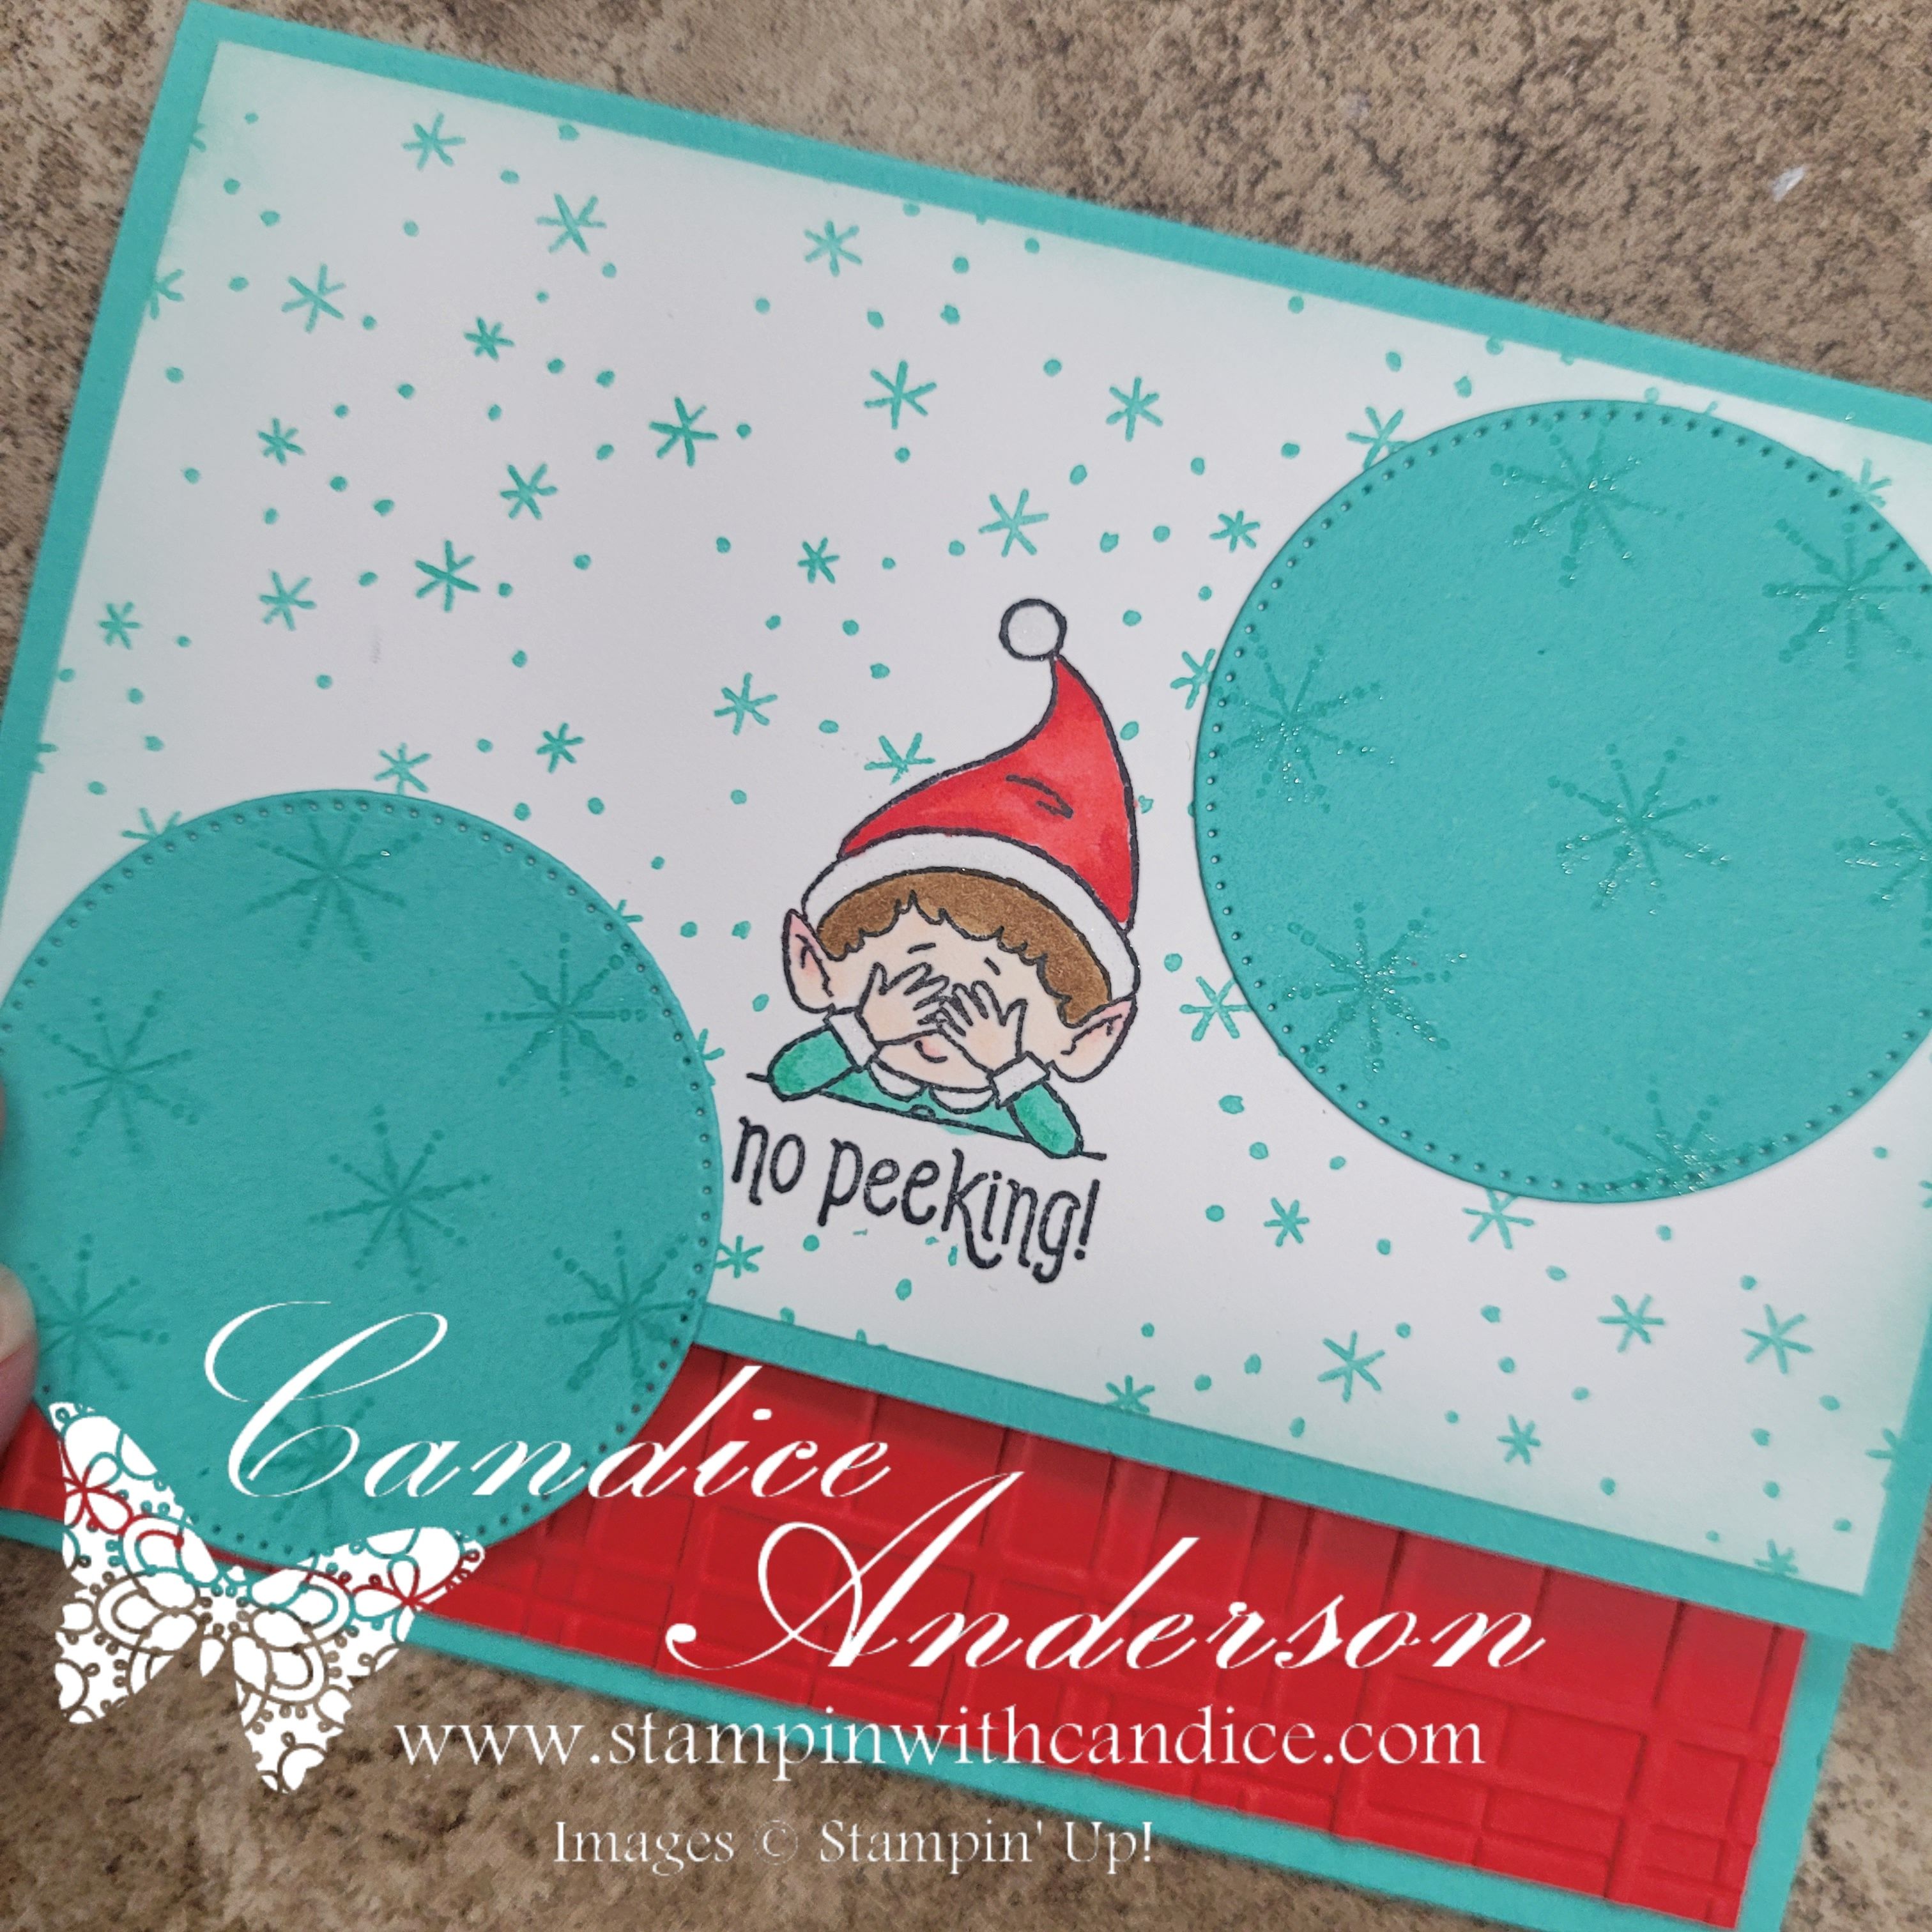
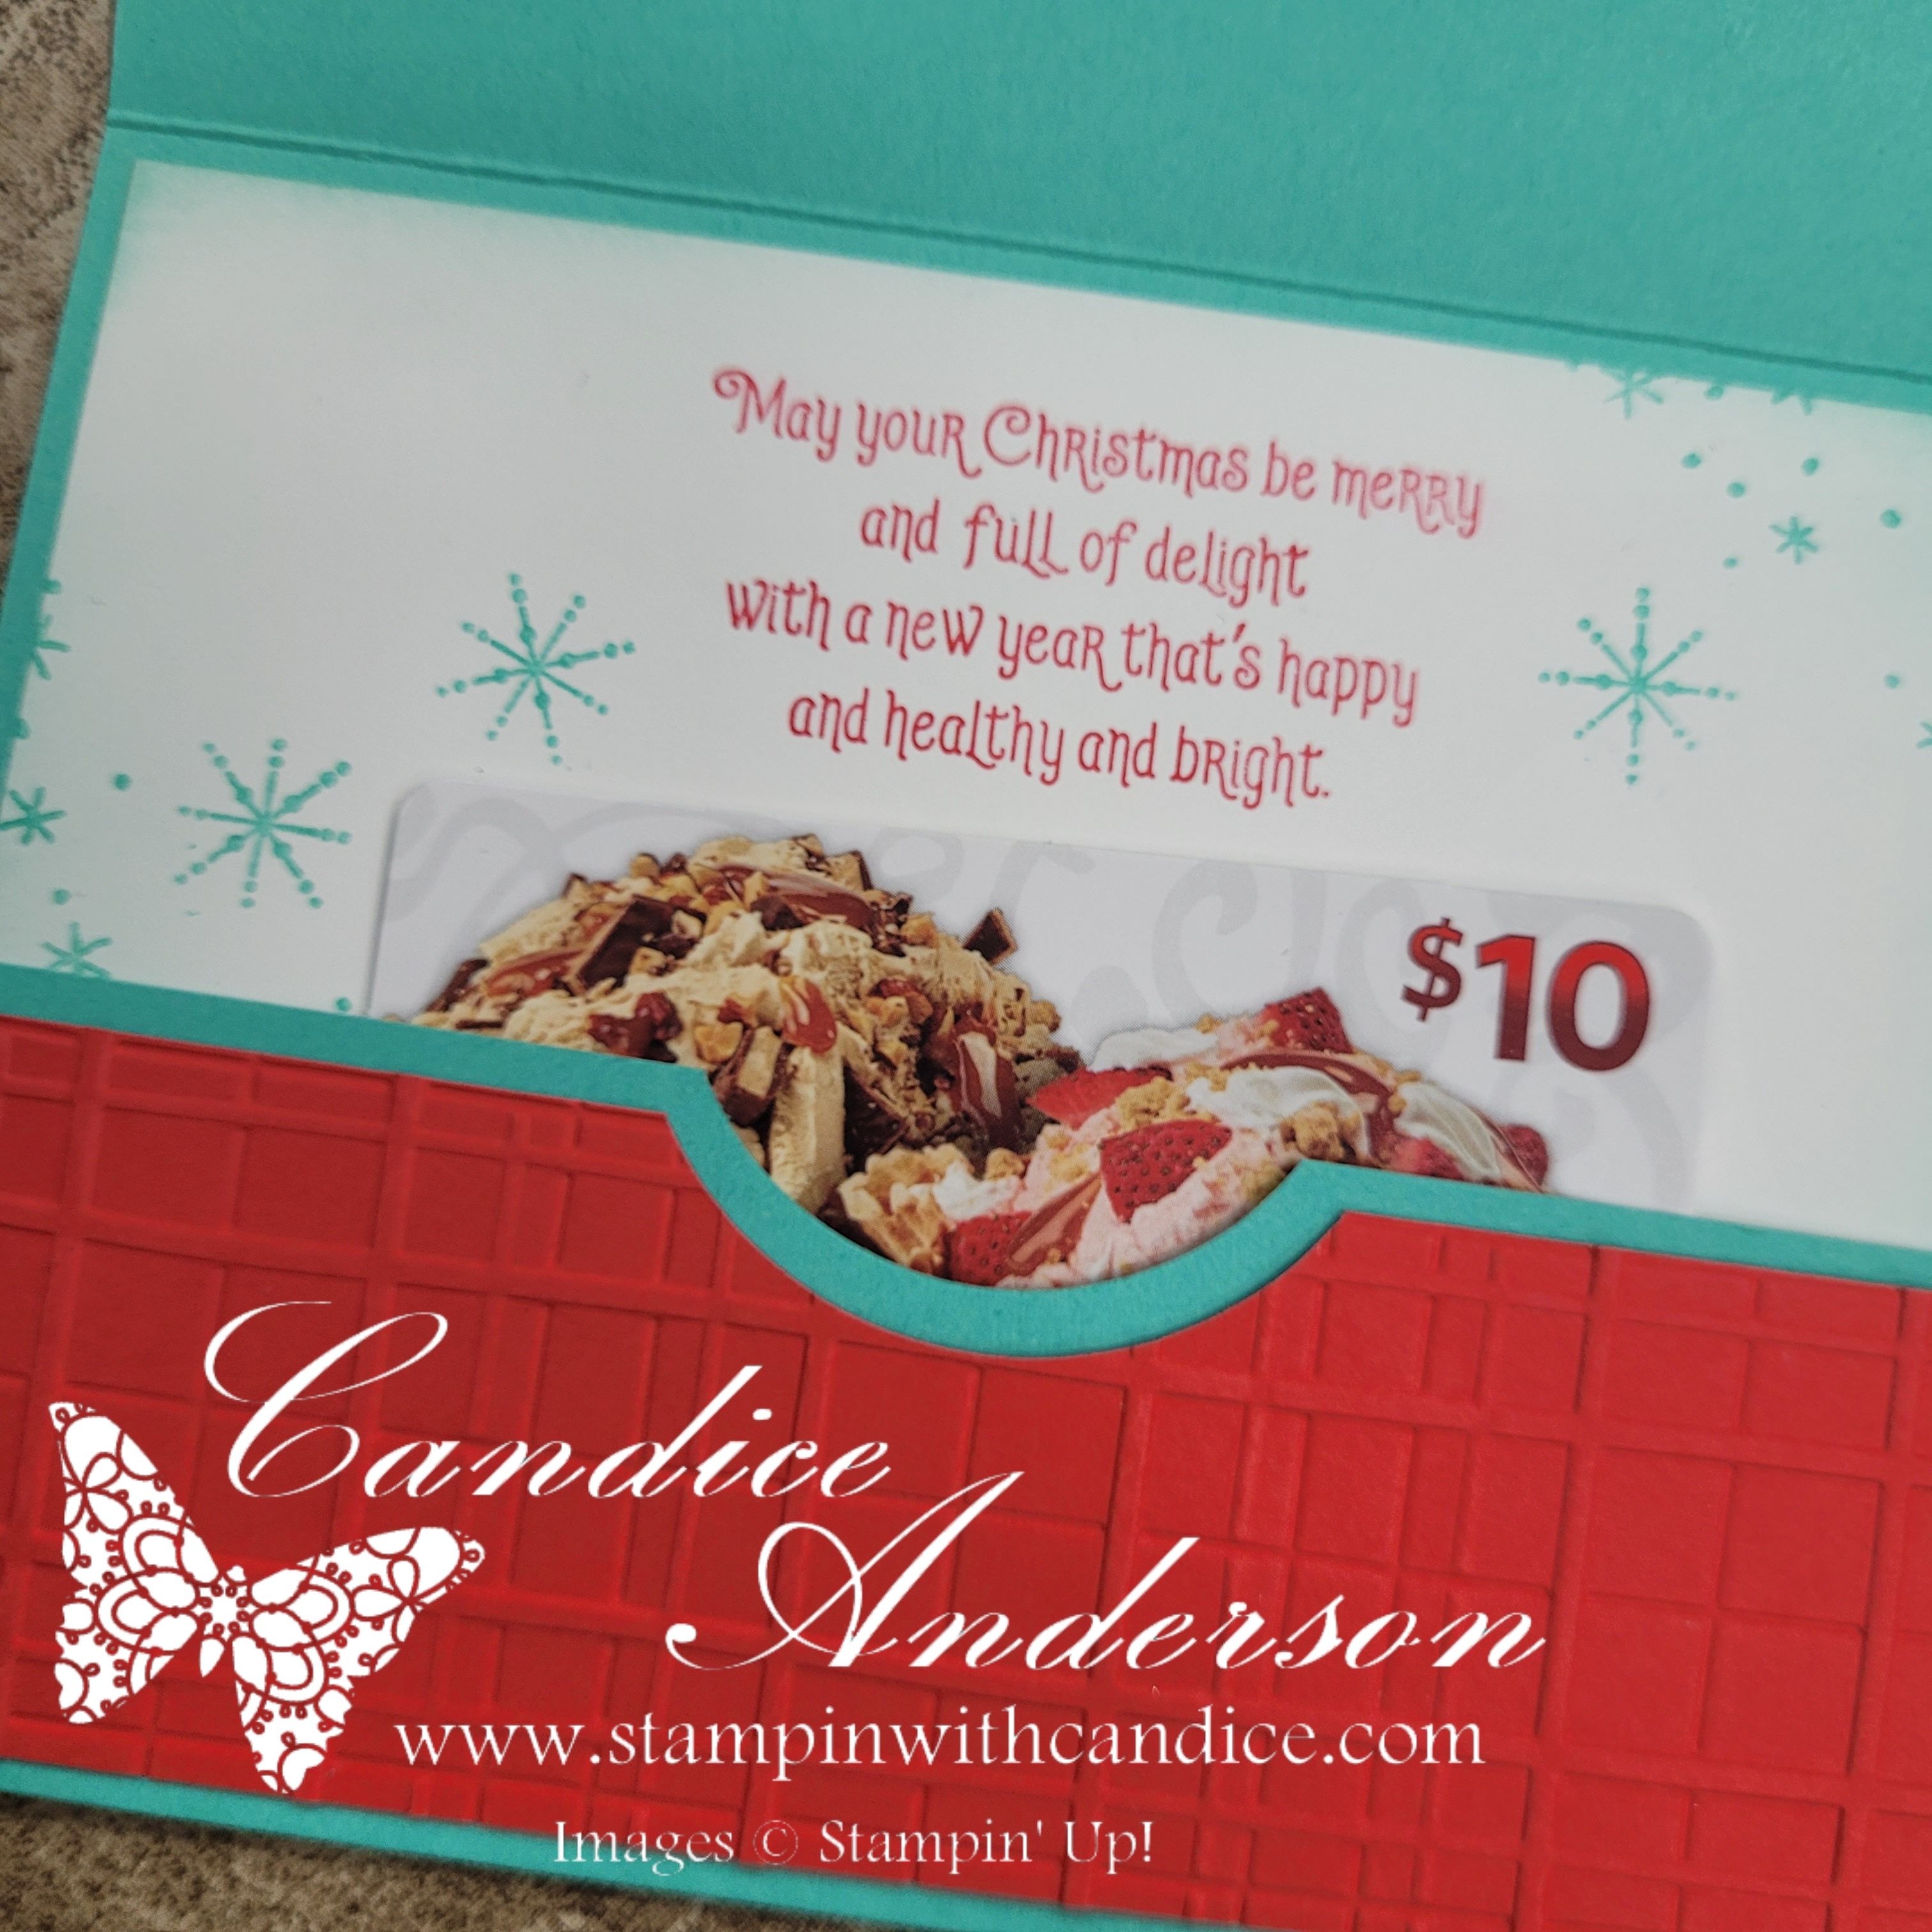
Day 23 – Elfie Time!

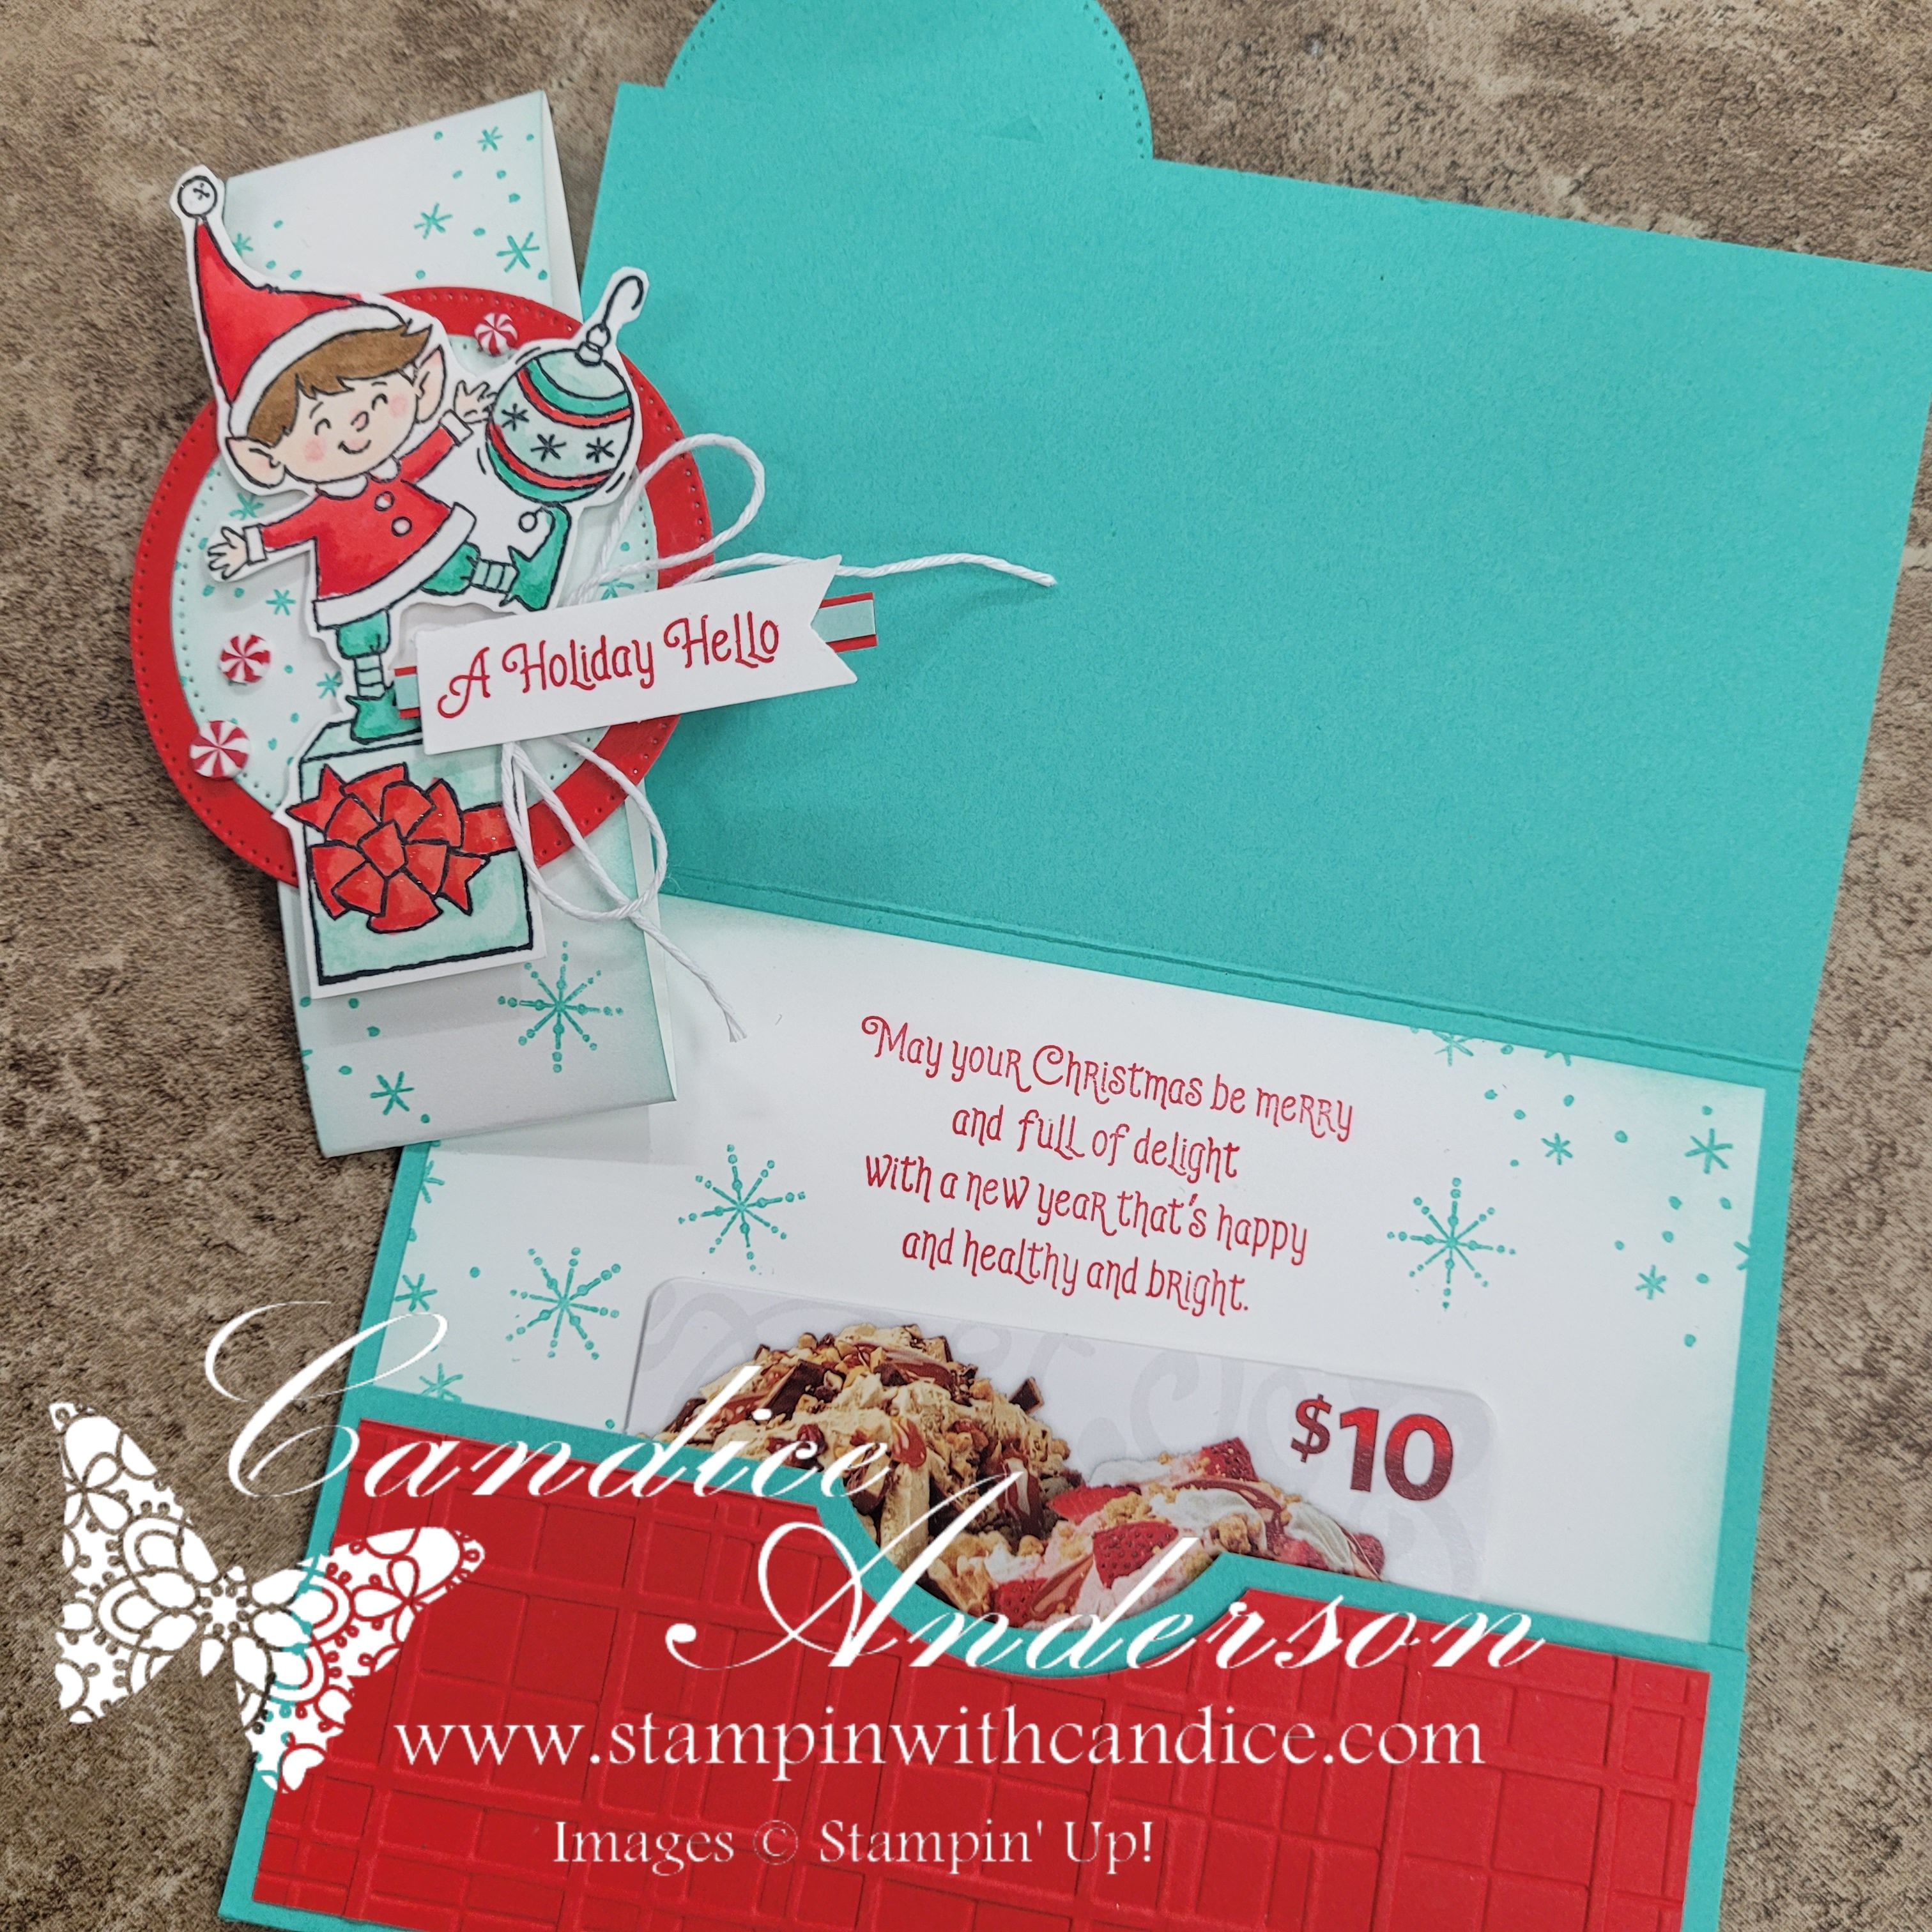
Fun Fold Gift Card Holder + Sketch Challenge #5

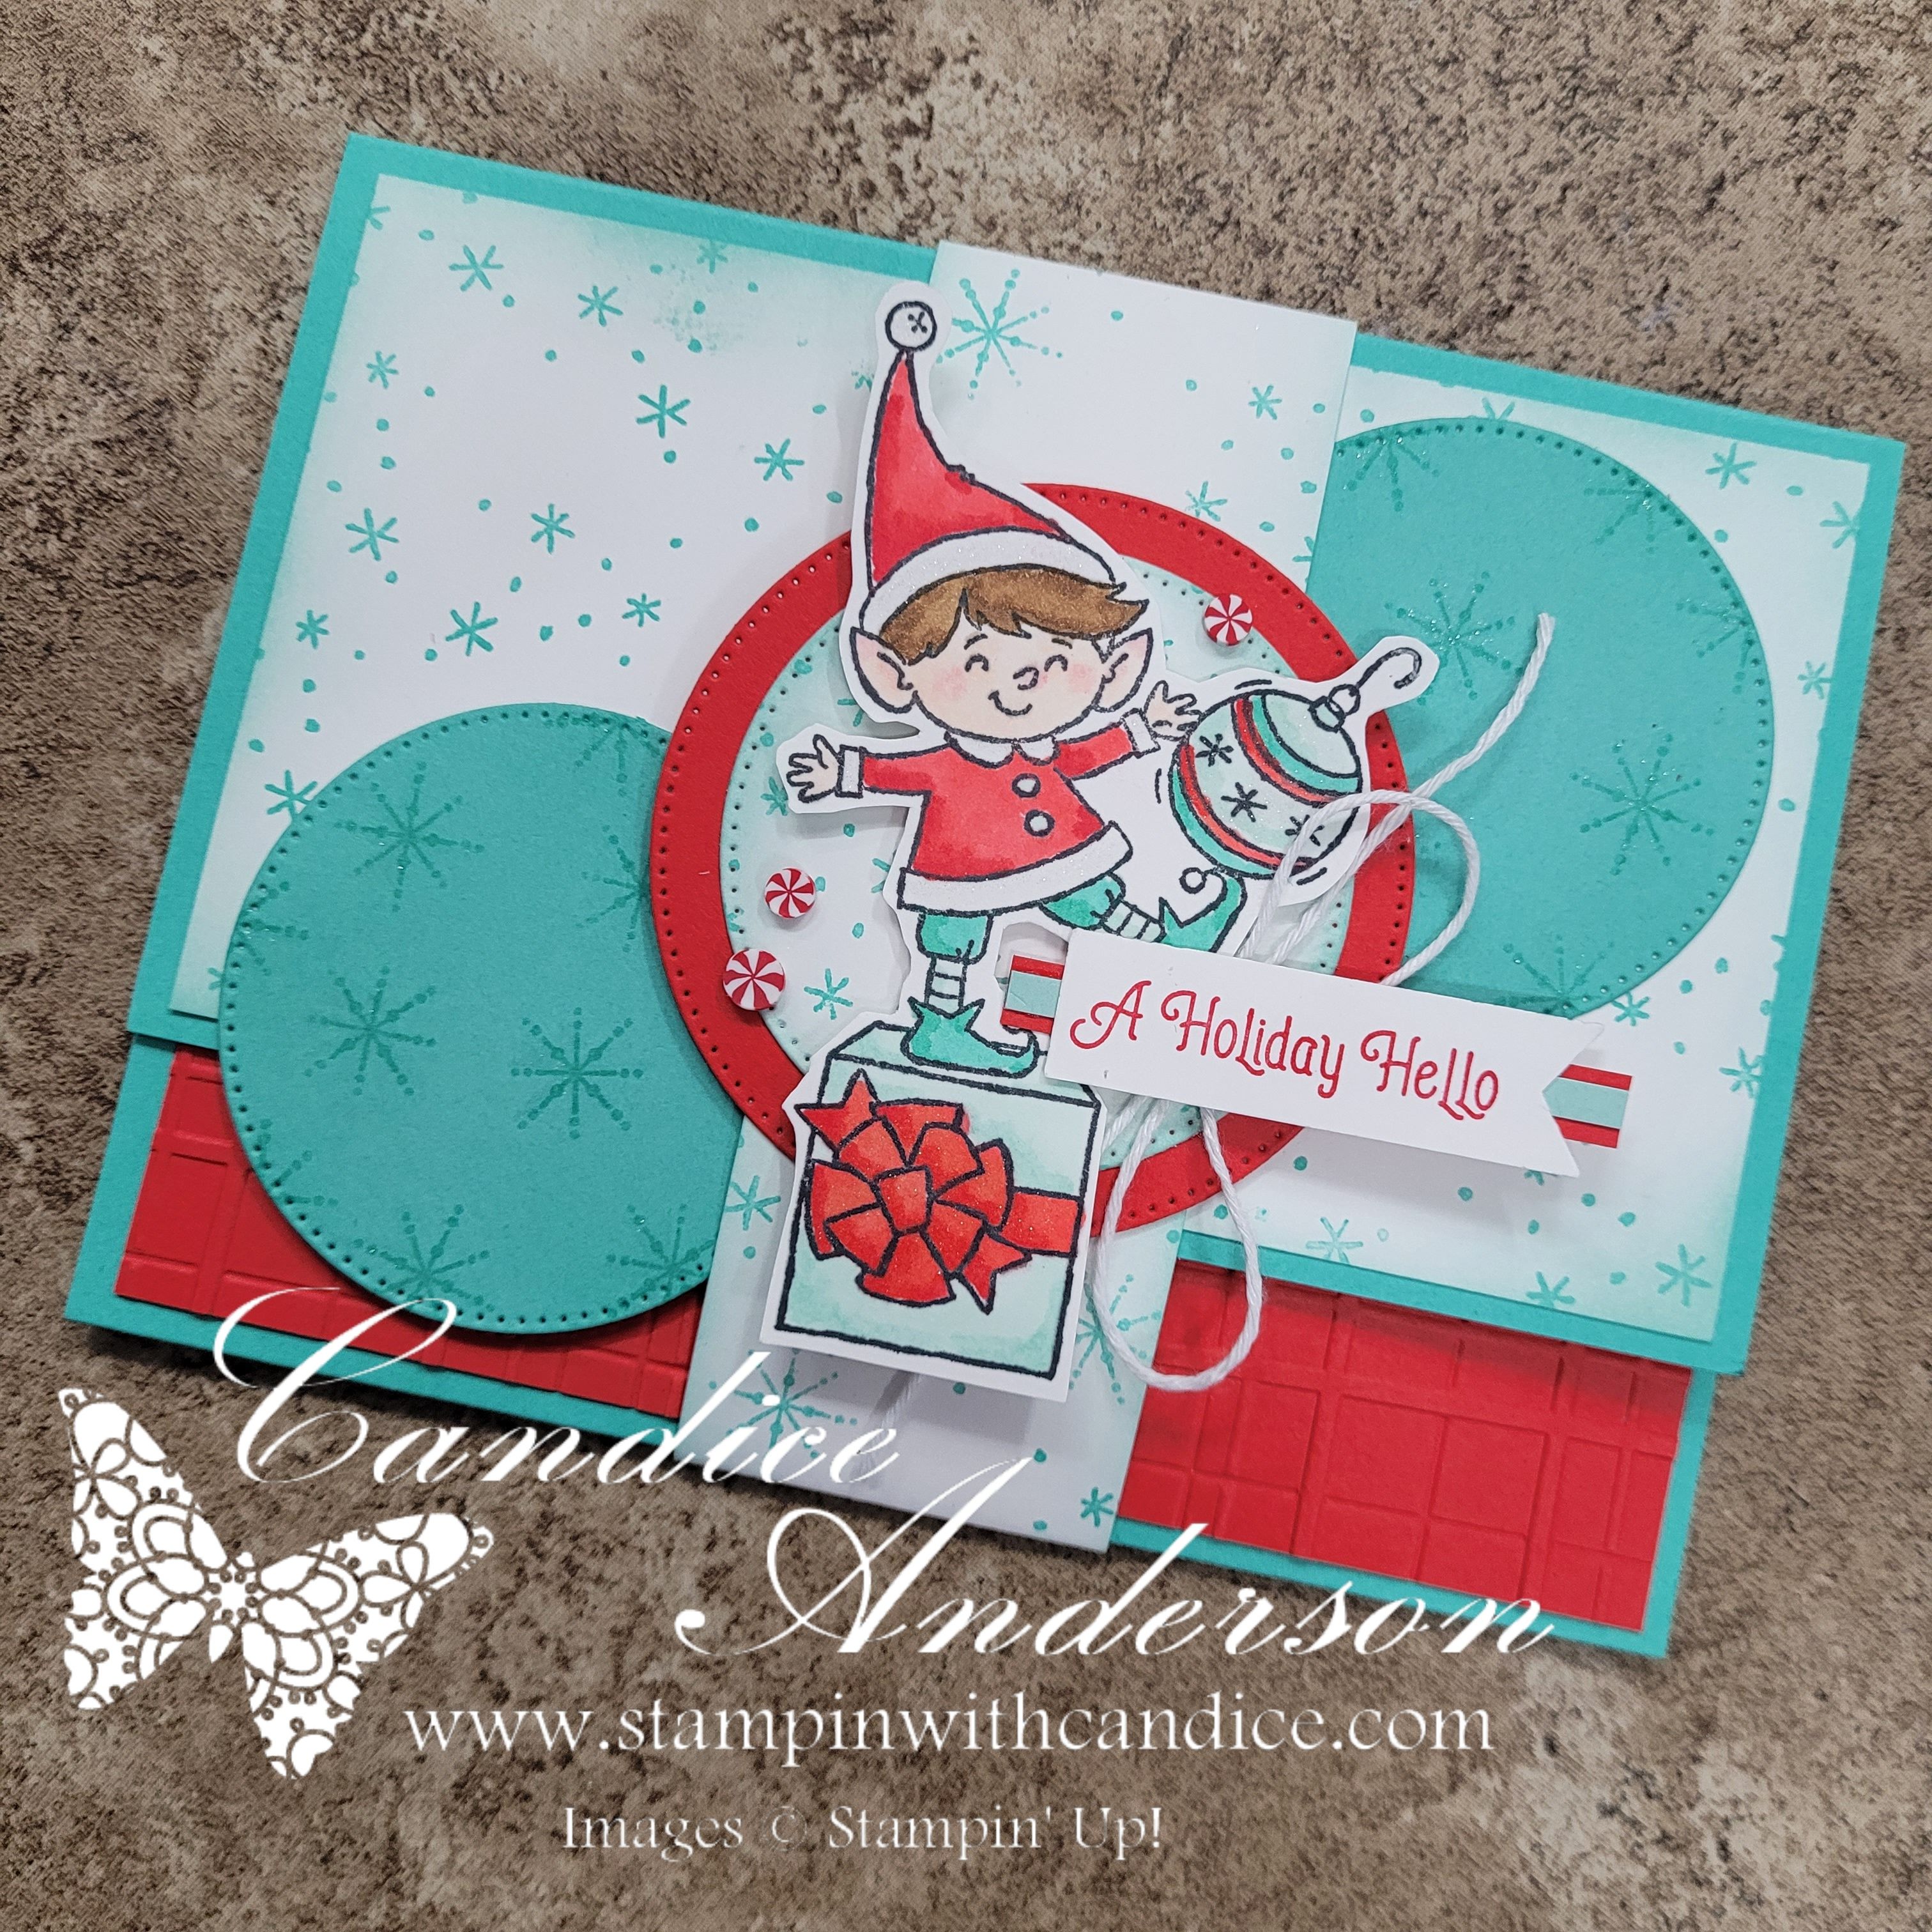
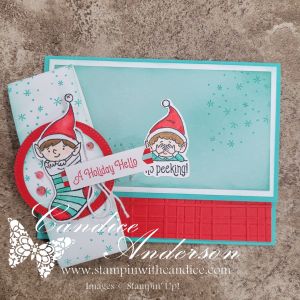
Today’s theme was Elfie Time, and the moment I read it, I knew exactly which stamp set I had to pull out—my beloved retired #Elfie (#150509). Pairing it with Sketch Challenge #5 inspired a playful twist: a Fun Fold Gift Card Holder!

This design is so easy to create and perfect for the holidays—because who doesn’t love receiving (or giving!) a cute handmade gift card holder?

I shared the full tutorial during a live in the Card A Day in November 2025 group as well as on my YouTube and Facebook pages. If you missed it, no worries—you can still catch the replay. And huge thanks to Kevin for inviting me on to share this project!


🎁 How to Make the Fun Fold Gift Card Holder

This fold comes together quickly and can be decorated for any theme or season. Here’s the basic template:

Card Base

  • Cut: 9-1/2″ x 5-1/2″
  • Score at: 3-1/2″ and 7-1/2″
    This creates:
  • A 3-1/4″ panel (the main front)
  • A 4-1/4″ panel (the inside)
  • A 2″ flap (perfect for the pocket)

Belly Band

  • Cut: 1-1/2″ x 8-1/2″ (or longer depending on embellishments)
  • Wrap loosely around the card so it slides easily.

Gift Card Cutout

You’ll need circle punches or dies:

  • 1-3/4″ for the pocket opening (#119850)
  • 2″ for the decorative circle layer (#133782)

Interior Layer

If you’re using a different color inside:

  • Cut 2-1/2″ x 5-1/4″
  • Make sure it extends past the punched opening for a clean look.

Tools That Help

  • Bone folder (#102300)
  • Tear & Tape (#154031)
  • Mini Glue Dots (#103683)
  • Mini Stampin’ Dimensionals (#144108)
  • Circle punches/dies

And then… decorate to your heart’s content!


🧝 Elfie Samples

Of course I made more than one! Here’s what I used:

Elfie Cards

Color combos:

  • Poppy Parade, Pool Party, Summer Splash
    Others:
    • White Baker’s Twine (#155475)
    • Real Red & White Peppermint Embellishments (#164050)
    • Strawberry Slush and Pretty in Pink Gems (#165615)
    • Forever Plaid Embossing Folder (#164049)
    • A Little Cheer (#166121)
    • Stylish Shapes Dies (#159183)
    • Wink of Stella (#141897)
    • Blending Brush (#160518)
    • Masking Paper (#155480)
    • Blends – Poppy Parade, Summer Splash, Pool Party, Pecan Pie, Petal Pink, Pretty in Pink

Both versions turned out adorable and festive!


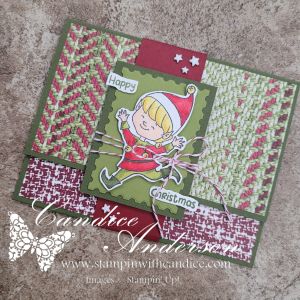
❄️ Additional Sample – Christmas Cuties

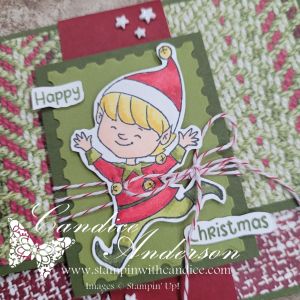
I also made a version using the retired Christmas Cuties (#139787) paired with the Need for Tweed Designer Series Paper (#166144) for a quick, textured background.

Color combo:

  • Mossy Meadow, Old Olive, Cherry Cobbler
    Others:
    • Real Red Baker’s Twine (#164051)
    • Shimmer Star Foam Stickers (#166202)
    • A Little Cheer (#166121)
    • Perennial Postage Dies (#162607)

A different look but just as charming!


🎄 Do You Love This Fun Fold as Much as I Do?

I adore how quick and adaptable this Fun Fold Gift Card Holder is, and I can’t wait to see what you create with it!

If you try this fold, please share your photos—I love seeing everyone’s creative twist on the design.

👉 You can shop current Stampin’ Up! supplies and tools here:
Shop with Me Here

A beautifully crafted Christmas card featuring a window scene that displays a peaceful nativity setting on one side, while the inside is adorned with cozy holiday elements like hanging stockings and warm colors.

Please feel free to contact me if you have any questions.

Contact me today to place your order!
435-232-2655 Cell ( Call or Text)
andersoncandice@hotmail.com


💕 Let’s Stay Connected

📺 YouTube
📘 Facebook
📸 Instagram
📌 Pinterest

#StampinWithCandice #StamperCandi #ACardADayInNovember2025 #30DayChristmasCardMakingChallenge #ChristmasCards #HandmadeCards #CreativeTechniques #HolidayCrafting #cardmaker #cardmaking #christmascards #handmadecards #papercraft #sketchchallenge #christmaschallenge

Day 22 – A Little Bit of Festive Flora & Oh Deer!

Silly Deer Mishaps + Paper Pumpkin Fun

Today’s challenge theme brought together two fun ideas: festive flora and oh deer—and that instantly reminded me of this month’s Paper Pumpkin kit and its adorably silly deer mishaps. The original kit was designed to create cute tags and gift boxes, but you know me… I couldn’t resist turning those tags into full cards!

A layout sketch for a card-making challenge, featuring a framed design in pale pink against a light blue background.

The TGIFC551 Sketch Challenge (even though it’s finished now) was the perfect layout inspiration. I loved the balance and simplicity of the sketch, and it translated beautifully to both tag designs in the kit.


Transforming the Tag into a Card

To bring out the playful “oh deer!” vibe, I reached for one of my favorite retired sets: Cookie-Cutter Christmas (#142043) with the coordinating punch. That sweet little deer was exactly what the project needed.

I added a festive pop using the Real Red Shiny Ribbon (#165876)—a tiny bow with a big holiday statement!

For the card base, I stamped the Linen Background Stamp (#167107) to add soft texture without overwhelming the design. It really ties everything together and gives the card a more polished look.

The end result?
A fun, festive, simple-to-create card that came together quickly and still feels special and works for both the challenges.


Bonus Card!

Since I loved the layout so much, I used the second tag design from the kit to create an additional card using the same sketch. Paper Pumpkin always makes it so easy to branch out and try new ideas—whether you follow the directions as-is or grab your supplies and create something entirely different.


Why I Love Paper Pumpkin

These kits are truly creativity sparkers:
✨ Quick projects
✨ Beautiful designs
✨ Endless alternate possibilities

And you never miss out when you’re subscribed!

Be sure to sign up so you always get your kit—
or even better, save on prepaid subscriptions starting December 1st!


👉 You can shop current Stampin’ Up! supplies and tools here:
Shop with Me Here

A beautifully crafted Christmas card featuring a window scene that displays a peaceful nativity setting on one side, while the inside is adorned with cozy holiday elements like hanging stockings and warm colors.

Please feel free to contact me if you have any questions.

Contact me today to place your order!
435-232-2655 Cell ( Call or Text)
andersoncandice@hotmail.com


💕 Let’s Stay Connected

📺 YouTube
📘 Facebook
📸 Instagram
📌 Pinterest

#StampinWithCandice #StamperCandi #ACardADayInNovember2025 #30DayChristmasCardMakingChallenge #ChristmasCards #HandmadeCards #CreativeTechniques #HolidayCrafting #cardmaker #cardmaking #christmascards #handmadecards #papercraft #sketchchallenge #christmaschallenge

Day 18 – Silent Night & Sketch Challenge #4

Today’s Christmas Challenge theme was Silent Night paired with Sketch Challenge #4, and the moment I saw the sketch I knew exactly what I wanted to reach for—the brand-new Swirled Designs Stamp Set (#167030) and Dies (#167032). The stars in this bundle are absolutely stunning, and they instantly sparked the perfect “silent night sky” idea.

Creating the Silent Night Background

I started with a Balmy Blue card base to give everything that crisp winter feel. For the next layer, I added Night of Navy, embossed with the So Swirly Embossing Folder (#163791). This folder adds such beautiful depth and movement—perfect for creating the look of a quiet, swirling night sky.

To bring in that magical Christmas sparkle, I die-cut the large star from the Peaceful Garden Glimmer Paper (#165929). The shine is subtle but so elegant, and it really helps the star take center stage.

Sentiments with a Twist

For the greeting, I reached for the Jar of Joy Stamp Set (#166176) and used the “may your heart be filled with joy” sentiment—except I masked off the word joy to better fit the sketch. I stamped and heat-embossed it in silver, then punched it out with the Triple Banner Punch for a clean finish.

To complete the sentiment on the inside, I added the word “Magic” from the Light & Wonder Stamp Set (#165756) along with a few coordinating stars. It ties everything together so nicely.

Ribbon Tip You’ll Want to Try

You might notice the ribbon on the card looks extra thin—here’s a fun trick! I used the Misty Moonlight Silver-Edged Ribbon (#165931) and simply cut off the silver edge so I could use it like baker’s twine. It adds just a touch of sparkle without overwhelming the design. Such an easy way to stretch your ribbon and get more looks from one spool!

Trying an Alternate Version

After finishing the first card, I wasn’t completely sure how I felt about the open center of the star, so I decided to try a second version. For this one, I traced the die onto a piece of Basic White cardstock and brushed it with Wink of Stella to create a soft sparkle behind the die-cut star. Once I layered the star over it, the whole look felt a bit more full and defined.

I used the same ribbon-cutting technique but added Balmy Blue Sheer Ribbon (#165767) behind the star as well. I even repurposed the extra little silver strips I trimmed away—perfect for accenting the sentiment!

For a final magical touch, I flicked my Wink of Stella across the Night of Navy embossed layer to create a splattered starlight effect. It’s such a simple technique, but it brings everything to life.

Which Version Do You Prefer?

Now the real question… Which one do I like better? Honestly, I’m still torn! The open star has a clean elegance, but the filled-in version has a soft glow that I really love.

I’d love to hear your thoughts—tell me in the comments which one speaks to you!

👉 You can shop current Stampin’ Up! supplies and tools here:
Shop with Me Here

A beautifully crafted Christmas card featuring a window scene that displays a peaceful nativity setting on one side, while the inside is adorned with cozy holiday elements like hanging stockings and warm colors.

Please feel free to contact me if you have any questions.

Contact me today to place your order!
435-232-2655 Cell ( Call or Text)
andersoncandice@hotmail.com


💕 Let’s Stay Connected

📺 YouTube
📘 Facebook
📸 Instagram
📌 Pinterest

#StampinWithCandice #StamperCandi #ACardADayInNovember2025 #30DayChristmasCardMakingChallenge #ChristmasCards #HandmadeCards #CreativeTechniques #HolidayCrafting #cardmaker #cardmaking #christmascards #handmadecards #papercraft #sketchchallenge #christmaschallenge

🌟 Day 4 – A Creative Challenge: Nativity Night Meets Stocking Surprise

Today’s Christmas Card Challenge really pushed me to get creative! I wanted to see if I could combine two completely different themes into one cohesive design — and I love how it turned out.

#ACardADayInNovember2025Nativity Night – peaceful starry sky, manger scene, or “O Holy Night”
🧦 #30DayChristmasCardMakingChallengeStocking SurpriseHanging stockings or hidden treats.

I’ve been wanting to create a window card using the Arch Dies, and this felt like the perfect opportunity. My goal was to design a card that tells a story — looking out the window, you see a peaceful nativity scene, while inside there’s a warm, cozy holiday setting complete with stockings hung and ready for Christmas morning.

This project reminded me how much I love finding ways to blend techniques and themes. Sometimes the best ideas come when you push yourself just a little outside your comfort zone. 💖

✨ Supplies & Details

This card took a little extra creativity — and a lot of wonderful products! I loved mixing and matching textures, colors, and dies to bring this cozy Christmas window scene to life. Here are the main supplies I used:

🪞 Dies & Embellishments:

🖌️ Tools & Coloring:

🎨 Ink Colors:

  • Balmy Blue
  • Early Espresso
  • Old Olive
  • Mossy Meadow

I loved how these products worked together to create depth, warmth, and sparkle — from the soft shimmer of the glimmer paper and ribbon to the textured brick background and peaceful glow behind the window.

👉 You can shop any of the current products directly through my Stampin’ Up! store:
Shop with Me Here


A beautifully crafted Christmas card featuring a window scene that displays a peaceful nativity setting on one side, while the inside is adorned with cozy holiday elements like hanging stockings and warm colors.

Please feel free to contact me if you have any questions.

Contact me today to place your order!
435-232-2655 Cell ( Call or Text)
andersoncandice@hotmail.com


💕 Let’s Stay Connected

📺 YouTube
📘 Facebook
📸 Instagram
📌 Pinterest

Day 1 – Creative Christmas Cards with Paper Pumpkin Kits

For Day 1 of my Christmas card challenges, I decided to reach for my Paper Pumpkin kit! I love how quick and easy these kits make it to get crafty — especially when time is short and creativity is flowing.

Three crafted Christmas cards featuring traditional holiday designs, including an ornament with 'Deck the Halls,' a card stating 'Merry Christmas,' and one proclaiming 'Joy to the World,' adorned with festive decorations in red and green.

This month’s kit was the perfect way to jump into the holiday spirit with some traditional red and green cheer. I wanted to see if I could stretch the kit a little further, so I challenged myself to create one card that worked for both of my Christmas card challenges — plus fit the #GDP520 challenge, too!

To round it out I couldn’t resist adding in a fun scrapbook layout using some of the leftover pieces, too!

Here’s what I took on today:
#ACardADayInNovemberDay 1: Traditional Red & Green Cheer
🎅 #30DayChristmasCardMakingChallengeDay 1: Merry and Bright Beginning
💚 #GDP520CASE the Designer: Sue Mohr

It’s amazing how versatile these Paper Pumpkin kits are — you can create cards, tags, gift packaging, or even add them into your memory-keeping projects. My scrapbook page features the same theme as my card — bright pops of red and green, festive accents, and a cozy, cheerful vibe.

Paper Pumpkin is a monthly craft kit delivered to your door—perfect for quick, beautiful projects. Subscribe by the 10th to get next month’s kit

Promotional image for Paper Pumpkin kit featuring festive crafting supplies, including tags, treat boxes, and a Christmas stamp, all set against a green background.

If you haven’t opened your kit yet, this is your reminder: pull it out, play along, and see how far your creativity can go! ✂️✨

If you’d like to join in the fun and play along check out my Facebook group for links to both groups.
And Remember to share your own creations — I’d love to see how you use your Paper Pumpkin this season! 💌

This week’s project is my little tribute to a retiring favorite — the Beside Me stamp set. I used the #GDP490 layout as inspiration to create a heartfelt farewell card. Swipe to see how it turned out! #lastchancelist #stampinup #handmadecards

Please feel free to contact me if you have any questions.

Order online
Contact me today to place your order!
435-232-2655 Cell ( Call or Text)
andersoncandice@hotmail.com


💕 Let’s Stay Connected

📺 YouTube
📘 Facebook
📸 Instagram
📌 Pinterest