Day 1 – Creative Christmas Cards with Paper Pumpkin Kits

For Day 1 of my Christmas card challenges, I decided to reach for my Paper Pumpkin kit! I love how quick and easy these kits make it to get crafty — especially when time is short and creativity is flowing.

Three crafted Christmas cards featuring traditional holiday designs, including an ornament with 'Deck the Halls,' a card stating 'Merry Christmas,' and one proclaiming 'Joy to the World,' adorned with festive decorations in red and green.

This month’s kit was the perfect way to jump into the holiday spirit with some traditional red and green cheer. I wanted to see if I could stretch the kit a little further, so I challenged myself to create one card that worked for both of my Christmas card challenges — plus fit the #GDP520 challenge, too!

To round it out I couldn’t resist adding in a fun scrapbook layout using some of the leftover pieces, too!

Here’s what I took on today:
#ACardADayInNovemberDay 1: Traditional Red & Green Cheer
🎅 #30DayChristmasCardMakingChallengeDay 1: Merry and Bright Beginning
💚 #GDP520CASE the Designer: Sue Mohr

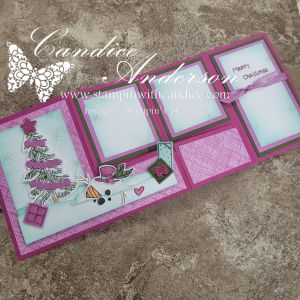
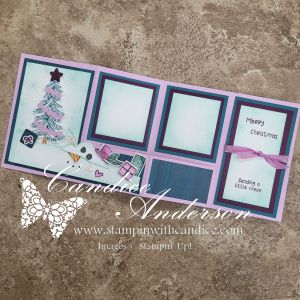
It’s amazing how versatile these Paper Pumpkin kits are — you can create cards, tags, gift packaging, or even add them into your memory-keeping projects. My scrapbook page features the same theme as my card — bright pops of red and green, festive accents, and a cozy, cheerful vibe.

Paper Pumpkin is a monthly craft kit delivered to your door—perfect for quick, beautiful projects. Subscribe by the 10th to get next month’s kit

Promotional image for Paper Pumpkin kit featuring festive crafting supplies, including tags, treat boxes, and a Christmas stamp, all set against a green background.

If you haven’t opened your kit yet, this is your reminder: pull it out, play along, and see how far your creativity can go! ✂️✨

If you’d like to join in the fun and play along check out my Facebook group for links to both groups.
And Remember to share your own creations — I’d love to see how you use your Paper Pumpkin this season! 💌

This week’s project is my little tribute to a retiring favorite — the Beside Me stamp set. I used the #GDP490 layout as inspiration to create a heartfelt farewell card. Swipe to see how it turned out! #lastchancelist #stampinup #handmadecards

Please feel free to contact me if you have any questions.

Order online
Contact me today to place your order!
435-232-2655 Cell ( Call or Text)
andersoncandice@hotmail.com


💕 Let’s Stay Connected

📺 YouTube
📘 Facebook
📸 Instagram
📌 Pinterest

Spooky Fun with Global Design Project #GDP511

This week’s Global Design Project challenge was all about using letters or numbers in our creations, and I couldn’t resist having a little spooky fun! 👻

I decided to make a playful Halloween card with a hidden surprise inside. On the front, I kept it creepy-cute with a mummy-style design, complete with googly eyes peeking out and bold letters spelling “BOO.” The little spiders and ribbon detail added just the right finishing touches.

But the real magic happens when you open the card! Inside, a bright and cheerful monster pops up, showing off big eyes, sharp (but friendly) teeth, and a touch of candy corn for good measure. It’s such a fun way to combine the challenge theme with a seasonal project.

That’s what I love about these challenges—they push me to think outside the box and come up with designs I might not have tried otherwise.

Here’s a closer look at the details:

  • Front of the card: spooky letters + mummy bandages + spiders
    • #166191 Spooky Sweet 12 x12 Specialty Designer Series Paper
    • #166106 Fright Night Dies
    • #166103 Fright Night Stamp Set
    • #166203 Petunia Pop Iridescent Ribbon
    • #166202 Shimmer Star Foam Stickers
  • Inside: colorful monster made with die cuts and stamped background
    • #164629 Everyday Arches dies (face)
    • #166115 Tractor & Co Dies (hair)
    • #166191 Spooky Sweet 12 x12 Specialty Designer Series Paper (cutouts for nose and mouth)
    • #166106 Fright Night Dies (spider)
    • #159183 Stylish Shapes Dies (eye – inside)
    • #163580 Spotlight on Nature (eye – outside)
    • #162722 Trusty Tools (eye – center)
    • #166793 Sweet Halloween Stamp set (coming Sept 20205)
  • Theme tie-in: letters used both in the “BOO” and background sentiment
    • Colors used:
      • Basic black
      • Daffodil Delight
      • Granny Apple Green
      • Petunia Pop
      • Pumpkin Pie
      • Early Espresso
      • Pecan Pie
      • Crumb Cake
      • Very Vanilla

👉 Want to make your own spooky creations? You can order the products I used at www.candiceanderson.stampinup.net.

I had so much fun with this one, and I hope it inspires you to try a Halloween-themed card of your own! 🎃🕷️

If you’d like to join in on this week’s challenge, head over to the Global Design Project and play along with #GDP511.

Please feel free to contact me if you have any questions.

This week’s project is my little tribute to a retiring favorite — the Beside Me stamp set. I used the #GDP490 layout as inspiration to create a heartfelt farewell card. Swipe to see how it turned out! #lastchancelist #stampinup #handmadecards
Order online
Contact me today to place your order!
435-232-2655 Cell ( Call or Text)
andersoncandice@hotmail.com

Birthday Card with Pop

Looking for a card that has a little pop? 🎉 Check out this easy-to-create Pop-Up Birthday Card featuring the “Terrific Toadstools” stamp set! This whimsical card adds a fun surprise inside, making it the perfect handmade touch for any birthday celebration.

Materials & Colors Used

Cardstock & Ink: Peach Pie, Azure Afternoon, Granny Apple Green, Berry Burst, Black and White

Stamp Set and other tools:

Terrific Toadstools Bundle (English) [164790]
So Swirly Embossing Folder [163791]
Textured Notes Dies [165555]
Itty Bitty Bokeh Mix [164618]
Peach Pie 3/8″ (1 Cm) Bordered Ribbon [163783]

Other Supplies: Scissors, adhesive, scoring tool, Dimensionals

📏 For Card Size & Dimensions and Instructions click on the link below

Terrific Toadstool Pop Up Birthday Card | TheseAreMyStamps

🎥 Watch My Quick Video Tutorial!

This card is sure to bring smiles with its interactive pop-up surprise! Have you ever tried making a pop-up card? Let me know in the comments! 😊


Please feel free to contact me if you have any questions.

Order online
Click on the shop now button.
Contact me today to place your order
or book your party!
435-232-2655 Cell ( Call or Text)
andersoncandice@hotmail.com Please feel free to contact me if you have any questions.

Stamp with Me Monday: Craft a Simple, Versatile Card Layout

I have been sharing a lot lately on my Facebook page; however, I feel that it’s easier to share more details with you on my blog. My goal it to go live every Monday (currently on Facebook) with the first Monday featuring a project you can stamp along with me. I have lots of videos and samples on my Facebook page if you want to check them out.

For these projects there is no need to have the exact product I’m using. Instead I give you basic information to grab from your supplies and how to turn it into a stunning project. Below you will find everything you need to follow along. Then watch the video to learn how to create your own projects.

In this video, I created a simple yet versatile card design that allows you to craft multiple unique cards, each with its own flair!


Here’s what you’ll need to follow along:

  • Designer paper: 3″ x 4-1/2″ (a bold design works best!)
  • Two coordinating cardstock pieces: 3-1/2″ x 4-3/4″ & 3-3/4″ x 5″
  • Card base: 8-1/2″ x 5-1/2″ (scored at 4-1/4″)
  • Scrap pieces for a stamped image or sentiment (I’m keeping mine simple with just a greeting!)
  • Optional: Ribbon & coordinating embellishments

You may have heard me mention creating your own designer series paper during the video, so I decided to give it a try and loved it so much I had to share. I created a quick video if you want to learn more.

Click here for printed instructions and supply list.

Check out more samples using this fun layout by clicking here.


Please feel free to contact me if you have any questions.

Order online
Click on the shop now button.
Contact me today to place your order
or book your party!
435-232-2655 Cell ( Call or Text)
andersoncandice@hotmail.com Please feel free to contact me if you have any questions.

Fun Fold Graduation Card

If you are like me you’ll notice that it’s that time of year again and while I don’t have one of my own children graduating this year I have plenty of family and friends celebrating this awesome achievement. I wanted to create a unique card for them and loved how it turned out so much that I wanted to share it with you. I had actually seen this technique before and went searching for it. However; what I found wasn’t quite what I was looking for so I took what I found and tweaked it a bit to make it work for me.

You’ll notice that I have two different styles for you. The first set are the second ones that I made when I wanted to make ones that were more generic and to create a video for you. The first ones I made for my nephew and good friend who were graduating from Utah State University who just happen to have the colors of blue. I will say that the tassel was easier to make out of bakers twine than it was out of the gold cord. As I mention in the video the adhesive strips make this project a lot easier to apply the double layers of letters.
These are the measurements that I used when creating this card. I will mention that when I put the card in a regular size envelope it did end up just a tiny bit larger that the 5 1/2″ of a standard card, so you may want to trim it down to 9″ with the card section that opens to 5″. It did fit fine in a clear envelope though.

One of the cards I was giving away was for one of my employees and I wanted to have more room for people to sign the card for her. This was easily solved by attaching it to a regular card front. I stamped the front of the card before attaching the graduation card since you would be able to see the top corners. You could also use this technique and instead of having the section on the card open you can design something flat and then attach to a standard size card.

I hope you enjoy the video and please share it with your friends. If you have any questions or need additional information please feel free to contact me. Remember you can purchase any of the items you’ve seen by going to my website at www.candiceanderson.stampinup.net.


Please feel free to contact me if you have any questions.

Order online
Click on the shop now button.
Contact me today to place your order
or book your party!
435-232-2655 Cell ( Call or Text)
andersoncandice@hotmail.com Please feel free to contact me if you have any questions.

Warm Welcome Bundle

Can you believe this is my last retiring stamp set. Tomorrow I will have a few more projects to share but this is the last stamp set that I had to use. I really struggled with coming up with ideas for this set. I actually combined two different samples from the mini catalog where it’s found. I also added in a new in color.

  • 160704 – Warm Welcome Bundle (R) (M)
  • 160698 – Warm Welcome Stamp St (R) (M)
  • 160703 – Warm Welcome Dies (R) (M)
  • 159177 – Brushed Shapes Dies (R)
  • 151193 – Champagne Rhinestone Basic Jewels (R)
  • 161598 – Basics Embossing Folders (O)
  • 160597 – Three Twine Combo Back (R) (M)
  • 153524 – Brushed Metallic Cardstock (R)
  • 160839 – Bellum Basics (C) (M)
  • Colors – Basic White (C), Costal Cabana (C), Pecan Pie (N)

(R) Retiring, (C) Carrying Over, (O) Online Exclusive, (M) Found in the Mini Catalog, (N) Found in the new 2023-2024 Catalog


Please feel free to contact me if you have any questions.

Order online
Click on the shop now button.
Contact me today to place your order
or book your party!
435-232-2655 Cell ( Call or Text)
andersoncandice@hotmail.com Please feel free to contact me if you have any questions.