Day 21 – Santa “Don’t Stop Believin’”

Rockin’ Santa & Snow Globe Dreams (with a Grinch-Inspired Twist!)

Today’s challenge theme was Santa — Don’t Stop Believin’, and my mind went in a dozen different directions before I landed on the perfect idea. Those of you who know me well know that I am a huge Grinch fan. (Yes… he even has his own dedicated section of my Christmas décor!)

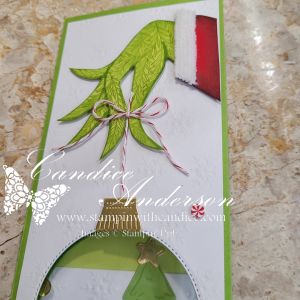
There’s a classic image of the Grinch holding a Christmas ornament, and I thought, How perfect would that be for this theme? So I decided to recreate that scene using our amazing Stampin’ Up! products.

Once the idea hit, the wheels started turning fast.

To really bring the magic to life, and because I love pushing the boundaries of our products, I decided to take it up a notch and turn it into a snow globe shaker card using my Flip Flap Technique (which I’m still claiming as my own unless someone can show me otherwise 😉). This time, I added an extra twist — slimline card, giving me plenty of room for the full Grinch-inspired scene.

And yes… the moment you step outside the “intended use” of our products, things get creative fast. This card is no exception! Let’s just say… this card was an adventure!
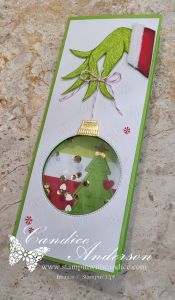

🎄 Creating the Ornament
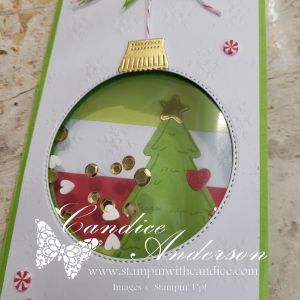
The ornament was actually the easy part!

  • Stylish Shapes Dies (#159183) for the circle
  • Gold Foil Sheets (#132622) for the topper
  • Topper from Ornamental Christmas (#166000)
  • Cherry Cobbler Baker’s Twine (#164051) for the hanging string

Simple, classic, and instantly recognizable.


💚 Crafting the Grinch’s Hand

This was where things got… creative.

No die gave me exactly what I wanted, so I sketched the Grinch’s hand by hand (pun intended 😉) and cut it from Lemon Lime Twist cardstock.

To add the Grinch’s signature “fur,” I stamped one of the leaf images from the Cheers & Sips set (#165588) in Granny Apple Green. The texture was perfect!

Then I added:

  • Granny Apple Green Stampin’ Blends for outlining
  • Blending Brush for shading
  • A hand-cut “Santa sleeve” in Real Red, brushed with black ink
  • And the perfect finishing touch — Fluffy Trim Ribbon (#165849) for the cuff

This combination brought the Grinch’s hand to life exactly the way I pictured it.

❄️ The Background & Final Touches

For the snowy scene, I used the gorgeous Silent Snowfall Specialty DSP (#166062) and added sparkle with a touch of Wink of Stella on the snowflakes.

A few Real Red & White Peppermint embellishments (#164050) tied the festive vibe together.


🌟 Creating the Slimline Flip Flap Shaker

This shaker section was the fun part!

How I Built It:

  • Cut Granny Apple Green cardstock to 7″.
  • Score at 3-1/2″.
  • Trim 1/16″ off one side.
  • Fold in half.
  • Layer the snowflake DSP on top.
  • Die-cut through all three layers at the same time using the Stylish Shapes circle.
    • You may need to run it through more than once, but cutting all layers together guarantees perfect alignment.

With the leftover piece of cardstock, I scored it again at 3-1/2″, leaving a 1/2″ tab to connect both pieces.

For this card I used the 3×3 Flip Flaps (#166514). There are multiple different sizes and the one you use will depend on how big your cutout is.

Here’s a quick video of how to assemble it.

Shaker Fillers:

  • Loose Gold Sequins (#165267)
  • White hearts from the Loose Valentine’s Assortment (#167074)—a fun sneak peek from our January 2027 Mini preorder!

Everything was sealed together using Tear & Tape.

Important Tip:

Always plan what the interior will look like through the window.
Whatever you stamp inside becomes part of the scene!


💬 Interior Details

Because you definitely can’t put a standard “Merry Christmas” in a Grinch-inspired snow globe card… 😄

I used the Mini Alphabet Dies (#162934) to create my own custom sentiment. Pairing these dies with Adhesive Sheets (#152334) is a must — instant letter stickers for easy placement!

To finish the little interior scene I used:

  • Pine Tree Trimmings Stamps (#166040)
  • Pine Tree Trimmings Dies (#166046)
  • A Little Cheer (#166121)
  • Jar of Joy (#166176)
  • And to complete it all, a sweet little heart from the Darling Dinos Dies (#164734)

Many elements shows through the shaker window, adding a beautiful layered effect.


❤️ The Finished Look

This card was definitely on the advanced end of the crafting spectrum, but the result is exactly the whimsical, storybook look I hoped for. A little Santa magic, a little Grinch mischief, and a whole lot of creativity.

It’s playful.
It’s nostalgic.
It’s unexpected.
And it absolutely makes me smile.

Sometimes the “big idea” cards are the ones that make you stop, smile, and believe—and this one did exactly that for me.

👉 Want to recreate it? You can shop current Stampin’ Up! supplies and tools here:
Shop with Me Here

A beautifully crafted Christmas card featuring a window scene that displays a peaceful nativity setting on one side, while the inside is adorned with cozy holiday elements like hanging stockings and warm colors.

Please feel free to contact me if you have any questions.

Contact me today to place your order!
435-232-2655 Cell ( Call or Text)
andersoncandice@hotmail.com


💕 Let’s Stay Connected

📺 YouTube
📘 Facebook
📸 Instagram
📌 Pinterest

#StampinWithCandice #StamperCandi #ACardADayInNovember2025 #30DayChristmasCardMakingChallenge #ChristmasCards #HandmadeCards #CreativeTechniques #HolidayCrafting #cardmaker #cardmaking #christmascards #handmadecards #papercraft #sketchchallenge #christmaschallenge
Day 19 – Hope & Light Meets North Pole Workshop?

Today’s Christmas Challenge brought two themes that couldn’t be more different: Hope and Light and North Pole Workshop. Instead of trying to force both themes into one design, I decided to lean into the contrast and create two separate cards—each with its own mood and message, but both built using the same layout and the same product focus:
Watercolor Pencils (#161700 & #149014) paired with Water Painters (#168234).

This turned out to be such a fun creative experiment—one layout, two techniques, and two completely different looks!


The Shared Layout

To keep a unified feel between the two designs, I started with a simple, versatile layout:

  • Horizontal card base: 8-1/2″ x 5-1/2″, scored at 4-1/4
  • Accent strip behind the focal point: 1-3/4″ x 5-1/2″
  • Focal image panel: Die-cut using the Textured Notes Dies (#165555) — a perfect little frame for any image
  • Layered background: 4-1/2″ x 4-1/4″ with the sentiment stamped along the bottom

It’s an easy formula that works for just about any stamp set or technique, which made it perfect for today’s theme split.


⭐ Card 1: North Pole Workshop

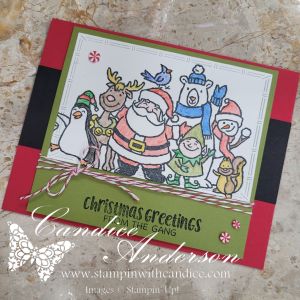
For my first card, I reached for a fun retired favorite—Christmas Crowd. It’s full of cheerful, whimsical North Pole characters, and it was the perfect set for a bright, playful look.

Technique: Coloring In the Image

For this card, I used the watercolor pencils in the most traditional way—coloring the entire image before blending it out slightly with my Water Painter. This gave everything a soft yet vibrant finish without overwhelming the line art.

Finishing Touches:

  • Cherry Cobbler Baker’s Twine (#164051)
  • Real Red & White Peppermint Embellishments (#164050)

These little elements really pull together that Santa’s-workshop, peppermint-candy vibe.


⭐ Card 2: Hope & Light (Silent Night Style)

For the second theme, I chose the retired Come to Bethlehem (#120591) set—a beautiful, solid-image stamp that has always felt powerful and peaceful to me.

Technique: Background Shading with Watercolor Pencils

Since the main image is a silhouette, I used the watercolor pencils differently for this card. Instead of coloring in the image, I lightly shaded a glowing backdrop behind the figures. With a soft wash from the Water Painter, it created a beautiful halo of color that makes the silhouette pop.

Finishing Touches:

  • Black Baker’s Twine (#155475)
  • Rhinestone Basic Jewels (#144220)

A little sparkle keeps the “light” theme present while keeping the card simple and serene.


⭐ The Result: One Layout, Two Techniques, Two Totally Different Looks

It always amazes me how using the same basic card design can produce completely different moods depending on the stamp set, colors, and technique.

  • North Pole Workshop → bright, fun, colorful
  • Hope & Light → soft, meaningful, peaceful

Both simple.
Both beautiful.
And both incredibly easy to create with supplies you already have.

👉 You can shop current Stampin’ Up! supplies and tools here:
Shop with Me Here

A beautifully crafted Christmas card featuring a window scene that displays a peaceful nativity setting on one side, while the inside is adorned with cozy holiday elements like hanging stockings and warm colors.

Please feel free to contact me if you have any questions.

Contact me today to place your order!
435-232-2655 Cell ( Call or Text)
andersoncandice@hotmail.com


💕 Let’s Stay Connected

📺 YouTube
📘 Facebook
📸 Instagram
📌 Pinterest

#StampinWithCandice #StamperCandi #ACardADayInNovember2025 #30DayChristmasCardMakingChallenge #ChristmasCards #HandmadeCards #CreativeTechniques #HolidayCrafting #cardmaker #cardmaking #christmascards #handmadecards #papercraft #sketchchallenge #christmaschallenge

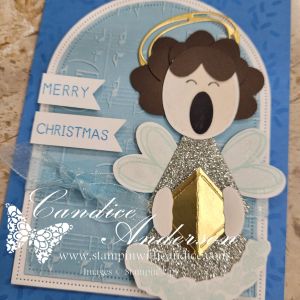
👼✨ Day 17 – Caroling Crew & Joy to the World

Day 17 paired Caroling Crew with Joy to the World — and these two themes came together perfectly!

Originally, I planned to pull out an older stamp set for this challenge… but the creative spark took over again, and I ended up making some holiday punch/die art magic instead. And honestly? I think you’re going to love what came out of this one!

I started by looking through my current sets for unexpected shapes and pieces I could repurpose. My eyes kept returning to the Bee My Valentine Stamp Set and matching punch — specifically the bee wings. And then it hit me…

✨ Angel wings!

From there, the ideas flowed as I searched my stash for more pieces to build a sweet holiday angel. Here’s everything I used and how I transformed each element:


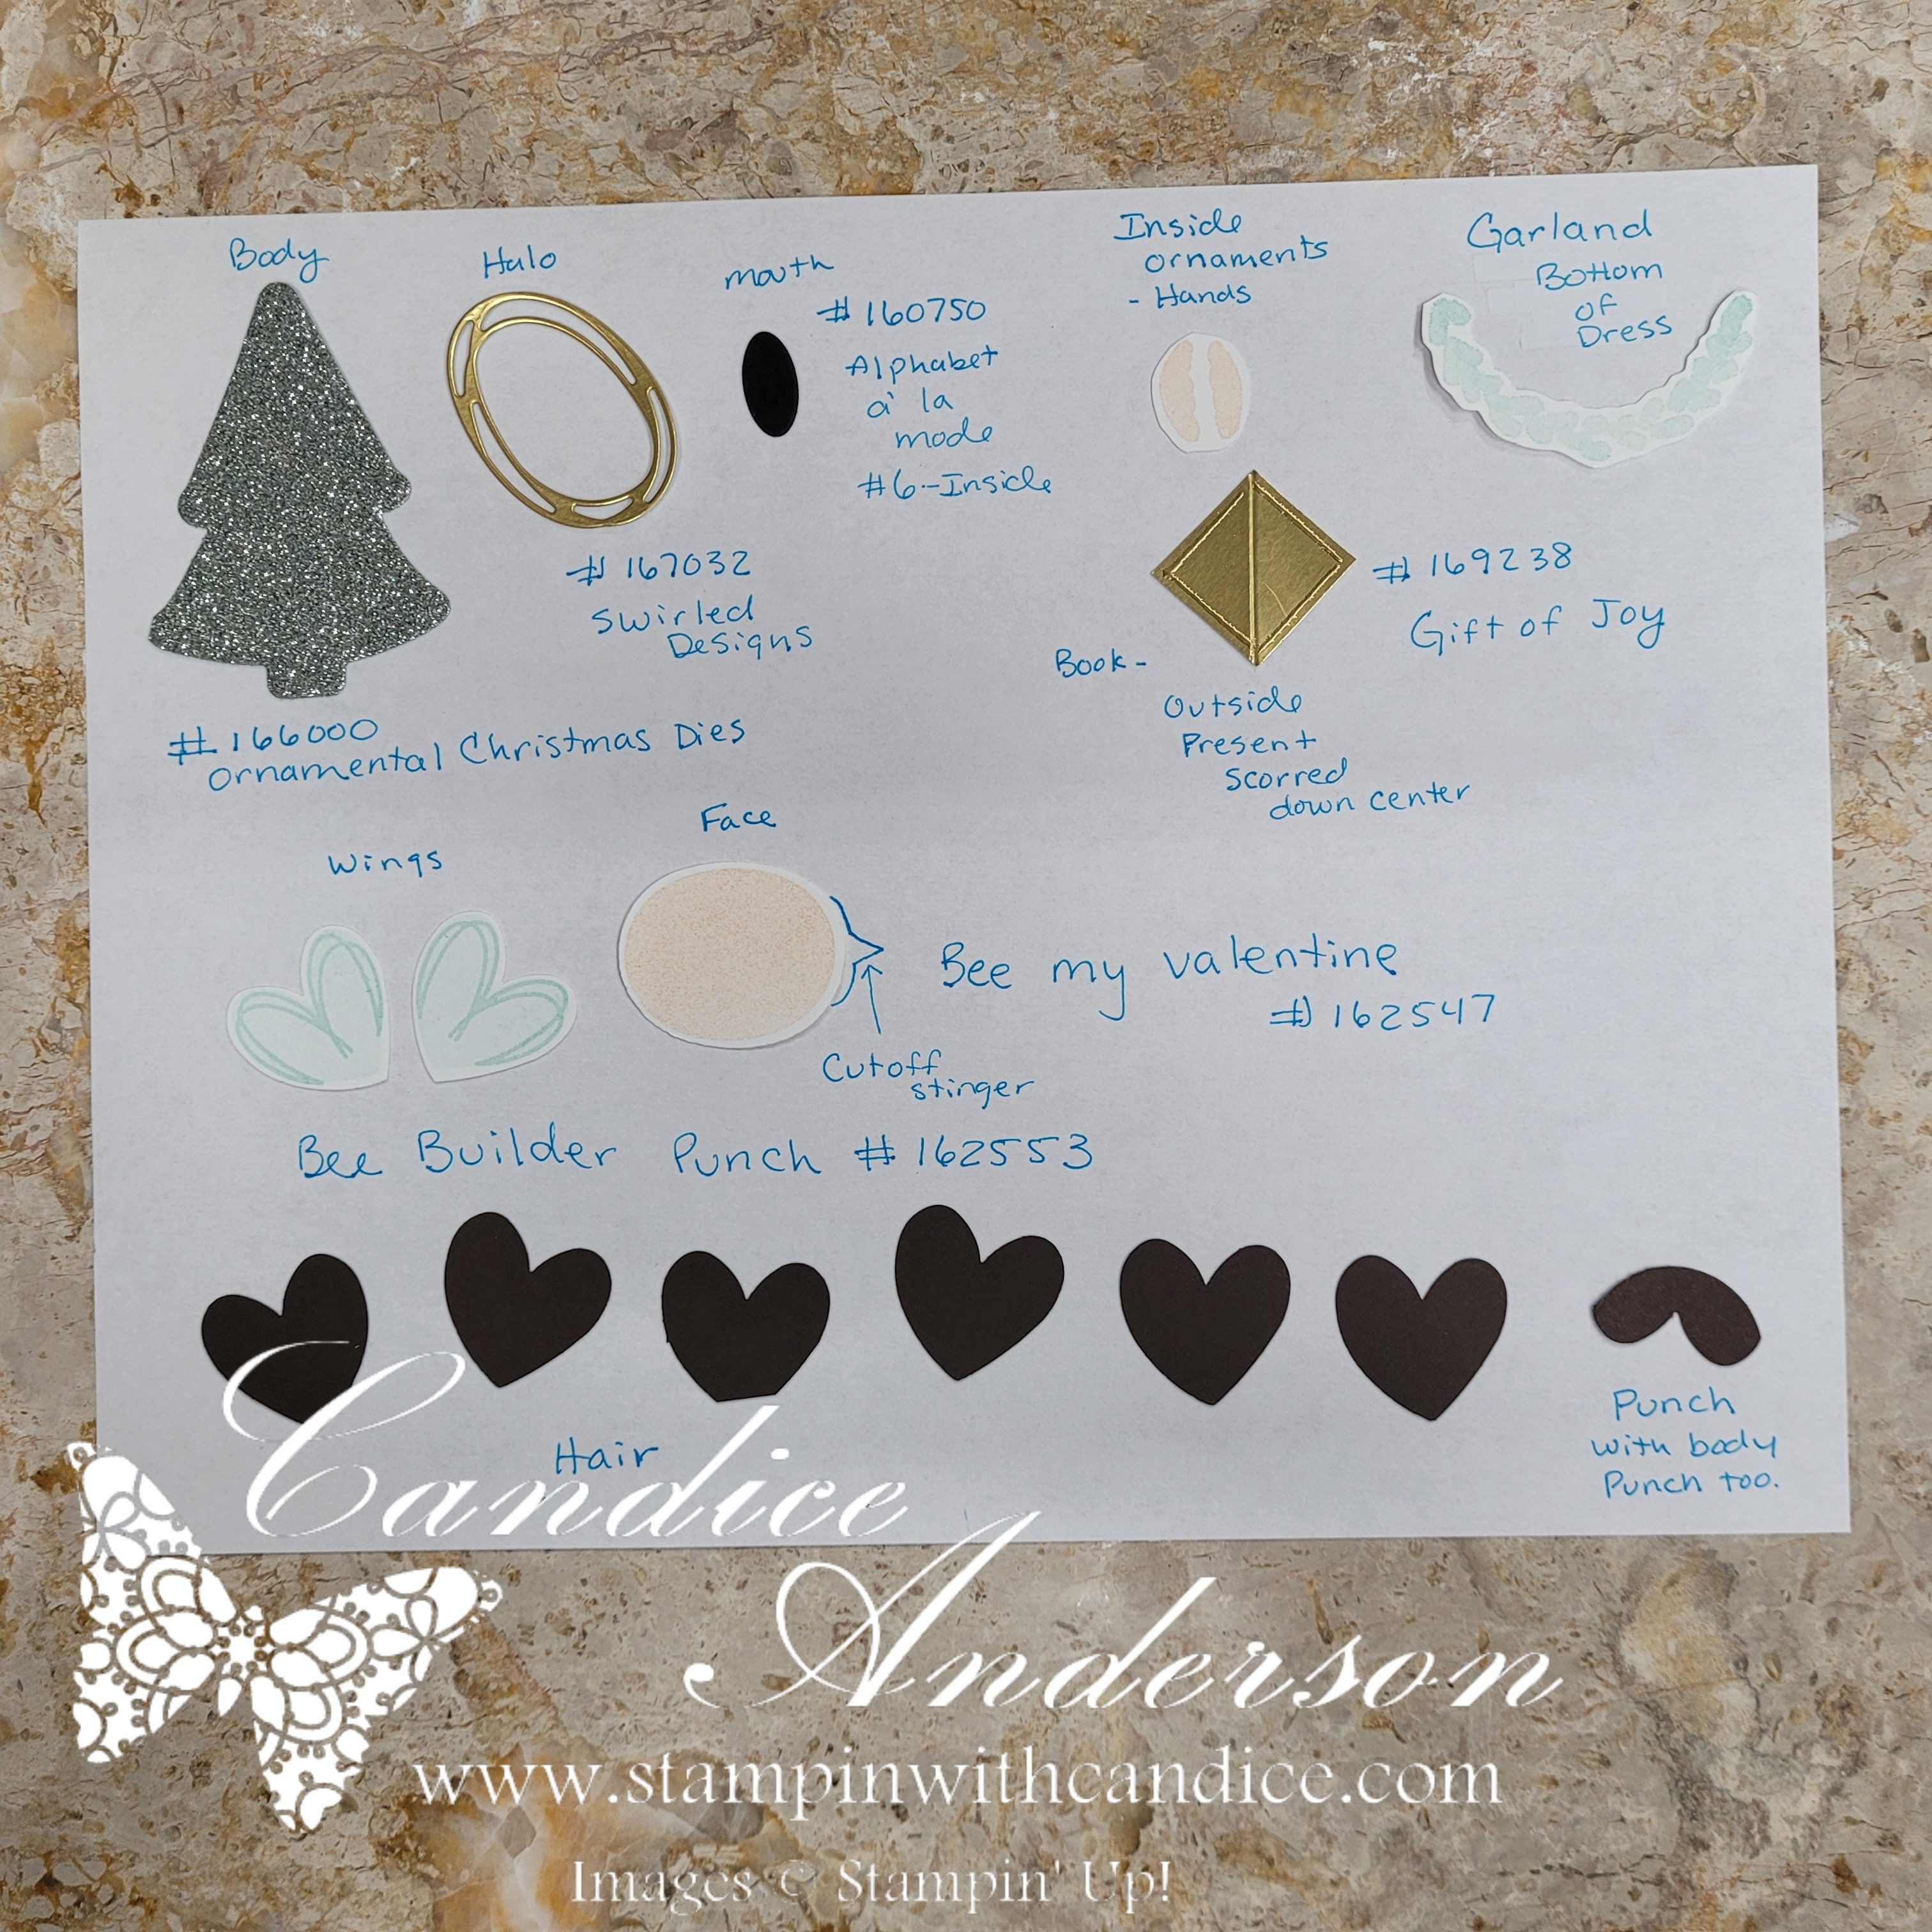
👼 Angel Punch-Art Breakdown

Bee My Valentine Stamp Set (#162546) + Punch (#162553)

  • Bee Body (Head): Stamped in Petal Pink on white cardstock – be sure to cut off the stinger.
  • Bee Wings (Angel Wings): Pool Party stamped on white — stamped off for the base, full strength for the outline + Wink of Stella for shimmer
  • Bee Wings (Hair): Punch only (no stamping) –
    • Early Espresso cardstock
    • You will need a total of 7
    • One will be punched with the Bee Body to create bangs with the heart arches on the inside.
  • Eyes: Created by masking the bee’s smile stamp to isolate the smile only for the “eye” shapes

Swirled Designs Dies (#167032)

  • Halo: Small oval cut in Gold Foil Sheets (#132622)

Ornamental Christmas Dies (#166000)

  • Dress: Christmas tree die (I used the shorter one with double flares) cut from Peaceful Garden Glimmer Paper (#165929)

Alphabet à La Mode Dies (#160750)

  • Mouth: Inside cut of the number “6” (cut from black cardstock)

Gift of Joy Stamp Set (#169238)

  • Garland: Stamped in Pool Party + Wink of Stella, trimmed to size
  • Hands: Petal Pink stamped on white — created using the inside of the ornament stamp, cut apart
  • Song Book: Stamped in Versamark and heat-embossed in gold on Gold Foil Sheets (#132622), trimmed and scored down the center to give it dimension

Sentiment

  • “Merry” and “Christmas” stamped in Azure Afternoon
  • Punched with the Three Banner Punch (#167050)
A layout of various punched and stamped elements for a holiday angel project, including parts labeled for the bee body, halo, mouth, garland, and more, showcased on a white sheet.

🌟 Background Details

  • Everyday Arches Dies (#164629):
    • Main arch in Balmy Blue, embossed (I used the retired Merry Melody #156392) and brushed lightly with white ink
    • Larger white arch behind for a layered frame
  • Card Base: Azure Afternoon
    • Background stamped with the leaf-fill image from Gift of Joy to add depth
  • Ribbon: Sheer Balmy Blue Ribbon (#165767)
  • Adhesives: Lots of dimensionals + mini glue dots to build the layered angel

The result?
✨ A super fun, whimsical work of art that brings both joy and creative surprise to the holiday season.

If you want to see exactly how I created this angel step-by-step, join me LIVE tonight — 11/17/25 at 7:30 PM MST on YouTube or Facebook!

👉 A full replay will be linked afterward if you can’t join live.


👉 You can shop current Stampin’ Up! supplies and tools here:
Shop with Me Here

A beautifully crafted Christmas card featuring a window scene that displays a peaceful nativity setting on one side, while the inside is adorned with cozy holiday elements like hanging stockings and warm colors.

Please feel free to contact me if you have any questions.

Contact me today to place your order!
435-232-2655 Cell ( Call or Text)
andersoncandice@hotmail.com


💕 Let’s Stay Connected

📺 YouTube
📘 Facebook
📸 Instagram
📌 Pinterest

#StampinWithCandice #StamperCandi #ACardADayInNovember2025 #30DayChristmasCardMakingChallenge #ChristmasCards #HandmadeCards #BeeMyValentine #PunchArt #AngelCard #CreativeTechniques #OrnamentalChristmas #GiftOfJoy #PeacefulGarden #EverydayArches #HolidayCrafting #JoyToTheWorld #CarolingCrew #StampinUp

✨ Day 11 – Minimalist Christmas & Frosted Windowpanes

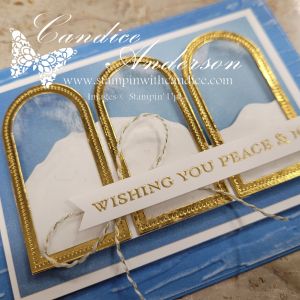
Day 11 brought the beautiful challenge of Minimalist Christmas, featuring white space, gold foil, and clean lines — paired perfectly with the theme Frosted Windowpanes. My goal was to create something simple yet elegant, and I absolutely love how this serene design turned out.

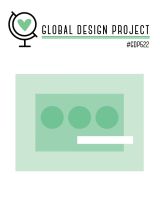
For my layout, I incorporated the Global Design Project Layout Challenge #GDP522, which inspired the clean structure of the card. I used the Everyday Arches Dies (#164629) to create three arched window elements, layering them with Textured Metallic Specialty Paper (#163772) and Window Sheets (#142314) for a frosty, dimensional look.

To achieve the frosted glass effect, I gently applied white ink to the back of the window sheets — this way, the ink isn’t exposed and still gives that soft, misty glow.

Behind the windows, I created a peaceful winter scene using the Light & Wonder Dies (#165762), accented with a touch of Wink of Stella (#141897) for shimmer, and layered it over the Lights of Aurora Designer Series Paper (#165755). I mounted the entire design on Azure Afternoon cardstock, embossed with the Birchwood 3D Embossing Folder (#164069) and brushed with a little more white ink to add a snowy texture. ❄️

To complete the look, I heat-embossed the sentiment “Wishing You Peace and Joy” from the Ornamental Christmas Stamp Set (#165991) in gold embossing powder, and tied everything together with a delicate gold bow made from the Black & Gold Baker’s Twine (#166005).

✨ Tip: The new Three Banner Punch (#167050) is a quick and easy way to make a perfect banner of any length — just feed one end of your strip into the punch for a clean finish!

This minimalist design truly embodies quiet beauty — simple, elegant, and full of frosted Christmas charm. 💛

👉 You can shop current Stampin’ Up! supplies and tools here:
Shop with Me Here

A beautifully crafted Christmas card featuring a window scene that displays a peaceful nativity setting on one side, while the inside is adorned with cozy holiday elements like hanging stockings and warm colors.

Please feel free to contact me if you have any questions.

Contact me today to place your order!
435-232-2655 Cell ( Call or Text)
andersoncandice@hotmail.com


💕 Let’s Stay Connected

📺 YouTube
📘 Facebook
📸 Instagram
📌 Pinterest

#StampinWithCandice #StamperCandi #CreativeSkills #StampinUp #ACardADayInNovember2025 #30DayChristmasCardMakingChallenge #ChristmasCards #HandmadeCards #GDP522 #MinimalistChristmas #FrostedWindowpanes #EverydayArches #LightAndWonder #OrnamentalChristmas #BirchwoodEmbossingFolder #WinkOfStella #CardMakingCommunity #ElegantDesign

☃️ Day 10 – Snowman Shenanigans & a Magical Color Twist

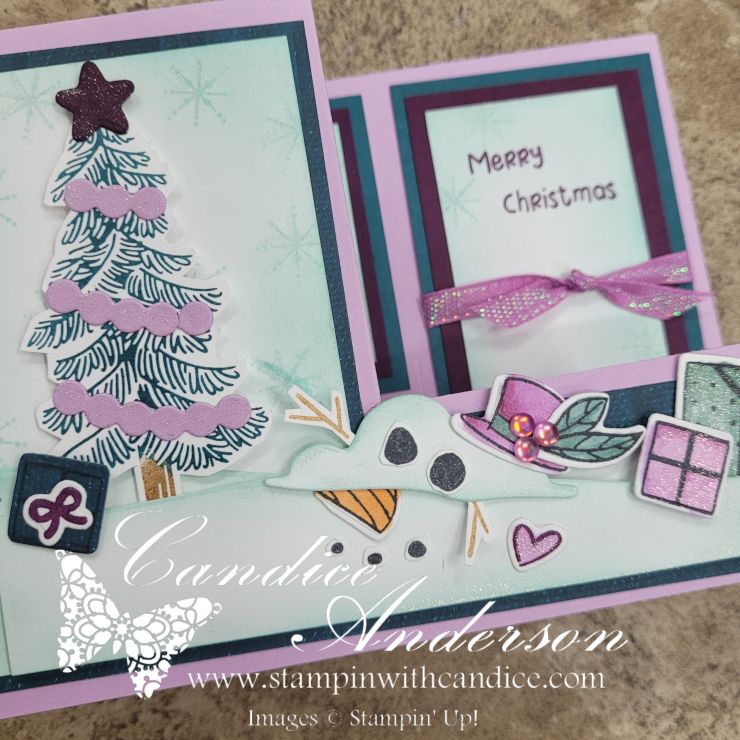
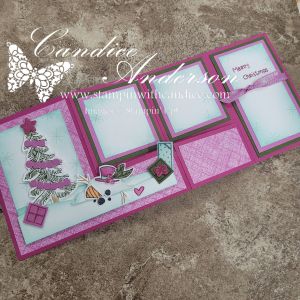
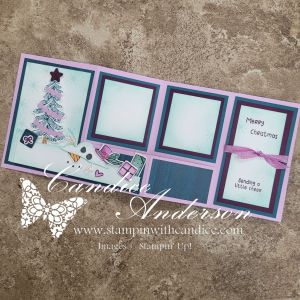
I had such a blast sharing today’s card during my live! This fun fold card is bursting with sparkle and holiday cheer — from the unexpected color combo of purples and greens to the whimsical twist on Snowman Shenanigans, I think you’re going to fall in love with this one just like I did. 💜💚✨

This card came together with a mix of creativity, experimentation, and a few surprises along the way. I used a lot of different products — including one very unexpected element!

I pulled pieces from the Darling Dinos (#164728) set again, but this time instead of dino-deer, I used them in a whole new way. Combined with the Light & Wonder Dies (#165762), I created the sweetest little snowman that’s sure to melt your heart. ☃️💖

To bring in more holiday magic, I added details and greetings from:
🎄 A Little Cheer Stamp Set (#166121)
🎅 Pine Tree Trimmings Stamp Set (#166040)
🌟 Pine Tree Trimmings Dies (#166046)


🎨 Color Palette Magic

For my color palette, I experimented with two different combos to capture the challenge colors — Concord and 9th —Plumberry, Rainforest, and Lilac.

As these are not Stampin’ Up! colors I had to adjust a bit. I started with my first color combo but after seeing some of the challenge samples, I decided to tweak the colors a bit to better match the prompt.

Which one is your favorite?

💜 First Combo: Mossy Meadow, Petunia Pop, and Berry Burst

  • Spooky Sweet DSP (#166191)

💚 Second Combo (used in my live): Blackberry Bliss, Pretty Peacock, and Fresh Freesia

  • Season of Elegance DSP (#164144)

Both versions share some fun common touches — I used Pool Party for the snow and Pecan Pie for the tree trunks and snowman twigs. ✨

To finish off the sparkle, I added:

  • Wink of Stella (#141897) for shimmer
  • Petunia Pop Iridescent Ribbon (#166203) for a soft, festive glow
  • Frosted Iridescent Dots (#165766) for a frosty finishing touch

These details gave the card just the right amount of shine and magic!


📏 I’ve included a picture of the measurements if you’d like to recreate this easy yet enchanting fun fold card yourself — it’s simple, sparkly, and so much fun to make!

A hand-drawn template showing measurements and scoring instructions for a fun fold card, labeled with dimensions and cut lines.

✨ If you missed my live, be sure to catch the replay and see how it all came together step-by-step! Plus you’ll want to catch the magic in action to see how this fun fold card opens to add surprise and delight to the receiver.


👉 You can shop current Stampin’ Up! supplies and tools here:
Shop with Me Here

A beautifully crafted Christmas card featuring a window scene that displays a peaceful nativity setting on one side, while the inside is adorned with cozy holiday elements like hanging stockings and warm colors.

Please feel free to contact me if you have any questions.

Contact me today to place your order!
435-232-2655 Cell ( Call or Text)
andersoncandice@hotmail.com


💕 Let’s Stay Connected

📺 YouTube
📘 Facebook
📸 Instagram
📌 Pinterest

#StampinWithCandice #StamperCandi #CreativeSkills #StampinUp #ACardADayInNovember2025 #30DayChristmasCardMakingChallenge #ChristmasCards #FunFoldCard #SnowmanShenanigans #DarlingDinos #LightAndWonder #ALittleCheer #PineTreeTrimmings #WinkOfStella #PetuniaPop #PrettyPeacock #BlackberryBliss #FreshFreesia #HandmadeCards #HolidayCrafting #StampingInspiration

🦕 Day 7 – Reindeer Games & Holiday Hustle

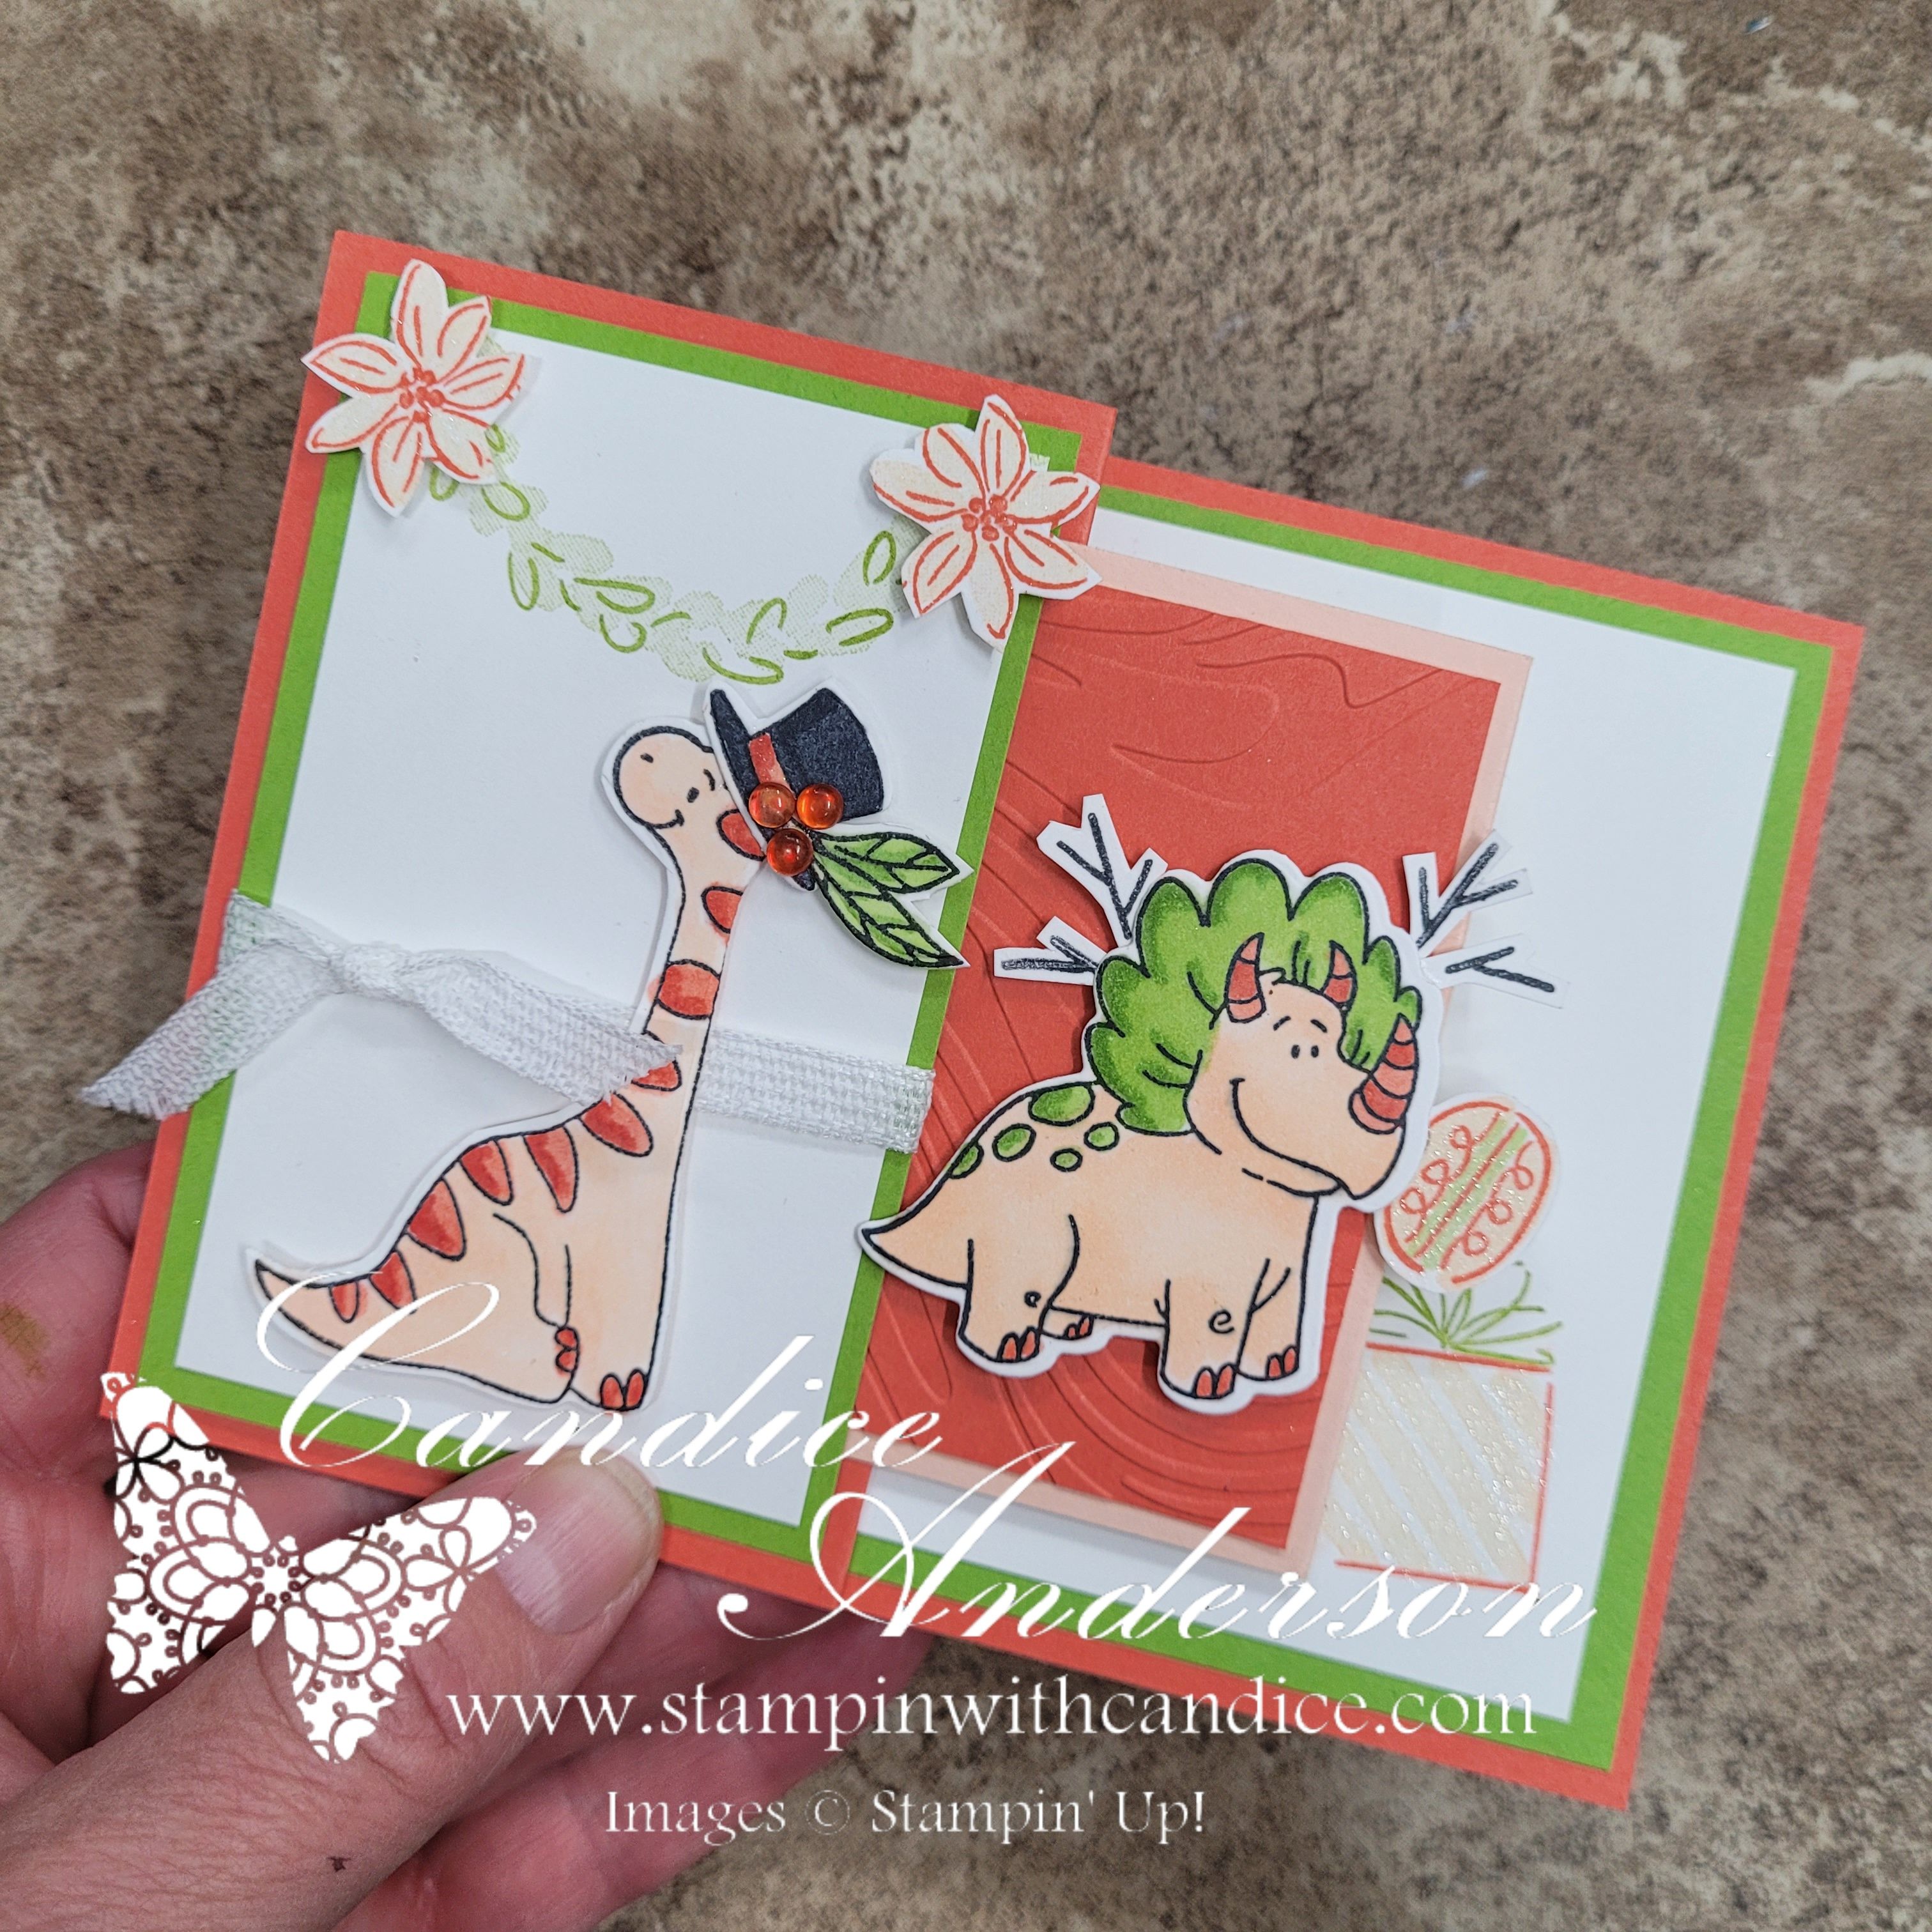
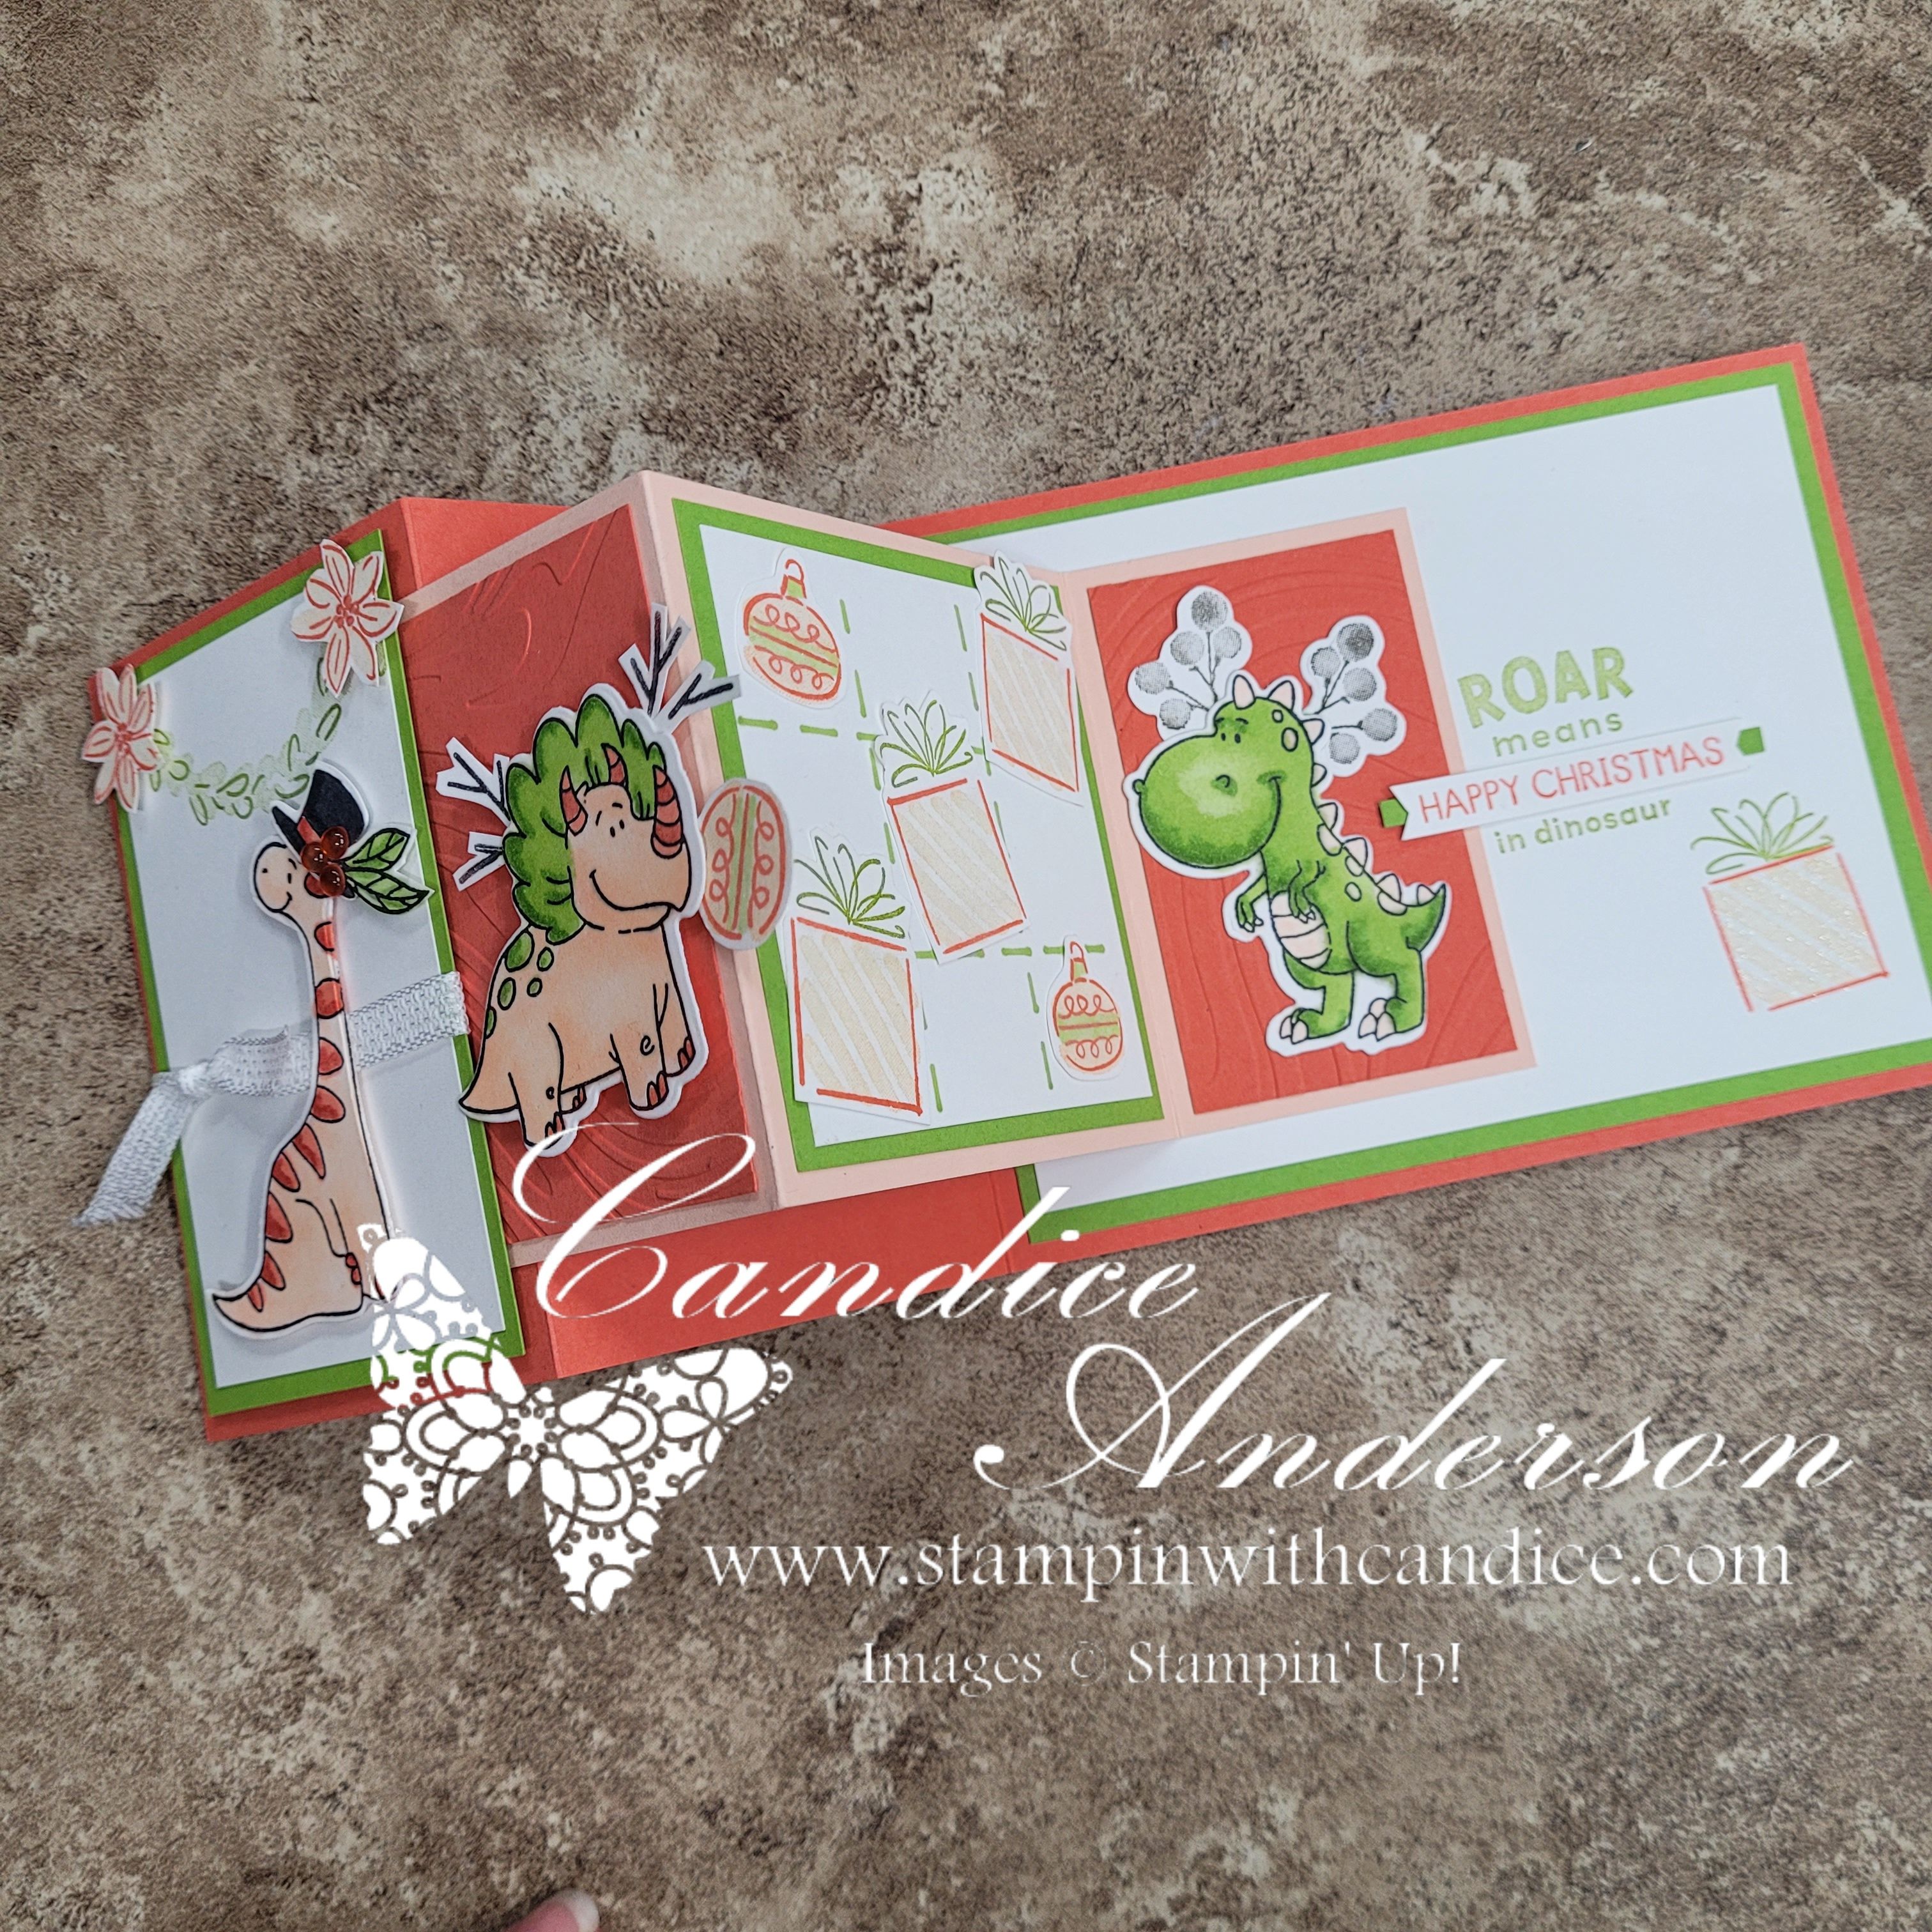
Day 7 was another challenge that really made me think outside the box! The themes — Reindeer Games and Holiday Hustle — go perfectly together, but there was one small problem… I didn’t have any current reindeer stamp sets. 🦌

Sure, I could’ve reached for a retired set, but I had a fun idea in my head and decided to give it a try instead. I pulled out my dino stamps and dies and got creative — dressing up our cute dinosaurs with antlers and a top hat, and setting the scene for a playful game of tic-tac-toe with presents and ornaments! 🎁✨

To make it even more fun, I used the colors from this week’s Global Design Project Challenge (#GDP) for my color inspiration:
🎨 Calypso Coral, Petal Pink, and Granny Apple Green

Definitely not your traditional Christmas palette, but it worked beautifully for this bright, cheerful, and whimsical card.

I paired everything with the Gift of Joy Stamp Set and a fun fold layout to bring it all together. It’s a playful mix of festive fun and creativity that’s sure to make someone smile this holiday season! 💚

👉 You can find current Stampin’ Up! supplies I used by visiting my store:
Shop with Me Here

  • 164728 Darling Dinos Stamp
  • 164734 Darling Dinos Dies
  • 169238 Gift of Joy Stamp
  • 163791 So Swirly Embossing Folder
  • 165562 White Ribbon

A beautifully crafted Christmas card featuring a window scene that displays a peaceful nativity setting on one side, while the inside is adorned with cozy holiday elements like hanging stockings and warm colors.

Please feel free to contact me if you have any questions.

Contact me today to place your order!
435-232-2655 Cell ( Call or Text)
andersoncandice@hotmail.com


💕 Let’s Stay Connected

📺 YouTube
📘 Facebook
📸 Instagram
📌 Pinterest

#StampinWithCandice #StamperCandi #CreativeSkills #StampinUp #ACardADayInNovember #30DayChristmasCardMakingChallenge #ChristmasCards #HandmadeCards #GlobalDesignProject #GDPColorChallenge #GiftOfJoy #HolidayHustle #ReindeerGames #FunFoldCard #CreativeCardmaking