Swapping Saturday 1-17-09

Time for swaps again and I’m still wishing I knew who it was.  I forgot to say one other thing as to why a lot of these cards don’t have names.  When we go to the local meetings we usually do full cards instead of card fronts like at convention.  This way we can actually use the card.  However because of this we often don’t put our name directly on the card.  Some will include a business card or the card might have a sticky note with the name, but they often get lost or removed.  That’s why I don’t know who to give the proper credit to.

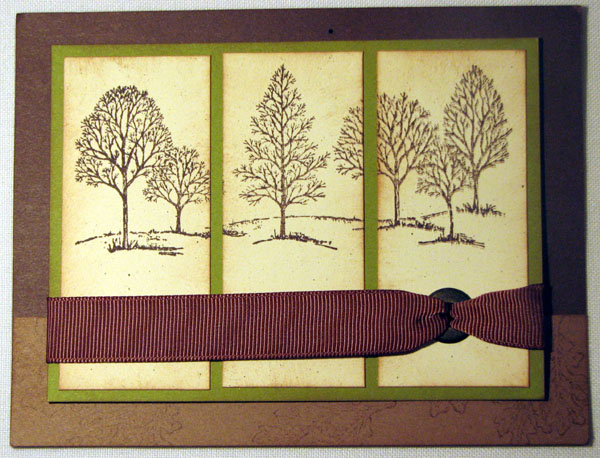
s-split-treesI really love this card and the way that she stamped the trees and then cut them apart.  I just think it is a really neat look.  I also really liked how she put on the ribbon.  It’s unique and different than the traditional knot that most people do (including myself).  I think it’s a beautiful card.

Click here to see more weekly Challenge Projects

Thrifty Thursday 1-15-09

Have you ever tried one of those books where all of the accents are made with one piece of paper.  Well I wanted to give it a try.  I searched for patterns, but didn’t really find one that worked for what I was doing so I just made up my own.  If I can find it I will try and post it for you.

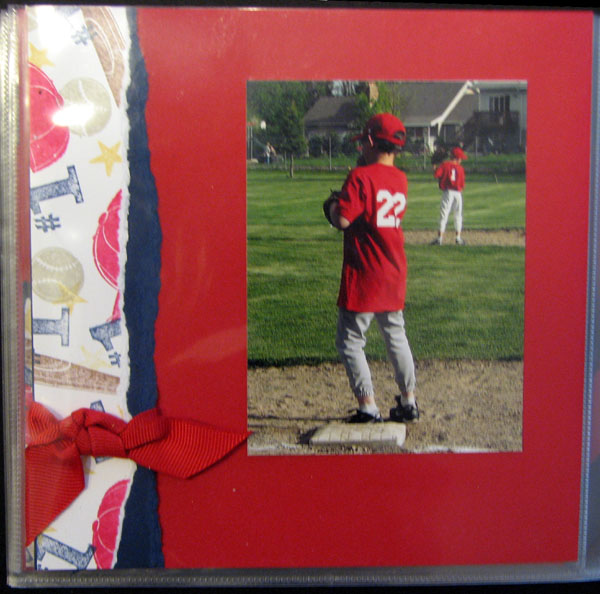
mb-frontThis is a great book to use for gift items, for kids or for something you just want a quick small scrapbook of that you can keep around the house.  I created this book for my son DJ.  It’s of his baseball team last summer.  The nice thing about it is that it’s quick and easy to make so you could make one for each kid or if they are old enough they could make their own.

First you want to decided on a theme.  I obviously used baseball here so I chose the Just Baseball set #109459 $12.95.  I also used the sporting set $109246 $17.95.

Then I picked the colors I wanted to use.  You want to choose 3 to 4 colors that you will used for the entire book.  I used Real Red, Night of Navy and Whisper White as my basic colors.  Then I added Close to Cocoa and Sahara Sand as my accent colors.  I picked my colors to match his baseball team colors and the colors of the equipment.

Next you will need 1 piece of 8 1/2 x 11 paper that you will be stamping on.  I used the Whisper White.  Then you just want to stamp your images on it randomly.  It doesn’t really matter where you stamp them because you are going to cut the paper all up.  I overlapped them a lot because I liked the look of it.

Once you have your paper stamped you will cut it up to the pattern.  Then you will need a piece of 8 1/2 x 11 paper of your accent color.  I have used the night of navy.  You would use the pattern to cut up this paper to go behind your stamped paper.

This book is a 6×6 and has 16 pages.  To save money I attached the pieces to both sides of the paper instead of using two different ones back to back.  It makes a total of 16 pages so you will need to sheets of 12 x 12 cut into 6×6 to give you 8 sheets.

mb-pg-7Once you have everything cut you can begin to assemble the book.  Here is just a sample of one of the pages.  You can click here to see the whole book.  I really will try to find the pattern and get it posted for you as well. 

I hope you try making one of these fun books for a loved one or letting your kids try one of there own. 

Some of the other great sets you could use to to create one of these books are: any of the sport ones, any flower sets, wild about you, bugs & kisses or just try it with your favorite set.

Click here to see more weekly Challenge Projects

Technique Tuesday 1-13-09

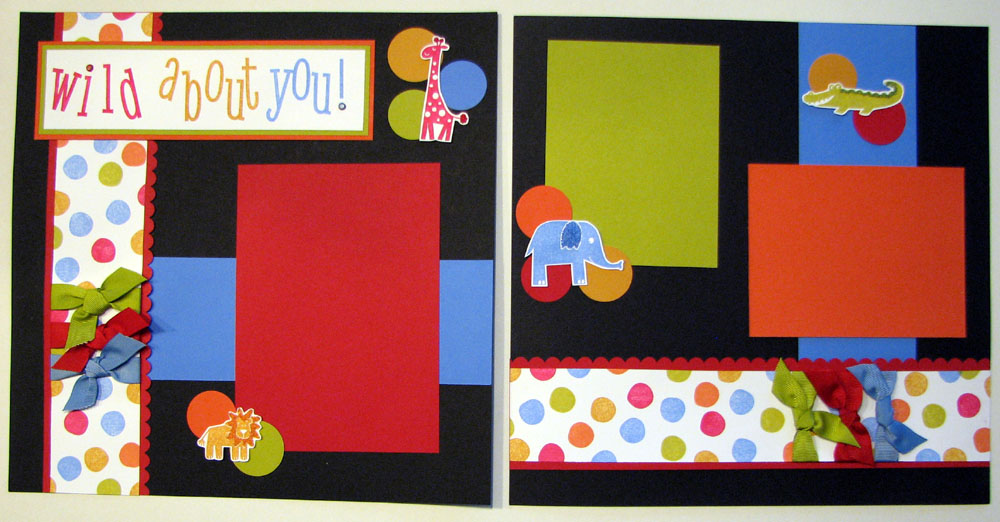
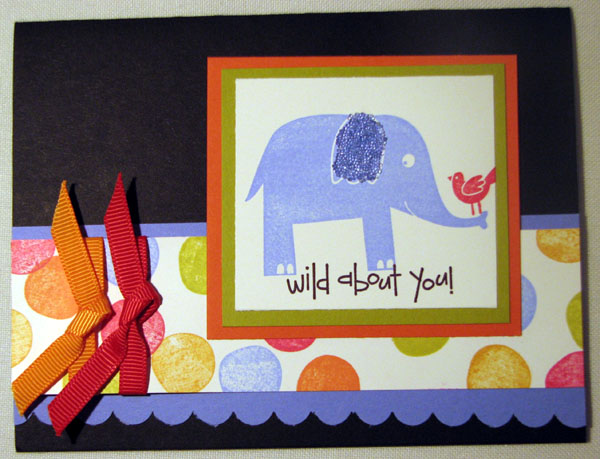
These awesome matches were made by my up-line Mindy Bywater.  She did them for a Convention Swap last year.  I think her and Janice used them for a club later because I made the card at one of Janice’s Demo Club nights.  Now your are probably wondering why they would be on technique Tuesday.  Well if you look closely at the ear of the Elephant you can see why.  On all of the animals she has used the beads.

I thought this was defiantly a fun and different way to use the beads.  If you’ve never tried them before then here’s the easy steps to use them.  I usually use both beads when I make things, but here she only used the micro beads.  I believe that we used the crystal effects.

First you want to stamp your image like normal.  Next you want to cut your image out if you are cutting them.  All the animals on the page are cut out.  The card is just on a square.  Once you have cut out your images you are ready to put on the beads.

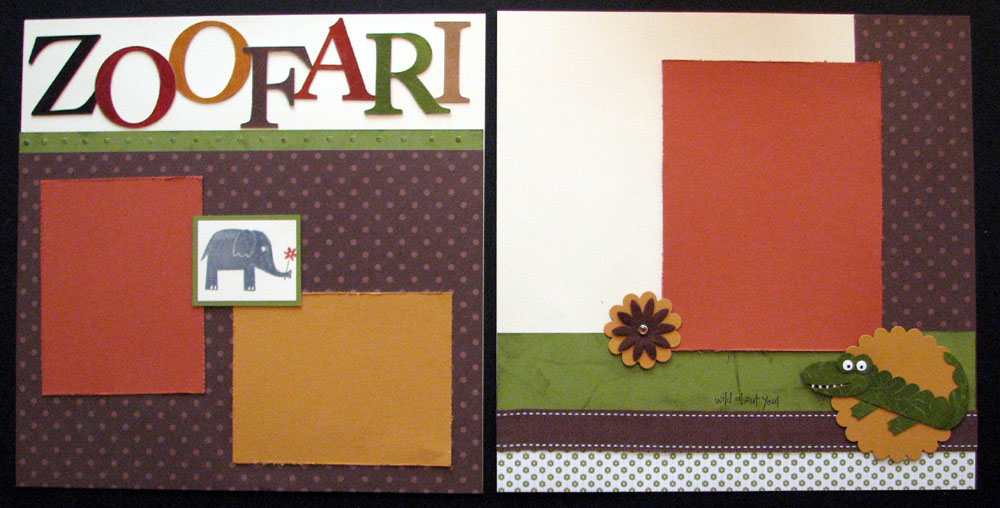
wild-about-you-pagesI’m going to be bad here and suggest something other than our wonderful powder pals when working with the beads.  The reason is the tiny beads bounce really bad and are full of static.  I sometimes use the large powder pal underneath, but I’ve actually found what works best is a piece of paper folded in 1/2.  I use the grid paper because it’s nice and big.  I like the paper because it doesn’t cause as much static and I can fold it completely in 1/2 and pour the beads back into the container without them bouncing everywhere.

To apply the beads you want to apply just a very thin layer of crystal effects and then sprinkle on the beads.  Don’t worry about spilling some on your paper that’s why we made it so that we could funnel them back into the container. 

wild-elephantShake off any loose beads and set them aside and to dry.  Make sure you let them dry really good.  You don’t want to try and apply them to the page when they are still wet or you will squish your beads and it won’t look good.

If you are doing just a small area like on the giraffe.  (It’s just his tail and the top of his antlers.) The easiest and best way to do it is just to dip the end of the desired part into the beads.  This is a lot less messy and and a lot faster too.

Now you are probably wondering where she got the cute circles from that are on the two stripes.  It’s actually one of the center’s available for the Pick a Petal #109445 $27.95.  Another fun thing she added is all the dots on the words are actually brads.  They would also be really fun to do with the beads.

I hope you try this fun technique at home.  I will show you another time how to use the beads with both sizes.

Click here to see more weekly Challenge Projects

Technique Tuesday 1-6-09

best-wishes-sponge-daubersSponge Daubers

This technique is fairly simple but I love it.  It works best with a bold image like this one: Upsy Daisy set #1111710 for $18.95.  This was another card from Brandi’s Card night at her meeting.  Once again I don’t know the Creator but I love the card.  I created a similar one for club.  You can check it out by clicking here.

First you want to choose to complimentary colors to create your image.  Here we have chosen Baja Brezze and Pacific Point.

Next you want to stamp your whole stamp in the lighter color.  Here it would be Baja Brezze. 

Then ink up your sponge dauber with the darker ink, Pacific Point in our example.  Use the sponge dauber to ink just the tops of the flowers.  Just touch it lightly to th tops.  This give the flowers color and dimension. 

Last stamp your image onto your paper.  One of the fun parts of this technique is that every card is truly different.  If your stamp colors are close like these two there is usually no need to clean your stamp in between if you are stamping multiple cards.

This card is finished by applying Kiwi Kiss ink to the edges of the top note paper and adding the Kiwi Kiss/Very Vanilla Satin ribbon along with the Maine Blueberry DSP.

So go ahead a try out this fabulous technique today.

Click here to see more weekly Challenge Projects

Thrifty Thursday 1-1-09

Wow I can’t believe it’s a new year already.  I hope that all of you had a great holiday and that your new year is full of blessings.  To start of the new year I decided to show a very versatile stamp set.  This one is on my wish list especially after making these cards at Brandi’s meeting.  I think they were created by Ashley Vancamp, but I’m not positive.  If anyone knows please let me know so I can give her proper credit. 

Post update- Thanks Megan she did confirm that the’s cute cards were made by Ashley.

best-wishes-stamp-set1The set is Best Wishes & More #111602 for $26.95.  You can find it in the current catalog on page 55.  This set is a great  value because each of the 5 images can represent different seasons or be used for just a general card.  I love it because it also comes with sayings which adds extra value.  You can create so many different types of cards and projects with just one set.

without-you-leavesThis card is a really great one just to let someone know how much you appreciate them.  It uses the Hawaii Papaya DSP #112460 for $9.95.

I also love designer series papers because they give you a color pallet.  You can see on the couldn’t do card it was so easy to choose the colors.  She just matched the Kiwi Kiss, Chocolate Chip and Tangerine Tango that was in the paper. 

If you ever wonder which colors are in the paper they are listed in the description.  Sometimes I am surprised at a color combination that I find in a set of designer series papers.  I probably would have never thought to put them together that way, but they always look great.  If you are struggling for an color pallet just give one of these papers a try.

ready-set-snowI really love the ready set snow card.  We put glitter on the snowflakes so it sparkles. I believe this card uses the Junior Varsity DSP #112458.

Our designer series papers are also a great value.  They are double sided so you get lots of verisitily.  When making cards one package goes along way. 

They are also great for scrapbooks because all you need is a little bit to add the extra touch any page would need.

As a special bonus for reading my blog let me know that you saw this when you place your order and I will give you this great set for just $24.26 (plus tax & shipping), or any designer series paper for just $8.95 (plus tax & shipping).  Just let me know you want the Thrifty Thursday special.  Hope you have a great day and give this awesome set a try.  Click here to place your on-line order.

Click here to see more weekly Challenge Projects