
Thank you so much for choosing to create with me! Whether you purchased the tutorial, earned it FREE with a qualifying order, or purchased the complete Class Kit, I truly appreciate your support of my small business.
Everything you need to create your adorable Halloween BOO Banner is right here!
You’ll find the complete step-by-step instructions below, along with measurements, photos, and helpful tips. Prefer a printed copy? Simply click the link below to download the PDF tutorial.
📄 DOWNLOAD THE PRINTABLE TUTORIAL
Be sure to check out the private video tutorial, where I’ll walk you through assembling the banner and share a few tips and tricks along the way!
⭐ IMPORTANT — Bookmark This Page!
This is your personal tutorial access page! Be sure to bookmark or save this page so you can easily return to the instructions and video whenever you’re ready to create.
Now, let’s get crafting!
Supplies
Need supplies – click here for easy ordering.
Paper
- Spooktacular 6″ × 6″ Designer Series Paper
- Granny Apple Green Cardstock
- Smoky Slate Cardstock
- Pumpkin Pie Cardstock
- Very Vanilla Cardstock
- Basic Black Cardstock
Adhesives
- Hot Glue
- Stampin’ Dimensionals
- Multipurpose Liquid Glue
- Mini Glue Dots
Accessories
- Essentials Baker’s Twine
Tools
- Bone Folder
- 1/4″ Hole Punch
- Scissors
- Simply Scored Scoring Tool *
- 1-3/4″ Circle Punch *
- Party Banner Dies *
- Party Alphabet Dies *
- Web of Fun Dies *
- Everyday Arches Dies *
Measurements & Cutting
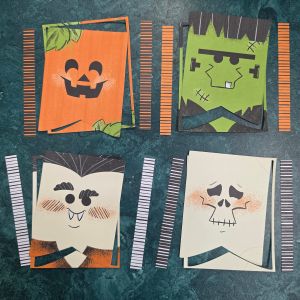
Spooktacular 6″ × 6″ Designer Series Paper — Monster Faces
- With the lines running horizontally across the paper, cut 5/8″ from each side of all four monster-face designs. Final measurement of the Monster face should be 4-3/4”.
- Set the 5/8″ strips aside. Do not discard them. Three of these strips will be used across the tops of the BOO banners and will also act as tabs to connect the banner pieces together.
- Use the 4th largest Party Banner Die to die-cut each monster face.
Granny Apple Green, Smoky Slate & Pumpkin Pie Cardstock
For each color:
Banner
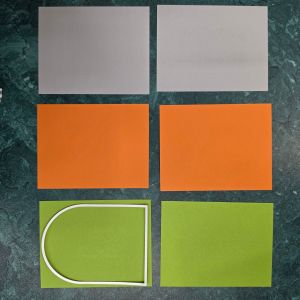
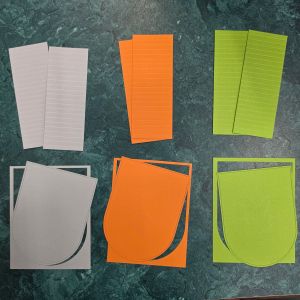
- Cut one piece 4-1/4″ × 5-1/2″.
- Die-cut using the largest Everyday Arches Die.
Rosette
- Cut one piece 4-1/4″ × 5-1/2″.
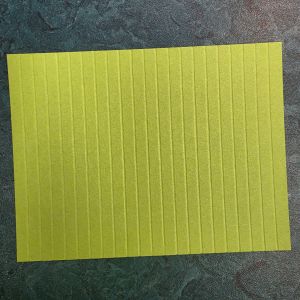
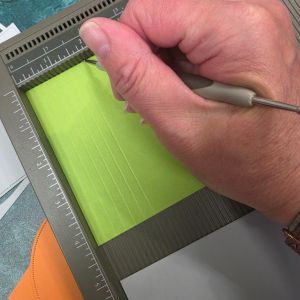
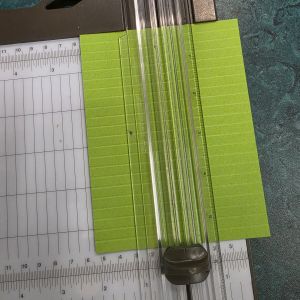
- Score every 1/4″ along the 5-1/2″ side.
- Cut the scored piece in into two 5-1/2″ x 1-1/2″ pieces
Basic Black Cardstock
Cut 8-1/2″ × 2-3/4″ and use it to die-cut:
- B
- O
- O
- 2 spiders
Very Vanilla Cardstock
Cut two 11″ × 4-1/4″ and use it to:
- Die-cut 2 spiderwebs.
- Cut 4 pieces 1/2″ × 2″ from Very Vanilla Cardstock. (Banner supports)
- Punch 6 circles with the 2″ Circle Punch.
Assembly Instructions
Create the Rosettes
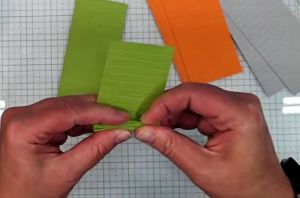
- Accordion-fold each scored cardstock strip, folding back and forth along the 1/4″ score lines.
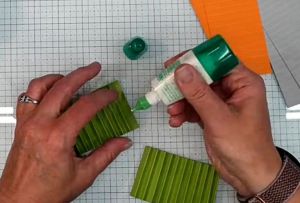
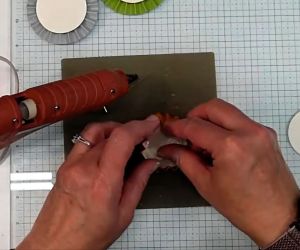
- Glue the ends of the two matching strips together with Multipurpose Liquid Glue to create one continuous accordion-folded ring. Allow the glue to dry.
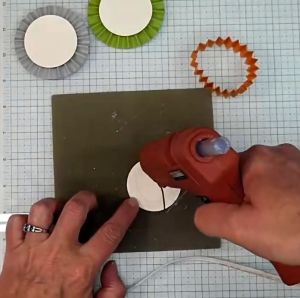
- Add a generous amount of hot glue to of one Very Vanilla 2″ circle.
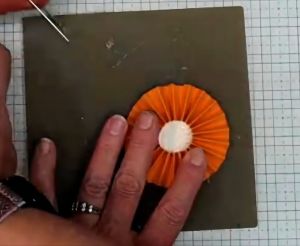
- Flatten the accordion-folded ring into a rosette and position it over the circle. Hold it in place until secure.
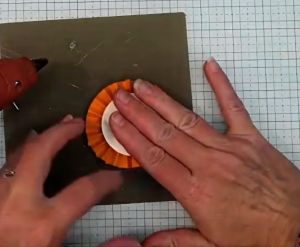
- Add hot glue to a second Very Vanilla circle and attach it to the front of the rosette, making sure it is centered.
- Attach the Basic Black letters to the centers of the rosettes:
- Smoky Slate Rosette — B
- Pumpkin Pie Rosette — O
- Granny Apple Green Rosette — O
Just a note if you watch the video you’ll see I had the wrong size for these and cut them down. I’ve fixed the measurements in the instructions so you should be all set.
Create the BOO Banners
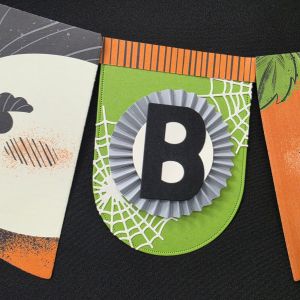
Granny Apple Green — B
- Position the Granny Apple Green arch with the rounded edge at the bottom.
- Attach part of a Very Vanilla spiderweb to the lower-left corner using Multipurpose Liquid Glue. Trim away the excess.
- Use the remaining portion of the spiderweb on the upper-left corner and trim to fit.
- Attach the Pumpkin Pie striped DSP across the top of the banner. Center the strip and allow it to extend beyond both sides.
- Attach the Smoky Slate B rosette to the center of the banner.
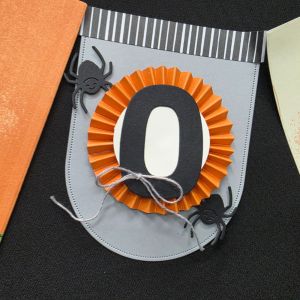
Smoky Slate — O
- Attach the black-and-white striped DSP across the top of the banner, centered and extending beyond both sides.
- Attach the Pumpkin Pie O rosette to the center.
- Use Stampin’ Dimensionals to attach one spider near the upper-left corner and one near the lower-right corner.
- Tie a small bow using 8″ of Grey Baker’s Twine and attach it to the lower-left side of the O with a Mini Glue Dot.
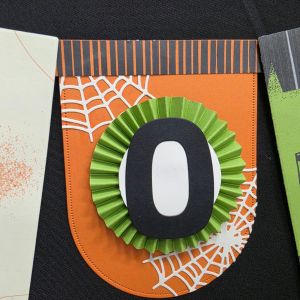
Pumpkin Pie — O
- Attach portions of the second Very Vanilla spiderweb to the upper-left and lower-right corners, using the same technique as the Granny Apple Green banner.
- Attach the black-and-Pumpkin-Pie striped DSP across the top, centered and extending beyond both sides.
- Attach the Granny Apple Green O rosette to the center.
Create the Hangers
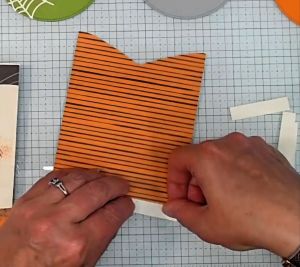
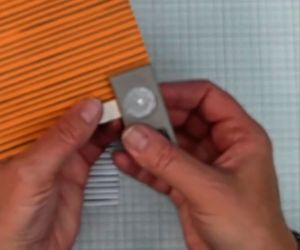
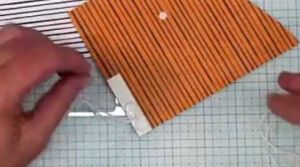
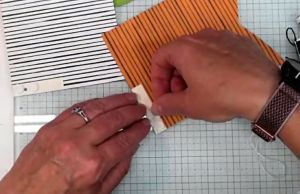
- On the back left side of the Dracula panel, attach one 1/2″ × 2″ Very Vanilla cardstock strip with Multipurpose Liquid Glue. Repeat on the back right side of the Frankenstein panel.
- Punch a 1/4″ hole through each reinforced area.
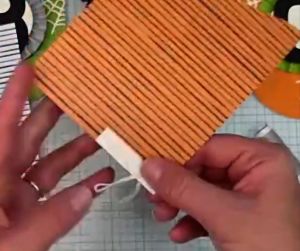
- Cut two 12″ pieces of Baker’s Twine (One black and one white). Create a loop and thread the twine through the hole from front to back.
- Secure the twine on the back using stampin’ dimensionals, then cover it with the second Very Vanilla reinforcement piece. This sandwiches the twine between the two cardstock pieces and helps reinforce the hanger.
- Tie a decorative bow on the front of each end.
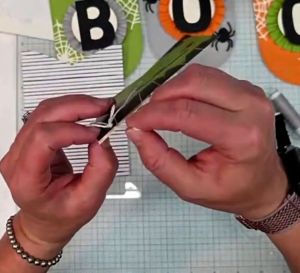
Assemble the Banner
- The 5/8″ DSP strips attached across the tops of the three BOO banners will act as tabs to connect the individual banner sections.
- Place two Stampin’ Dimensionals on the overhanging DSP strips on each side of each BOO banner.
- Beginning with Dracula, attach the banners together using the Dimensionals. Allow the finished banner to curve naturally as you work.
- Assemble the pieces in this order:
Dracula → B → Pumpkin → O → Skeleton → O → Frankenstein
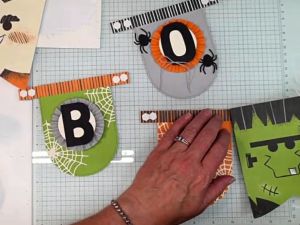
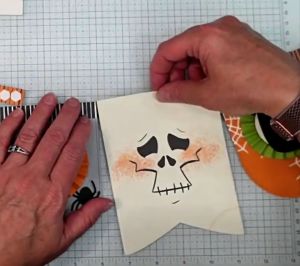
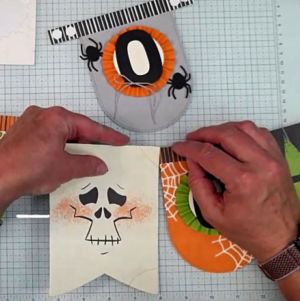
Once everything is securely attached, your Boo Banner is ready to hang and enjoy!
👻 More Spooktacular Inspiration!
I hope you’ve enjoyed creating your Halloween BOO Banner and that it brings a smile to your face each time you bring it out for the holiday season!
If you love the Spooktacular Designer Series Paper as much as I do, there’s even more inspiration waiting for you!
🎃 EXPLORE MORE SPOOKTACULAR PROJECTS
Be sure to check out my Spooktacular Gift Bag Tutorial and the fun Gift Card Holder projects I’ve shared using this same paper. There are so many creative possibilities!
Looking for even more creative inspiration? Visit my Premium Tutorial Library, where you’ll find a growing collection of projects, techniques, fun folds, and more.
🦋And remember to sign up for my newsletter to get access to my exclusive FREE Tutorial Library, along with creative inspiration, upcoming classes, and special offers delivered to your inbox!
Thank you again for supporting Stampin’ With Candice. I hope this project inspires you to keep learning, connecting, creating, and growing!
Happy Crafting!

💕 Let’s Stay Connected
📺 YouTube 📘 Facebook 📸 Instagram 📌 Pinterest
Copyright Notice
The artwork, stamps, images, and product designs used in this project are © Stampin’ Up!
This tutorial, project design, written instructions, photographs, and video content are © Candice Anderson/StampinWithCandice.com.
This tutorial is for personal use only and may not be copied, reproduced, redistributed, sold, or taught as your own without the express written permission of Candice Anderson.

