
Today I want to share with you a project that I’m so excited about. I absolutely love the new Mini Treat Bag from Stampin’ Up! and I wanted to have a little fun with it. I’ve heard of others turning it into a box so I decided to give it a try. It turned out so cute and I used it as my swap during Leadership this last week. While I was creating all my swaps I decided that I was going to make my first ever Stampin’ With Candice video. I hope that is will be the first of many.
So first I’m going to share the cute project with you and find a few pictures of putting the project together. Then I’ll share the video with you and last I’ll share a list of supplies so you can create one yourself.
So I love Valentines and choose that as my team. The current occasions catalog has so many great Valentines products.

Here’s my video. Please don’t laugh. It’s my first one and I’m still learning. I hope that it will help you to get an idea of how easy this box is to create. I started taking pictures and decided that the video would be easier. I hope you enjoy it and if so please like and share it. Thanks
Here’s a list of supplies and the pieces that you will need to create your box.
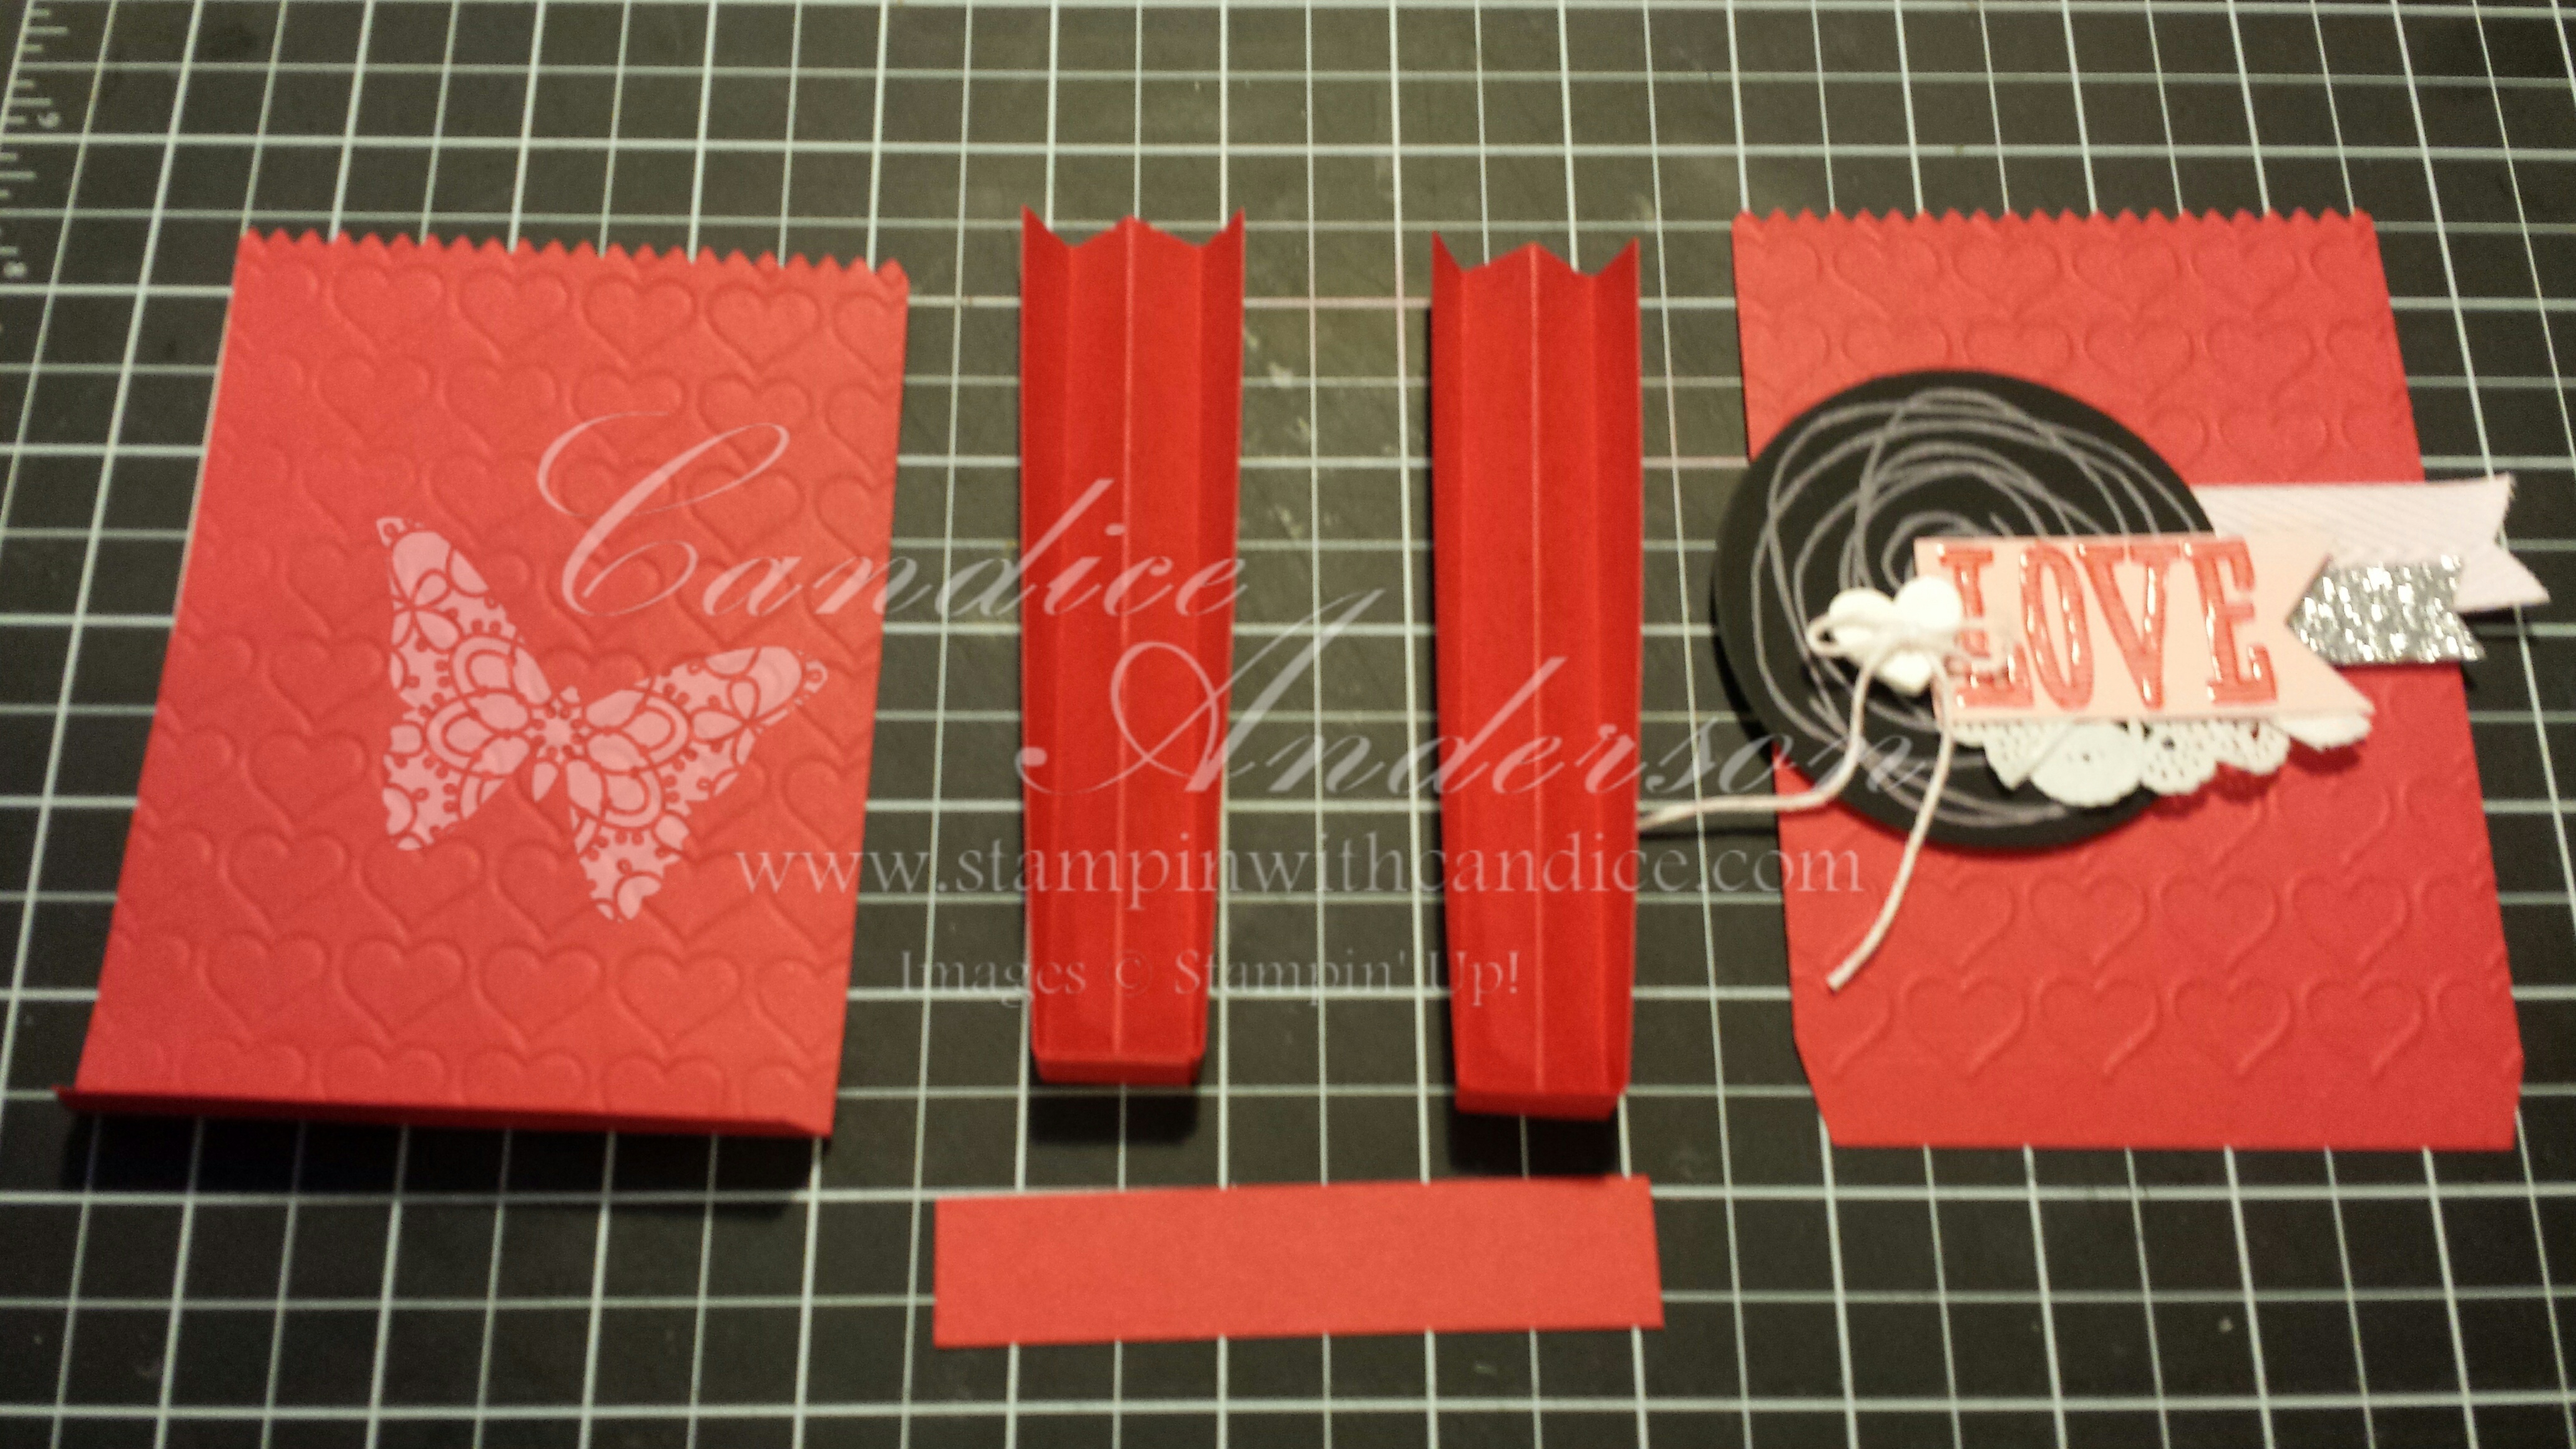
- The front & back is cut using a 5 1/2 x 4 1/4 piece. (you’ll need 2) Be sure to line up the edge with the bottom and the side where the score line is.
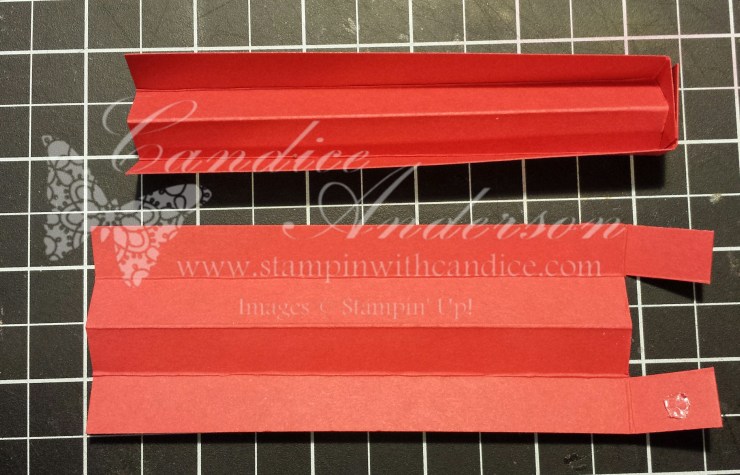
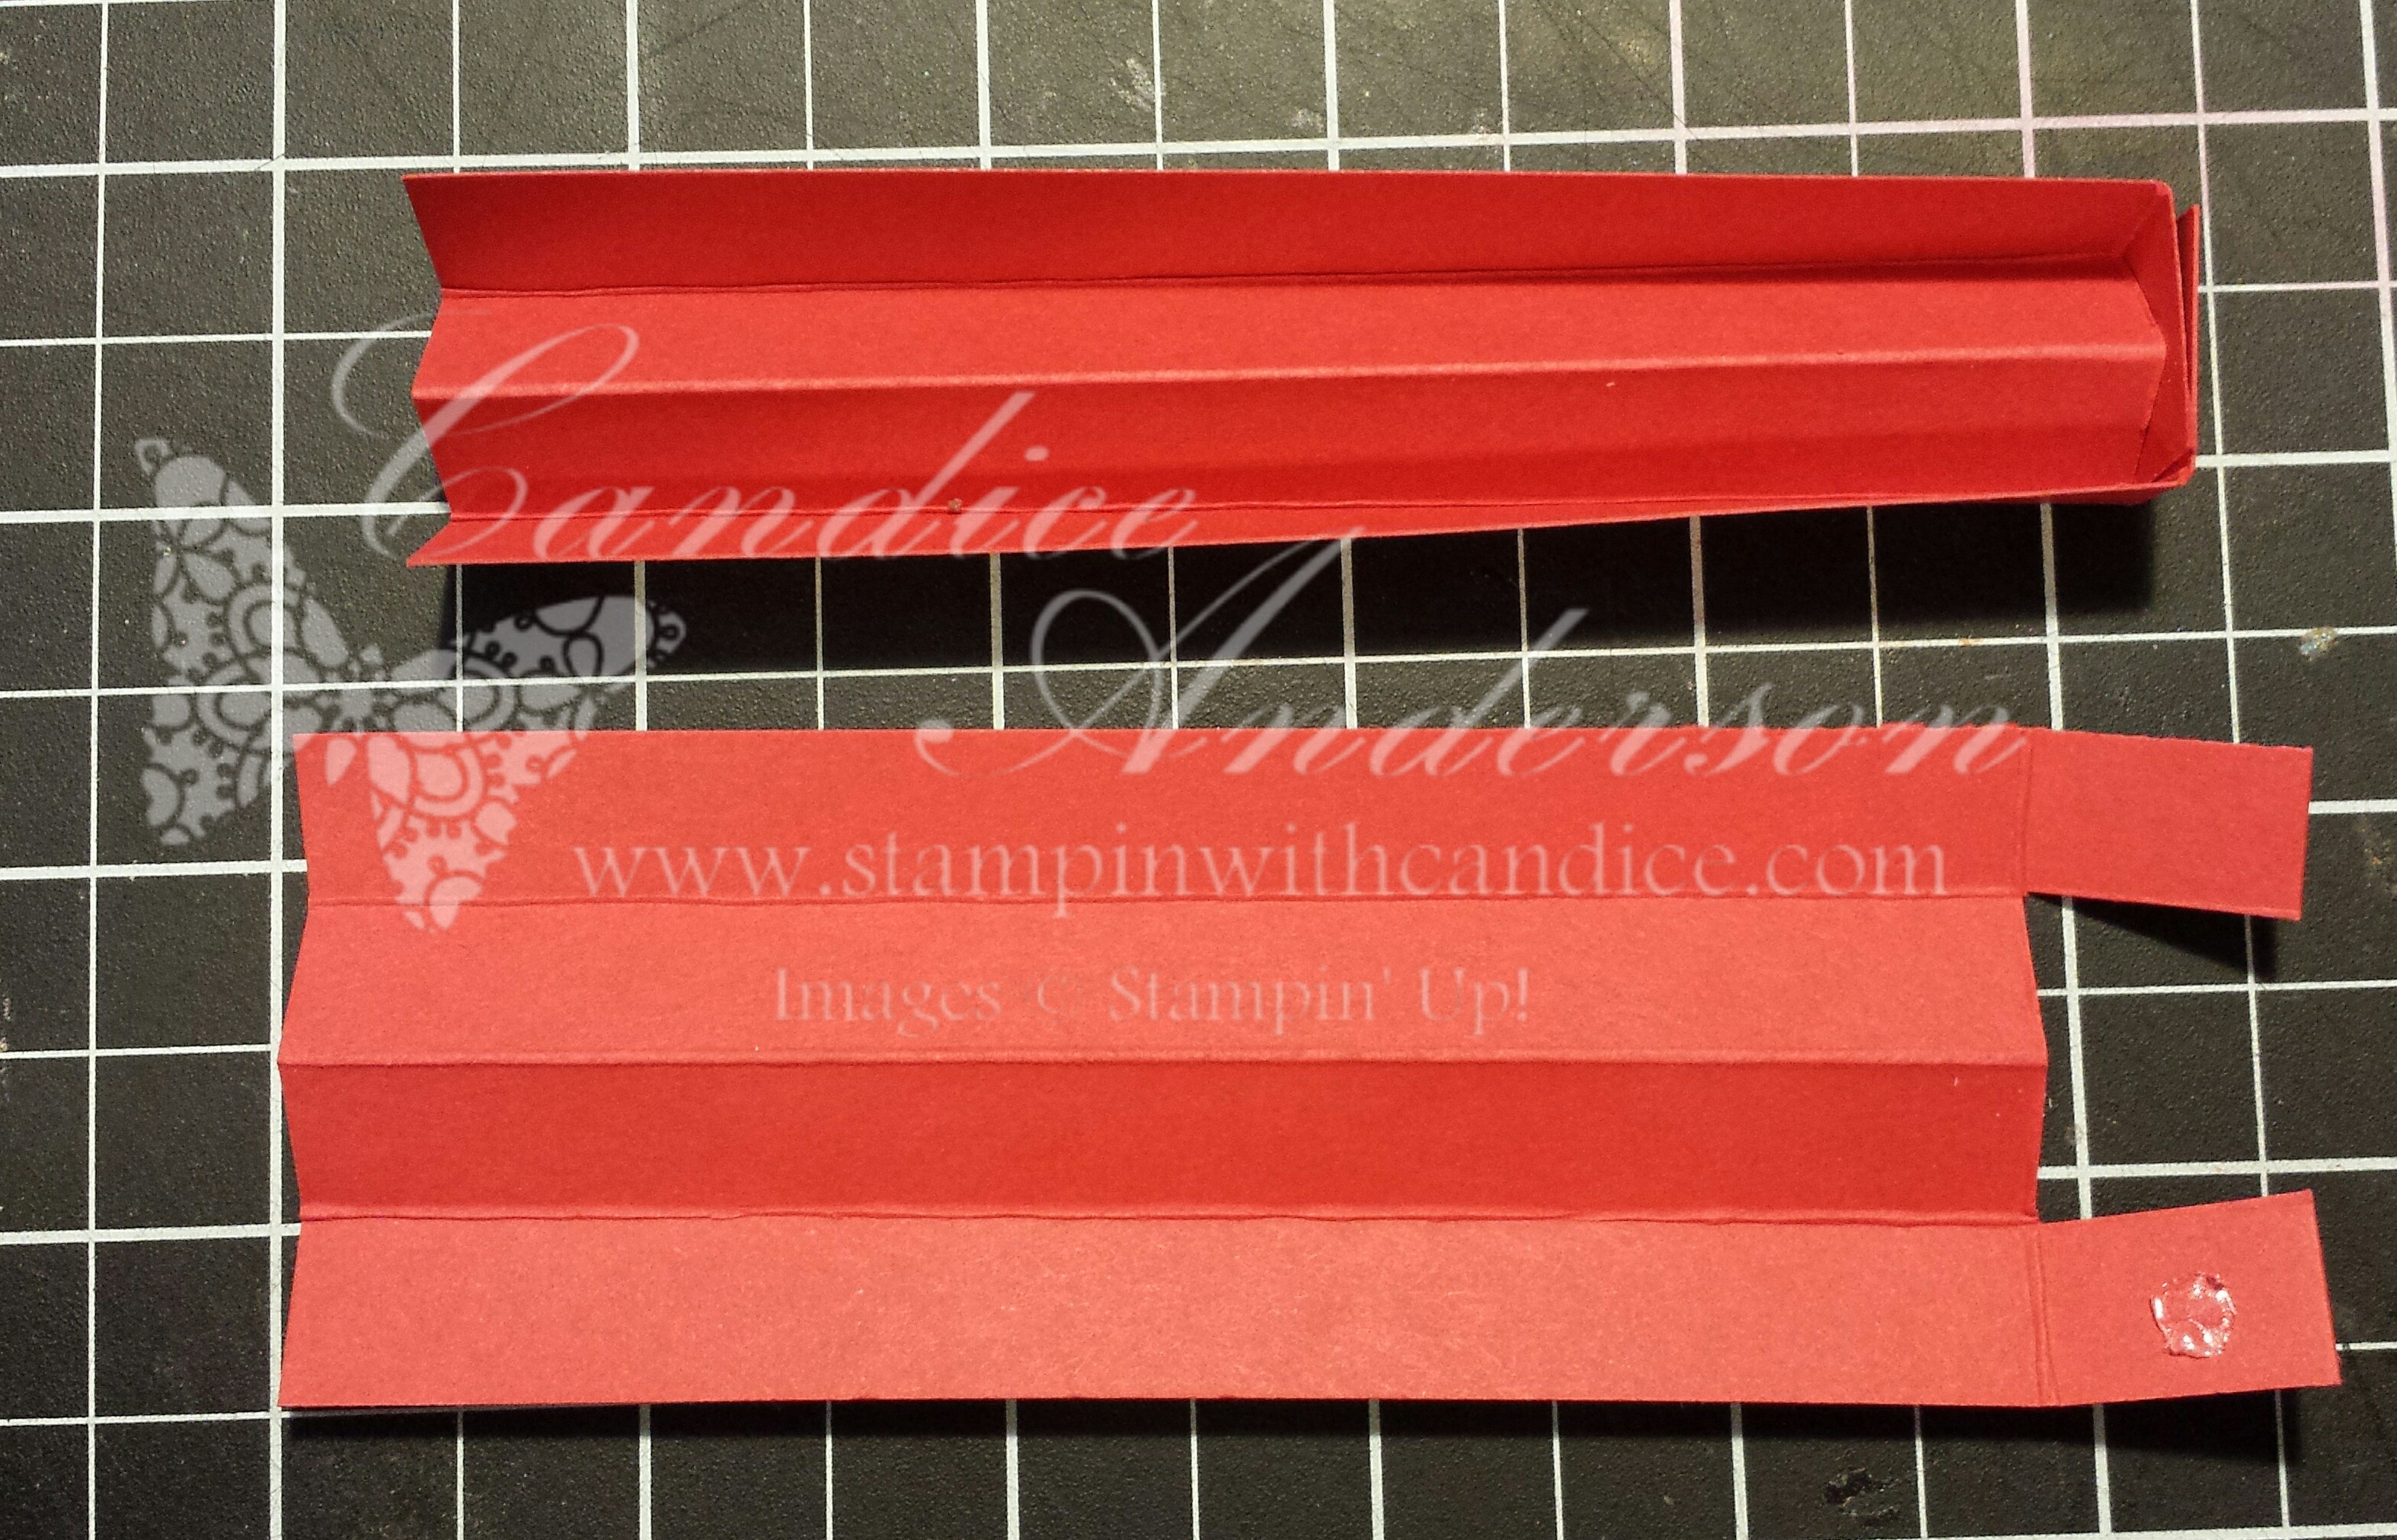
- You’ll need 2 pieces 2 x 5 1/2 for your sides. Score them at a 1/2″, 1″ and 1 1/2″. Then score the bottom at 4 3/4. You will cut out the center section as shown. Fold and attach the bottom using a mini glue dot.
- You’ll also need a piece for the bottom. It is 3 1/2″ x 3/4″.
Here are the supplies if you want to create the front the same as mine.
- Stamps Snuggles & Smooches #140326 $15.95
- Mini Treat Bag Framelits Dies #137547 $39.95
- Circle Collection Framelits Dies #130911 $26.95
- Big Shot Die Cutting Machine #113439 $99.95
- Magnetic Platform #130658 $39.95
- Happy Heart Textured Impressions Embossing Folder #137364 $7.95
- Rose Coral Colorbox Chalk Ink #138091 $5.95
- Real Red Classic Ink Pad #126949 $5.95
- Smoky Slate Stampin’ Blendabilities #131005 $11.95
- Simply Pressed Clay #130685 $6.95
- Alphanumeric Mold #137854 $9.95
- Blushing Bride 3/4″ Chevron Ribbon #130013 $8.95
- Blushing Bride Baker’s Twine #134575 $2.95
- Gold Sequin Trim #132983 $4.95
- Blushing Bride 1/4″ Cotton Ribbon #134558 $5.95
- Basic Black Baker’s Twine #134576 $2.95
- Real Red 1/4″ Cotton Ribbon #134563 $5.95
- Tea Lace Paper Doilies #129399 $2.95
- Silver Glimmer Paper #135314 $4.95
- Real Red 8 1/2″ x 11″ Cardstock #102482 $6.95
- Blushing Bridge 8 1/2″ x 11″ Cardstock #131198 $6.95
- Chalkboard Paper #137786 $7.95
- Basics Hodgepodge Clips #133765 $6.95
- Crystal Effects #101055 $6.25
- Vanilla Shimmer Smooch Spritz #118772 $4.95
- Mini Glue Dotes #103683 $4.95
- Stampin’ Dimensionals #104430 $3.95
- Multipurpose Liquid glue (Tombow) #110755 $3.95
- Stampin’ Trimmer #126889 $29.95
- Banner Punch #133519 $12.95
- Bone Folder #102300 $6.95
- Paper Snips #103579 $9.95
Just a few quick notes on the front of the Valentines box.
- Be sure to run your front and back pieces through with the embossing folder before you begin to assemble your box
- The Love is stamped then cut out with the tag die that came with the treat bag. I just cut the end off. Afterwards I covered it in Crystal Effects and let it dry completely before attaching to the front.
- I used a 1/4 of the Tea Lace Paper Doily and scrunched it to fit the love.
- The Flower like image is stamped in Rose Coral Colorbox ink on the Chalkboard paper and then cut out with the circle framelits.
- I used the medium Gray Smoky Slate Blendabilites marker to color on the gold sequines to turn them silver.
- After forming your heart with the simply pressed clay I sprayed it with Vanilla Shimmer smooch and let dry. Then I used a needle to thread the bakers twine through it and tied a bow.
- I used the Banner Punch and went through the top to only punch the edge of the Silver Glimmer paper to create the banner.
- The Silver Glimmer Paper and the Chevron Ribbon are attached to the back of the Chalkboard Circle. This is glued onto the box with Tombow Multipurpose Glue.
- I attached the Tea Lace to the love with Tombow and then attached the love to the Chalkboard Circle with dimensionals. I also used dimensionals to attach the clay heart.
I really hope you enjoyed this project. Please let me know if you have any questions. I’d love to hear your comments. Also please feel free to share with your friends. I’d love to see your box creations. Please feel free to share them on my facebook page.
 Order online 24/7
Contact me to order or book your party today!
435-245-5321 Home
435-232-2655 Cell (Text)
andersoncandice@hotmail.com

Published by