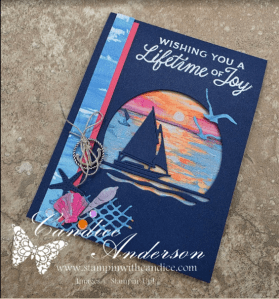
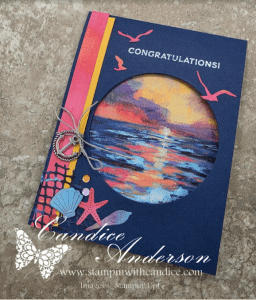
Peek-a-Boo Scenic Coast Fun Fold Tutorial

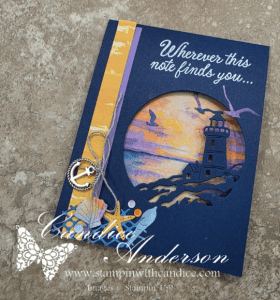
A few weeks ago, I shared this easy peek-a-boo fun fold during my Monday night live featuring the beautiful Scenic Coast Suite. After receiving several requests for the measurements and instructions, I finally had a chance to put together a complete tutorial!

There are two things I especially love about this card. First is the peek-a-boo feature. The opening creates a beautiful frame that lets you showcase both the Designer Series Paper and the coordinating die-cut images.

The second is how I used the Designer Series Paper for the die cuts themselves. By strategically cutting the 6″ × 6″ paper, I was able to take advantage of the colors and details already in the artwork, giving the die-cut images extra dimension, texture, and interest.

And the best part? This fun fold looks impressive but is surprisingly simple to create!

Take a Closer Look

Check out this quick video for a closer look at all three versions of the Peek-a-Boo Scenic Coast Fun Fold.

Want to Make One?

I’ve put everything together in one convenient resource so you can recreate the project at your own pace.

Your Peek-a-Boo Scenic Coast Fun Fold Tutorial includes:

  • Step-by-step online instructions with photos
  • Complete materials and cutting guide
  • Downloadable and printable PDF tutorial
  • Full video tutorial
  • Complete project supply list
  • Helpful tips for creating all three variations

Get the Complete Tutorial for Just $7

Once your purchase is complete, you’ll receive immediate access to the tutorial page, where you can follow the instructions online, download your printable PDF, or craft along with the video.


Already Have the Tutorial?

Need supplies to create your own Peek-a-Boo Scenic Coast Fun Fold?

Click the Shop Now button below to view the complete project supply list. From there, you can select the items you need, add them to your cart, and continue shopping for anything else on your wish list.


Looking for More Creative Inspiration?

Be sure to join my email list! Subscribers receive access to my Free Tutorial Library, filled with projects, ideas, and resources to help you keep creating.


No matter where your creative journey takes you, I’m so glad you’re here. Let’s learn, create, connect, and grow together—one project at a time. 🦋

A beautifully crafted Christmas card featuring a window scene that displays a peaceful nativity setting on one side, while the inside is adorned with cozy holiday elements like hanging stockings and warm colors.

💕 Let’s Stay Connected

📺 YouTube 📘 Facebook 📸 Instagram 📌 Pinterest

Create Stunning Christmas Cards: CASE Techniques

This week’s Global Design Project challenge, #GDP560, is another fun CASE the Designer challenge, featuring Charlet Mallett!

I love CASE challenges because there are so many different directions you can take the inspiration. You can focus on the colors, layout, technique, or even just one little element that catches your eye.

For my card, I chose to focus on Charlet’s background technique and a similar layout, but gave it a Christmas twist using the Pretty Poinsettia Bundle. 🎄

I absolutely love how the soft background adds interest without competing with that gorgeous poinsettia. It really helps the rich colors and dimension of the flower pop!

That’s one of my favorite things about CASEing another designer—you can start with the same inspiration and create something completely your own. ❤️

Want to See How It Comes Together?

Check out my reel for a quick recap of how to create this stunning card!

Then use these quick tips when creating your own:

  • Create your own stencil. Cut the leaves from a thick piece of paper. I used one of the cardboard backers from a Designer Series Paper pack. Keep an extra piece handy to cover any open areas as you move the design around your background.
  • Start with watercolor paper. For the best results with this background technique, watercolor paper gives you a little more freedom to work with the water and ink.
  • Make your own color spritz. Add a few drops of reinker to a color spritzer along with water to create the soft background color.
  • Add some splatters. A Water Painter makes it quick and easy to add those little splatters of color that give the background even more interest.
  • Give your poinsettia dimension. Ink the edges of the poinsettia petals and leaves, then gently curl them with a Bone Folder before assembling. This adds beautiful depth and texture.
  • Customize your Rhinestones. Use Stampin’ Blends to add color to your Rhinestones so they coordinate perfectly with your project.

Want to create your own?
Click here for a complete list of the products I used and an easy way to place your order.


No matter where your creative journey takes you, I’m so glad you’re here. Let’s learn, create, connect, and grow together—one project at a time. 🦋

A beautifully crafted Christmas card featuring a window scene that displays a peaceful nativity setting on one side, while the inside is adorned with cozy holiday elements like hanging stockings and warm colors.

💕 Let’s Stay Connected

📺 YouTube 📘 Facebook 📸 Instagram 📌 Pinterest

Creating Depth with One Color: Card Making Tips

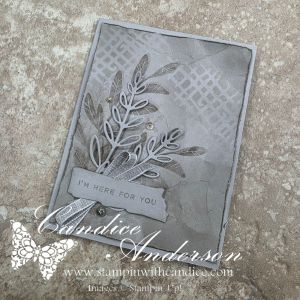
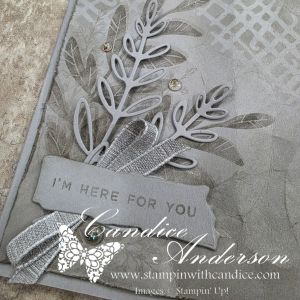
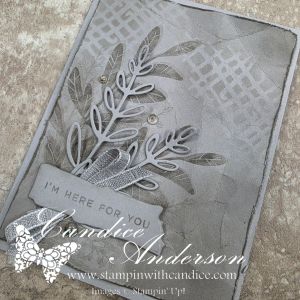
This week’s #TGIFC587 challenge was all about tone-on-tone, and I decided to really challenge myself by creating an entire card using just one color.

Rather than choosing a color you would typically expect with the Notes of Collage Bundle, I reached for Gray Granite. This is a sneak peek bundle (and I’m not even sure when it will be released!), but I couldn’t wait to create with it. I have to say… I absolutely love how this card turned out.

One of my goals was to show that a monochromatic card doesn’t have to feel flat. By layering several simple techniques, I was able to create lots of depth, texture, and contrast while staying true to a single color palette.

For the background, I die cut one of the abstract images and used the piece as a mask with a blending brush to softly add ink. Afterwards, I made sure my Gray Granite ink pad was freshly reinked so I could stamp the large leaf at full strength twice, then stamped the wispy leaf a several times using the stamp off technique for a softer, lighter impression.

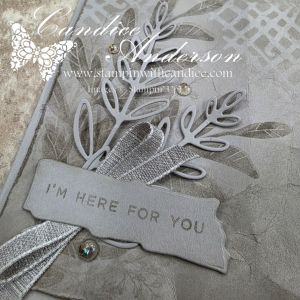
To add even more texture, I distressed the edges of the cardstock with my scissors before gently crinkling the panel. A little more Gray Granite ink brushed over the edges and creases helped highlight all of that wonderful texture. The delicate die-cut leaves, cut from Gray Granite cardstock, really stand out against the inked background without introducing another color.

I kept the sentiment monochromatic as well by stamping “I’m Here for You” in Gray Granite on a die-cut label. Finally, I finished the card with Gray Granite Variegated Ribbon and a few Mosaic Dots for just the right amount of sparkle and elegance.

This card was a wonderful reminder that sometimes limiting yourself creatively can actually open the door to new ideas. It’s amazing how much interest you can create with a single color by simply varying the depth of ink, layering textures, and adding dimension.

Have you ever challenged yourself to create a true monochromatic card using just one color? I’d love to hear which color you would choose or better yet share your creation in the comments or on my social media.

No matter where your creative journey takes you, I’m so glad you’re here. Let’s learn, create, connect, and grow together—one project at a time. 🦋

A beautifully crafted Christmas card featuring a window scene that displays a peaceful nativity setting on one side, while the inside is adorned with cozy holiday elements like hanging stockings and warm colors.

💕 Let’s Stay Connected

📺 YouTube 📘 Facebook 📸 Instagram 📌 Pinterest

Craft Unique Shaped Cards for Any Occasion

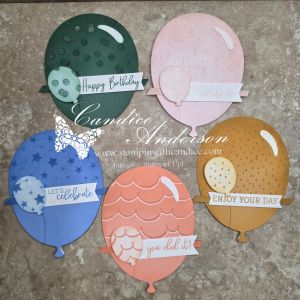
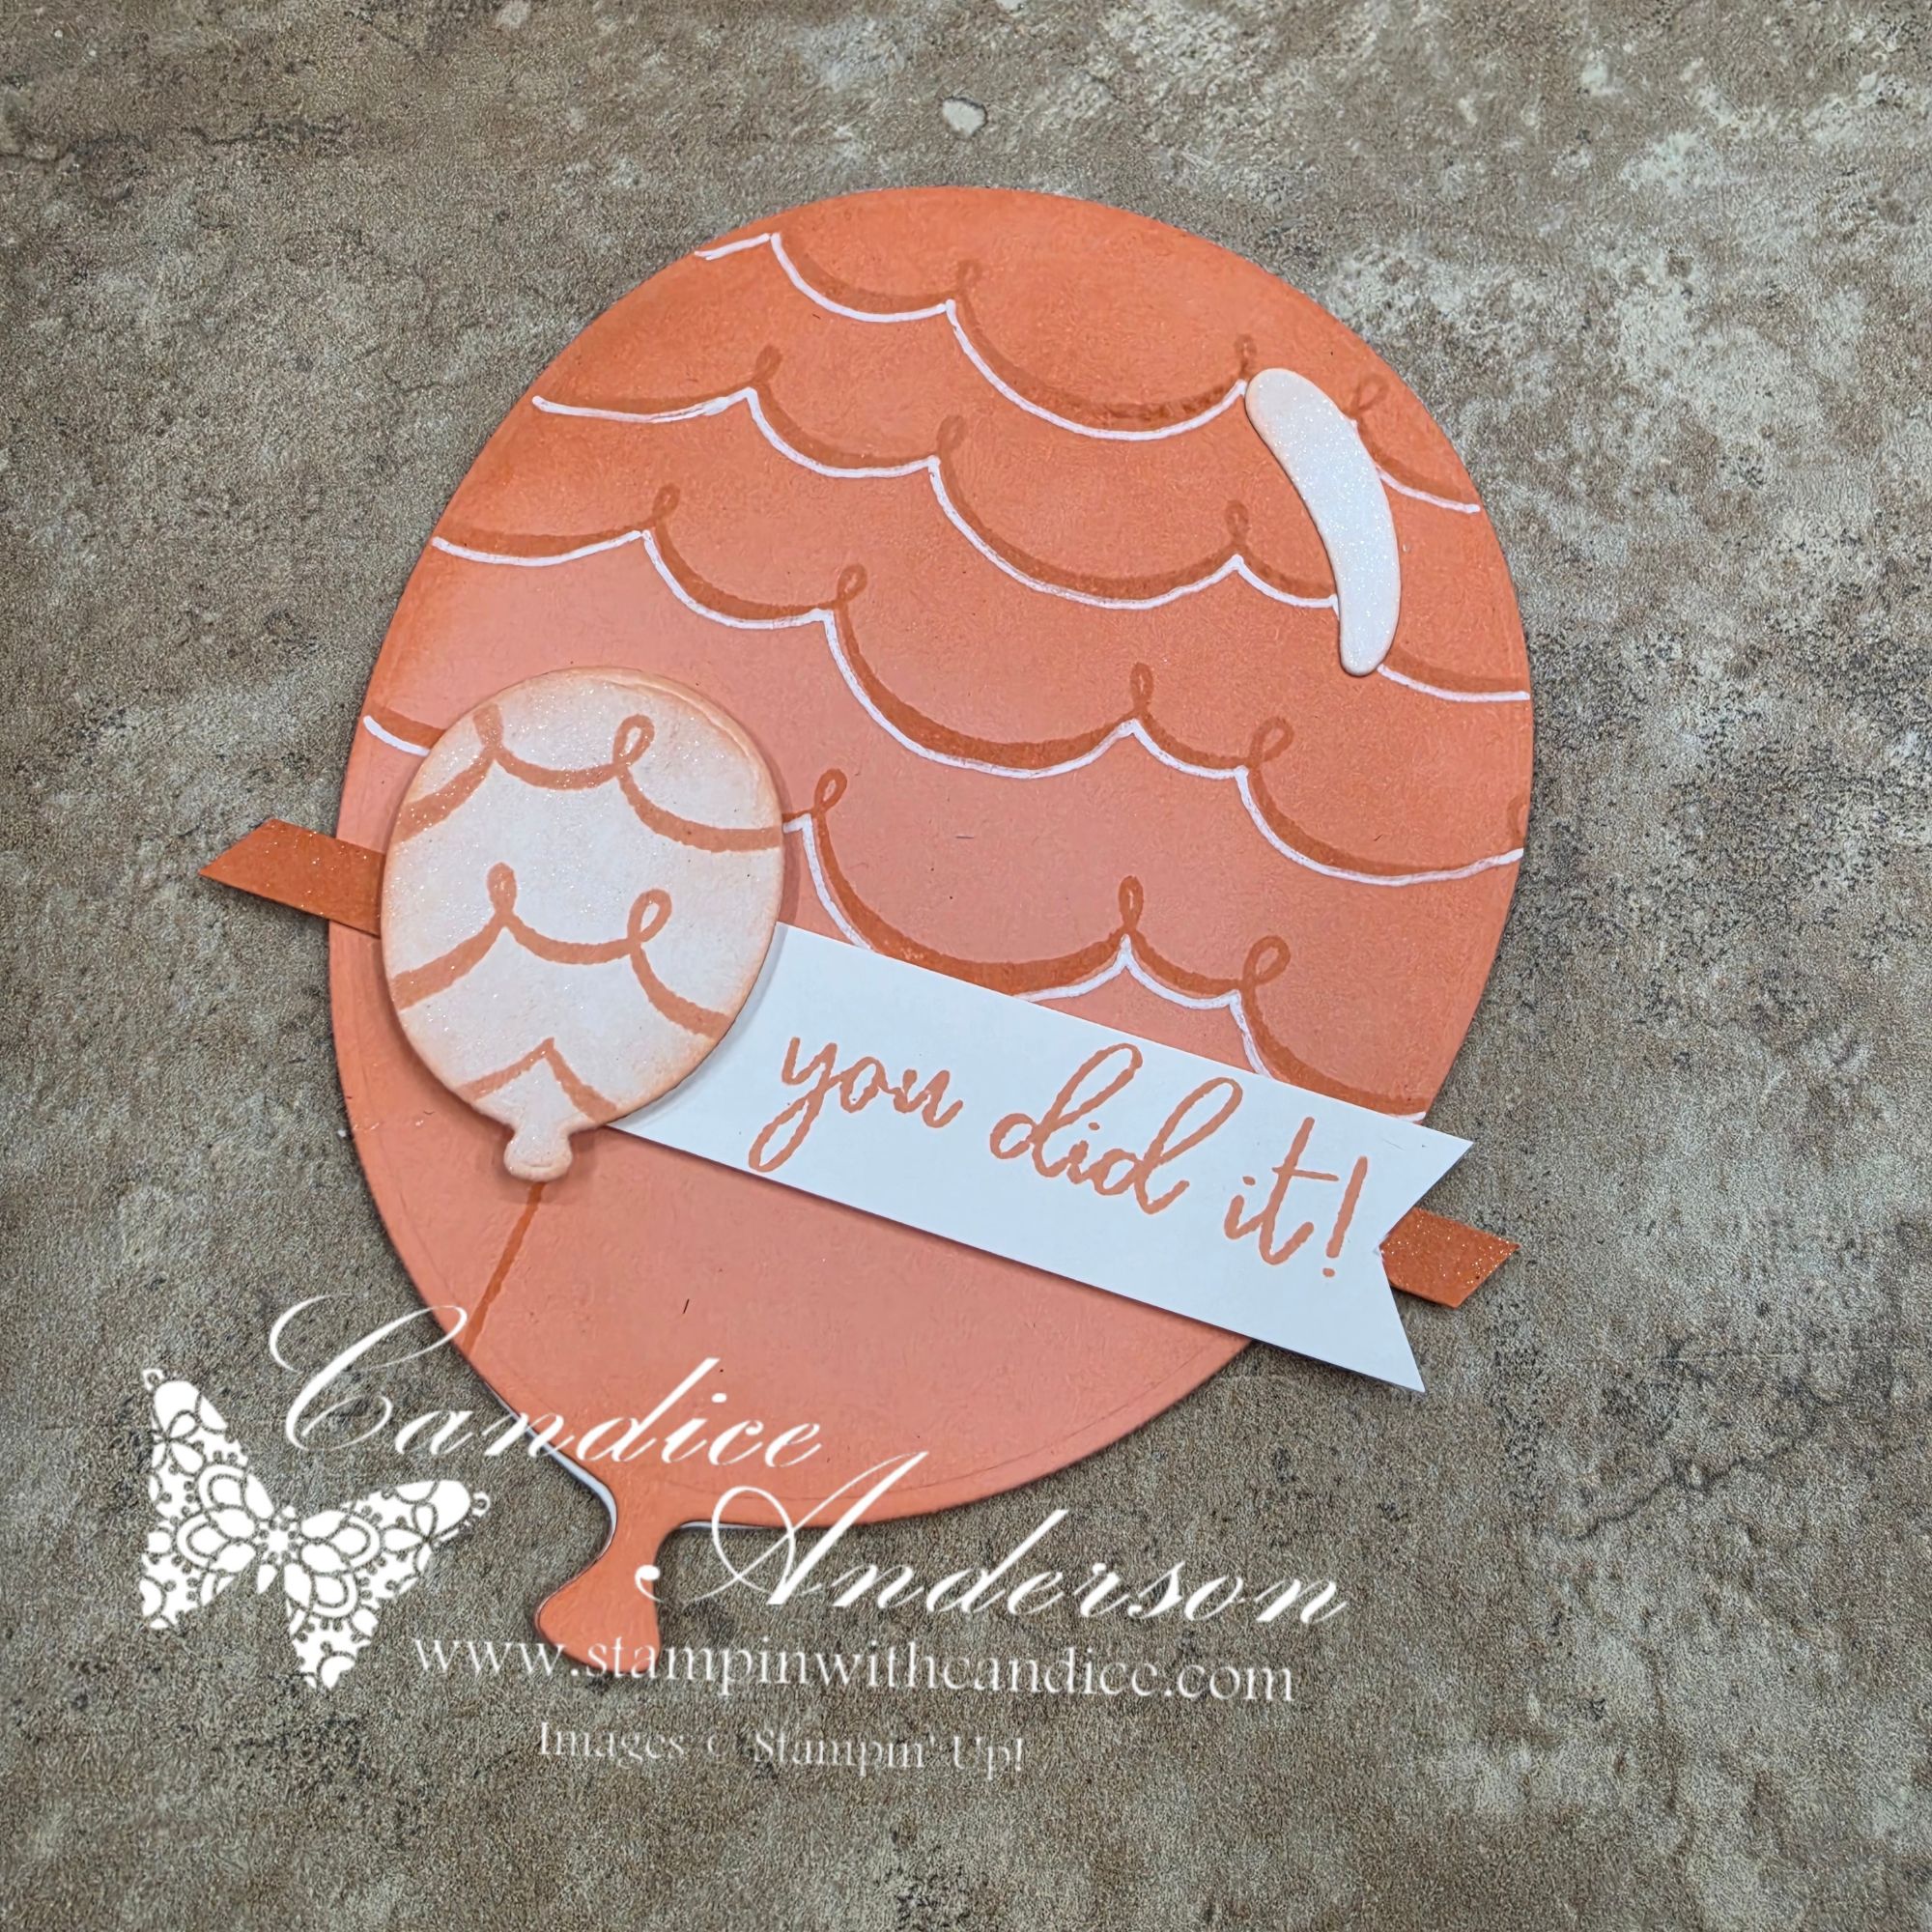
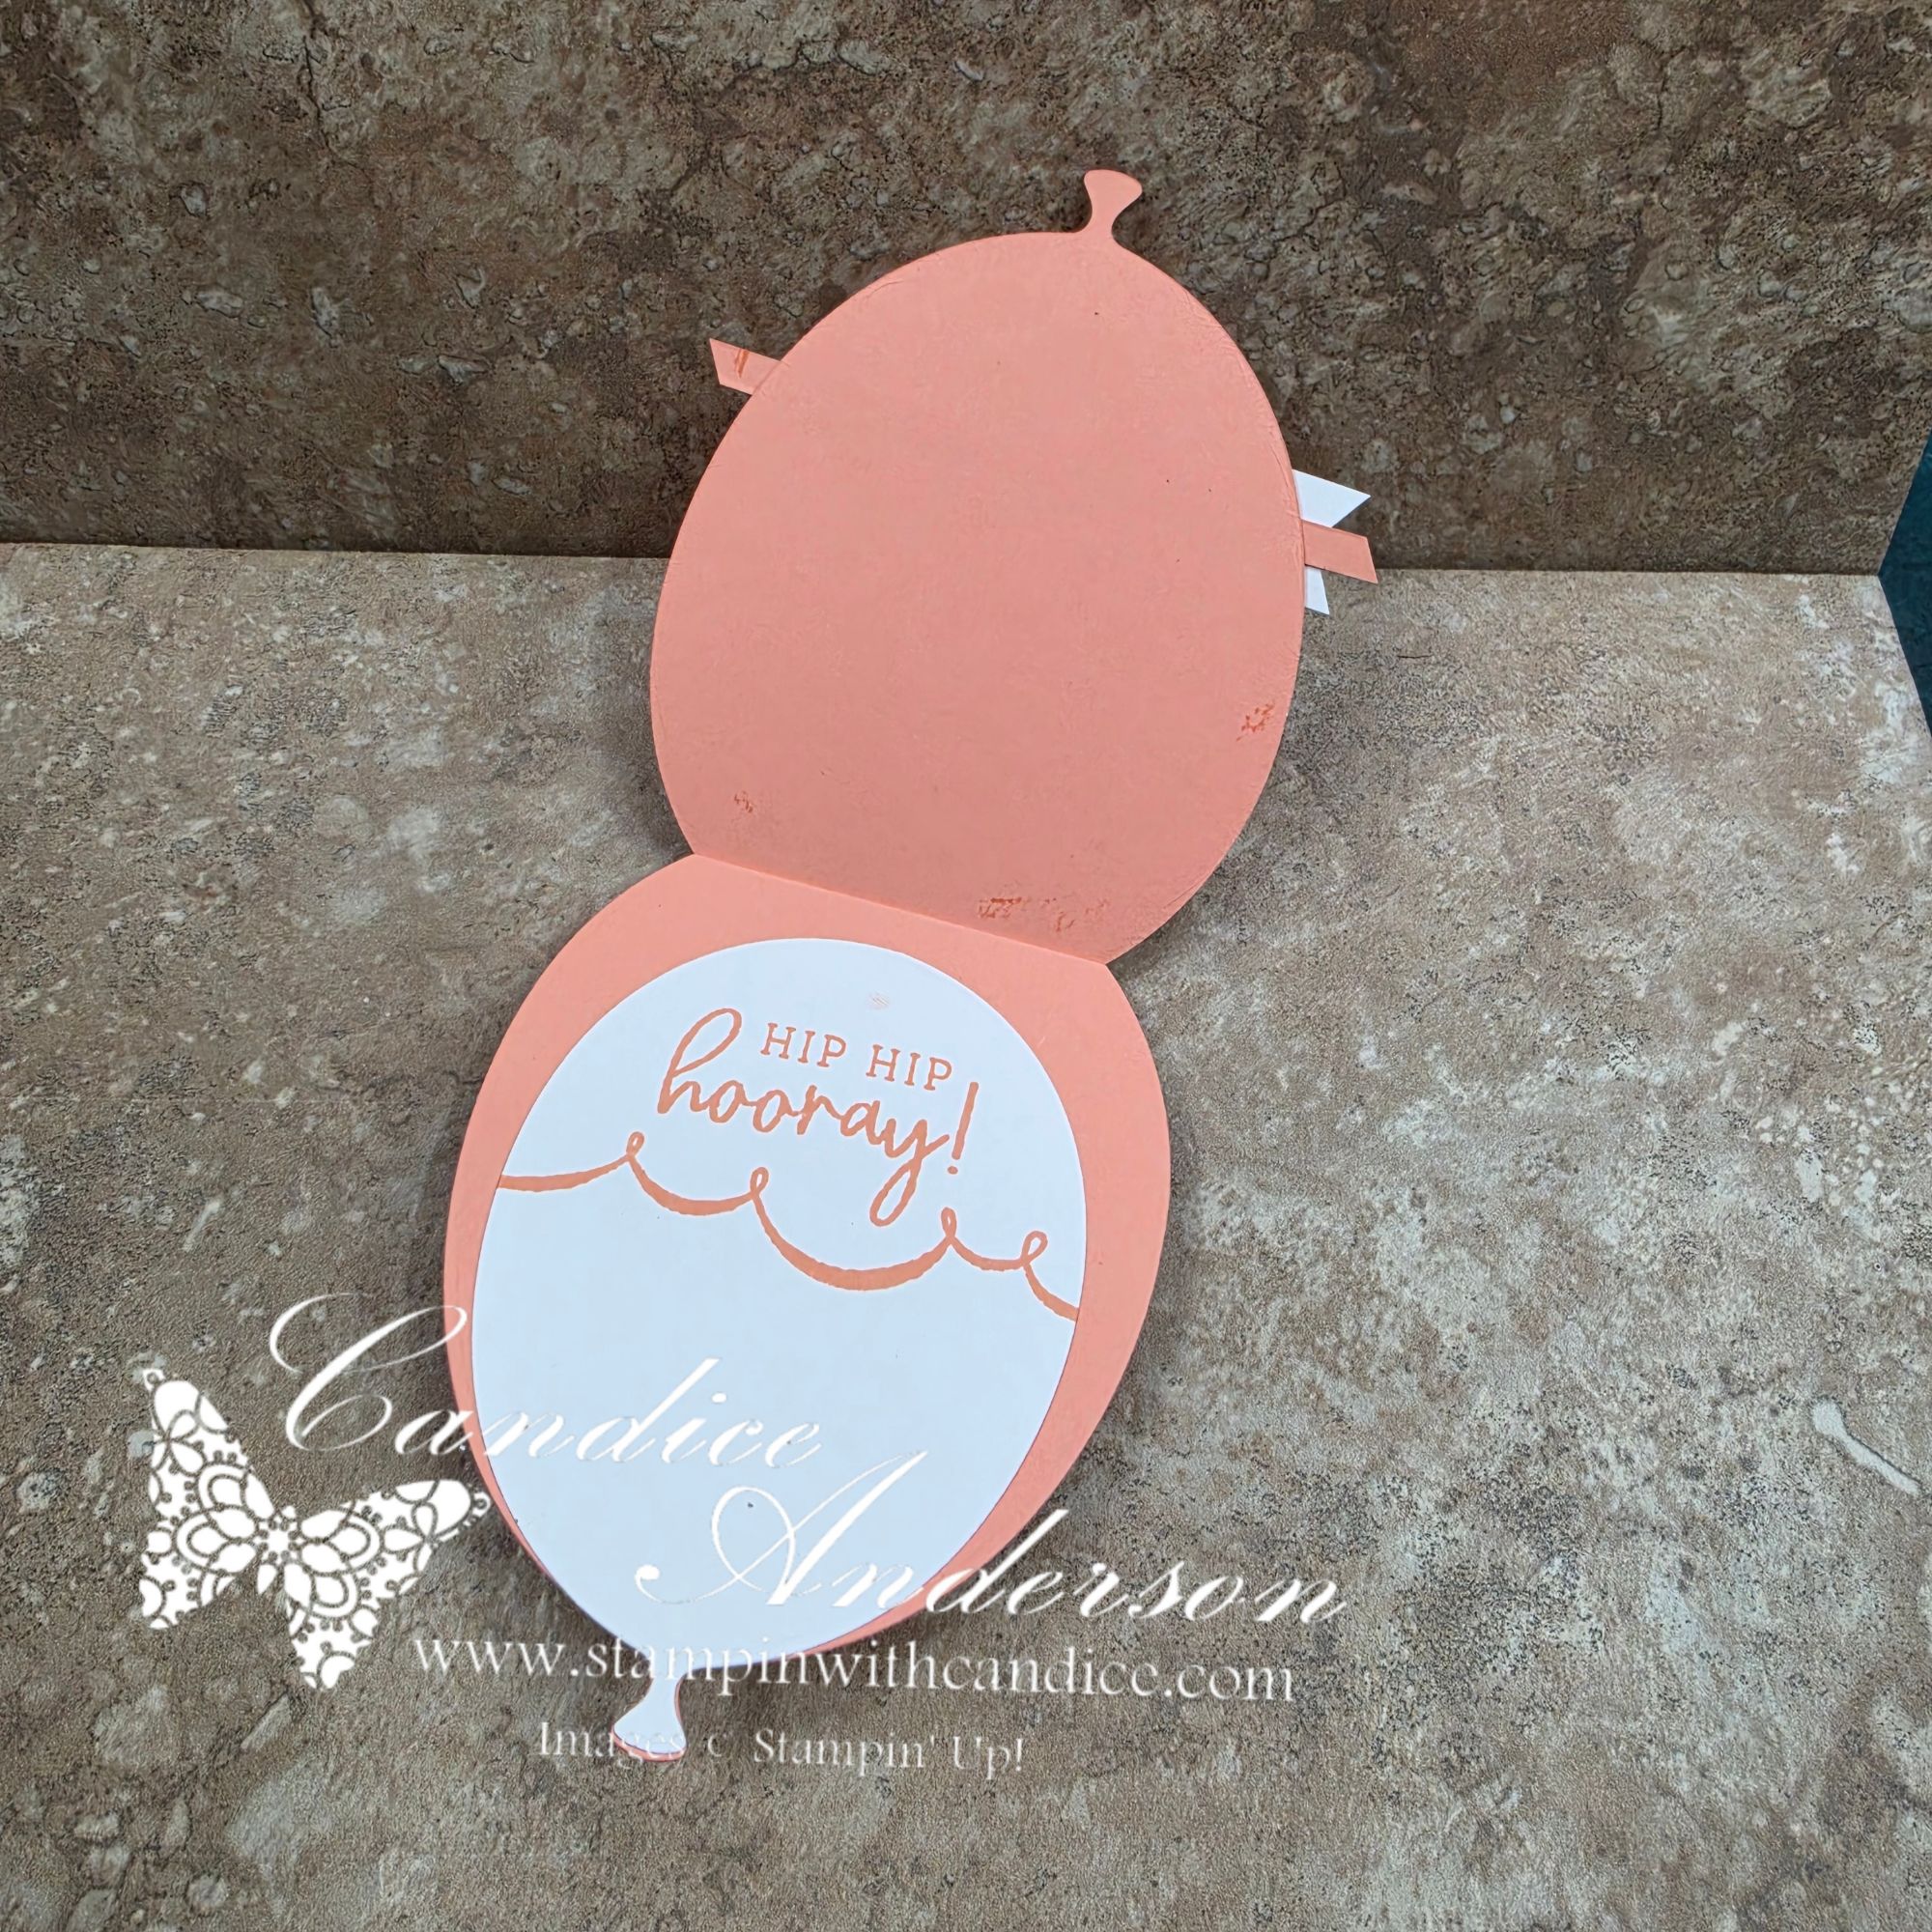
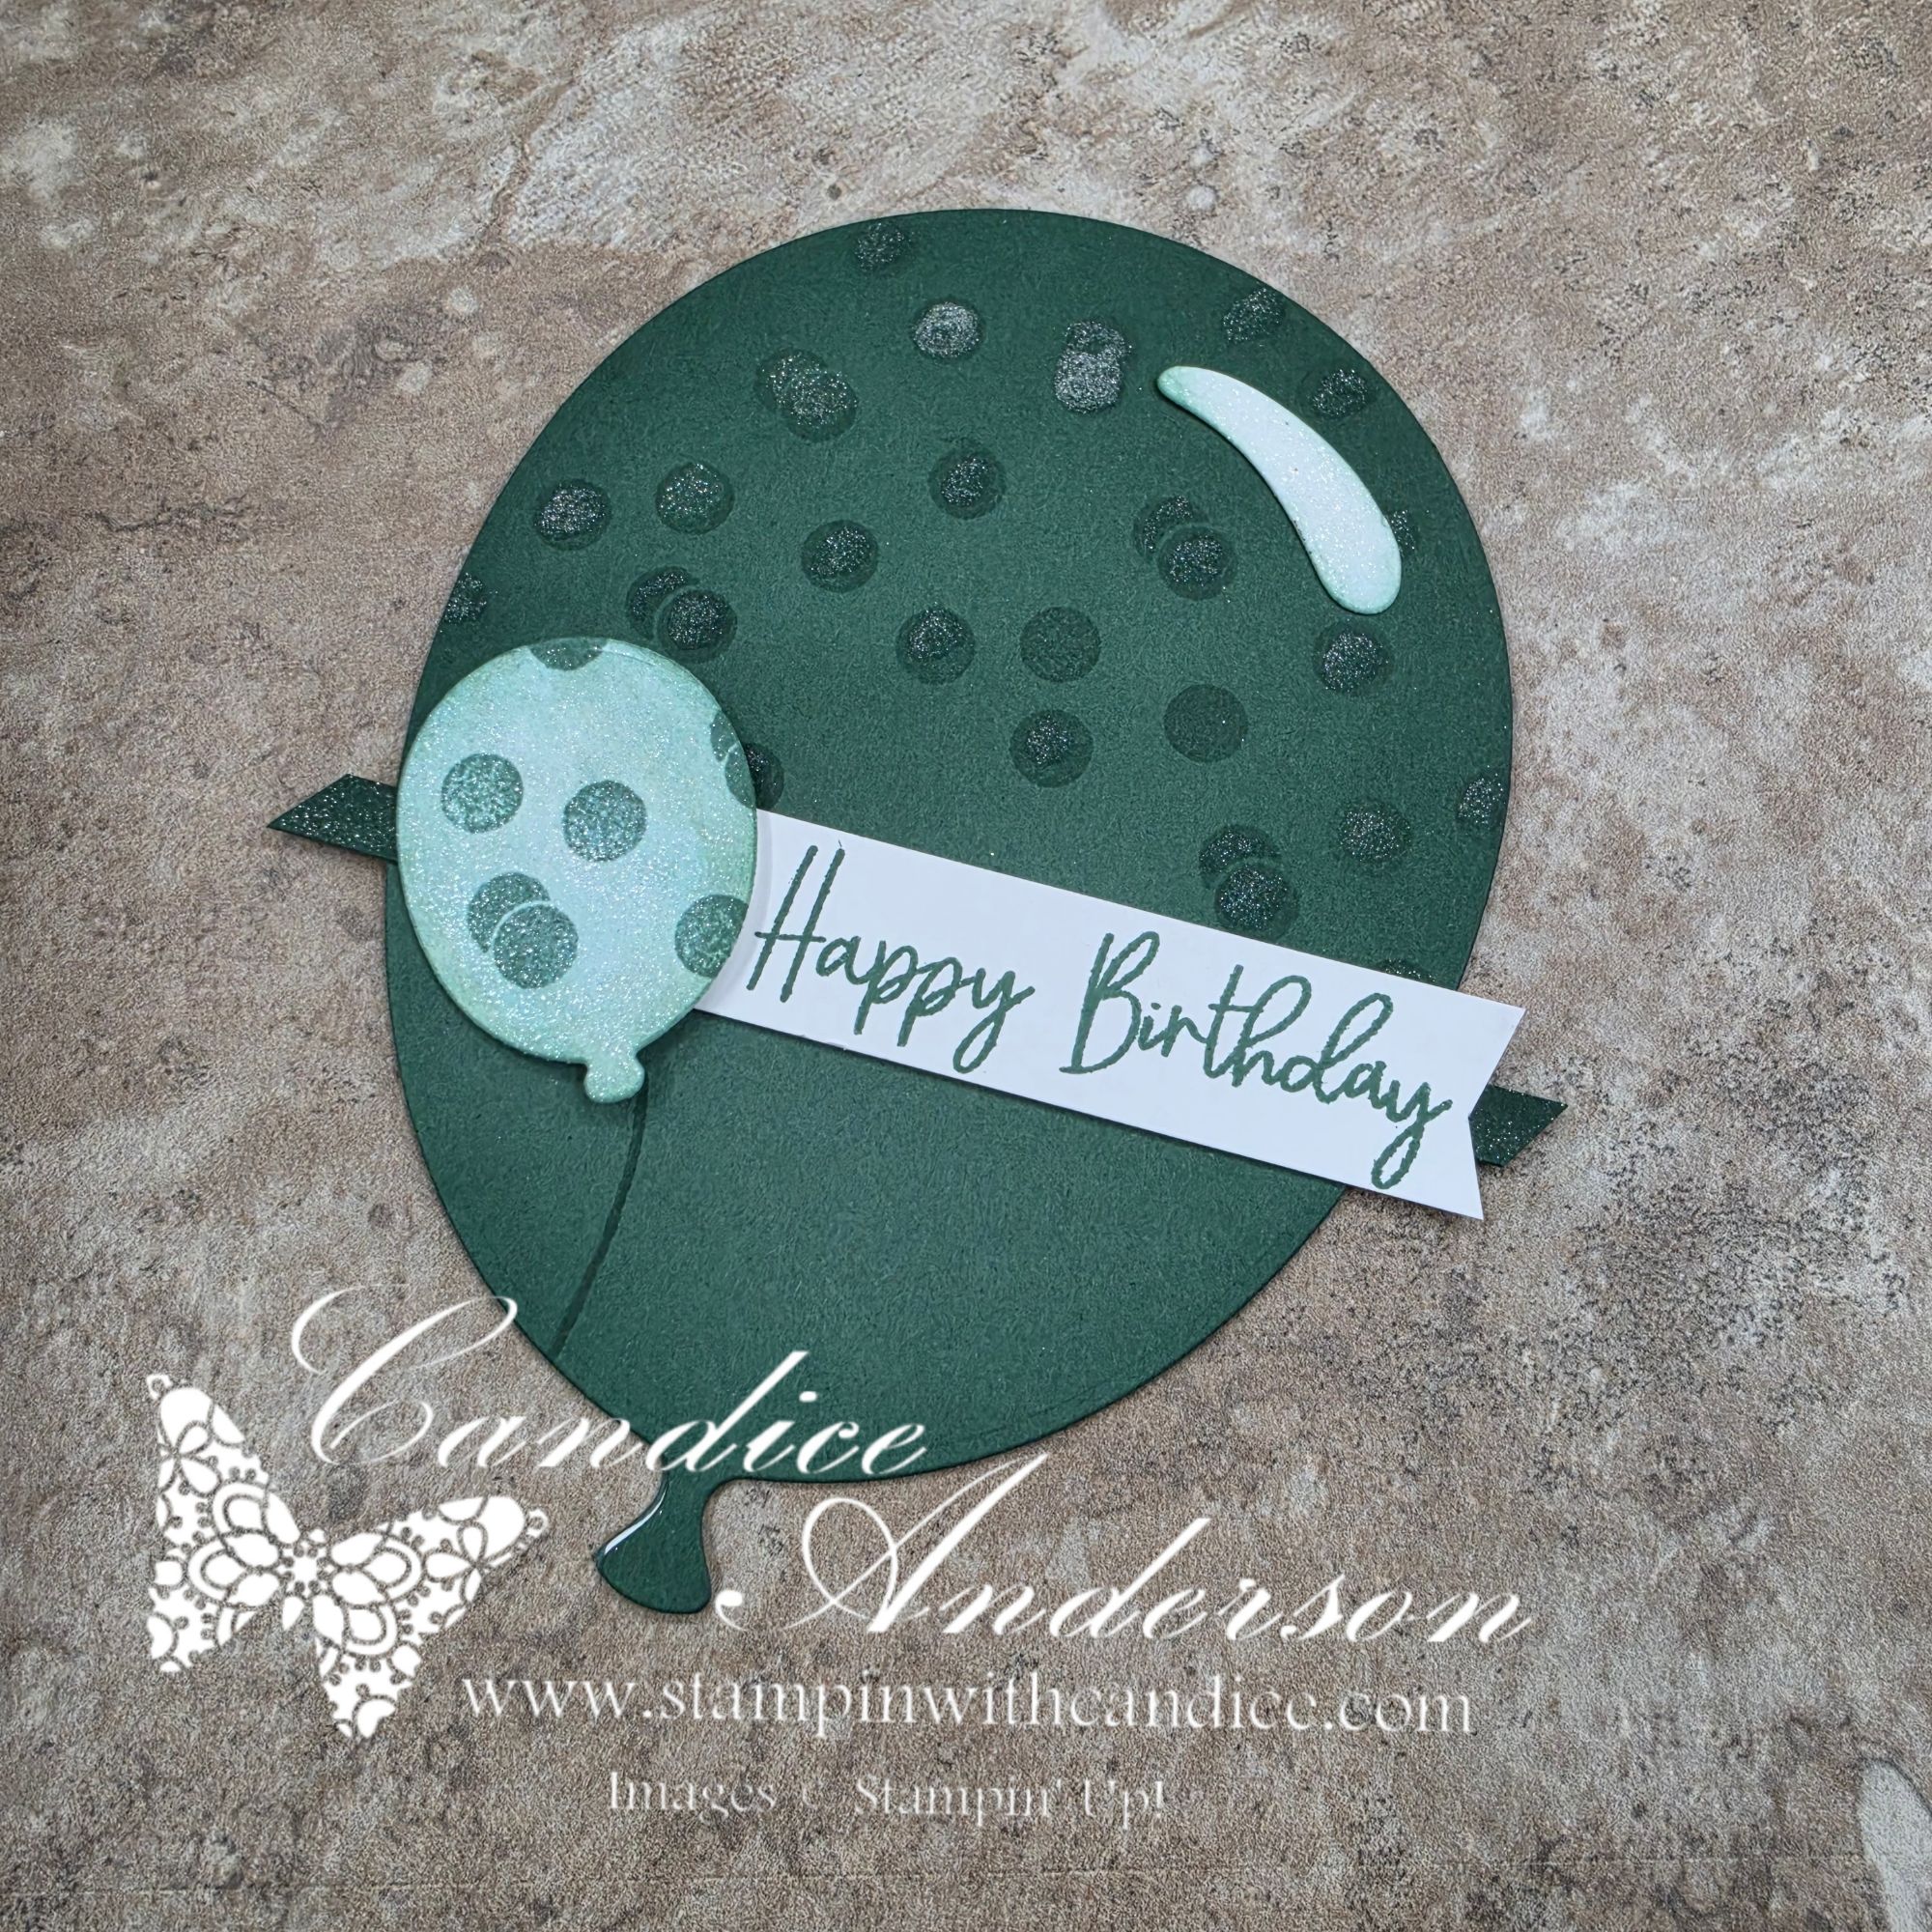
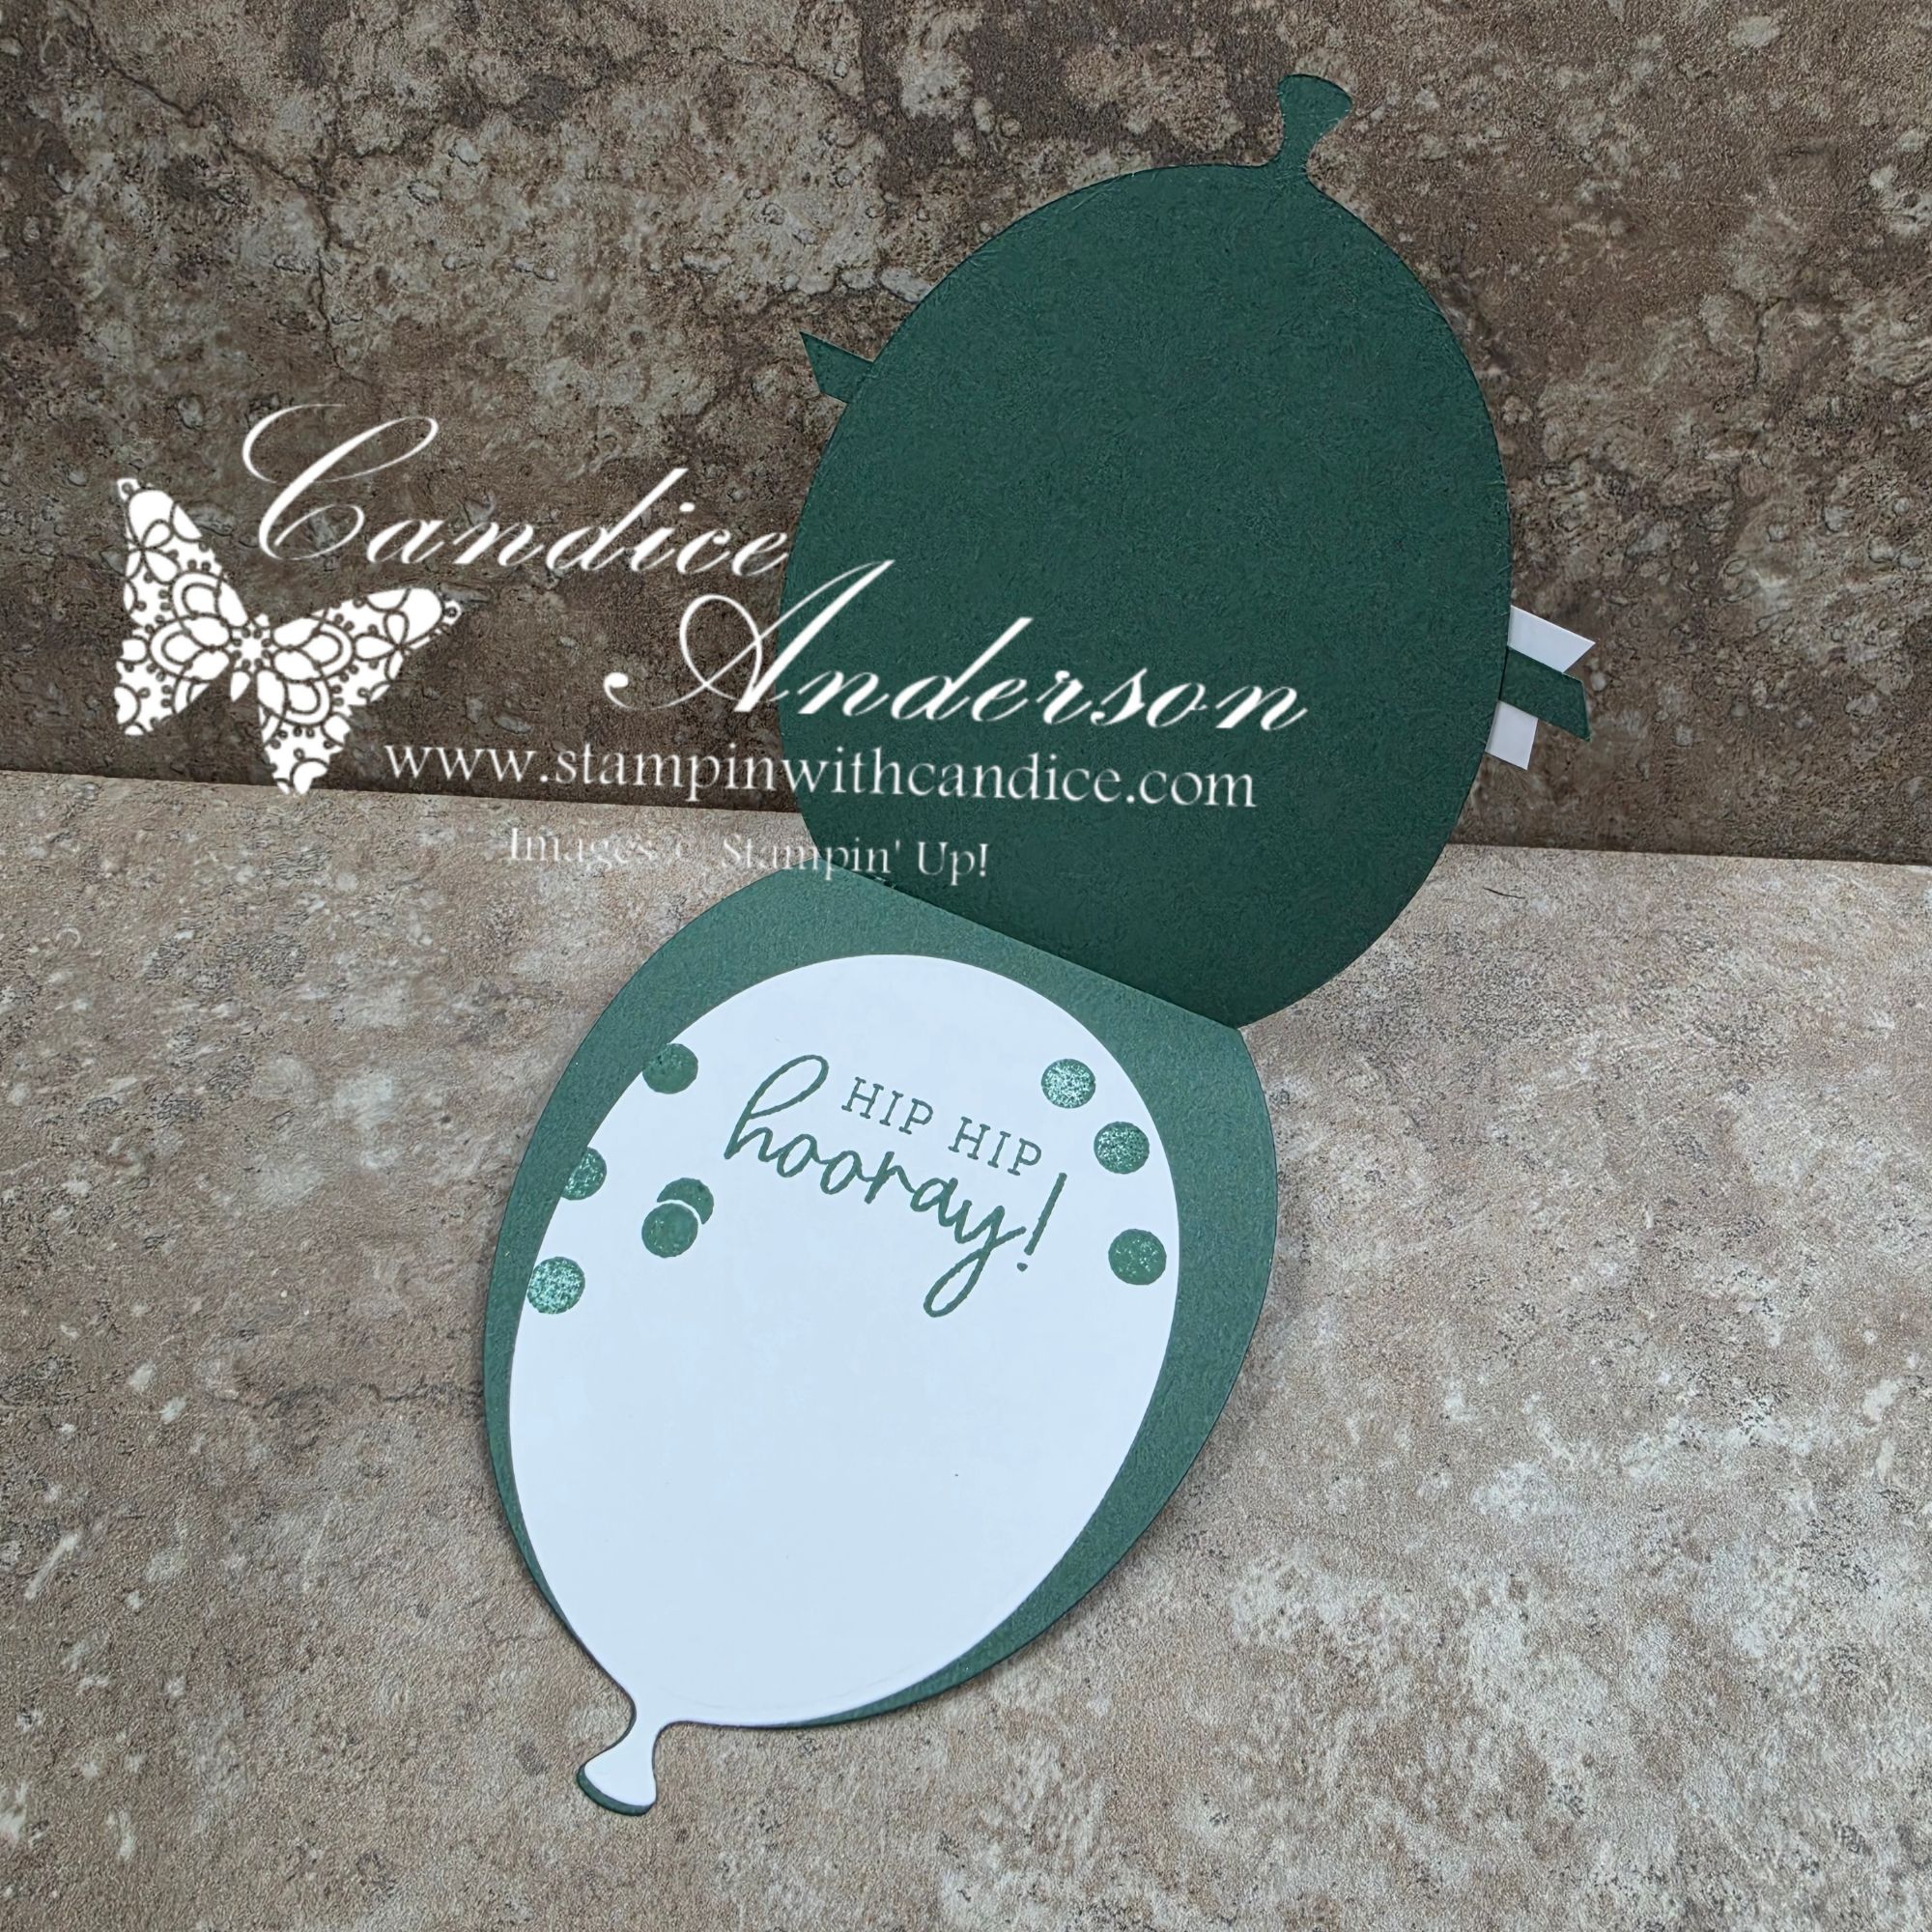
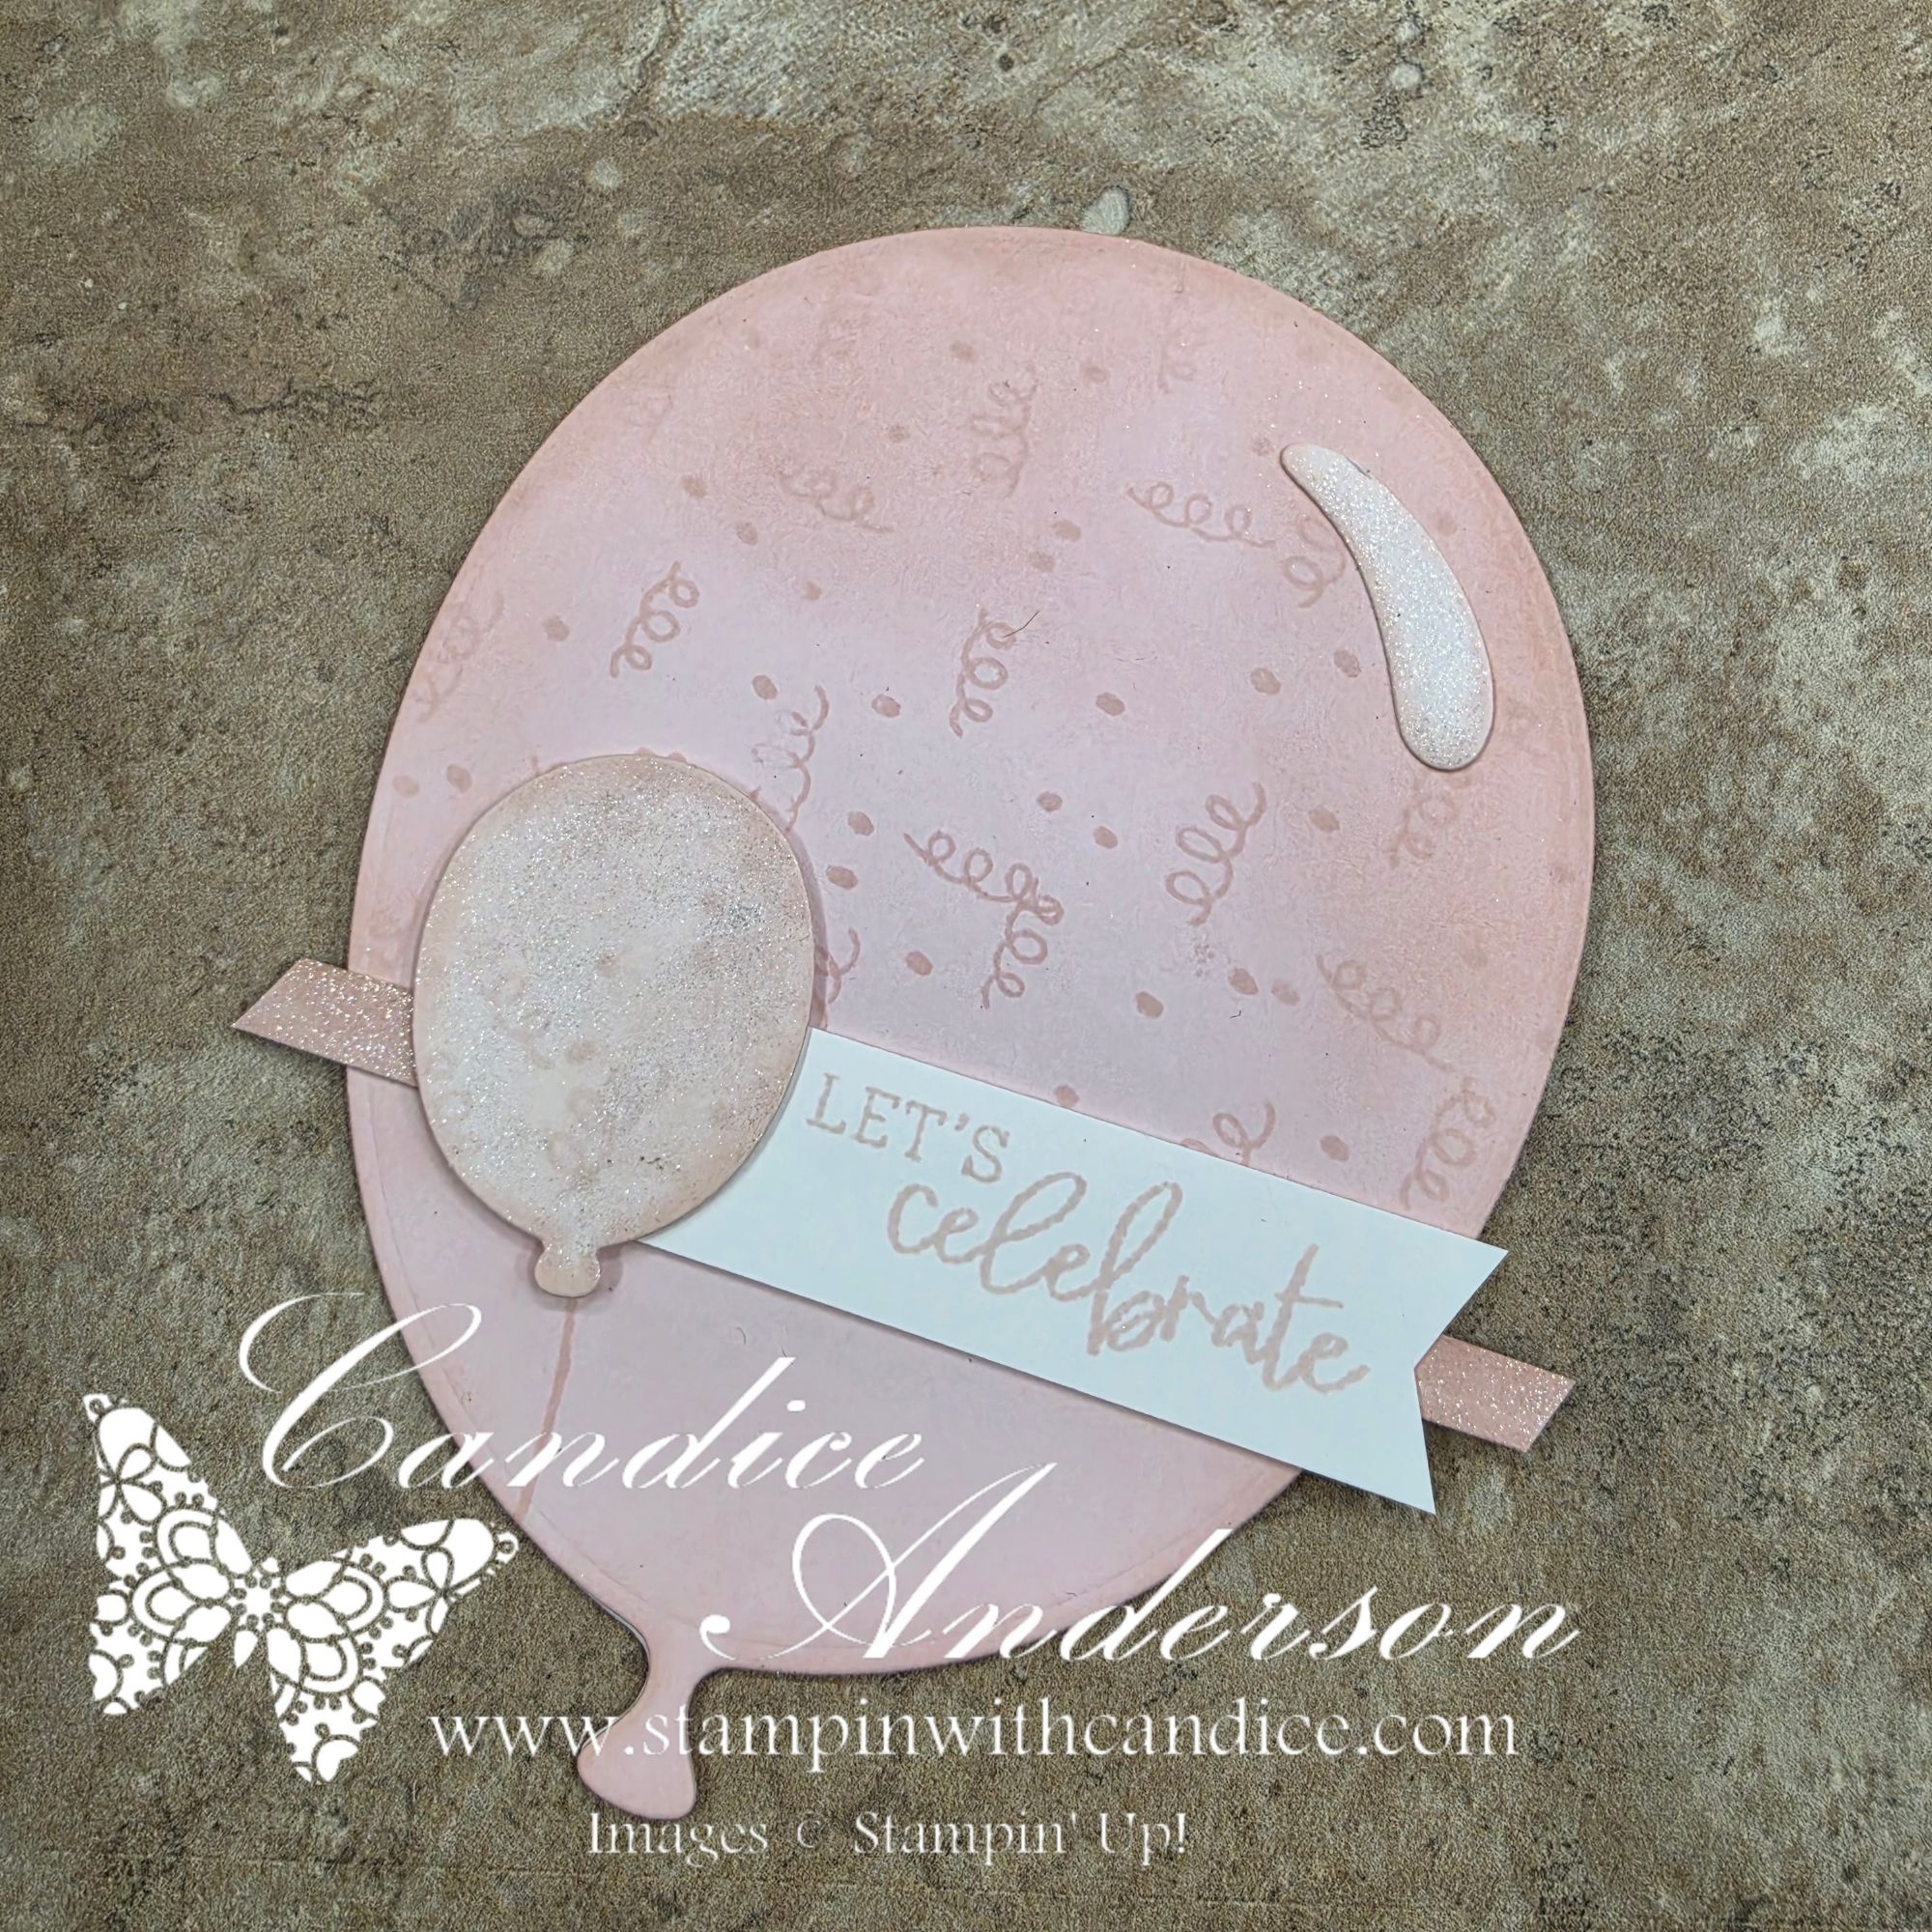
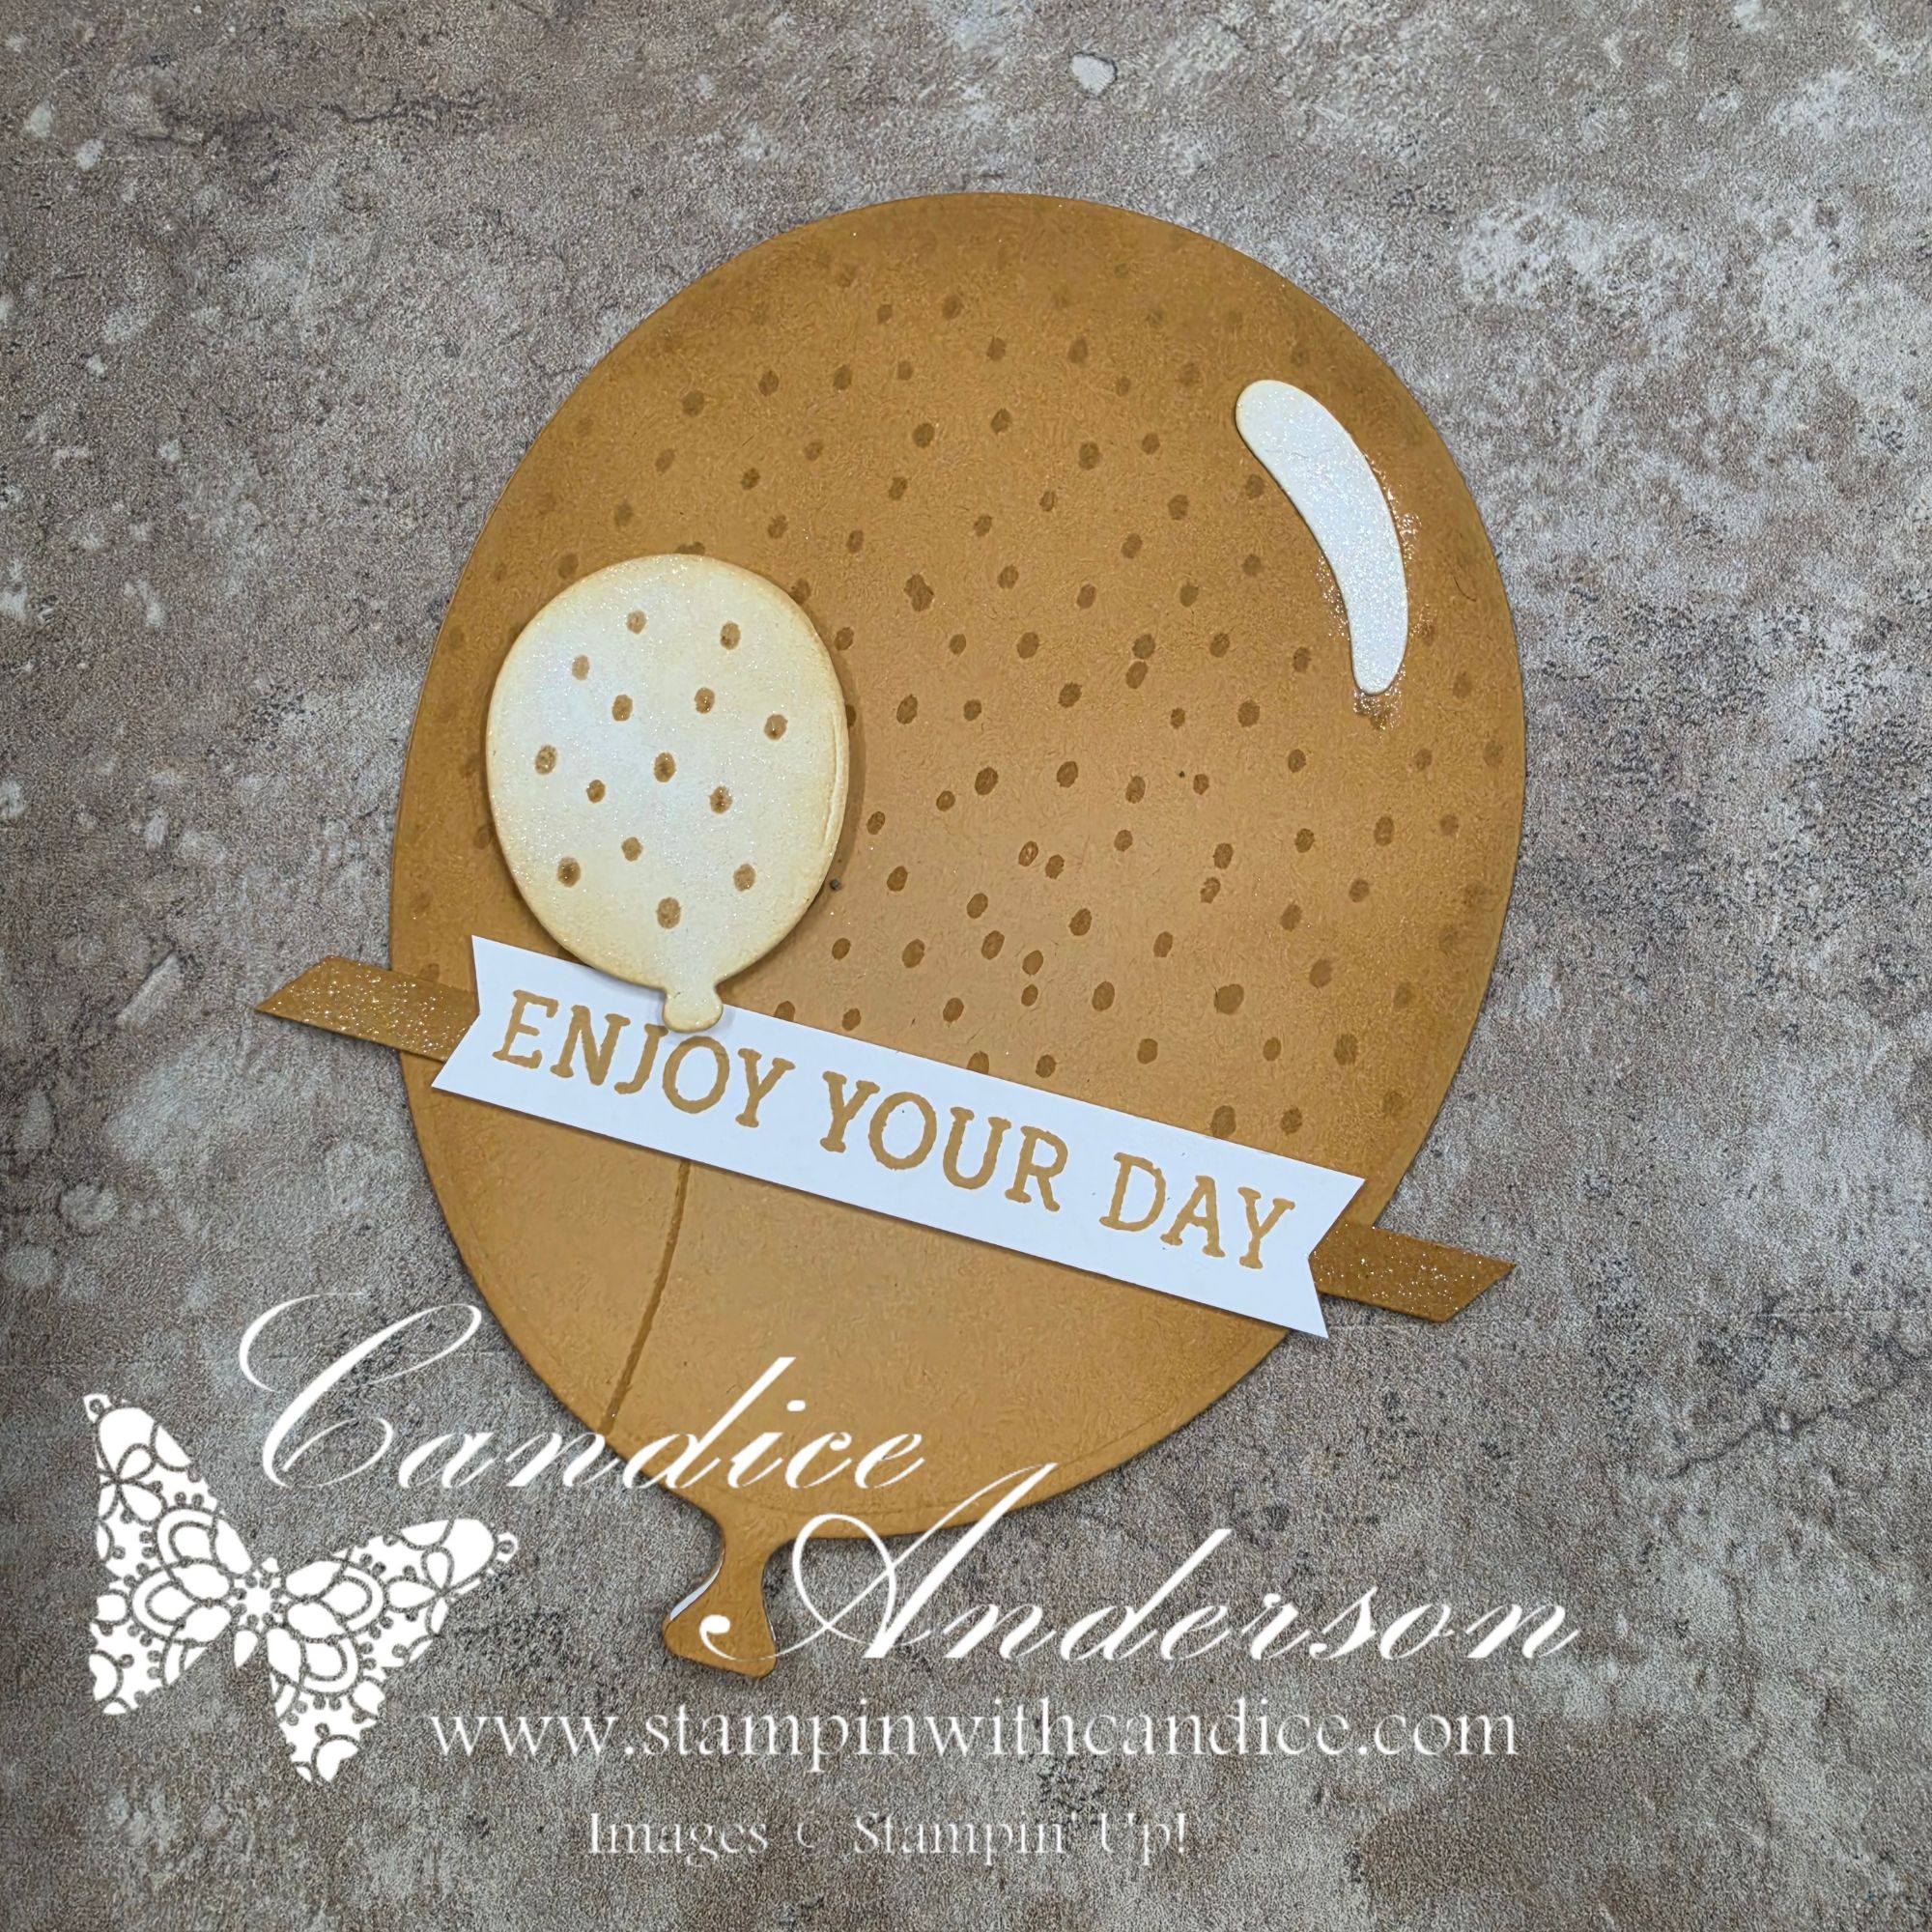
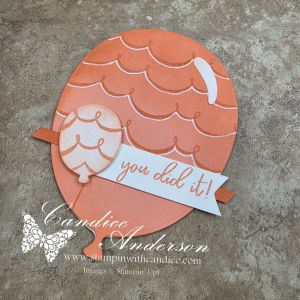
On my live this week, I shared how easy it is to create fun shaped cards using your larger dies. These cards are quick to make, full of personality, and a great way to add a little extra wow to your projects.

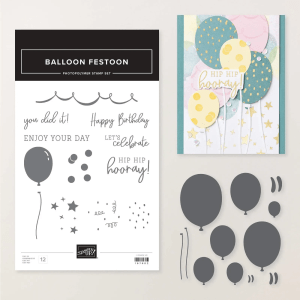
For today’s cards, I featured the Balloon Festoon Bundle #167606, which includes these fabulous oversized balloon dies. I was inspired by my friend Amelia, who demonstrated a simple technique for turning almost any large die shape into a card base. And bonus depending on which one you choose they can still fit in a standard size envelope.

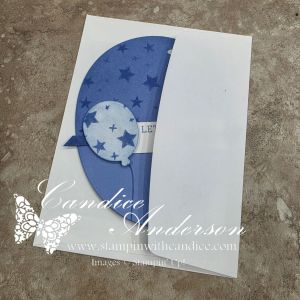
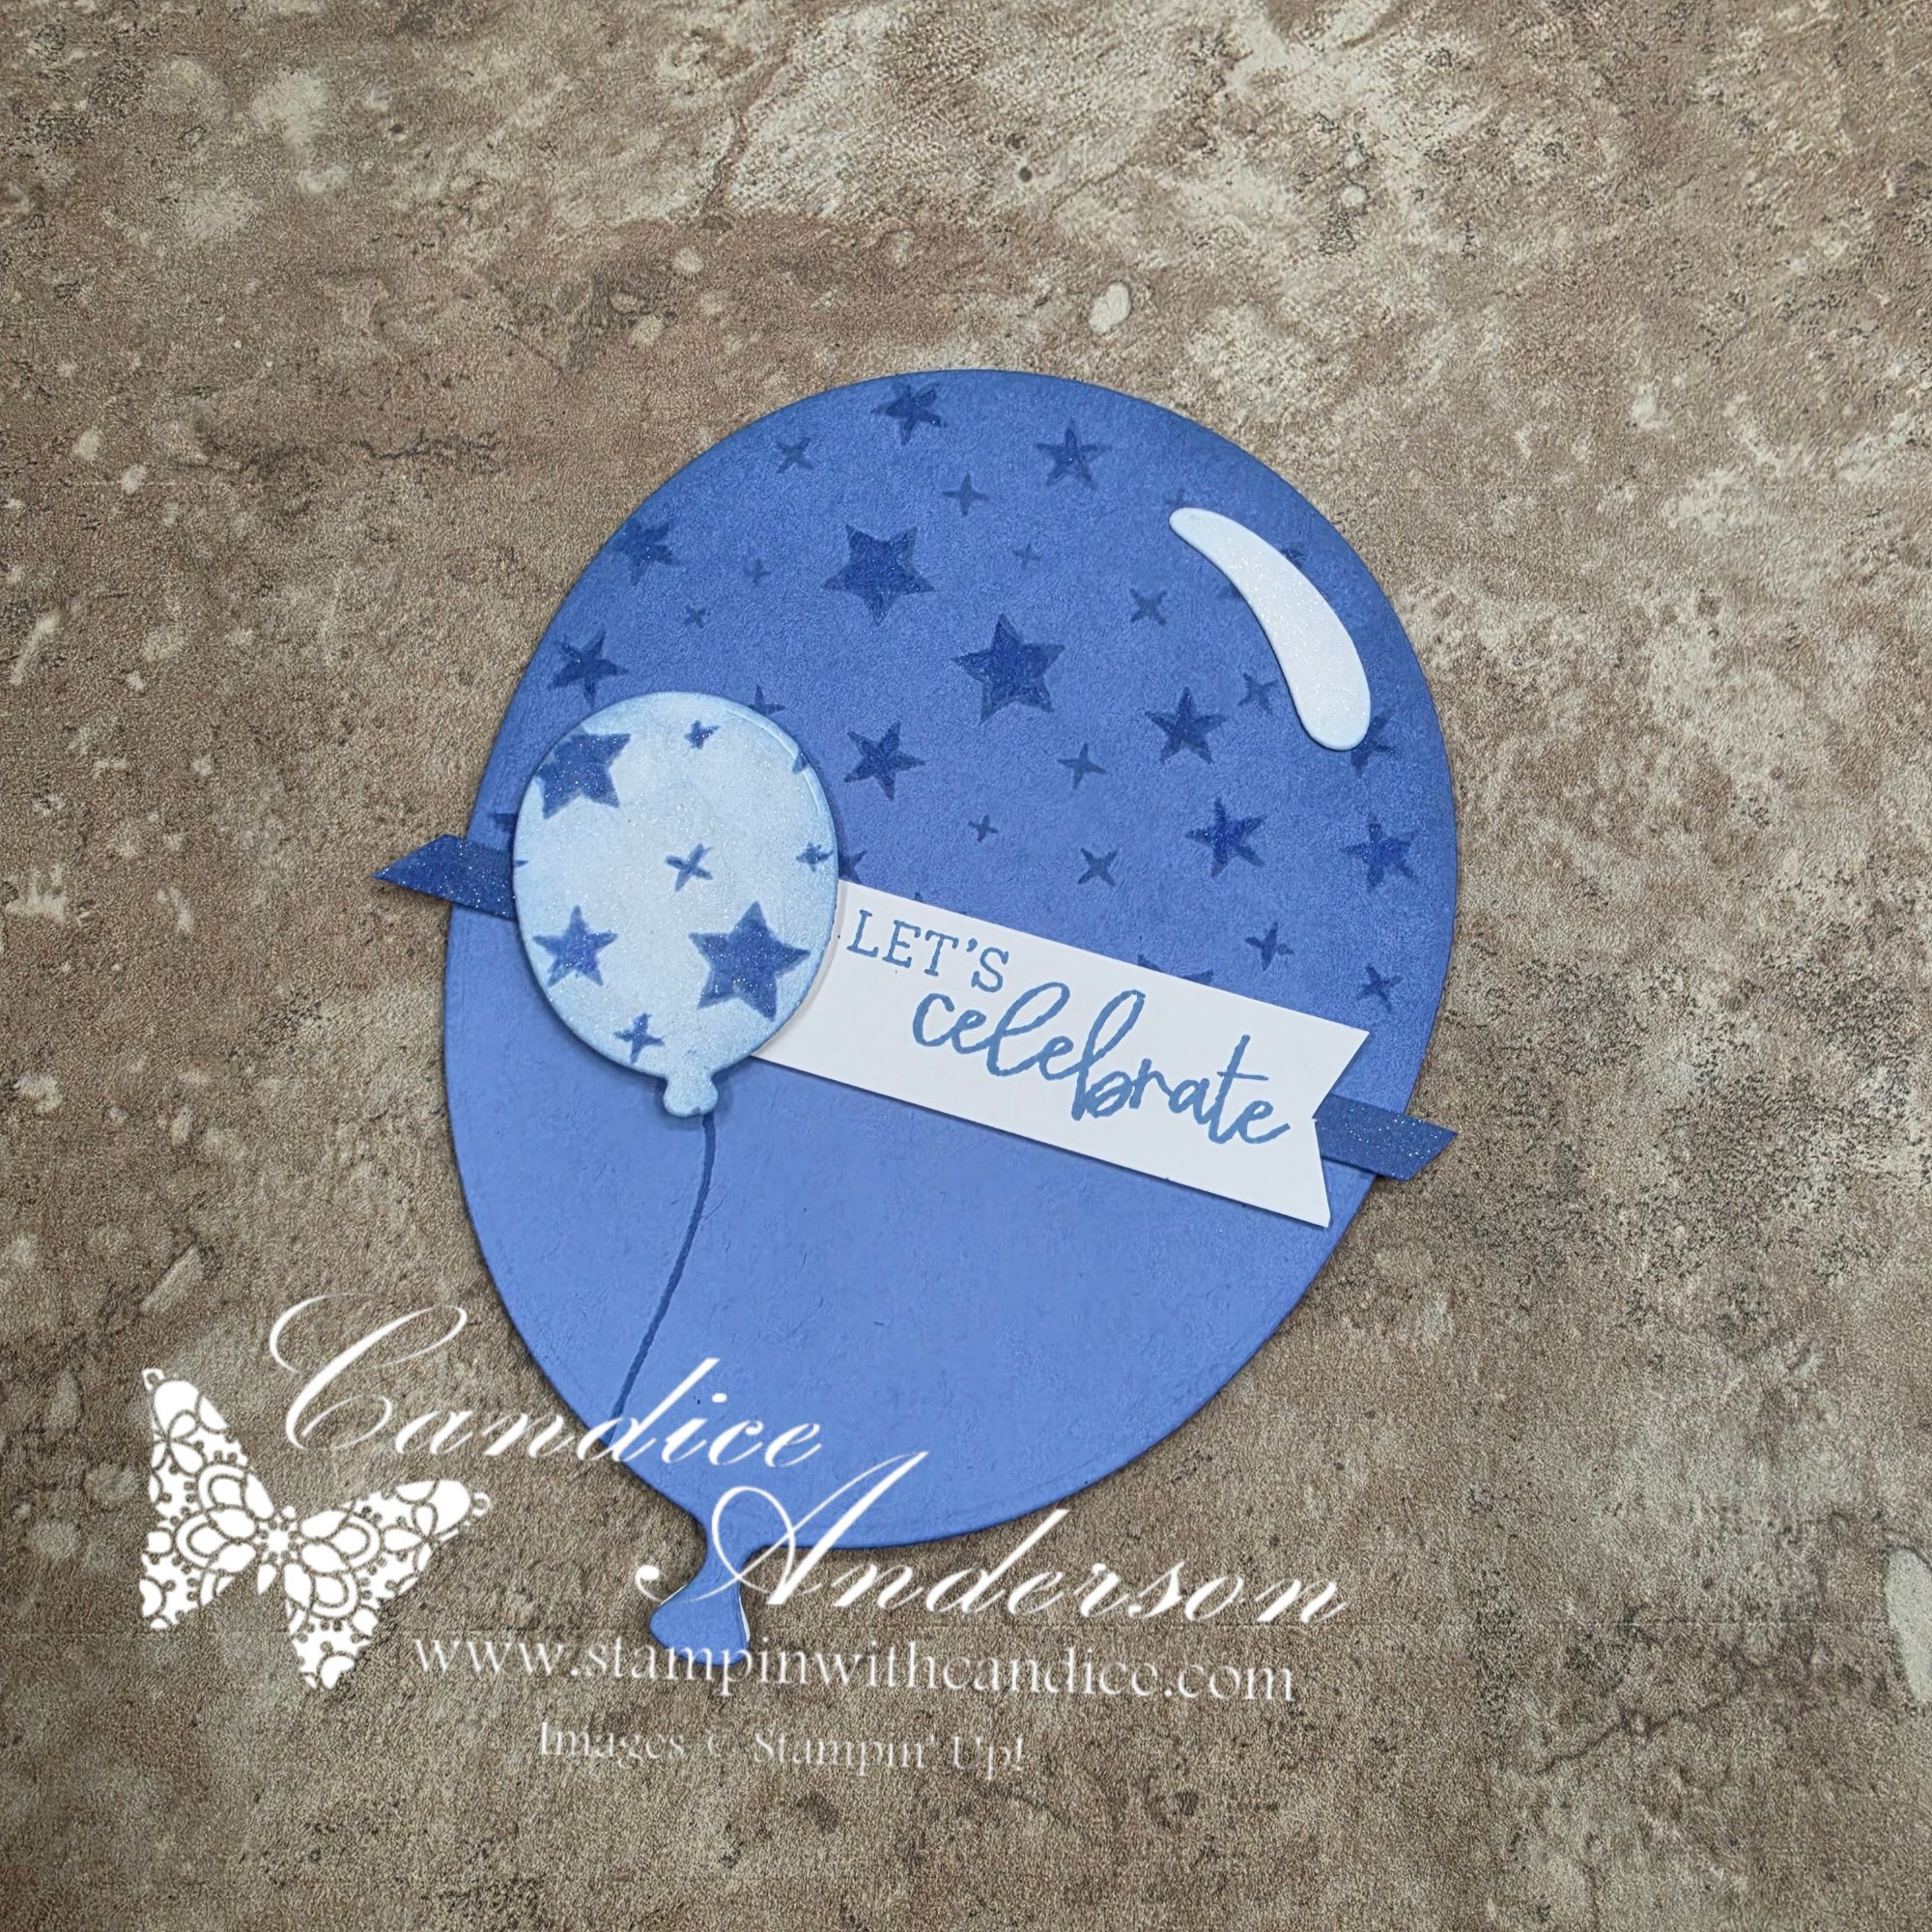
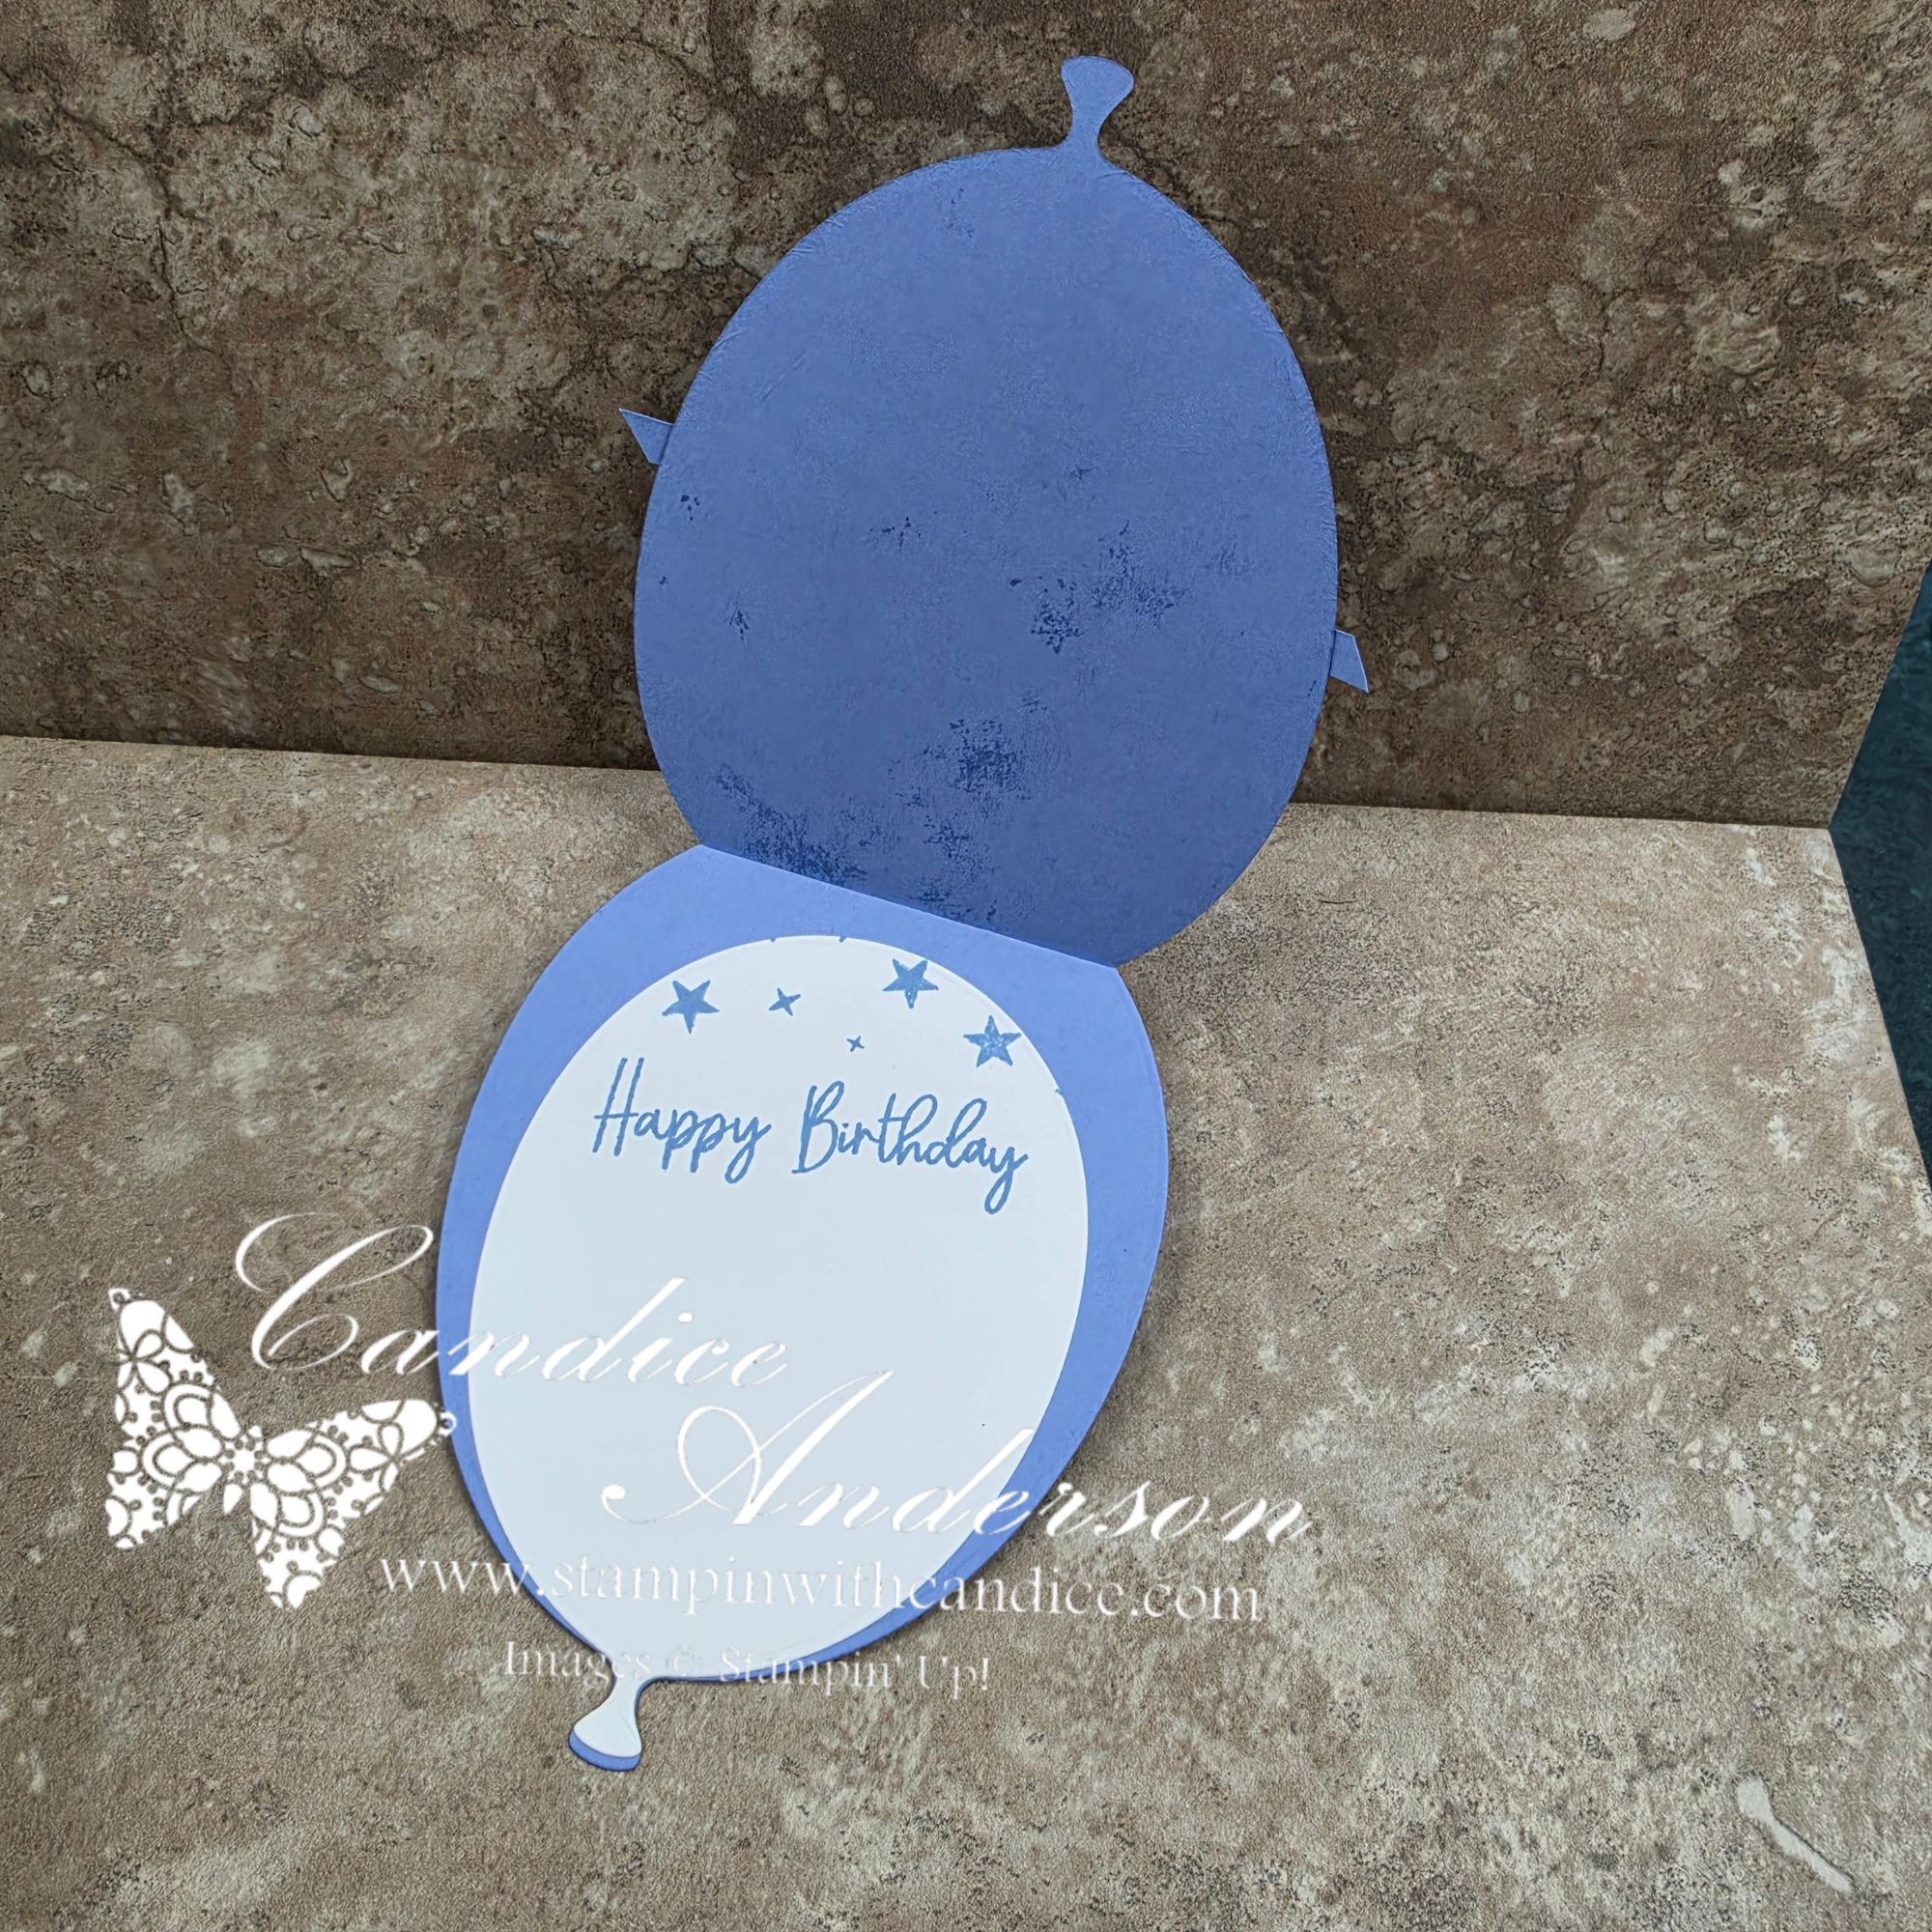
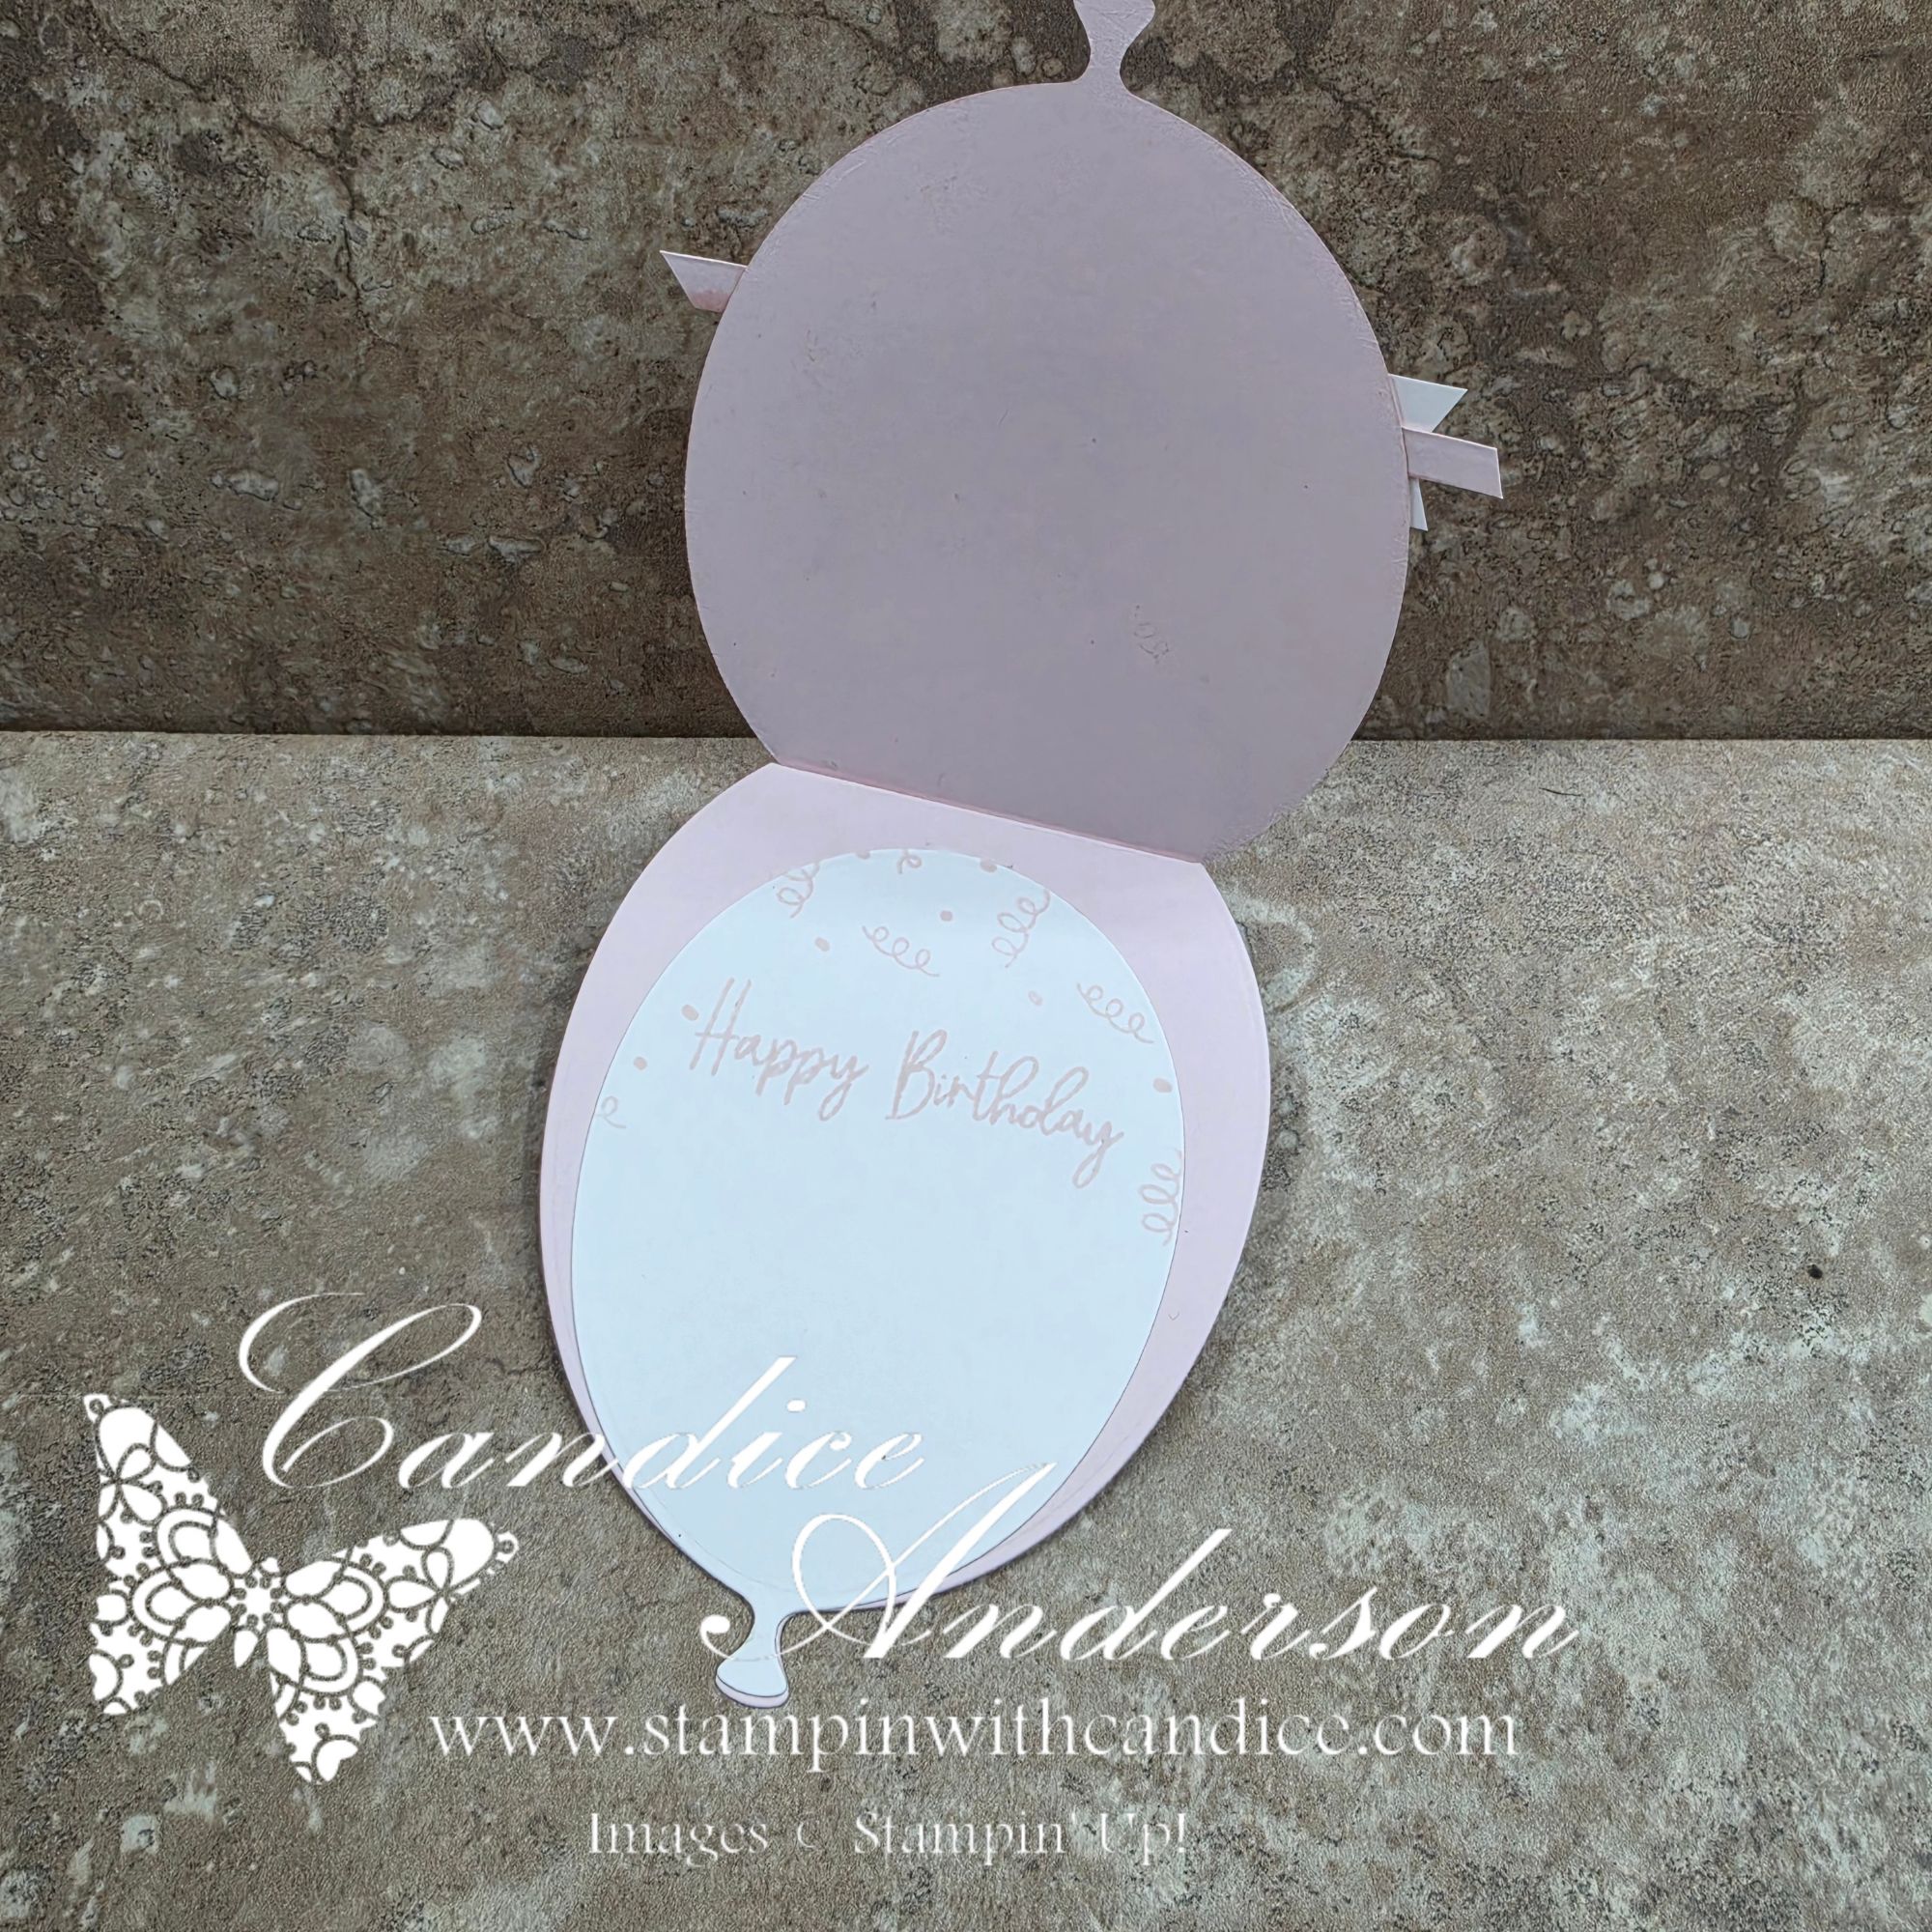
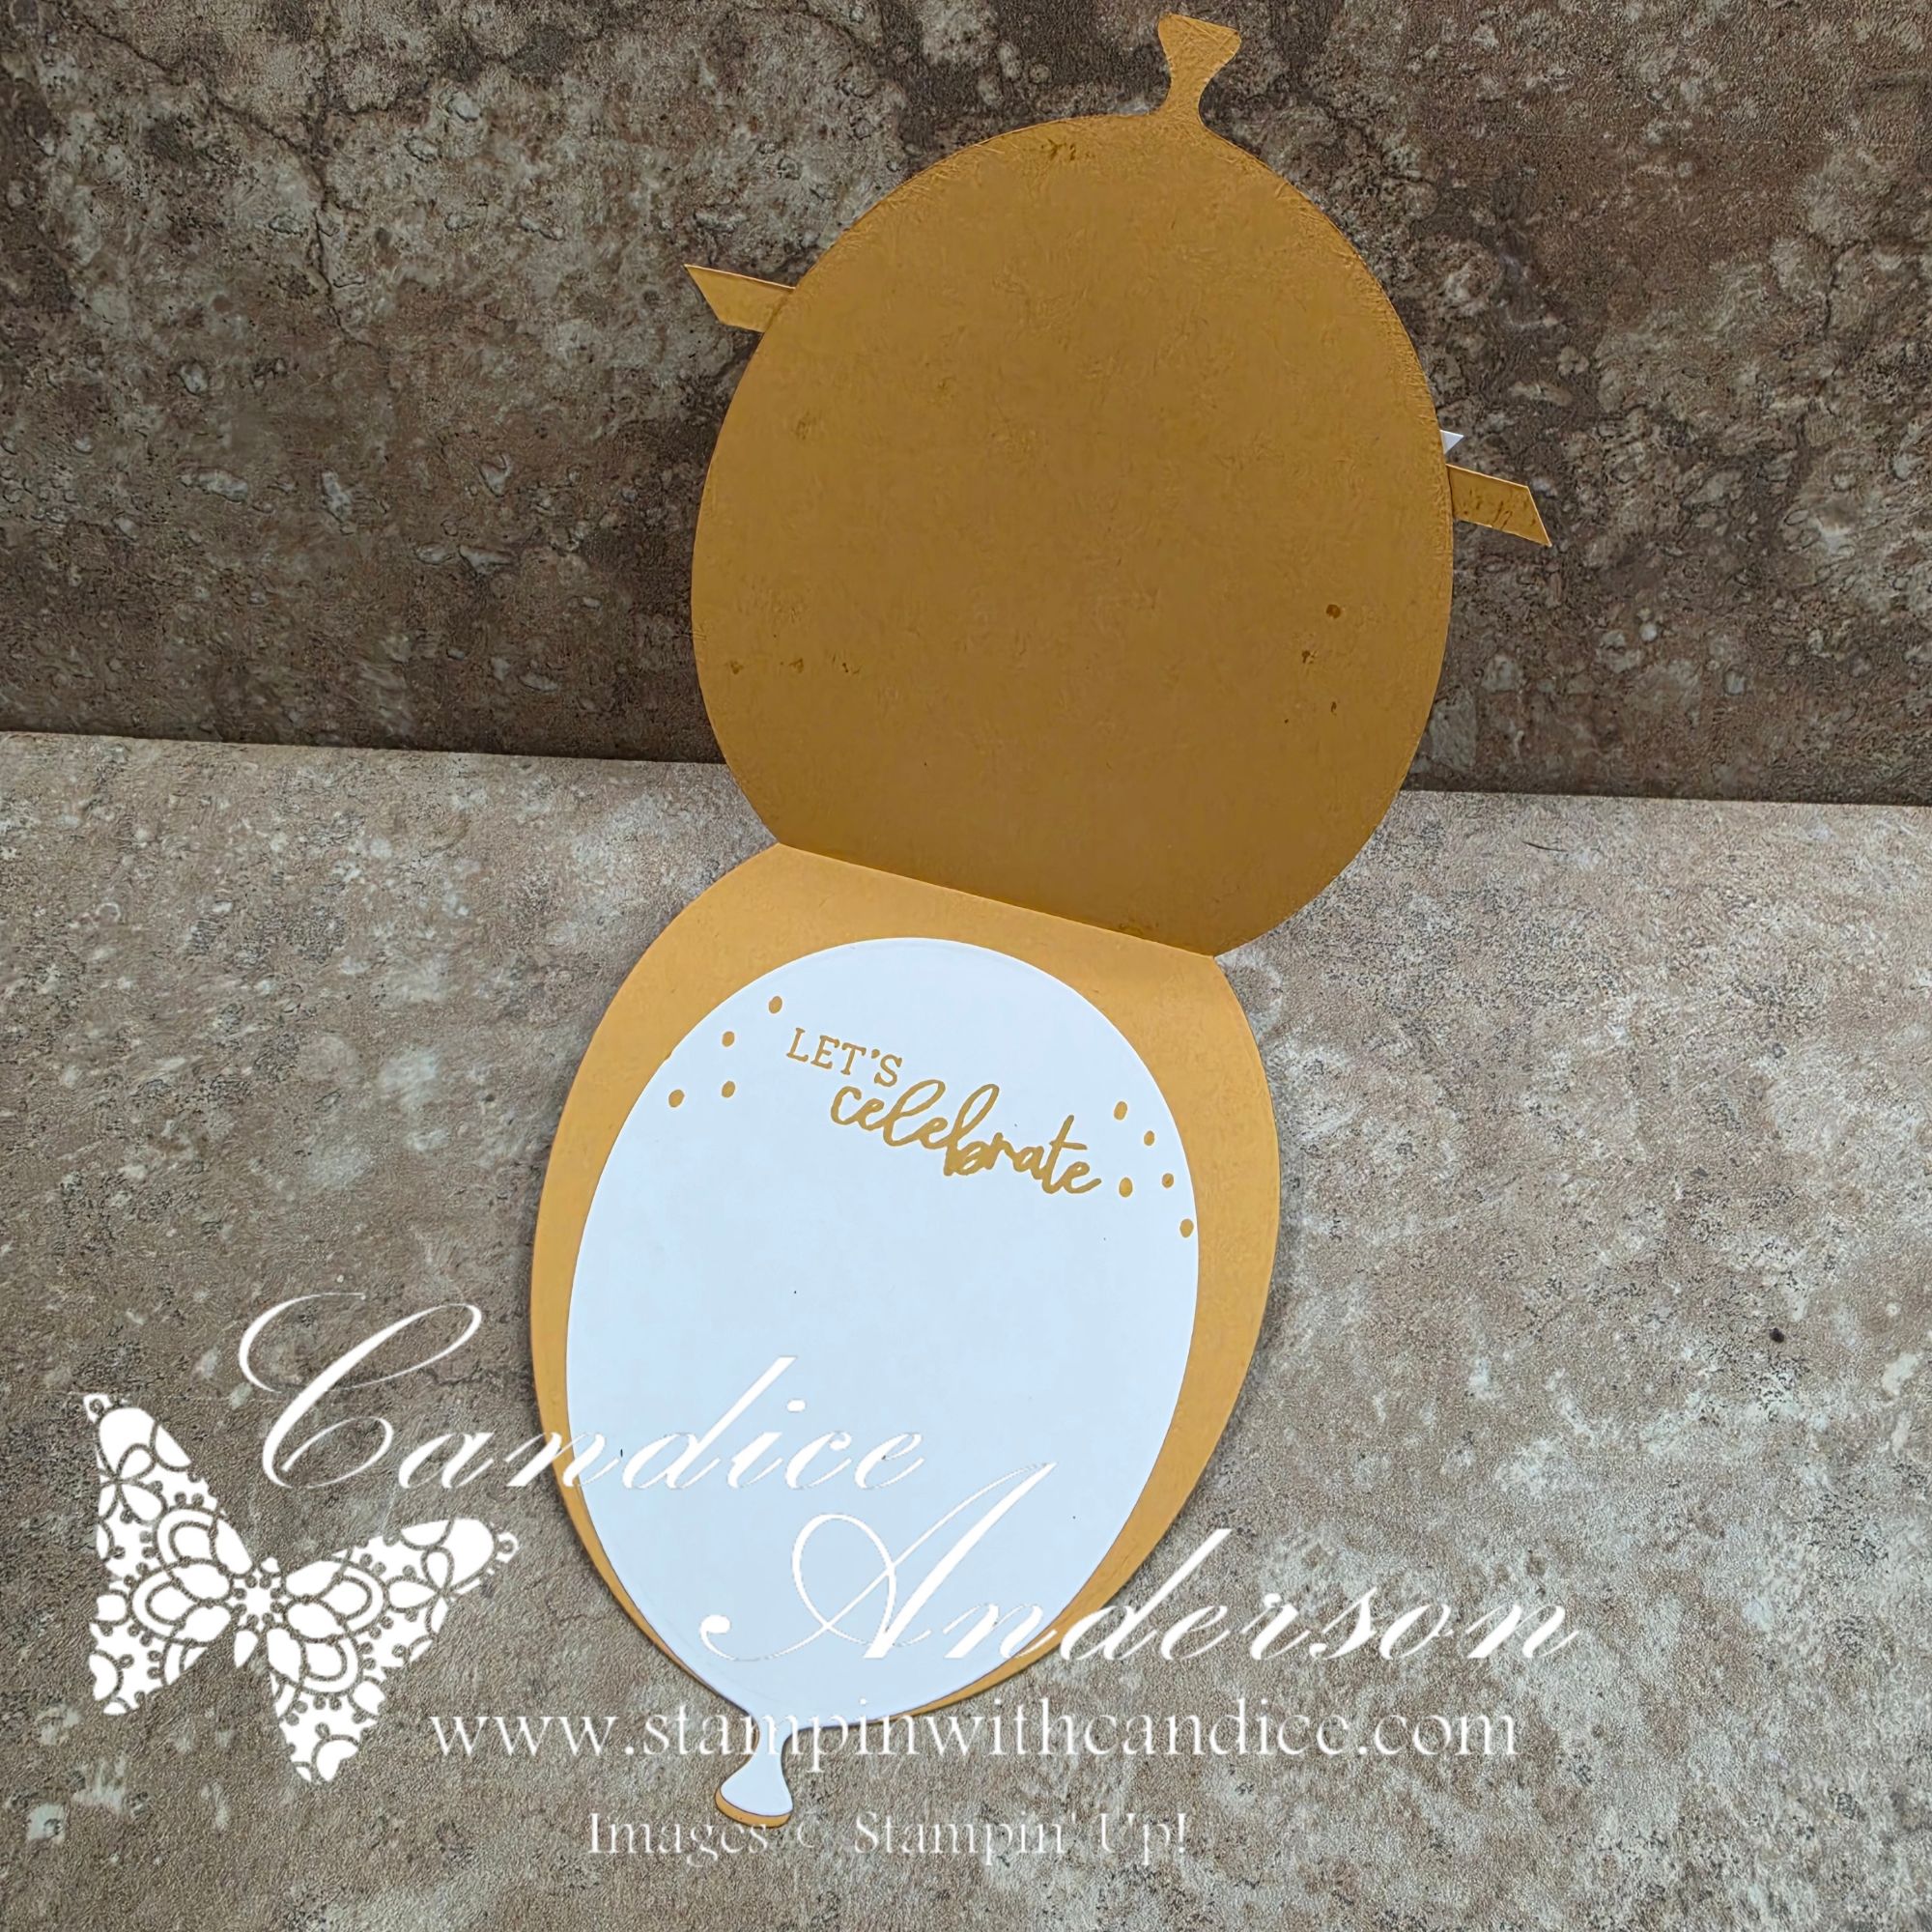
The process is surprisingly easy. Simply cut two of your chosen shapes. On one of the die-cut pieces, score about ½” along the top or side, depending on the shape and how you want the card to open. Fold along the score line and adhere that folded tab to the back of the second die cut. Just like that, you have a shaped card that opens and closes!

I decided to keep my designs simple by using a single color of cardstock and coordinating ink along with Basic White. By combining stamping and blending brushes, I was able to create several different shades and tones of the same color, adding depth and interest without needing lots of supplies. I chose to feature some of the new In Colors, but this technique works beautifully with any color palette. Check out all the fun combinations you can make.

These shaped cards are perfect for birthdays, celebrations, congratulations, and so many other occasions. Depending on the size of the die you use, many will even fit inside a standard-sized envelope, making them easy to mail.

To finish them off, I added a touch of sparkle with Wink of Stella or if you are using the in-colors try out our new shimmer brushes.

Fast, easy, and so much fun—this is definitely a technique you’ll want to try with your favorite large dies. As an added bonus, you’ll discover that many of your dies can do double duty, creating both focal elements and unique card bases.

I hope you’ll give shaped cards a try! If you missed the live, be sure to catch the replay and see just how simple these cards are to create.


Ready to get started?

Click the Shop Now button to order any supplies you need. Then click on the Balloon Festoon Card Tutorial below to access the PDF tutorial, video instructions, cutting guide, and helpful tips and tricks.

Before you know it, you’ll be creating your own fun shaped cards for birthdays, celebrations, and special occasions. Happy crafting, and I can’t wait to see what you create!

Colorful advertisement banner featuring the text 'SHOP NOW' and 'Online Store' with decorative elements like flowers, butterflies, scissors, and craft supplies.

Balloon Festoon Card Tutorial

Bonus – Add a little extra with the new white gel pen.


A beautifully crafted Christmas card featuring a window scene that displays a peaceful nativity setting on one side, while the inside is adorned with cozy holiday elements like hanging stockings and warm colors.

💕 Let’s Stay Connected

📺 YouTube 📘 Facebook 📸 Instagram 📌 Pinterest

Waterside Retreat Father’s Day Card Tutorial

Need a Father’s Day card that’s a little more special this year? I’ve got you covered!

A collection of handmade Father's Day cards featuring a green Adirondack chair, various outdoor-themed decorations like a bicycle, life ring, fishing gear, and the text 'Happy Father's Day' on a white background.

This interactive Father’s Day card features the beautiful Waterside Retreat Suite Collection and a fun pull-tab mechanism that transforms the card from a flat mailing piece into a standing display card. The relaxing Adirondack chair, weathered wood textures, and natural elements make this the perfect card for dads, grandpas, husbands, and anyone who enjoys the outdoors.

One of my favorite parts of this project is the stamped scene. In the tutorial, I’ll share how to use masking techniques, simple coloring with Water Painters, and a few extra details to create depth and dimension without a lot of extra work.

What’s Included

When you purchase the tutorial, you’ll receive:

  • Complete supply list
  • All cutting measurements
  • Detailed step-by-step written instructions
  • Exclusive private video tutorial
  • Tips and tricks to help you successfully recreate the card

This project folds flat for mailing but pops up into a display card when the pull tab is lifted, making it a fun surprise for the recipient.

Supplies Needed

Stampin’ Up! Products

  • Waterside Retreat Suite Collection (#167932)
  • Rounded Rectangle Punch (#167880) or corner rounder
  • Hole Punch Assortment (#165409) or any hole punch
  • Water Painters (#168253)
  • Masking Paper (#155480)
  • Bordering in Beauty Dies (#167556) or similar tag die/punch
  • Paper Trimmer (#152392)
  • Baker’s Twine Essentials Pack (#155475)
  • Sponge Daubers (#133773)

Cardstock

  • Gray Granite
  • Basic White

Ink Colors

  • Gray Granite
  • Old Olive
  • Peaceful Pine
  • Barely Blush
  • Cajun Craze

Adhesives

  • Multipurpose Liquid Glue (#110755)
  • Mini Stampin’ Dimensionals (#144108)

Are you ready to get started?

Purchase the tutorial for just $7.

cards
Powered by paypal

Or Get it for FREE!

Place a $25+ Stampin’ Up! order through me and get it for FREE. (US Only) Once you have placed your please order fill out the form. After your qualifying order is confirmed, you will receive access to the written tutorial and private video tutorial.  


Feel free to contact me with any questions.

Thank you for being part of the Stampin’ With Candice community! 💜
Happy Stampin’!

A beautifully crafted Christmas card featuring a window scene that displays a peaceful nativity setting on one side, while the inside is adorned with cozy holiday elements like hanging stockings and warm colors.

💕 Let’s Stay Connected

📺 YouTube
📘 Facebook
📸 Instagram
📌 Pinterest

Easy Pocket Fun Fold Card – Simply Out of This World 🌙✨

Last night on my live I shared this easy pocket fun fold card inspired by Sunny Day Stamping, and I promised you all the details! This card is so simple to create but still gives you that extra wow when the recipient pulls out the hidden insert.

Three handmade birthday cards featuring a space theme. Each card has a yellow and blue color scheme with text that says 'You're Out of This World.' One card includes an astronaut illustration, while another features the phrase '3-2-1 Blast off!' Various design elements like stars and moons are incorporated.

For my cards I used the brand new Moon and Back Stamp Set (#167531) coming in March — and it is absolutely adorable. 🌙 It pairs perfectly with this interactive design.


How to Create the Pocket Fun Fold

This design is very versatile. You can create it horizontal or vertical — I did one of each!

  1. Choose your direction (horizontal or vertical).
  2. Decide how much you want your pull-out insert to peek over the top. You can either fold it down or cut it off.
    • I cut off 1″ on my horizontal card.
    • I cut off 1-1/2″ on my vertical card.
  3. Use adhesive to seal the sides (I used Tear & Tape) or simply wrap a ribbon or belly band around the card.
  4. Pick a circle shape for your focal point.

Now here’s the fun part 👇

Before you fully close your pocket, punch or die cut a matching circle on the card base directly behind where your focal circle will sit. This allows your focal image to actually attach to the pull-out insert instead of the card front.

When attaching your focal circle to the pull-out piece, use Stampin’ Dimensionals so it sits slightly raised above the paper. This not only adds dimension and extra WOW, but it also makes the insert easier to slide in and out — and easier for the recipient to grab ahold of.

Such a simple trick — but it makes a big difference in both the design and functionality and t it creates that magical interactive element when the card is opened!


Adding Even More WOW

On my vertical card, I stepped it up by adding a handmade rosette behind the circle focal point. It adds dimension and really makes the design pop. This is quick any easy to do using the simply scored tool. I walk you through it in the video.

This fun fold truly is out of this world — and perfect for birthdays, kids’ cards, encouragement, and more.

Be sure to watch the replay for full step-by-step instructions and to see exactly how it all comes together!


Supplies Used

Stamps & Dies

  • Moon and Back Stamp Set (#167531 – coming in March!)
  • Spotlight on Nature Dies (#163580)
  • Stylish Shapes Dies (#159183)

Tools & Accessories

  • 2″ Circle Punch (#133782)
  • Simply Scored (#122334)
  • Tear & Tape Adhesive (#154031)
  • Stampin’ Dimensionals (#14430)
  • Black & White Baker’s Twine (#155475)

Cardstock

  • Daffodil Delight
  • Basic Black
  • Poppy Parade
  • Azure Afternoon

Ink

  • Real Red
  • Crushed Curry
  • Blueberry Bushel
  • Memento Black

If you give this pocket fun fold a try, I would love to see what you create! Be sure to tag me or share it in the comments. 💕

And remember to follow along so you never miss another Make It With Me Monday!


A beautifully crafted Christmas card featuring a window scene that displays a peaceful nativity setting on one side, while the inside is adorned with cozy holiday elements like hanging stockings and warm colors.

Please feel free to contact me if you have any questions.

Contact me today to place your order!
435-232-2655 Cell ( Call or Text)
andersoncandice@hotmail.com


💕 Let’s Stay Connected

📺 YouTube
📘 Facebook
📸 Instagram
📌 Pinterest