Create With Candice: Holly Jolly Branches Christmas Card Class 🎄

Let’s get creative and get those Christmas cards ready!

Can you believe Christmas is just around the corner? It seems like we were just enjoying summer, and suddenly it’s time to start thinking about holiday cards, decorating, and all the fun that comes with the season!

If you’re anything like me, you love sending handmade Christmas cards, but finding the time to make them can be a challenge. That’s why I’m so excited to introduce my Create With Candice Holly Jolly Branches Christmas Card Class!
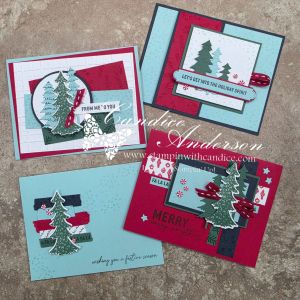
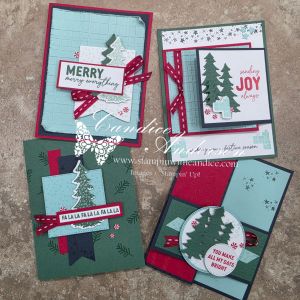
I’ve been having so much fun creating with the Holly Jolly Branches Bundle, and I couldn’t resist putting together a collection of cards featuring this beautiful set.

For this class, I’ve designed eight different Christmas cards, including three fun folds! We’ll be creating everything from traditional cards with beautiful layers and textures to fun folds that add a little surprise for the recipient.

And the best part? With the full class kit, you’ll have everything prepared to make two of each design — 16 handmade Christmas cards!

Whether you want a prepared kit delivered to your door or prefer to craft with supplies you already own, I’ve created three ways for you to join the fun!


🎄 Class Details

Create With Candice: Holly Jolly Branches Christmas Card Class

  • Live Class: Wednesday, November 18, 2026
  • Time: 7:00 PM Mountain Time
  • Location: Online via private YouTube link
  • Class Length: Approximately 90 minutes to 2 hours
  • Projects: Eight different Christmas card designs, including three fun folds
  • Replay: Available beginning November 19, so you can craft at your own pace!

Can’t make the live class? No worries! You’ll have access to the replay, along with the PDF instructions and preparation video.

✂️ Three Ways to Join the Class

Option 1: Complete Christmas Card Class Kit — $55 + Shipping

Want to skip most of the measuring, cutting, and preparation? This option is for you!

Your class kit includes:

  • Prepared cardstock and card bases for 16 cards — two of each of the eight designs
  • Die-cut and embossed pieces needed for your projects
  • A full package of coordinating embellishments
  • A full roll of coordinating ribbon
  • Step-by-step PDF instructions and cutting guide
  • A preparation video to help you get ready
  • Access to the live online class and replay

What you’ll need: The Holly Jolly Branches Stamp Set, coordinating ink pads, adhesives, a paper trimmer, bone folder, and scissors.

All the cardstock, die-cut pieces, embossed elements, ribbon, and embellishments will be provided in your kit. You’ll do your own stamping and assembly during the class.

Important: Physical class kits are available for shipping within the United States only.

Registration Deadline: Monday, November 2, 2026, at 11:59 PM Mountain Time, or while supplies last.


Option 2: FREE Digital Class With a $50 Purchase

Already have the supplies you need, or looking to add some new products to your collection?

Place a qualifying $50 Stampin’ Up! product order through my store and receive the digital class at no additional charge!

You’ll receive:

  • Step-by-step PDF instructions and cutting guide
  • Preparation video
  • Access to the live class
  • Access to the replay

You’ll provide your own cardstock, ribbon, embellishments, stamps, inks, and other supplies.

This is a wonderful option if you want to purchase the Holly Jolly Branches Stamp Set or Bundle and join me for the class!

REQUEST YOUR FREE TUTORIAL

Have you placed your qualifying Stampin’ Up! order? Complete the form below to request your FREE tutorial!

Please include the name of the tutorial you’re requesting and your qualifying Stampin’ Up! order number in the message section.

Once I’ve verified your purchase, I’ll email you the link to access your tutorial.

Please note: A qualifying purchase is required to receive your free tutorial.

← Back

Thank You for Requesting Your Free Tutorial!

Your tutorial request has been received! I’ll review your information and verify your qualifying Stampin’ Up! order. Once verified, I’ll email you the link to access your requested tutorial. Please keep an eye on your inbox, including your junk or spam folder. Thank you for supporting Stampin’ With Candice! I can’t wait for you to start creating! Happy Crafting! 🦋 Candice
Please include the tutorial name and your qualifying Stampin' Up! order number.


Option 3: Digital Class Only — $12

Have a collection of Christmas crafting supplies already? Or perhaps you live outside the United States?

You can purchase the digital class for just $12!

You’ll receive the same PDF instructions, cutting guide, preparation video, live class access, and replay.

You’ll provide your own materials and can use the featured products or adapt the designs using supplies you already have.

It’s a great way to learn new layouts, techniques, and fun folds that you can use again and again!


❤️ Crafting Is More Fun With a Friend!

One of my favorite things about crafting is sharing the experience with someone else!

If you’re purchasing the complete class kit, why not invite a friend to craft along with you?

I’m offering an optional Craft With a Friend Add-On Kit that includes the prepared paper and die-cut pieces for a second set of 16 cards.

You’ll share the ribbon, embellishments, and class access included with your original kit, so there’s no need to purchase everything twice!

Both kits will ship together to the same U.S. address.

Look for the Craft With a Friend option on your class access page after purchasing your full kit. This special add-on is available only during the physical kit registration period.


🎨 Featured Products and Supplies

For this class, I’m featuring the Holly Jolly Branches Stamp Set and coordinating dies, along with beautiful traditional Christmas colors and lots of texture!

Our featured colors include:

  • Pool Party
  • Real Red
  • Peaceful Pine
  • Secret Sea
  • Basic White

The card samples feature Real Red and White Stitched Ribbon, peppermint embellishments, die cuts, and embossed backgrounds to add dimension and detail. Please note that ribbon and embellishments included in the class kits may vary based on product availability.

Additional supplies used in my samples include:

  • Holly Jolly Branches Stamp Set and Dies
  • Stylish Shapes Dies
  • Party Banner Dies
  • Forever Plaid Embossing Folder (retired)
  • Seasonal Cheer Embossing Folder (Last Chance)
  • Coordinating ink pads
  • Adhesives, including Multipurpose Glue, Stampin’ Dimensionals, and Mini Glue Dots

Don’t worry if you don’t have every product I’ve used! If you’re participating digitally, you’re welcome to substitute supplies from your own collection.

A complete supply list will be included with your class materials, or click here to start shopping for the products you’ll need to create your cards!


📅 Important Class Dates

  • November 2: Last day to register for the physical class kit, or while supplies last.
  • November 11: PDF instructions, cutting guide, and preparation video become available on the private class page.
  • November 18: Join me live at 7:00 PM Mountain Time for our Create With Candice Christmas Card Class!
  • November 19: The class replay will be available for anyone who couldn’t attend live or wants to revisit the projects.

Your class materials and replay will remain available after the live event, so you can work at your own pace.


🎄 Ready to Get Creative?

I love the personal touch of handmade Christmas cards. There’s just something special about sending a card that you’ve taken the time to create yourself.

Whether you’re making cards for family and friends, learning a new fun fold, or simply enjoying a little creative time, I hope you’ll join me for this class!

Choose the class option that works best for you and let’s create something beautiful together!

  • Register for the Complete Class Kit — $55 + Shipping
  • Earn the Digital Class FREE With a $50 Order
  • Purchase the Digital Class — $12

I’m so excited to craft with you!

Happy Stamping!
Learn • Connect • Create • Grow

A beautifully crafted Christmas card featuring a window scene that displays a peaceful nativity setting on one side, while the inside is adorned with cozy holiday elements like hanging stockings and warm colors.

💕 Let’s Stay Connected

📺 YouTube 📘 Facebook 📸 Instagram 📌 Pinterest

Create with Candice Challenge #CWCC002 – A Colorful Twist on Christmas!

Sometimes the best inspiration comes from a project you’ve already created! That’s exactly how this month’s Create with Candice Creative Challenge came to life.

Last week, I introduced our second creative challenge, and this time we’re playing with COLOR! 🎨


The Inspiration Behind the Challenge

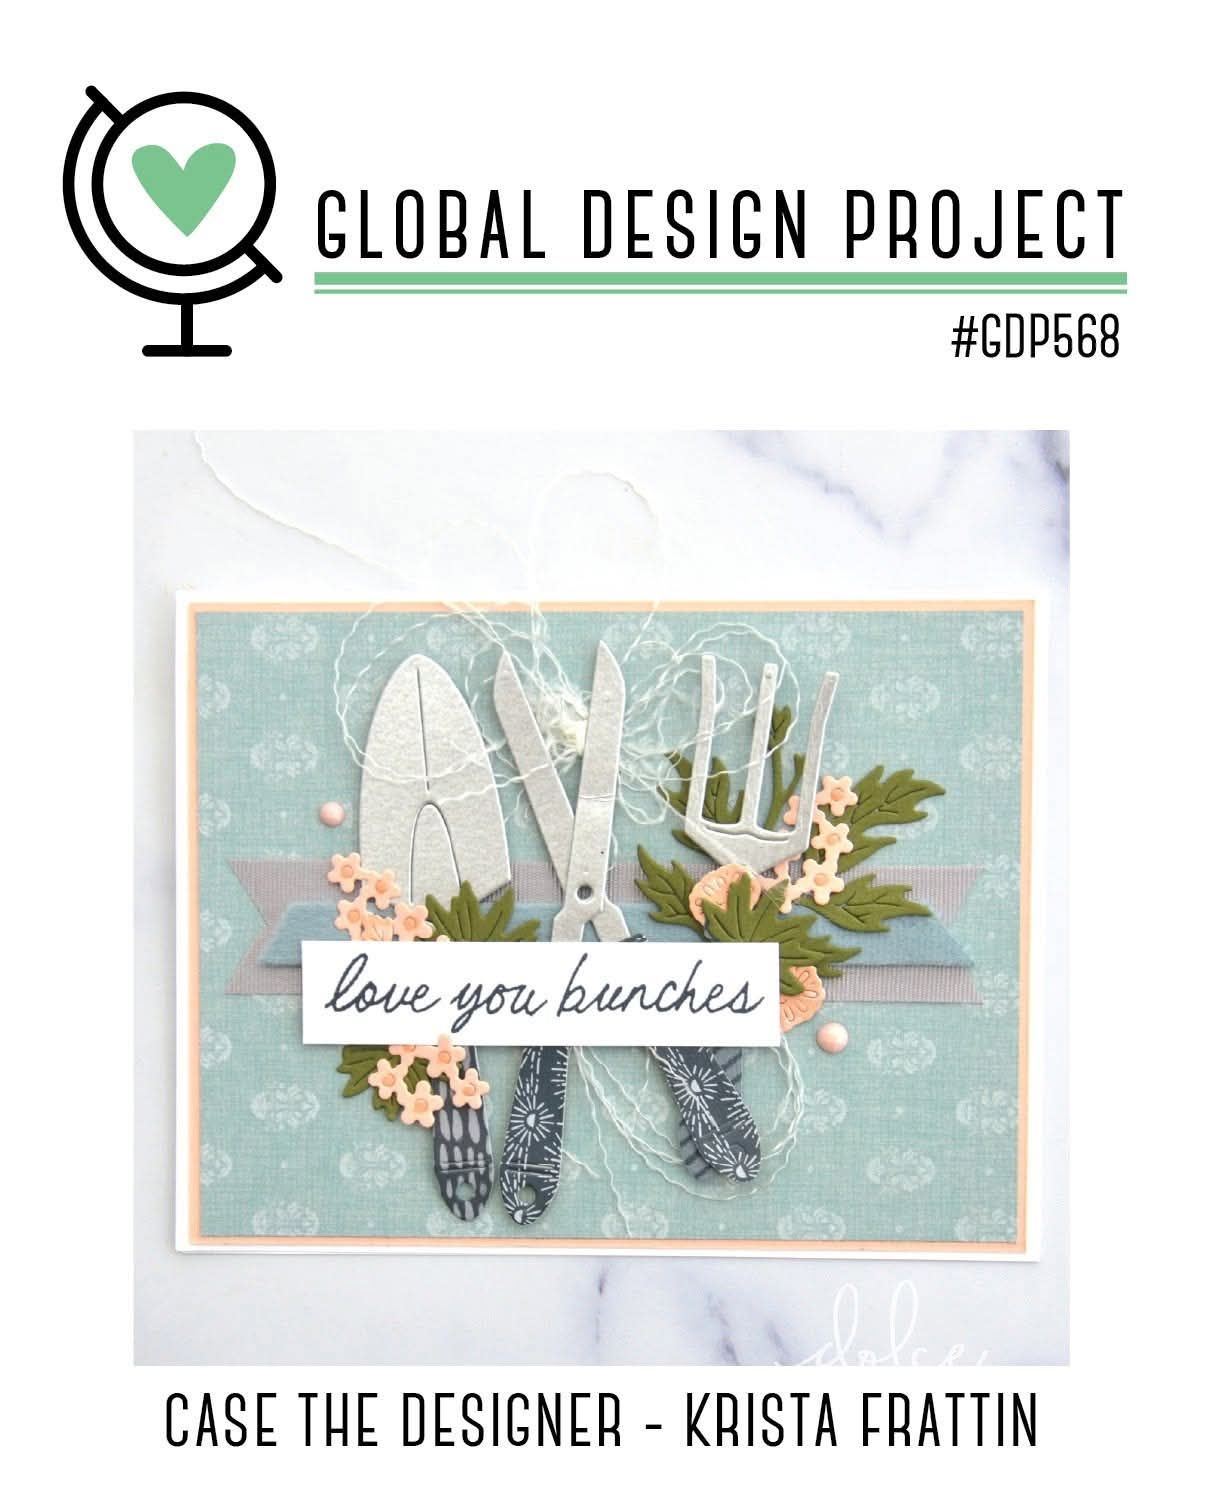
It all started with a card I created for the Global Design Project’s CASE the Designer challenge featuring Krista Frattin.

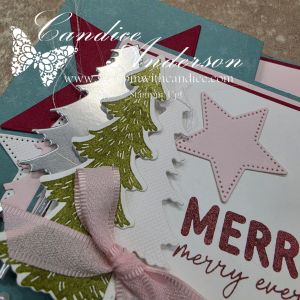
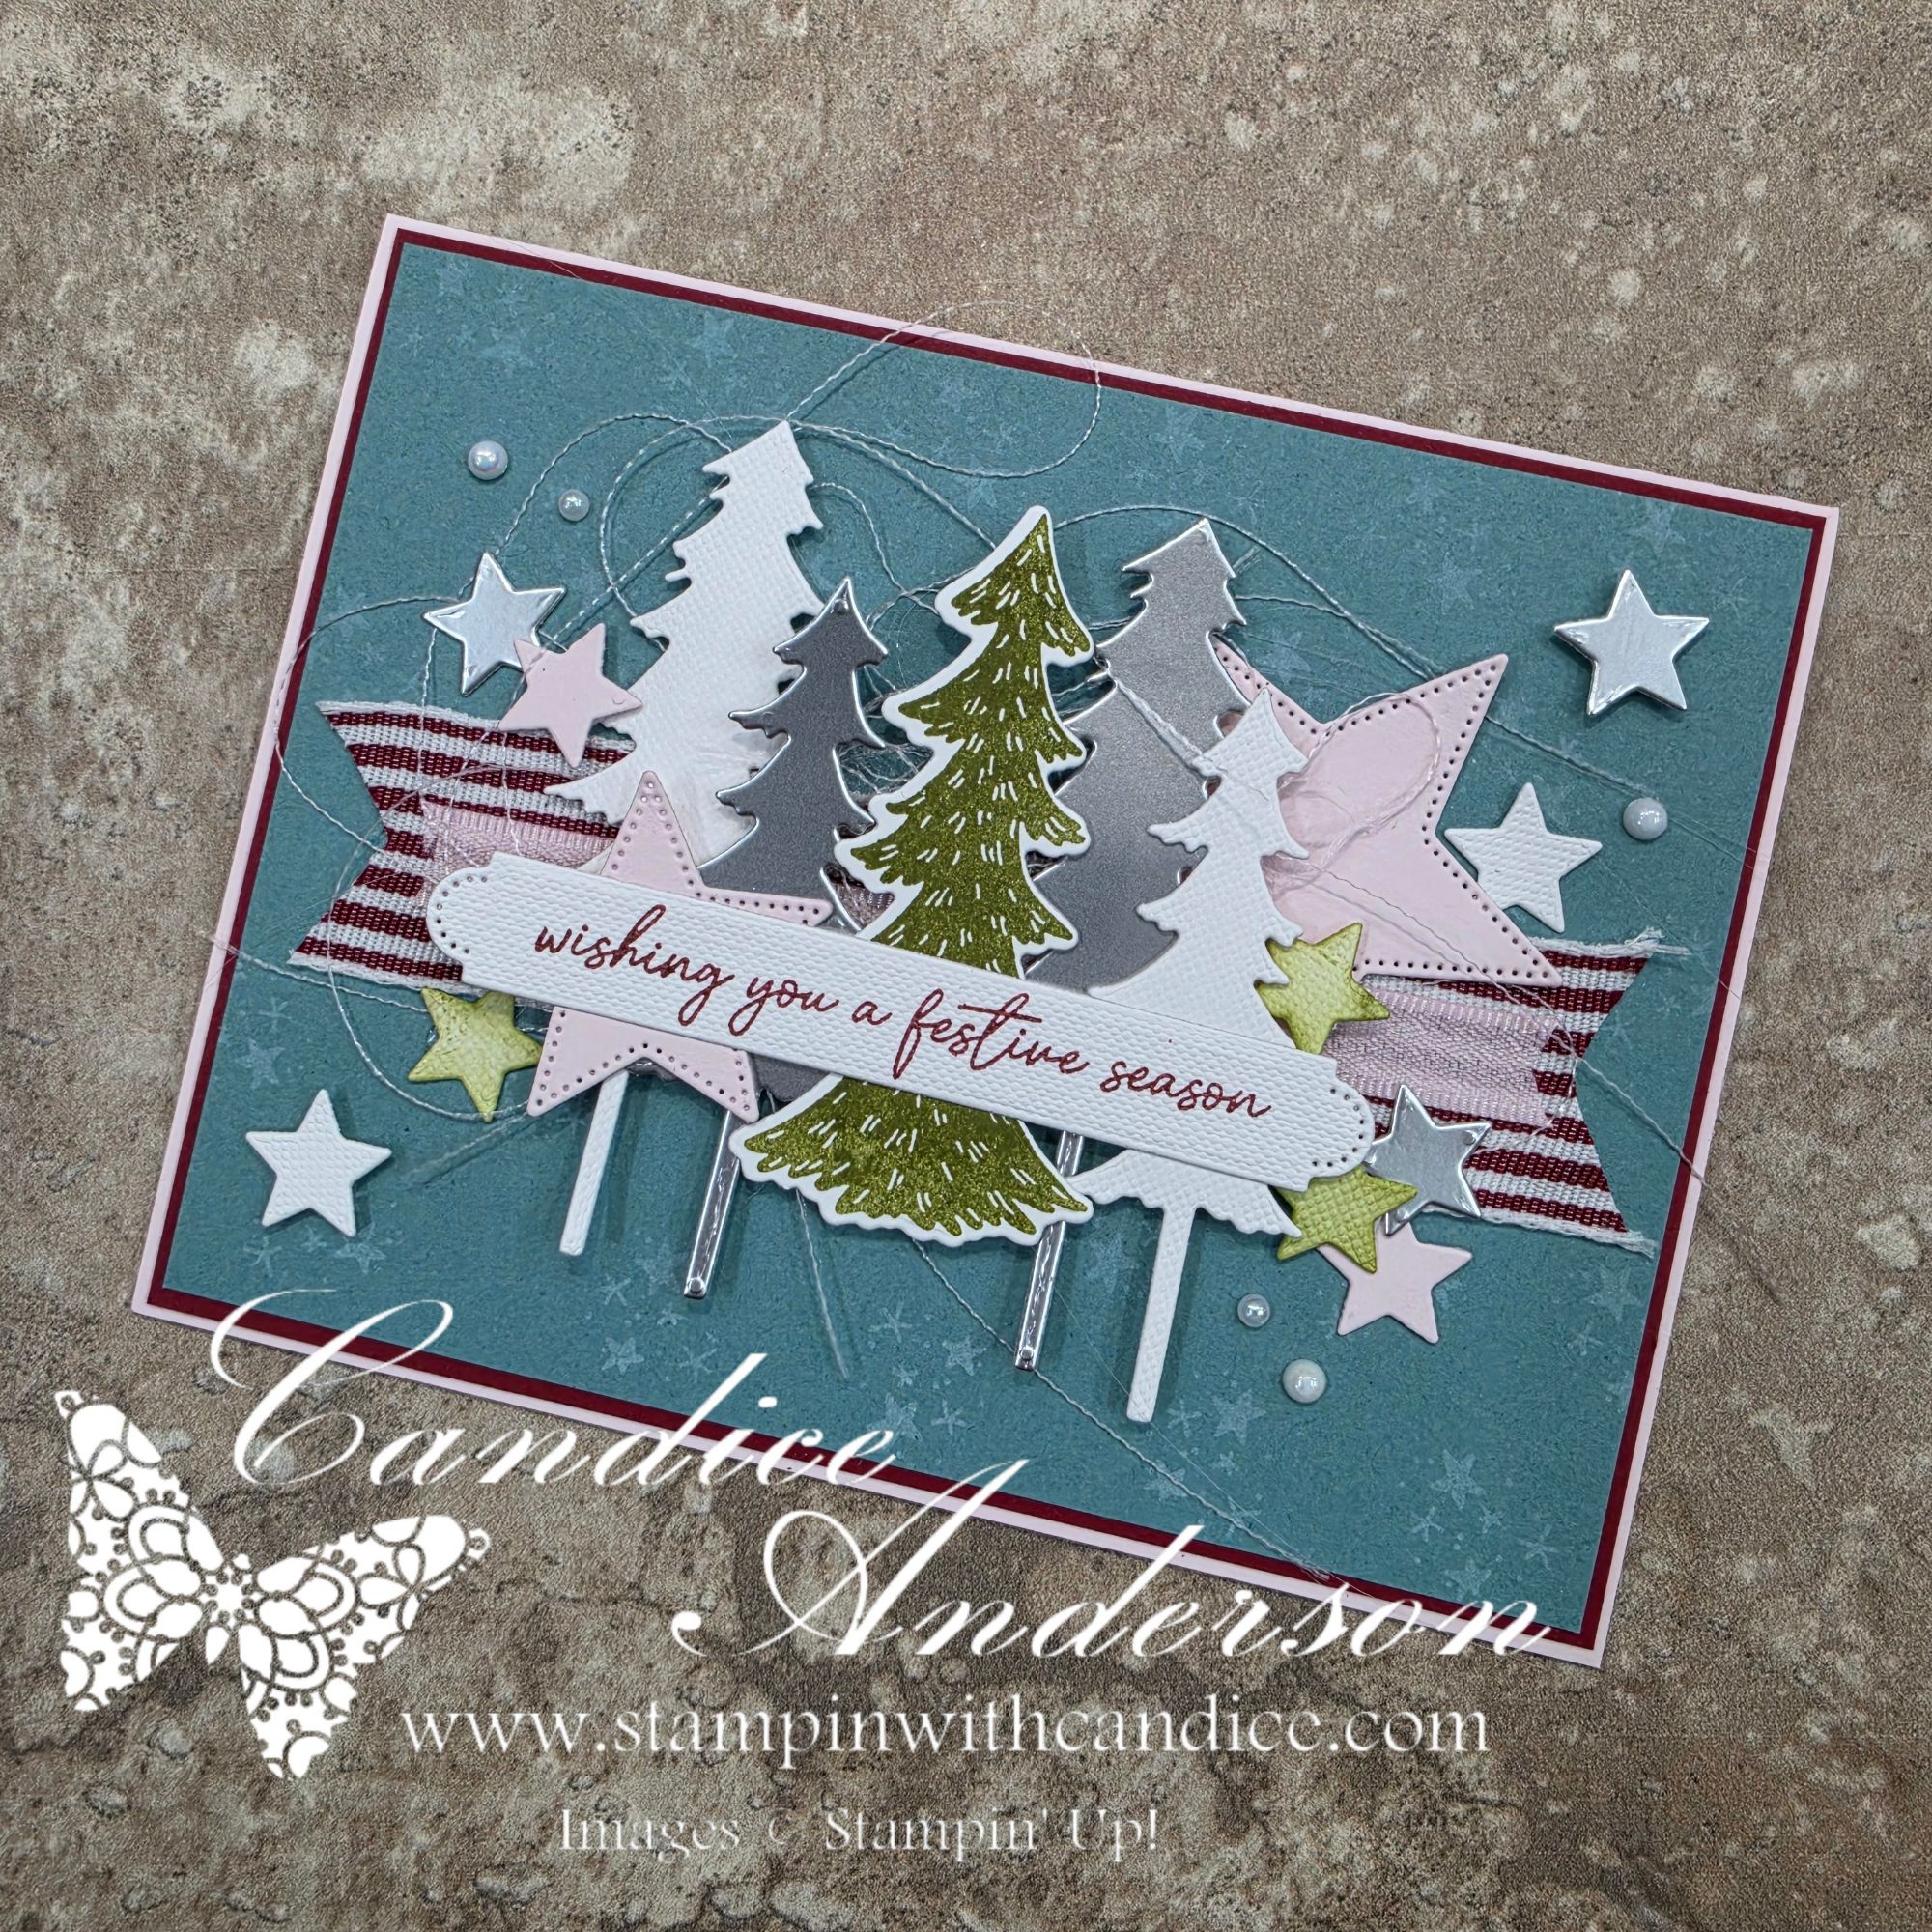
I loved the colors in her original design, but since I was using the Holly Jolly Branches Bundle, I wanted to give my card a little more of a Christmas feel.

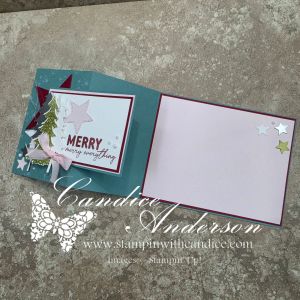
I started with a Lost Lagoon background and, of course, added Old Olive for my Christmas tree. I swapped in Barely Blush for a softer touch, but the real surprise was my fourth color — Cherry Cobbler!

I had this beautiful, large Cherry Cobbler ribbon that I really wanted to incorporate, so I decided to go bold. To finish things off, I added a little sparkle with Silver Foil Sheets and some Basic White to balance everything out.

Not only did I love how the finished card turned out, but I absolutely fell in love with how these four colors worked together!

And just like that, I had the inspiration for our next challenge!


🎨 Your Challenge: Four Colors, Endless Possibilities!

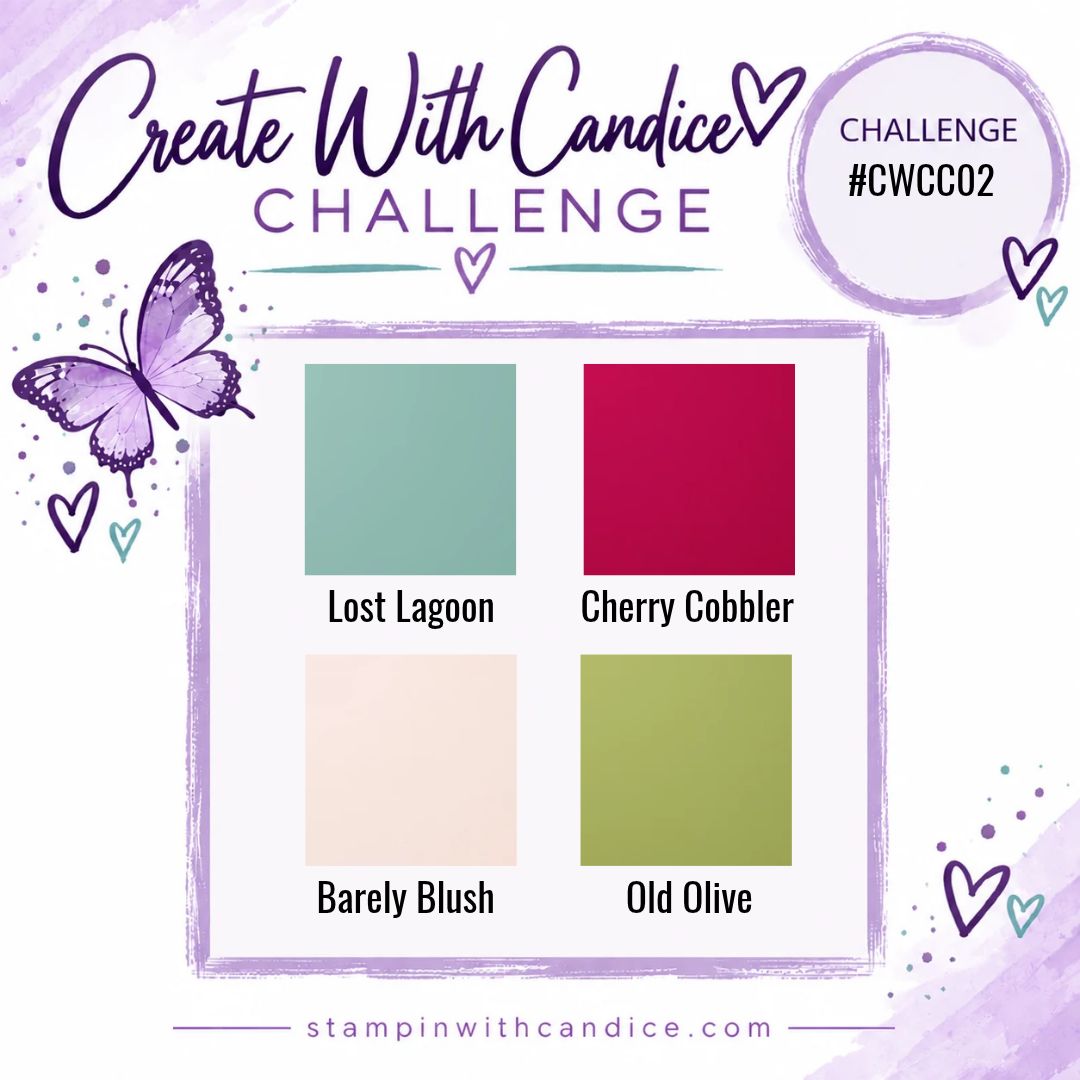
For Create with Candice Challenge #CWCC002, I’m challenging you to create something using these four Stampin’ Up! colors:

  • Lost Lagoon
  • Cherry Cobbler
  • Barely Blush
  • Old Olive

You can also incorporate neutral colors and a little metallic sparkle, just like I did!

The best part? Your project doesn’t have to be Christmas-themed!

That’s one of the things I love most about color challenges. The same combination can inspire completely different projects depending on the stamps, papers, and designs you choose.

Whether you create a card, scrapbook page, gift packaging, or something entirely different, I can’t wait to see how you bring these colors to life!


A Little More Inspiration!

Of course, I couldn’t stop at just one card!

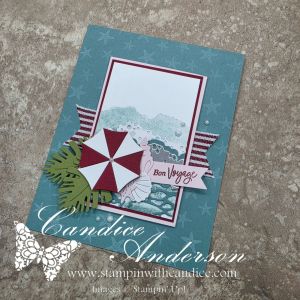
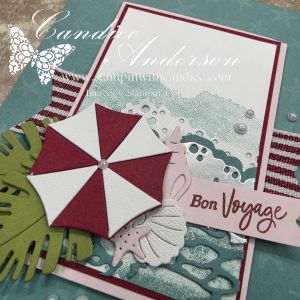
After creating my original Holly Jolly Branches card, I decided to see how these colors would work with something completely different. I pulled out the Rolling Waves Bundle and created another sample.

Then, during my Monday Live, I went back to the Holly Jolly Branches Bundle, this time playing with a different layout and incorporating the Shining Star Dies, our Product of the Month.

I love how each project has its own personality, even though they’re all using the same four colors!

Be sure to catch the live replay! I’ll show you how I created the whimsical ribbon background and share more about the special textured paper I used. It’s a fun little detail you won’t want to miss!


🦋 Ready to Take the Challenge?

Now it’s your turn!

I hope you love this color combination as much as I do and will join me for this month’s creative challenge.

Challenge Deadline: Saturday, November 21, 2026

That gives you plenty of time to pull out your supplies, get creative, and share your project!

Remember, everyone is welcome to participate, and you don’t have to use Stampin’ Up! products.

Visit my Create with Candice Challenge page for all the details on how to participate and share your creations.

When sharing on social media, be sure to:

  • Use our challenge hashtag #CWCC002
  • Include #CreateWithCandice
  • Tag Stampin’ With Candice so I can find your project and share your creativity with our community!

I can’t wait to see what you create with these colors. Will you go with something festive, or will you surprise me with something completely different?

Happy Creating! 💜

Learn • Connect • Create • Grow

A beautifully crafted Christmas card featuring a window scene that displays a peaceful nativity setting on one side, while the inside is adorned with cozy holiday elements like hanging stockings and warm colors.

💕 Let’s Stay Connected

📺 YouTube 📘 Facebook 📸 Instagram 📌 Pinterest

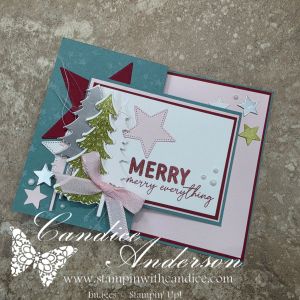
Shining Stars & Holly Jolly Branches | Global Design Project #GDP568

This week’s Global Design Project Challenge #GDP568 was another fun CASE the Designer challenge, featuring the talented Krista Frattin!

All week long, I wasn’t quite sure what I wanted to create for this challenge. I had a few ideas floating around, but nothing was really coming together. Then, toward the end of the week, my Stampin’ Up! order arrived with this month’s Product of the Month — the Shining Stars Dies! ⭐

OMG! I was so excited to get my hands on these dies, and as soon as I saw them, I knew they would be perfect for this challenge!

I decided to pair them with the Holly Jolly Branches Bundle and step a little outside my usual Christmas color palette. I took inspiration from Krista’s beautiful colors, changing them up just slightly to give my card a more festive feel.

And I have to say, I absolutely LOVE how it turned out!


Creating the Background & Adding Layers

I started with Lost Lagoon for my background, stamping a subtle pattern of stars using white ink. I love how the soft white stars add interest without taking away from the focal point.

Next, I stamped my Christmas tree in Old Olive and began building layers with the Holly Jolly Branches Bundle and Shining Stars Dies.

To add a little sparkle, I die-cut several trees and stars using Silver Foil Sheets. I love how the metallic accents catch the light and give the card that extra touch of holiday magic!

A Sneak Peek at Something New!

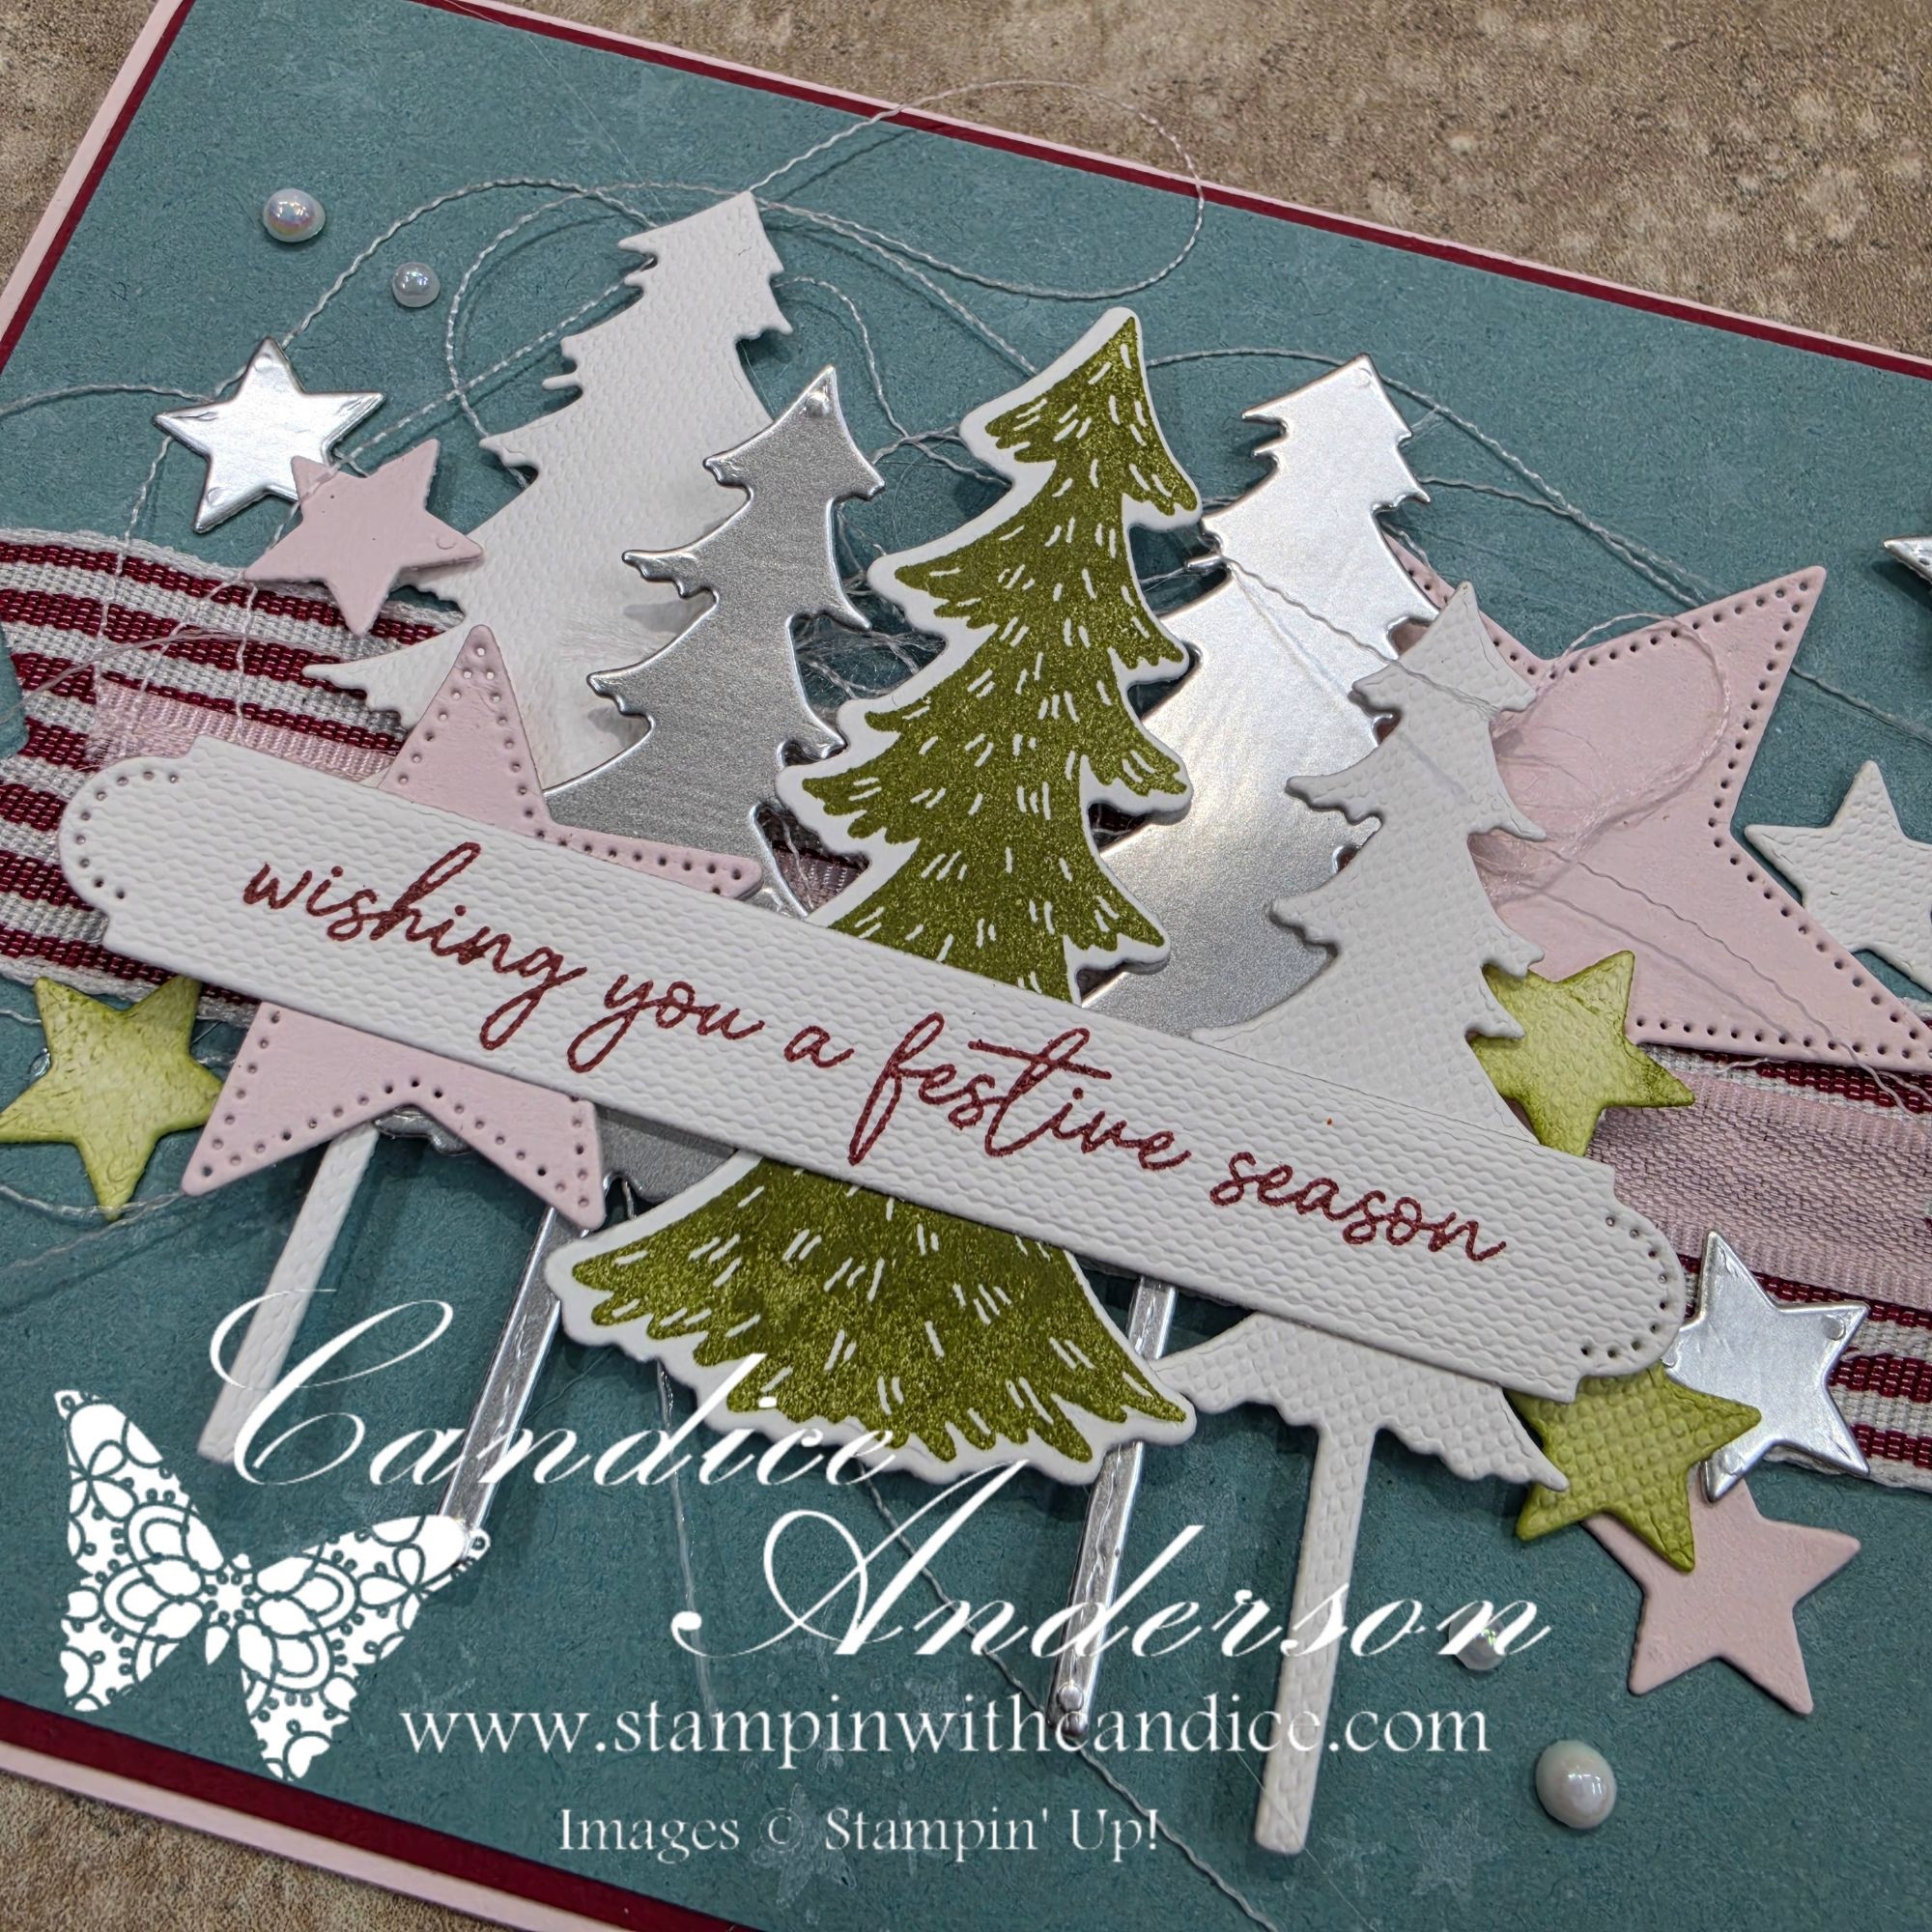
One of my favorite details on this card might be a little difficult to see in the pictures.

The greeting, several of the trees, and some of the stars were all die-cut from the new Textured Canvas Specialty Paper, coming in November as part of Stampin’ Up!’s Online Exclusives!

This paper is so cool! It adds a beautiful, soft texture to your projects, but what’s even better is that you can stamp directly onto it!

I also used a Blending Brush to add Old Olive ink to a few of the canvas stars, giving them a little extra color and dimension. It’s such a simple way to customize the paper while still allowing that wonderful texture to show through.

One of the things I love most about being a Stampin’ Up! demonstrator is getting early access to new products like this!

And speaking of being a demonstrator, there’s an awesome joining special happening in October! If you’ve ever thought about joining my team, I’d love to share more with you. You can also visit the GROW section of my blog to learn more about the creative opportunities and benefits of being part of my team.

Ribbon, Stars & a Little Whimsy

To finish building my design, I added some Barely Blush stars and ribbon, along with the new Cherry Cobbler Striped Grosgrain Ribbon.

We’ve had ribbon similar to this in the past, and it’s always been one of my favorites for Christmas projects. There’s just something about those festive stripes!

But did you notice the wispy ribbon flurries tucked behind the trees?

This is such a fun technique, and it’s one I recently shared when creating my Spooktacular Gift Bags!

By carefully pulling out one of the main threads from the ribbon, you can separate the fibers and create these wonderful, delicate wisps. I tucked them behind my trees, letting them loop and flow naturally across the card.

I love how they add movement, texture, and a little bit of whimsy without overwhelming the design.

For the finishing touches, I added a few Iridescent Pearls and layered my Lost Lagoon panel onto Cherry Cobbler cardstock, all mounted on a Barely Blush card base.

Those little details really brought everything together!


Sometimes the Best Projects Are the Unexpected Ones!

When I first sat down to create this card, I really wasn’t sure how it was going to turn out. I had a general idea, a new set of dies I couldn’t wait to play with, a color palette that was a little different from my usual Christmas combinations, and beautiful challenge sample for inspiration.

But once I started creating, everything came together surprisingly easily!

I love the mix of textures, the unexpected colors, and all those wonderful layers. It’s definitely one of those cards that looks more complicated than it actually is and has that WOW factor I love!

That’s one of the reasons I enjoy participating in creative challenges so much. They encourage me to try something different, look at my supplies in a new way, and sometimes discover combinations I might never have thought to use.

What do you think? Would you use Lost Lagoon, Old Olive, Barely Blush, and Cherry Cobbler for a Christmas card?


Have You Gotten Your Shining Stars Dies Yet?

If the Shining Stars Dies aren’t already on your wish list, you might want to add them! ⭐

They’re this month’s Stampin’ Up! Product of the Month, which means you can purchase them for just $5 with a qualifying $75 order!

I have a feeling these dies are going to be popular, so I wouldn’t wait too long if you want to grab a set before they’re gone.

Ready to shop? Visit my online store at candiceanderson.stampinup.net.

And remember to check out the other amazing creations for #GDP568. There’s always so much inspiration to be found!

Happy Stamping!

Learn • Connect • Create • Grow 🦋
A beautifully crafted Christmas card featuring a window scene that displays a peaceful nativity setting on one side, while the inside is adorned with cozy holiday elements like hanging stockings and warm colors.

💕 Let’s Stay Connected

📺 YouTube 📘 Facebook 📸 Instagram 📌 Pinterest

Create Stunning Christmas Cards: CASE Techniques

This week’s Global Design Project challenge, #GDP560, is another fun CASE the Designer challenge, featuring Charlet Mallett!

I love CASE challenges because there are so many different directions you can take the inspiration. You can focus on the colors, layout, technique, or even just one little element that catches your eye.

For my card, I chose to focus on Charlet’s background technique and a similar layout, but gave it a Christmas twist using the Pretty Poinsettia Bundle. 🎄

I absolutely love how the soft background adds interest without competing with that gorgeous poinsettia. It really helps the rich colors and dimension of the flower pop!

That’s one of my favorite things about CASEing another designer—you can start with the same inspiration and create something completely your own. ❤️

Want to See How It Comes Together?

Check out my reel for a quick recap of how to create this stunning card!

Then use these quick tips when creating your own:

  • Create your own stencil. Cut the leaves from a thick piece of paper. I used one of the cardboard backers from a Designer Series Paper pack. Keep an extra piece handy to cover any open areas as you move the design around your background.
  • Start with watercolor paper. For the best results with this background technique, watercolor paper gives you a little more freedom to work with the water and ink.
  • Make your own color spritz. Add a few drops of reinker to a color spritzer along with water to create the soft background color.
  • Add some splatters. A Water Painter makes it quick and easy to add those little splatters of color that give the background even more interest.
  • Give your poinsettia dimension. Ink the edges of the poinsettia petals and leaves, then gently curl them with a Bone Folder before assembling. This adds beautiful depth and texture.
  • Customize your Rhinestones. Use Stampin’ Blends to add color to your Rhinestones so they coordinate perfectly with your project.

✨ Want to create your own?
Click here for a complete list of the products I used and an easy way to place your order.


No matter where your creative journey takes you, I’m so glad you’re here. Let’s learn, create, connect, and grow together—one project at a time. 🦋

A beautifully crafted Christmas card featuring a window scene that displays a peaceful nativity setting on one side, while the inside is adorned with cozy holiday elements like hanging stockings and warm colors.

💕 Let’s Stay Connected

📺 YouTube 📘 Facebook 📸 Instagram 📌 Pinterest

Day 30 – Let It Snow!

Merry Little Moments & a Snow-Kissed Finale ❄️

Wow… I can’t believe this is the end of the 30-day challenge. I’m honestly so proud of myself for participating in both challenges every single day. This month stretched me, inspired me, and filled my craft room (and heart!) with joy. Thank you for being here with me through it all!

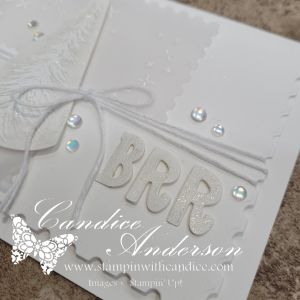
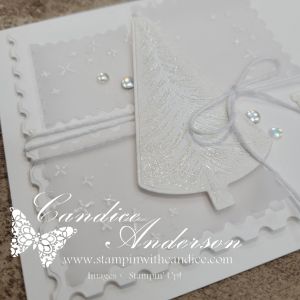
Today’s theme was Let It Snow – Merry Little Moments, and the goal was to create an all-white card using white layers, vellum, and sparkle for a snow-kissed look. And let me tell you… this one really challenged me.


❄️ Attempt #1… and Why I Started Over

My first try used gold and some retired products, and while it wasn’t bad, it wasn’t the pure snowy look the challenge called for. So I scrapped it and decided to try again.

This time, I went looking for inspiration and came across a gorgeous design I had cased before by the wonderfully talented Melody Hyde. Her vision jump-started my creativity, and I began brainstorming ways to tweak her idea to make it my own.


🎄 A Frosty, Sparkling Design

I stamped the tree from the Ornamental Christmas Stamp Set (#165991) with white ink and embossed in white then cut with the matching Dies (#166000) I used the Perennial Postage Dies (#162607) to create a layered, textured winter scene.

Vellum Panels

I die-cut three small postage shapes from vellum, then stamped the star image from Spooky Halloween (#166192) in White Craft Ink and heat-embossed them in white.

The soft vellum + snowy embossing instantly gave the perfect frosty feel.

The BRR Message

Using the Mini Alphabet Dies (#162934), I cut out the letters BRR.
Tip: To add dimension without wrestling tiny pieces of Dimensional foam, I rolled up Mini Glue Dots to pop the letters up slightly. Perfect lift—zero frustration!

I also brushed each letter with Wink of Stella for a sparkly, icy shimmer.


✨ Wink of Stella Magic

Did you know you can use Wink of Stella with the emboss resist technique?
I used it on my die-cut tree, and the sparkle settled right into the embossed design. It created the most beautiful, snowy glow—subtle but magical.


🎀 Finishing Details

To complete the card:

  • I tied it together with White Baker’s Twine
  • Added Frosted Iridescent Dots (#165766) for the perfect snow-kissed sparkle
  • Kept everything in soft whites and vellum layers for that peaceful winter moment

This final project feels serene, frosty, and completely fitting for the last day of the challenge.


❤️ Reflecting on the Challenge

One of today’s prompts was to share my favorite card from the entire month… and honestly? I’m not sure I can. There were so many I loved creating for different reasons.

But my favorite part of this challenge wasn’t any single card—
it was sharing each project with you, reading your comments, and having you join me along the way. Thank you again to everyone who crafted, encouraged, watched, liked, or simply followed along.

A digital banner for a card-making challenge featuring a snowy blue background with snowflakes, text reading 'Card a Day in November! Card Making Challenge Christmas Card Edition DAY 30 Let it Snow!'

I hope you’ll continue to join me as I keep sharing what I love.
Here’s to many more Merry Little Moments together. ❄️❤️


👉 You can shop current Stampin’ Up! supplies and tools here:
Shop with Me Here

A beautifully crafted Christmas card featuring a window scene that displays a peaceful nativity setting on one side, while the inside is adorned with cozy holiday elements like hanging stockings and warm colors.

Please feel free to contact me if you have any questions.

Contact me today to place your order!
435-232-2655 Cell ( Call or Text)
andersoncandice@hotmail.com


💕 Let’s Stay Connected

📺 YouTube
📘 Facebook
📸 Instagram
📌 Pinterest

#StampinWithCandice #StamperCandi #ACardADayInNovember2025 #30DayChristmasCardMakingChallenge #ChristmasCards #HandmadeCards #CreativeTechniques #HolidayCrafting #cardmaker #cardmaking #christmascards #handmadecards #papercraft #StampinUpKits #christmaschallenge

Day 29 – Pinecone & Poinsettia Elegance Meets Cocoa & Company

A Floral Favorite + Cozy Cocoa = One Beautiful Winter Card

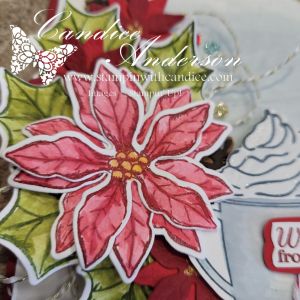
When I started today’s challenge, I’ll be honest—I had no idea where I was going. The themes Pinecone & Poinsettia Elegance and Cocoa & Company felt so different, and I wasn’t sure how they were going to come together on one card. But poinsettias are one of my absolute favorite holiday flowers (yes, I buy a new one every year!), so I knew I wanted to start with the retired Poinsettia Petals Stamp Set (#153475) and Dies (#153522).

From there… the magic started to grow.

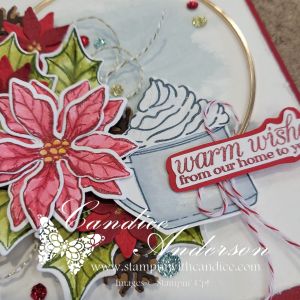
A handmade winter greeting card featuring vibrant poinsettias and holly leaves, a cup of cocoa topped with whipped cream, and a gold circular frame. The sentiment reads 'warm wishes from our home to yours' in red lettering, with colorful sequins adding sparkle.

🌺 Watercolored Poinsettias & Layered Florals

I began by cutting a bunch of pieces from the poinsettia and pinecone dies. I wanted a soft water colored look, so I stamped the poinsettia outlines in the darker shade and then water colored with the Water Painters (#168253) using the lighter shade.

Color Choices:

  • Flowers: Cherry Cobbler + Real Red
  • Flower Centers: Crushed Curry
  • Leaves: Mossy Meadow + Old Olive

I also cut additional small flowers in both Real Red and Cherry Cobbler, layered them together, and added Gold Metallic Enamel Effects for the centers. The dimensional layered look was gorgeous.


🌲 Pinecones & the Perfect Focal Element

For the pinecones, I used:

  • Pecan Pie cardstock
  • Early Espresso cardstock

I was arranging all my pieces when something caught my eye: the retired Large Gold Hoops (#166004). Suddenly, the card clicked into place. The hoop became the perfect wreath-like frame to build my poinsettia cluster around.


☕️ Bringing in the Cocoa Theme

Next challenge: how do I incorporate cocoa into a poinsettia & pinecone card?

I had two great current product options, and ultimately went with the Weekend Adventures Stamp Set (#167318) for the mug. For the whipped topping, I used the More Than Autumn Stamps (#164228) and Dies (#164075).

Details:

  • Mug stamped in Secret Sea
  • Interior washed with Cloud Cover
  • Whipped topping sparkle added with Wink of Stella

The greeting was stamped in Cherry Cobbler, fussy-cut, layered onto Real Red, and fussy-cut again for a bold double-layered sentiment.

I tied a small Real Red Baker’s Twine Bow (#164051) to the mug for a cozy finishing touch.


🎨 Soft, Vintage-Inspired Background

I didn’t want a stark white background, so I used Watercolor Paper (#149612) and did a soft wash using Cloud Cover and my Aqua Painters. Then I roughed up the edges with my scissors and bent the corners slightly for a worn, distressed look.

This gave the whole card a warm, handmade, winter-cozy feel.


✨ Assembly & Final Touches

With all the pieces ready, I began arranging and adhering everything around the gold hoop—
using lots of Dimensionals and Mini Glue Dots to secure every element and build incredible depth. Bonus water coloring the paper adds automatic depth by warping the paper. I did use a bone folder to add a bit of a curl to the petals.

I finished the front with the Traditional Sparkling Sequins (#165875), using a variety of colors to add softness, shine, and movement.

Since the card base is Cherry Cobbler, I made sure to decorate the inside as well. I added a Merry Christmas sentiment, tucked in a few small poinsettias, sprinkled more sequins, and mounted the whole inside layer onto Old Olive cardstock for balance and contrast.

This is definitely not your typical flat card—it has layers, depth, movement, and dimension and doesn’t exactly fit within the confines of a standard mailable design. But it is perfect for that special someone you want to hand-deliver a card to… the kind of card that truly shows how much you care. The pictures don’t do it justice. I made a quick video to help showcase the texture and depth to this card.


❤️ Final Thoughts

I love how this card evolved from “I have no idea where I’m going” to one of my favorite designs of the entire month. The mix of elegant florals, rustic pinecones, and a warm mug of cocoa created such a charming, heartfelt winter masterpiece.


👉 You can shop current Stampin’ Up! supplies and tools here:
Shop with Me Here

A beautifully crafted Christmas card featuring a window scene that displays a peaceful nativity setting on one side, while the inside is adorned with cozy holiday elements like hanging stockings and warm colors.

Please feel free to contact me if you have any questions.

Contact me today to place your order!
435-232-2655 Cell ( Call or Text)
andersoncandice@hotmail.com


💕 Let’s Stay Connected

📺 YouTube
📘 Facebook
📸 Instagram
📌 Pinterest

#StampinWithCandice #StamperCandi #ACardADayInNovember2025 #30DayChristmasCardMakingChallenge #ChristmasCards #HandmadeCards #CreativeTechniques #HolidayCrafting #cardmaker #cardmaking #christmascards #handmadecards #papercraft #StampinUpKits #christmaschallenge