From Treat Bag to Box: My Favorite Heart Gusseted Treat Bag Project

Monday night on my live, I shared multiple projects using the Heart Gusseted Treat Bags (#167073), and I had so much fun playing with these bags and seeing just how many ideas I could come up with. 💕

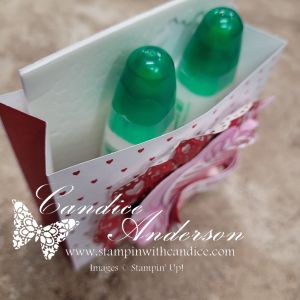
My live video featured my favorite project.. This little box is relatively simple to make, and I love how versatile it is—plus, one bag makes TWO boxes, which is always a win!
Box Instructions

Start with one Heart Gusseted Treat Bag:

  1. Cut off the top folded portion of the bag.
    • Measure 9-1/4″ up from the bottom and cut.
  2. Trim the bottom so the bag measures 9″ total.
  3. Cut the bag in half at 4-1/2″.
  4. Score the bottom at 3/4″.
    • Be sure to flip the piece so you get a good score on both sides.
  5. Cut the corners on the bottom of each piece up to the 3/4″ score line.
    • You should now have two red sections and two white sections.
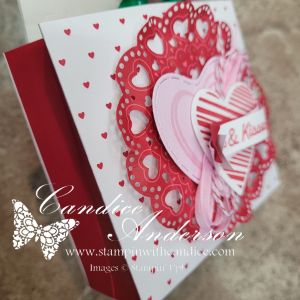
Box Base (for Support)

  • Cut a piece of chipboard to 4″ x 1-1/4″
    • I used chipboard from my Paper Pumpkin kits.
  • Cover with Real Red cardstock, also 4″ x 1-1/4″.
  • Adhere to the bottom of the inside of the box for extra stability.

Decorating Details
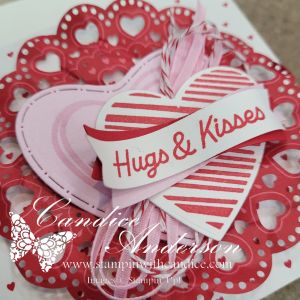
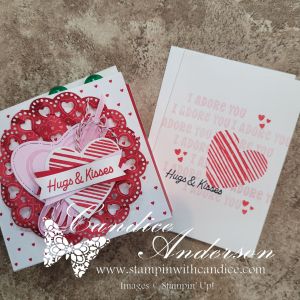
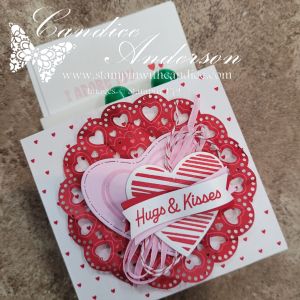
A close-up view of a decorative Valentine's Day card featuring layered hearts in shades of pink and red, with a ribbon that reads 'Hugs & Kisses'. The background includes a lace-like doily pattern.

Decorate your box as desired! For my sample, I used:

  • Lovely Doilies #167104
  • Endless Love Stamp Set #167055
  • Endless Love Dies #167061
  • Bubble Bath Ribbon #167075
  • Real Red Baker’s Twine #164051

Colors: Real Red, White, & Bubble Bath

✨ Perfect Fit: This box fits our Note Cards (#159232) perfectly, making it ideal for a sweet Valentine note or gift enclosure.

The simple card design tucked inside the box was inspired by Heidi Collins, keeping the look clean, classic, and easy to recreate.
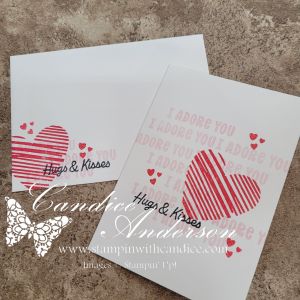
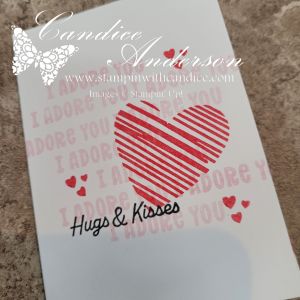
✨ Bonus: This project is the perfect fit for this week’s Global Design Project challenge – Hearts #GDP531! 💖

Be sure to check out my video to see just how easy this project is to create, along with the other fun ideas I shared. I’ll be posting more details on the remaining projects later this week, so be sure to tune back in! 💕


A beautifully crafted Christmas card featuring a window scene that displays a peaceful nativity setting on one side, while the inside is adorned with cozy holiday elements like hanging stockings and warm colors.

Please feel free to contact me if you have any questions.

Contact me today to place your order!
435-232-2655 Cell ( Call or Text)
andersoncandice@hotmail.com
💕 Let’s Stay Connected

📺 YouTube
📘 Facebook
📸 Instagram
📌 Pinterest

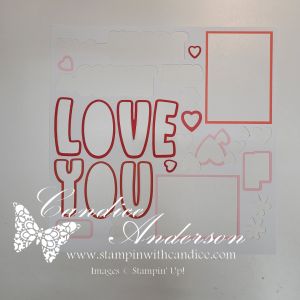
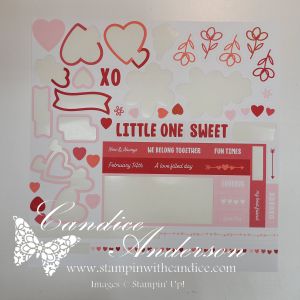
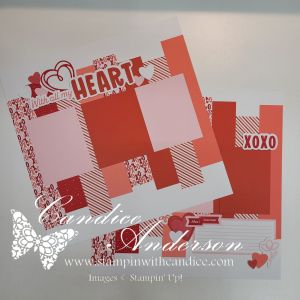
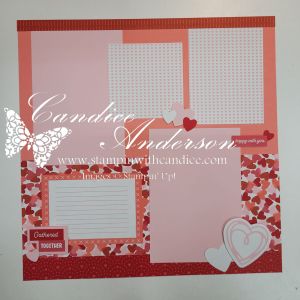
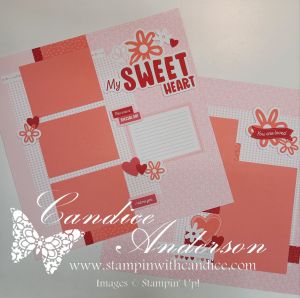
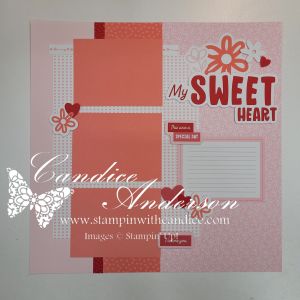
Discover the Love Story Scrapbooking Workshop Kit ✂️💖

Have you seen the three new Scrapbooking Workshop Kits in the Mini Catalog? Because oh my goodness—I am in love with all three! 😍

Today I decided to put together the Love Story Scrapbooking Workshop Kit #167078, and I wanted to share exactly what I love about these kits.

Here’s why these kits are a total win:

1️⃣ They are beautifully designed.
The creativity in these kits is incredible—from the layouts to the little design details. Everything coordinates so well and feels very intentional.

2️⃣ They are super easy to assemble.
I completed my Love Story kit in about 3 hours, and that included taking my time and truly enjoying the process.

3️⃣ The instructions are fantastic.
They are clear, easy to follow, and very well put together—perfect whether you’re a beginner or a seasoned scrapbooker.

4️⃣ They are relaxing and enjoyable to create.
This was one of those projects where you can just sit back, craft, and unwind. No stress. Just fun.

5️⃣ They have coordinating stamp sets.
I love that you can expand the kit with matching stamps to make it even more versatile.

  • Love Story Stamp Set #167065
  • Exploring Nature Stamp Set #166913
  • Beach Time Stamp Set #166832

6️⃣ The kits coordinate with full suites.
All three new kits—

  • Love Story Scrapbooking Workshop Kit #167078
    • Made with Love Suite #167079
  • Exploring Nature Scrapbooking Workshop Kit #166934
    • Nature Walk Suite #166936
  • Beach Time Scrapbooking Workshop Kit #166843
    • Beach Boardwalk Suite #166844

have matching suites that include additional stamp sets, ribbons, papers, and accessories you can add to your project if you want to take it even further.

7️⃣ Bonus: LOTS of extra goodies!
There is plenty of extra paper and stickers left over, which means more cards, more layouts, and more creative fun later on.

✨ Stay tuned to see what I come up with using my leftovers—I have ideas already brewing!

If you love scrapbooking but want something that’s easy, coordinated, and totally stress-free, these workshop kits are a must-try. 💕


A beautifully crafted Christmas card featuring a window scene that displays a peaceful nativity setting on one side, while the inside is adorned with cozy holiday elements like hanging stockings and warm colors.

Please feel free to contact me if you have any questions.

Contact me today to place your order!
435-232-2655 Cell ( Call or Text)
andersoncandice@hotmail.com

💕 Let’s Stay Connected

📺 YouTube
📘 Facebook
📸 Instagram
📌 Pinterest

#StampinWithCandice #ScrapbookingWorkshop #LoveStoryKit #CreativeTime #MemoryKeepingMadeEasy #StampinUp

Easy Fun Fold Gift Card Holder Tutorial

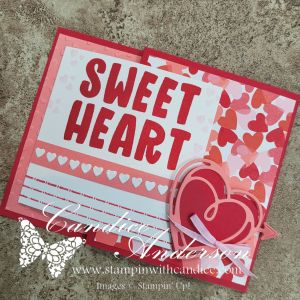
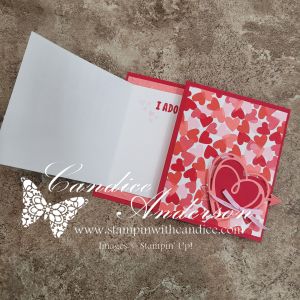
On my Monday Live, I shared an easy-to-make fun fold gift card holder inspired by my recent mini album. This sweet project features brand-new products that were released just yesterday, and I absolutely love how simple yet impressive this design is.

Card Base & Structure

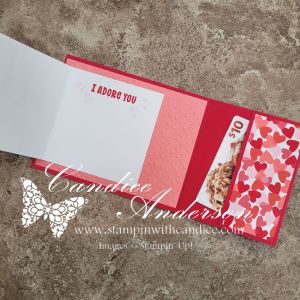
Start with a piece of Real Red cardstock cut to 4-1/4″ x 11″.
Score at 5-1/2″ and 9″.

  • The 5-1/2″ section will be on the left side of the card.
  • Fold the 2″ section inward, then fold again on the 5-1/2″ score line.
  • This creates a pocket on the inside of the card.

Secure the sides of the pocket using Tear & Tape (#154031), leaving the top edge open so you can tuck in a gift card or cash.

Inside Panel

Cut Flirty Flamingo cardstock to 5-1/4″ x 4″ and emboss it using the
Hearts of Love 3D Embossing Folder (#167071).

Attach this to the inside of the card on the 5-1/2″ x 4-1/4″ section.

Designer Series Paper

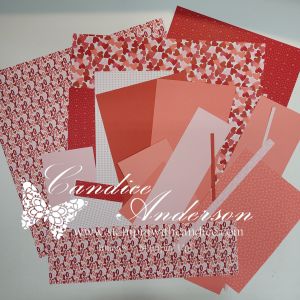
From the Made with Love Designer Series Paper (#167054), cut:

  • 4″ x 3-1/4″
  • 4″ x 1-3/4″

Place these pieces on:

  • The 3-1/2″ section folded to the front
  • The 2″ section folded inside to form the pocket

Left Folding Panel

Cut Basic White cardstock to 3-1/2″ x 7″ and score in half at 3-1/2″.

Stamp “Sweet Heart” from the Love Story Stamp Set (#167065) on the front and decorate as desired.

Attach this panel centered over the embossed section on the left side of the card base.

For one version, I placed the mini hearts directly on the white panel. For the second card, I added them to a 1/4″ strip of coordinating paper for a slightly different look.

Closure & Finishing Touches

For the closure, cut:

  • One solid heart
  • One lined heart

Using the Endless Love Dies (#167061).
Add arrows if you’d like for extra detail.

Attach the hearts to the front using Stampin’ Dimensionals, creating a small pocket for the folded panel to tuck underneath.

Finish the card with Bubble Bath Faux Linen Ribbon (#167075).


I love how simple and easy this fun fold gift card holder is to make, yet it has such a wow factor. Be sure to check out the video to see the step-by-step process, and I can’t wait to see your ideas using this design and these beautiful new products!


A beautifully crafted Christmas card featuring a window scene that displays a peaceful nativity setting on one side, while the inside is adorned with cozy holiday elements like hanging stockings and warm colors.

Please feel free to contact me if you have any questions.

Contact me today to place your order!
435-232-2655 Cell ( Call or Text)
andersoncandice@hotmail.com

💕 Let’s Stay Connected

📺 YouTube
📘 Facebook
📸 Instagram
📌 Pinterest

Scrapped! Episode 30 – Gratitude Mini Album

A Beautiful Way to Celebrate What Matters Most

November always inspires me to slow down and reflect on the things I’m most grateful for. For Scrapped! Episode 30, I wanted to create something that captured those heartfelt moments in a way I could revisit year after year. Instead of a traditional scrapbook page, I designed a Gratitude Mini Album—a keepsake filled with texture, layers, and interactive elements that make memory keeping both meaningful and fun.

This mini album is built using our Flip Flaps and features gorgeous pull-outs, flaps, pockets, and hidden journaling spots. It’s the perfect way to document gratitude, seasonal reflections, or family traditions during the holidays. And because the album structure is so versatile, you can recreate it for any theme—thankfulness, celebrations, travel, or even a yearly highlight book.

🎥 Be sure to watch the episode for a closer look at how the project comes together and ideas for customizing your own album.


About the Album

For this project, I started with chipboard (the kind that comes in Paper Pumpkin kits or many of our other crafting kits—recycling win!) to create sturdy front and back covers. The inside includes multiple sizes of Flip Flaps, thoughtful fold-outs, a waterfall element, reinforced center pages, and plenty of spaces for photos, journaling, and decorative touches.

Once the structure was built, I decorated the album using the warm, earthy tones of the Gathering Together Suite (165987), which felt absolutely perfect for a gratitude theme. The stamps, dies, textures, and embellishments all came together beautifully to create a heartfelt, cozy design.

Featured Products

Gathering Together Suite (#165987)

  • Gathering Moments Stamp Set (#165970)
  • Gathering Moments Dies (#165979)
  • Gathering Together Designer Series Paper (#165969)
  • Gathering Leaves Embossing Folder (#165983)
  • Early Espresso & Old Olive Baker’s Twine Combo (#165986)
  • Cajun Craze and Gold Dots Embellishments (#165984)

I also pulled sentiments and decorative elements from:

  • Just a Note Stamp Set (#166098) + Dies (#166101)
  • Our Story Stamp Set (#167109)
  • Celebrate Together Stamp Set (#166655)

👉 You can shop current Stampin’ Up! supplies and tools here:
Shop with Me Here

The color palette—Basic Beige, Cajun Craze, Crushed Curry, Early Espresso, Old Olive, and Champagne Foil—set the warm and inviting tone that makes this mini album feel extra special.

I loved this project so much that I’m already working on a Christmas version with a fun twist on the layout—so stay tuned!


Want to Make This Album Yourself?

You can absolutely create your own version of this Gratitude Mini Album—and I’ve made it easy!

Gratitude Mini Album Tutorial

$10.00 USD

✨ FULL step-by-step tutorial, including:

  • complete measurements
  • detailed instructions
  • cutting guides
  • photos
  • tips for customizing
  • and a full supply list
cards
Powered by PayPal

Whether you’re documenting memories for yourself or creating a heartfelt handmade gift, this album is something you’ll treasure year after year.


A beautifully crafted Christmas card featuring a window scene that displays a peaceful nativity setting on one side, while the inside is adorned with cozy holiday elements like hanging stockings and warm colors.

Please feel free to contact me if you have any questions.

Contact me today to place your order!
435-232-2655 Cell ( Call or Text)
andersoncandice@hotmail.com

💕 Let’s Stay Connected

📺 YouTube
📘 Facebook
📸 Instagram
📌 Pinterest

Day 30 – Let It Snow!

Merry Little Moments & a Snow-Kissed Finale ❄️

Wow… I can’t believe this is the end of the 30-day challenge. I’m honestly so proud of myself for participating in both challenges every single day. This month stretched me, inspired me, and filled my craft room (and heart!) with joy. Thank you for being here with me through it all!

Today’s theme was Let It Snow – Merry Little Moments, and the goal was to create an all-white card using white layers, vellum, and sparkle for a snow-kissed look. And let me tell you… this one really challenged me.


❄️ Attempt #1… and Why I Started Over

My first try used gold and some retired products, and while it wasn’t bad, it wasn’t the pure snowy look the challenge called for. So I scrapped it and decided to try again.

This time, I went looking for inspiration and came across a gorgeous design I had cased before by the wonderfully talented Melody Hyde. Her vision jump-started my creativity, and I began brainstorming ways to tweak her idea to make it my own.


🎄 A Frosty, Sparkling Design

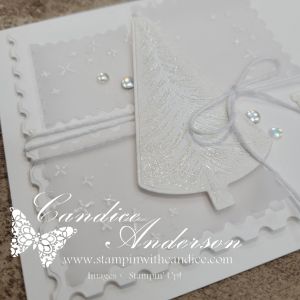
I stamped the tree from the Ornamental Christmas Stamp Set (#165991) with white ink and embossed in white then cut with the matching Dies (#166000) I used the Perennial Postage Dies (#162607) to create a layered, textured winter scene.

Vellum Panels

I die-cut three small postage shapes from vellum, then stamped the star image from Spooky Halloween (#166192) in White Craft Ink and heat-embossed them in white.

The soft vellum + snowy embossing instantly gave the perfect frosty feel.

The BRR Message

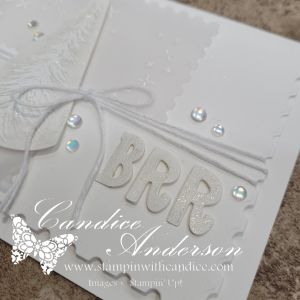
Using the Mini Alphabet Dies (#162934), I cut out the letters BRR.
Tip: To add dimension without wrestling tiny pieces of Dimensional foam, I rolled up Mini Glue Dots to pop the letters up slightly. Perfect lift—zero frustration!

I also brushed each letter with Wink of Stella for a sparkly, icy shimmer.


✨ Wink of Stella Magic

Did you know you can use Wink of Stella with the emboss resist technique?
I used it on my die-cut tree, and the sparkle settled right into the embossed design. It created the most beautiful, snowy glow—subtle but magical.


🎀 Finishing Details

To complete the card:

  • I tied it together with White Baker’s Twine
  • Added Frosted Iridescent Dots (#165766) for the perfect snow-kissed sparkle
  • Kept everything in soft whites and vellum layers for that peaceful winter moment

This final project feels serene, frosty, and completely fitting for the last day of the challenge.


❤️ Reflecting on the Challenge

One of today’s prompts was to share my favorite card from the entire month… and honestly? I’m not sure I can. There were so many I loved creating for different reasons.

But my favorite part of this challenge wasn’t any single card—
it was sharing each project with you, reading your comments, and having you join me along the way. Thank you again to everyone who crafted, encouraged, watched, liked, or simply followed along.

A digital banner for a card-making challenge featuring a snowy blue background with snowflakes, text reading 'Card a Day in November! Card Making Challenge Christmas Card Edition DAY 30 Let it Snow!'

I hope you’ll continue to join me as I keep sharing what I love.
Here’s to many more Merry Little Moments together. ❄️❤️


👉 You can shop current Stampin’ Up! supplies and tools here:
Shop with Me Here

A beautifully crafted Christmas card featuring a window scene that displays a peaceful nativity setting on one side, while the inside is adorned with cozy holiday elements like hanging stockings and warm colors.

Please feel free to contact me if you have any questions.

Contact me today to place your order!
435-232-2655 Cell ( Call or Text)
andersoncandice@hotmail.com

💕 Let’s Stay Connected

📺 YouTube
📘 Facebook
📸 Instagram
📌 Pinterest

#StampinWithCandice #StamperCandi #ACardADayInNovember2025 #30DayChristmasCardMakingChallenge #ChristmasCards #HandmadeCards #CreativeTechniques #HolidayCrafting #cardmaker #cardmaking #christmascards #handmadecards #papercraft #StampinUpKits #christmaschallenge

Day 29 – Pinecone & Poinsettia Elegance Meets Cocoa & Company

A Floral Favorite + Cozy Cocoa = One Beautiful Winter Card

When I started today’s challenge, I’ll be honest—I had no idea where I was going. The themes Pinecone & Poinsettia Elegance and Cocoa & Company felt so different, and I wasn’t sure how they were going to come together on one card. But poinsettias are one of my absolute favorite holiday flowers (yes, I buy a new one every year!), so I knew I wanted to start with the retired Poinsettia Petals Stamp Set (#153475) and Dies (#153522).

From there… the magic started to grow.

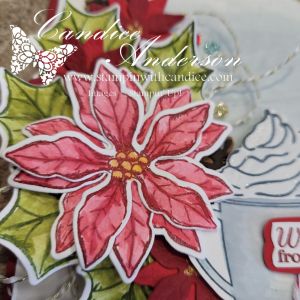
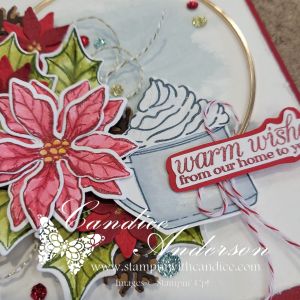
A handmade winter greeting card featuring vibrant poinsettias and holly leaves, a cup of cocoa topped with whipped cream, and a gold circular frame. The sentiment reads 'warm wishes from our home to yours' in red lettering, with colorful sequins adding sparkle.

🌺 Watercolored Poinsettias & Layered Florals

I began by cutting a bunch of pieces from the poinsettia and pinecone dies. I wanted a soft water colored look, so I stamped the poinsettia outlines in the darker shade and then water colored with the Water Painters (#168253) using the lighter shade.

Color Choices:

  • Flowers: Cherry Cobbler + Real Red
  • Flower Centers: Crushed Curry
  • Leaves: Mossy Meadow + Old Olive

I also cut additional small flowers in both Real Red and Cherry Cobbler, layered them together, and added Gold Metallic Enamel Effects for the centers. The dimensional layered look was gorgeous.


🌲 Pinecones & the Perfect Focal Element

For the pinecones, I used:

  • Pecan Pie cardstock
  • Early Espresso cardstock

I was arranging all my pieces when something caught my eye: the retired Large Gold Hoops (#166004). Suddenly, the card clicked into place. The hoop became the perfect wreath-like frame to build my poinsettia cluster around.


☕️ Bringing in the Cocoa Theme

Next challenge: how do I incorporate cocoa into a poinsettia & pinecone card?

I had two great current product options, and ultimately went with the Weekend Adventures Stamp Set (#167318) for the mug. For the whipped topping, I used the More Than Autumn Stamps (#164228) and Dies (#164075).

Details:

  • Mug stamped in Secret Sea
  • Interior washed with Cloud Cover
  • Whipped topping sparkle added with Wink of Stella

The greeting was stamped in Cherry Cobbler, fussy-cut, layered onto Real Red, and fussy-cut again for a bold double-layered sentiment.

I tied a small Real Red Baker’s Twine Bow (#164051) to the mug for a cozy finishing touch.


🎨 Soft, Vintage-Inspired Background

I didn’t want a stark white background, so I used Watercolor Paper (#149612) and did a soft wash using Cloud Cover and my Aqua Painters. Then I roughed up the edges with my scissors and bent the corners slightly for a worn, distressed look.

This gave the whole card a warm, handmade, winter-cozy feel.


✨ Assembly & Final Touches

With all the pieces ready, I began arranging and adhering everything around the gold hoop—
using lots of Dimensionals and Mini Glue Dots to secure every element and build incredible depth. Bonus water coloring the paper adds automatic depth by warping the paper. I did use a bone folder to add a bit of a curl to the petals.

I finished the front with the Traditional Sparkling Sequins (#165875), using a variety of colors to add softness, shine, and movement.

Since the card base is Cherry Cobbler, I made sure to decorate the inside as well. I added a Merry Christmas sentiment, tucked in a few small poinsettias, sprinkled more sequins, and mounted the whole inside layer onto Old Olive cardstock for balance and contrast.

This is definitely not your typical flat card—it has layers, depth, movement, and dimension and doesn’t exactly fit within the confines of a standard mailable design. But it is perfect for that special someone you want to hand-deliver a card to… the kind of card that truly shows how much you care. The pictures don’t do it justice. I made a quick video to help showcase the texture and depth to this card.


❤️ Final Thoughts

I love how this card evolved from “I have no idea where I’m going” to one of my favorite designs of the entire month. The mix of elegant florals, rustic pinecones, and a warm mug of cocoa created such a charming, heartfelt winter masterpiece.


👉 You can shop current Stampin’ Up! supplies and tools here:
Shop with Me Here

A beautifully crafted Christmas card featuring a window scene that displays a peaceful nativity setting on one side, while the inside is adorned with cozy holiday elements like hanging stockings and warm colors.

Please feel free to contact me if you have any questions.

Contact me today to place your order!
435-232-2655 Cell ( Call or Text)
andersoncandice@hotmail.com

💕 Let’s Stay Connected

📺 YouTube
📘 Facebook
📸 Instagram
📌 Pinterest

#StampinWithCandice #StamperCandi #ACardADayInNovember2025 #30DayChristmasCardMakingChallenge #ChristmasCards #HandmadeCards #CreativeTechniques #HolidayCrafting #cardmaker #cardmaking #christmascards #handmadecards #papercraft #StampinUpKits #christmaschallenge