Create Stunning Christmas Cards: CASE Techniques

This week’s Global Design Project challenge, #GDP560, is another fun CASE the Designer challenge, featuring Charlet Mallett!

I love CASE challenges because there are so many different directions you can take the inspiration. You can focus on the colors, layout, technique, or even just one little element that catches your eye.

For my card, I chose to focus on Charlet’s background technique and a similar layout, but gave it a Christmas twist using the Pretty Poinsettia Bundle. 🎄

I absolutely love how the soft background adds interest without competing with that gorgeous poinsettia. It really helps the rich colors and dimension of the flower pop!

That’s one of my favorite things about CASEing another designer—you can start with the same inspiration and create something completely your own. ❤️

Want to See How It Comes Together?

Check out my reel for a quick recap of how to create this stunning card!

Then use these quick tips when creating your own:

  • Create your own stencil. Cut the leaves from a thick piece of paper. I used one of the cardboard backers from a Designer Series Paper pack. Keep an extra piece handy to cover any open areas as you move the design around your background.
  • Start with watercolor paper. For the best results with this background technique, watercolor paper gives you a little more freedom to work with the water and ink.
  • Make your own color spritz. Add a few drops of reinker to a color spritzer along with water to create the soft background color.
  • Add some splatters. A Water Painter makes it quick and easy to add those little splatters of color that give the background even more interest.
  • Give your poinsettia dimension. Ink the edges of the poinsettia petals and leaves, then gently curl them with a Bone Folder before assembling. This adds beautiful depth and texture.
  • Customize your Rhinestones. Use Stampin’ Blends to add color to your Rhinestones so they coordinate perfectly with your project.

Want to create your own?
Click here for a complete list of the products I used and an easy way to place your order.


No matter where your creative journey takes you, I’m so glad you’re here. Let’s learn, create, connect, and grow together—one project at a time. 🦋

A beautifully crafted Christmas card featuring a window scene that displays a peaceful nativity setting on one side, while the inside is adorned with cozy holiday elements like hanging stockings and warm colors.

💕 Let’s Stay Connected

📺 YouTube 📘 Facebook 📸 Instagram 📌 Pinterest

Cut, Shake & Share: Valentine Treat Ideas with Heart Gusseted Treat Bags

Last week on my live, I shared several fun ideas using the Heart Gusseted Treat Bags (#167073). I posted about the project I created during the live, but then realized I never shared the other projects—so today I’m fixing that!

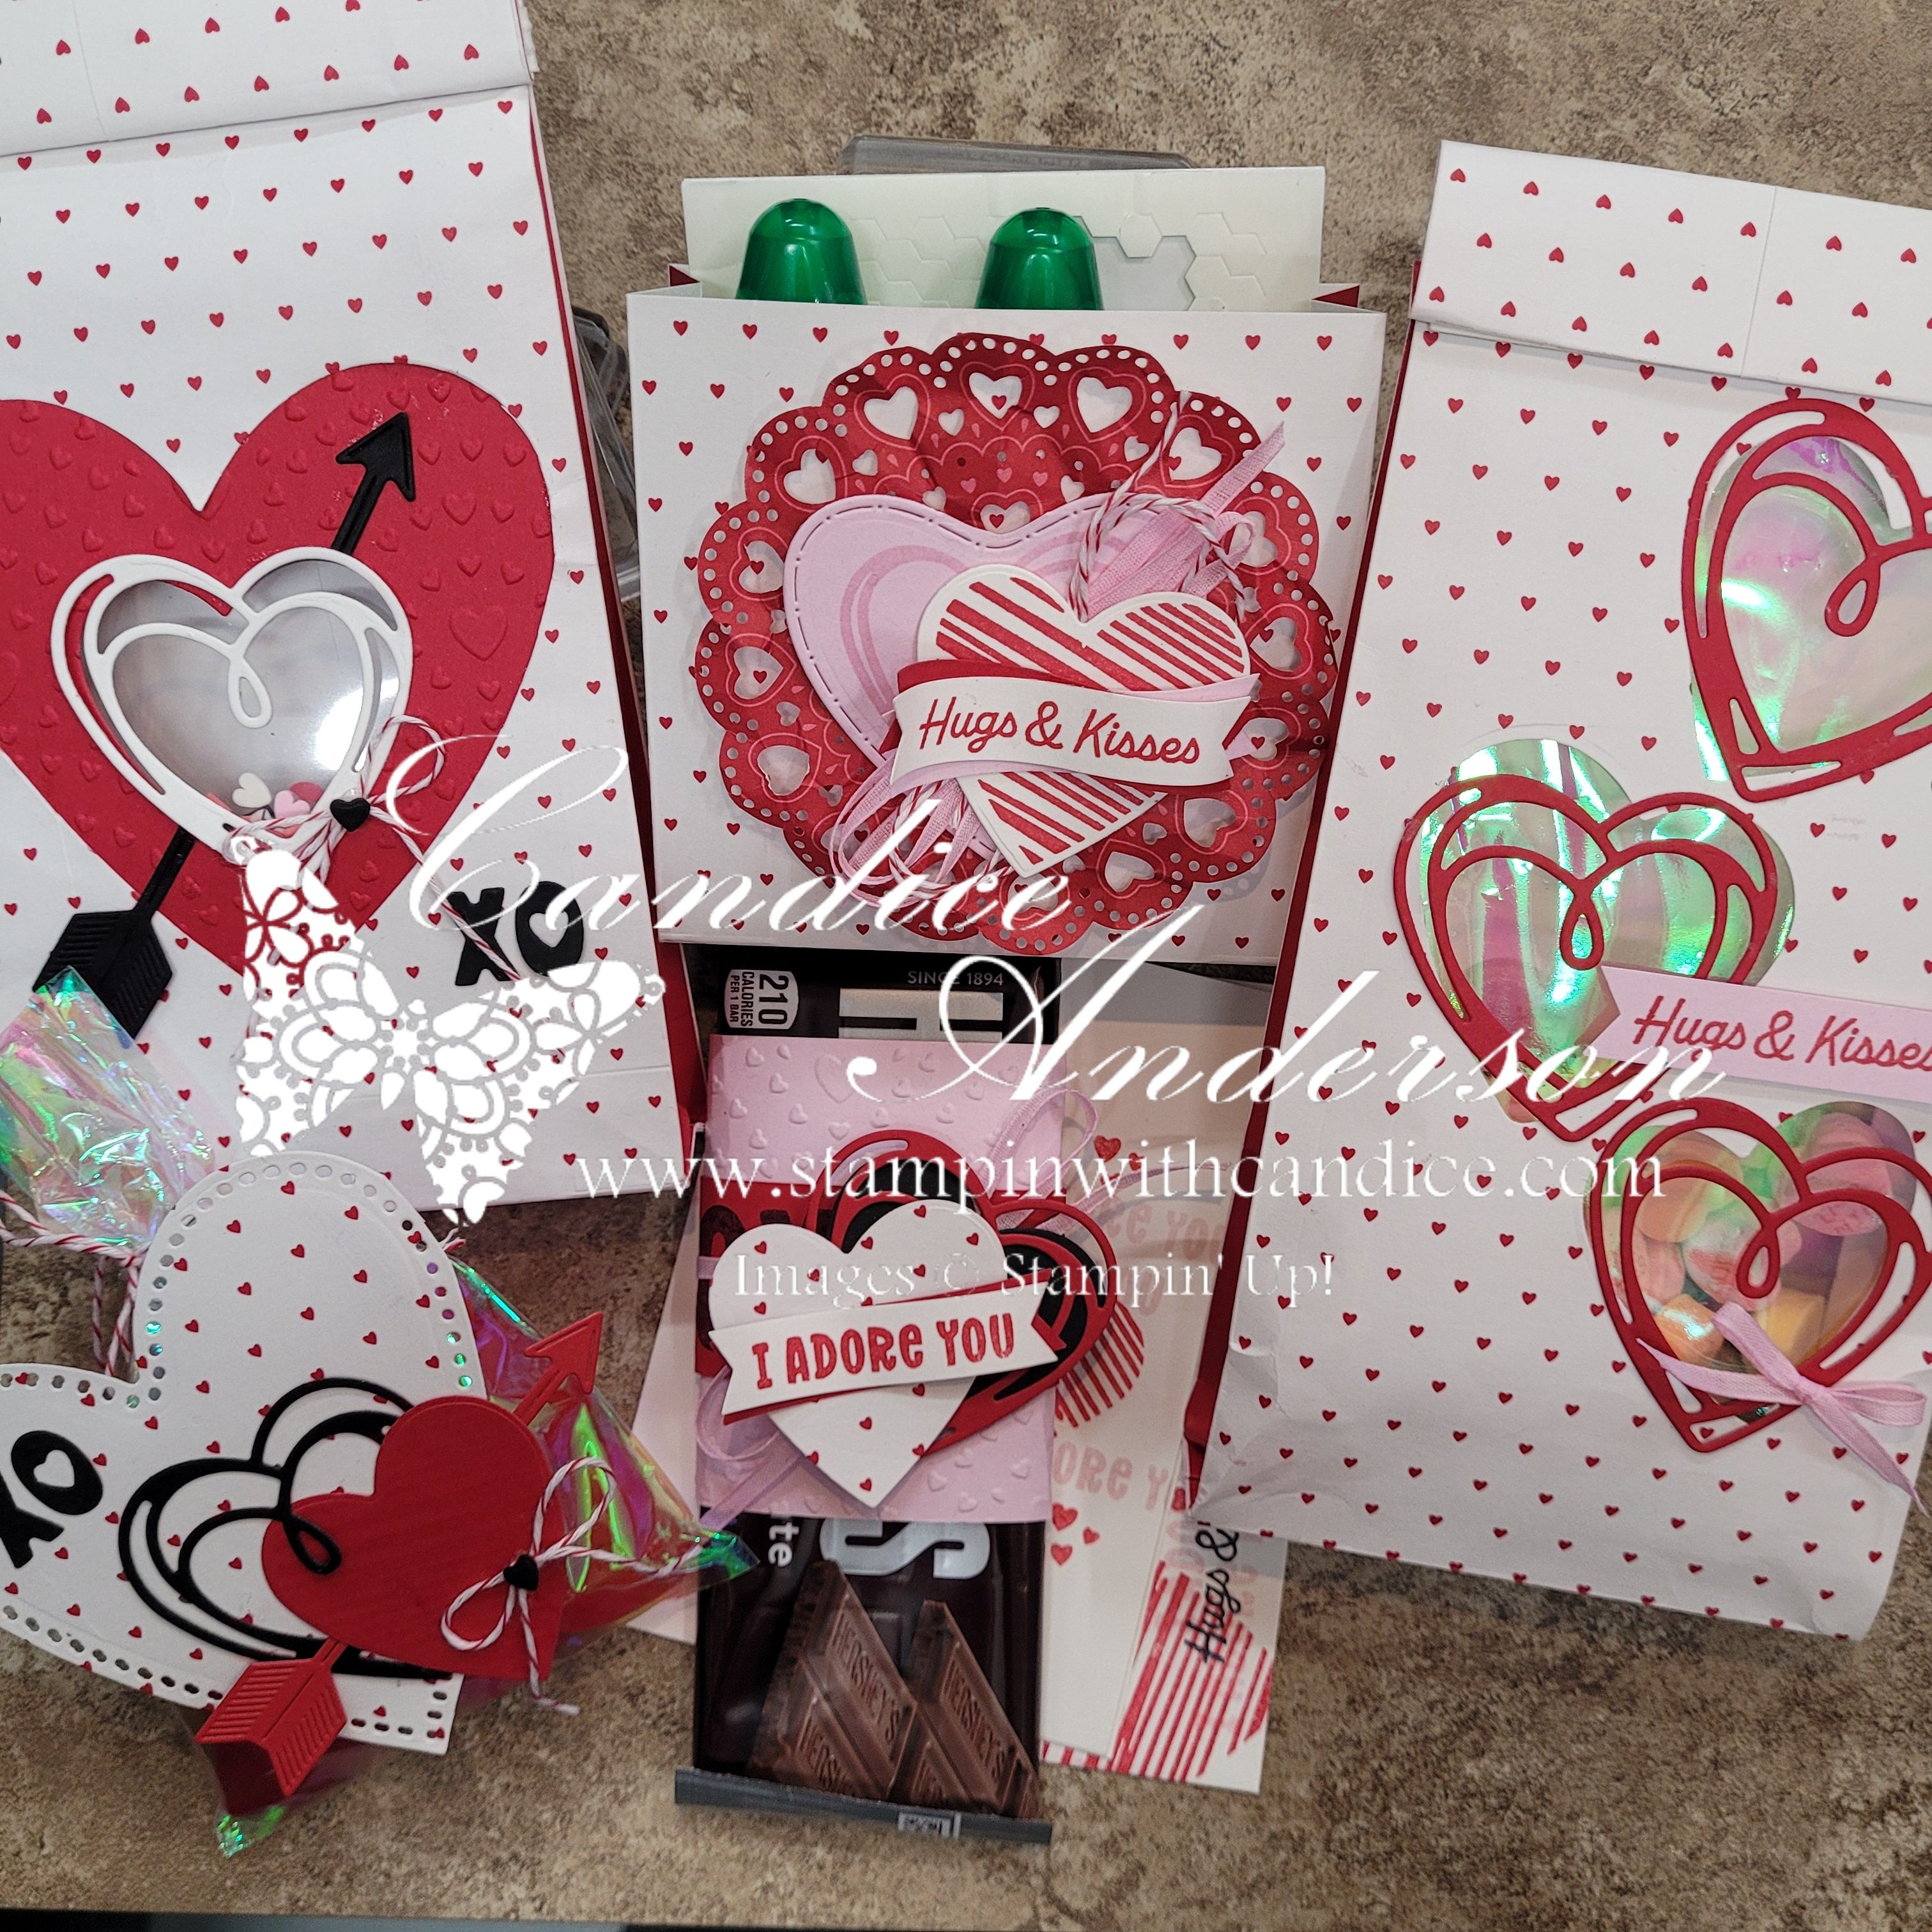
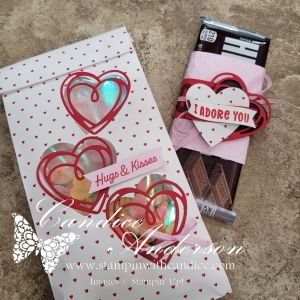
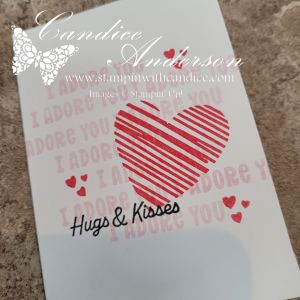
A variety of decorated gift bags with heart designs, featuring messages like 'Hugs & Kisses' and 'I Adore You'. The bags are embellished with red and pink colors, and some contain chocolates and other small gifts.

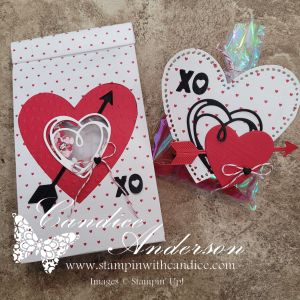
These four additional projects all feature cutting a window into the treat bags using the Endless Love Dies (#167061), then using the die-cut heart from the bag on a coordinating project. It’s such a fun way to stretch your supplies and get multiple projects from one idea.

Helpful Tips Before You Cut

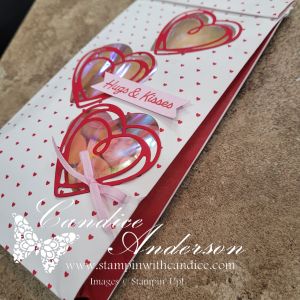
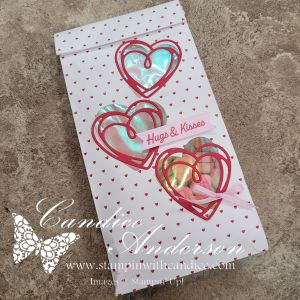
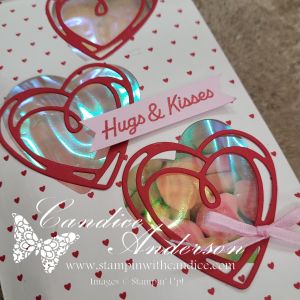
A handmade greeting card featuring three red heart cutouts with a transparent background, displaying colorful sequins inside, and the text 'Hugs & Kisses' on a pink ribbon.

Be sure to watch the video where I share tips on how to avoid cutting through the sides of the bag. For this technique, you’ll want to use the Mini Cutting Plates (#151004) and place one inside the bag, so you’re only cutting through a single layer.

If you’d like your bag to stand up like mine, score the bottom of the bag at 1/2″, then fold that section to the inside to create a flat base.


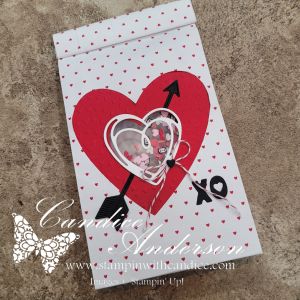
Project One – Large Heart Window Shaker

For my first project, I used the large heart die to cut a window in the bag. I then cut a smaller heart from Real Red cardstock and embossed it with the Hearts of Love 3D Embossing Folder (#167071).

To create the shaker:

  • I used a 3″ x 3″ Flip Flap (#166514)
  • Filled it with the Loose Valentines Assortment (#167074)
  • Attached it to the back of the embossed red heart
  • Then adhered everything to the inside of the bag behind the window

I finished the bag with additional die cuts and Real Red Baker’s Twine (#164051).

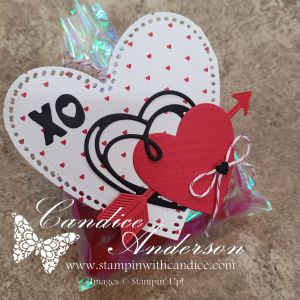
For the coordinating project, I used the heart cut from the treat bag along with extra die cuts and twine then attached them to an Iridescent Treat Bag (#166204)—quick, easy, and adorable.


Project Two – Filigree Hearts & Shimmery Window

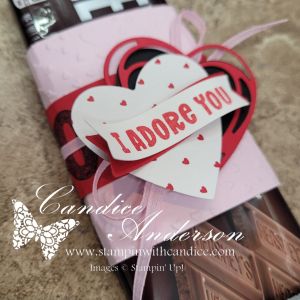
For the second project, I cut the smaller hearts and layered them with the filigree heart dies.

To create a shimmery window:

  • I cut open an Iridescent Treat Bag (#166204)
  • Adhered it to the inside of the gusseted treat bag

For the greeting, I used the Three Banner Punch (#167050) for a quick and easy sentiment. The final touch was Bubble Bath 1/8″ Faux Linen Ribbon (#167075)—the perfect delicate accent.

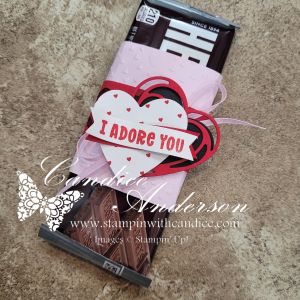
Coordinating Candy Bar Treat

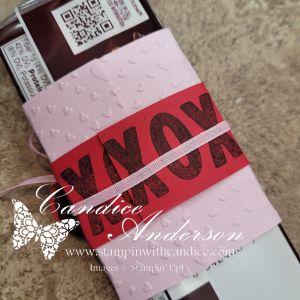
To coordinate, I layered one of the hearts cut from the treat bag onto additional die cuts. I embossed Bubble Bath cardstock, wrapped it around a candy bar, and added:

  • A strip of Real Red cardstock stamped with XO in black
  • A big, beautiful bow made from the Bubble Bath Faux Linen Ribbon

Quick, easy, and super cute!


Any of these projects would make a perfect Valentine treat for someone special, and they’re a great way to get even more value from your Heart Gusseted Treat Bags.

💖 Remember: You can purchase all of the products used for these projects on my website. I appreciate your support.


A beautifully crafted Christmas card featuring a window scene that displays a peaceful nativity setting on one side, while the inside is adorned with cozy holiday elements like hanging stockings and warm colors.

Please feel free to contact me if you have any questions.

Contact me today to place your order!
435-232-2655 Cell ( Call or Text)
andersoncandice@hotmail.com


💕 Let’s Stay Connected

📺 YouTube
📘 Facebook
📸 Instagram
📌 Pinterest

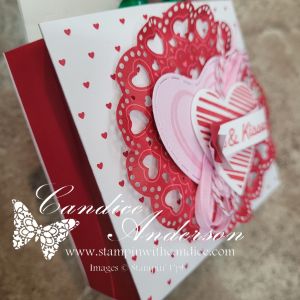
From Treat Bag to Box: My Favorite Heart Gusseted Treat Bag Project

Monday night on my live, I shared multiple projects using the Heart Gusseted Treat Bags (#167073), and I had so much fun playing with these bags and seeing just how many ideas I could come up with. 💕

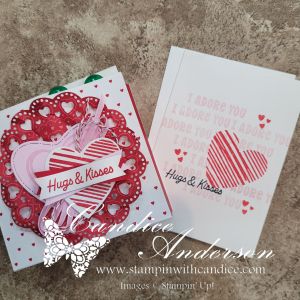
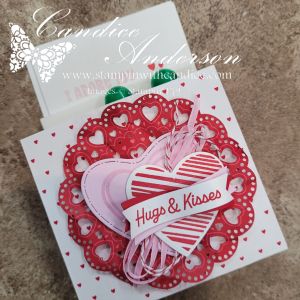
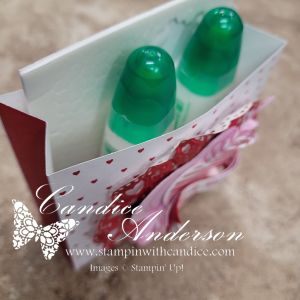
My live video featured my favorite project.. This little box is relatively simple to make, and I love how versatile it is—plus, one bag makes TWO boxes, which is always a win!

Box Instructions

Start with one Heart Gusseted Treat Bag:

  1. Cut off the top folded portion of the bag.
    • Measure 9-1/4″ up from the bottom and cut.
  2. Trim the bottom so the bag measures 9″ total.
  3. Cut the bag in half at 4-1/2″.
  4. Score the bottom at 3/4″.
    • Be sure to flip the piece so you get a good score on both sides.
  5. Cut the corners on the bottom of each piece up to the 3/4″ score line.
    • You should now have two red sections and two white sections.

Box Base (for Support)

  • Cut a piece of chipboard to 4″ x 1-1/4″
    • I used chipboard from my Paper Pumpkin kits.
  • Cover with Real Red cardstock, also 4″ x 1-1/4″.
  • Adhere to the bottom of the inside of the box for extra stability.

Decorating Details

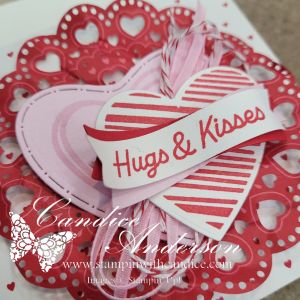
A close-up view of a decorative Valentine's Day card featuring layered hearts in shades of pink and red, with a ribbon that reads 'Hugs & Kisses'. The background includes a lace-like doily pattern.

Decorate your box as desired! For my sample, I used:

  • Lovely Doilies #167104
  • Endless Love Stamp Set #167055
  • Endless Love Dies #167061
  • Bubble Bath Ribbon #167075
  • Real Red Baker’s Twine #164051

Colors: Real Red, White, & Bubble Bath

Perfect Fit: This box fits our Note Cards (#159232) perfectly, making it ideal for a sweet Valentine note or gift enclosure.

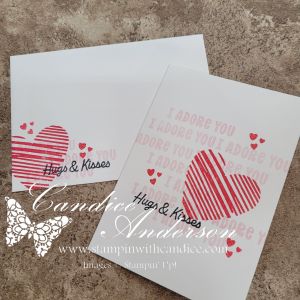
The simple card design tucked inside the box was inspired by Heidi Collins, keeping the look clean, classic, and easy to recreate.

Bonus: This project is the perfect fit for this week’s Global Design Project challenge – Hearts #GDP531! 💖

Be sure to check out my video to see just how easy this project is to create, along with the other fun ideas I shared. I’ll be posting more details on the remaining projects later this week, so be sure to tune back in! 💕


A beautifully crafted Christmas card featuring a window scene that displays a peaceful nativity setting on one side, while the inside is adorned with cozy holiday elements like hanging stockings and warm colors.

Please feel free to contact me if you have any questions.

Contact me today to place your order!
435-232-2655 Cell ( Call or Text)
andersoncandice@hotmail.com


💕 Let’s Stay Connected

📺 YouTube
📘 Facebook
📸 Instagram
📌 Pinterest

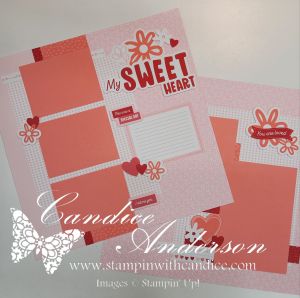
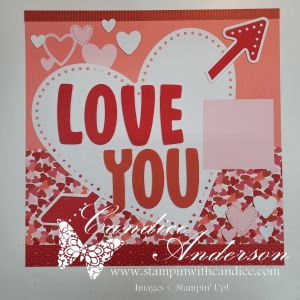
Discover the Love Story Scrapbooking Workshop Kit ✂️💖

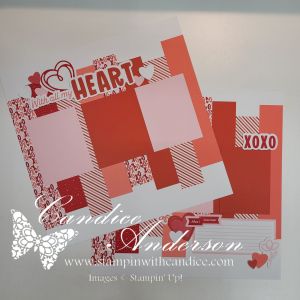
Have you seen the three new Scrapbooking Workshop Kits in the Mini Catalog? Because oh my goodness—I am in love with all three! 😍

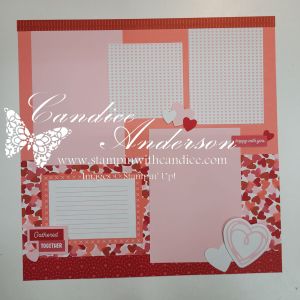
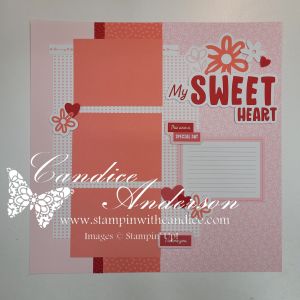
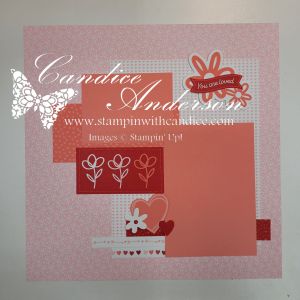
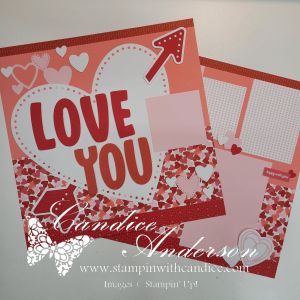
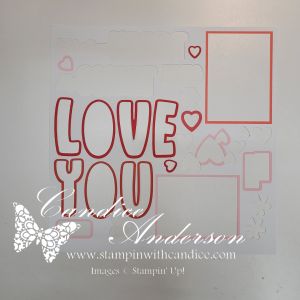
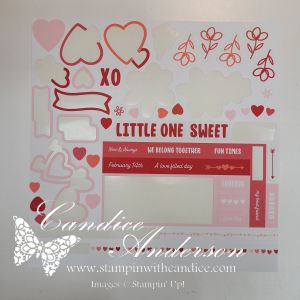
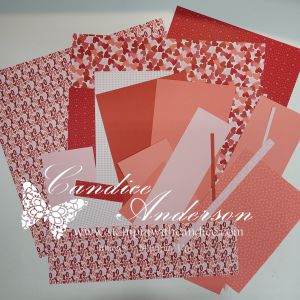
Today I decided to put together the Love Story Scrapbooking Workshop Kit #167078, and I wanted to share exactly what I love about these kits.

Here’s why these kits are a total win:

1️⃣ They are beautifully designed.
The creativity in these kits is incredible—from the layouts to the little design details. Everything coordinates so well and feels very intentional.

2️⃣ They are super easy to assemble.
I completed my Love Story kit in about 3 hours, and that included taking my time and truly enjoying the process.

3️⃣ The instructions are fantastic.
They are clear, easy to follow, and very well put together—perfect whether you’re a beginner or a seasoned scrapbooker.

4️⃣ They are relaxing and enjoyable to create.
This was one of those projects where you can just sit back, craft, and unwind. No stress. Just fun.

5️⃣ They have coordinating stamp sets.
I love that you can expand the kit with matching stamps to make it even more versatile.

  • Love Story Stamp Set #167065
  • Exploring Nature Stamp Set #166913
  • Beach Time Stamp Set #166832

6️⃣ The kits coordinate with full suites.
All three new kits—

  • Love Story Scrapbooking Workshop Kit #167078
    • Made with Love Suite #167079
  • Exploring Nature Scrapbooking Workshop Kit #166934
    • Nature Walk Suite #166936
  • Beach Time Scrapbooking Workshop Kit #166843
    • Beach Boardwalk Suite #166844

have matching suites that include additional stamp sets, ribbons, papers, and accessories you can add to your project if you want to take it even further.

7️⃣ Bonus: LOTS of extra goodies!
There is plenty of extra paper and stickers left over, which means more cards, more layouts, and more creative fun later on.

Stay tuned to see what I come up with using my leftovers—I have ideas already brewing!

If you love scrapbooking but want something that’s easy, coordinated, and totally stress-free, these workshop kits are a must-try. 💕


A beautifully crafted Christmas card featuring a window scene that displays a peaceful nativity setting on one side, while the inside is adorned with cozy holiday elements like hanging stockings and warm colors.

Please feel free to contact me if you have any questions.

Contact me today to place your order!
435-232-2655 Cell ( Call or Text)
andersoncandice@hotmail.com


💕 Let’s Stay Connected

📺 YouTube
📘 Facebook
📸 Instagram
📌 Pinterest

#StampinWithCandice #ScrapbookingWorkshop #LoveStoryKit #CreativeTime #MemoryKeepingMadeEasy #StampinUp

Easy Fun Fold Gift Card Holder Tutorial

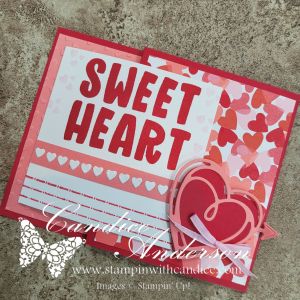
On my Monday Live, I shared an easy-to-make fun fold gift card holder inspired by my recent mini album. This sweet project features brand-new products that were released just yesterday, and I absolutely love how simple yet impressive this design is.

Card Base & Structure

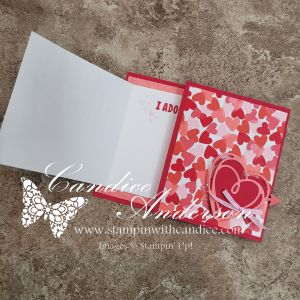
Start with a piece of Real Red cardstock cut to 4-1/4″ x 11″.
Score at 5-1/2″ and 9″.

  • The 5-1/2″ section will be on the left side of the card.
  • Fold the 2″ section inward, then fold again on the 5-1/2″ score line.
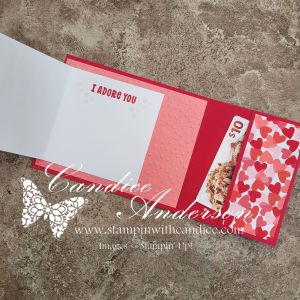
  • This creates a pocket on the inside of the card.

Secure the sides of the pocket using Tear & Tape (#154031), leaving the top edge open so you can tuck in a gift card or cash.

Inside Panel

Cut Flirty Flamingo cardstock to 5-1/4″ x 4″ and emboss it using the
Hearts of Love 3D Embossing Folder (#167071).

Attach this to the inside of the card on the 5-1/2″ x 4-1/4″ section.

Designer Series Paper

From the Made with Love Designer Series Paper (#167054), cut:

  • 4″ x 3-1/4″
  • 4″ x 1-3/4″

Place these pieces on:

  • The 3-1/2″ section folded to the front
  • The 2″ section folded inside to form the pocket

Left Folding Panel

Cut Basic White cardstock to 3-1/2″ x 7″ and score in half at 3-1/2″.

Stamp “Sweet Heart” from the Love Story Stamp Set (#167065) on the front and decorate as desired.

Attach this panel centered over the embossed section on the left side of the card base.

For one version, I placed the mini hearts directly on the white panel. For the second card, I added them to a 1/4″ strip of coordinating paper for a slightly different look.

Closure & Finishing Touches

For the closure, cut:

  • One solid heart
  • One lined heart

Using the Endless Love Dies (#167061).
Add arrows if you’d like for extra detail.

Attach the hearts to the front using Stampin’ Dimensionals, creating a small pocket for the folded panel to tuck underneath.

Finish the card with Bubble Bath Faux Linen Ribbon (#167075).


I love how simple and easy this fun fold gift card holder is to make, yet it has such a wow factor. Be sure to check out the video to see the step-by-step process, and I can’t wait to see your ideas using this design and these beautiful new products!


A beautifully crafted Christmas card featuring a window scene that displays a peaceful nativity setting on one side, while the inside is adorned with cozy holiday elements like hanging stockings and warm colors.

Please feel free to contact me if you have any questions.

Contact me today to place your order!
435-232-2655 Cell ( Call or Text)
andersoncandice@hotmail.com


💕 Let’s Stay Connected

📺 YouTube
📘 Facebook
📸 Instagram
📌 Pinterest

Scrapped! Episode 30 – Gratitude Mini Album

A Beautiful Way to Celebrate What Matters Most

November always inspires me to slow down and reflect on the things I’m most grateful for. For Scrapped! Episode 30, I wanted to create something that captured those heartfelt moments in a way I could revisit year after year. Instead of a traditional scrapbook page, I designed a Gratitude Mini Album—a keepsake filled with texture, layers, and interactive elements that make memory keeping both meaningful and fun.

This mini album is built using our Flip Flaps and features gorgeous pull-outs, flaps, pockets, and hidden journaling spots. It’s the perfect way to document gratitude, seasonal reflections, or family traditions during the holidays. And because the album structure is so versatile, you can recreate it for any theme—thankfulness, celebrations, travel, or even a yearly highlight book.

🎥 Be sure to watch the episode for a closer look at how the project comes together and ideas for customizing your own album.


About the Album

For this project, I started with chipboard (the kind that comes in Paper Pumpkin kits or many of our other crafting kits—recycling win!) to create sturdy front and back covers. The inside includes multiple sizes of Flip Flaps, thoughtful fold-outs, a waterfall element, reinforced center pages, and plenty of spaces for photos, journaling, and decorative touches.

Once the structure was built, I decorated the album using the warm, earthy tones of the Gathering Together Suite (165987), which felt absolutely perfect for a gratitude theme. The stamps, dies, textures, and embellishments all came together beautifully to create a heartfelt, cozy design.

Featured Products

Gathering Together Suite (#165987)

  • Gathering Moments Stamp Set (#165970)
  • Gathering Moments Dies (#165979)
  • Gathering Together Designer Series Paper (#165969)
  • Gathering Leaves Embossing Folder (#165983)
  • Early Espresso & Old Olive Baker’s Twine Combo (#165986)
  • Cajun Craze and Gold Dots Embellishments (#165984)

I also pulled sentiments and decorative elements from:

  • Just a Note Stamp Set (#166098) + Dies (#166101)
  • Our Story Stamp Set (#167109)
  • Celebrate Together Stamp Set (#166655)

👉 You can shop current Stampin’ Up! supplies and tools here:
Shop with Me Here

The color palette—Basic Beige, Cajun Craze, Crushed Curry, Early Espresso, Old Olive, and Champagne Foil—set the warm and inviting tone that makes this mini album feel extra special.

I loved this project so much that I’m already working on a Christmas version with a fun twist on the layout—so stay tuned!


Want to Make This Album Yourself?

You can absolutely create your own version of this Gratitude Mini Album—and I’ve made it easy!

Gratitude Mini Album Tutorial

$10.00 USD

✨ FULL step-by-step tutorial, including:

  • complete measurements
  • detailed instructions
  • cutting guides
  • photos
  • tips for customizing
  • and a full supply list
cards
Powered by paypal

Whether you’re documenting memories for yourself or creating a heartfelt handmade gift, this album is something you’ll treasure year after year.


A beautifully crafted Christmas card featuring a window scene that displays a peaceful nativity setting on one side, while the inside is adorned with cozy holiday elements like hanging stockings and warm colors.

Please feel free to contact me if you have any questions.

Contact me today to place your order!
435-232-2655 Cell ( Call or Text)
andersoncandice@hotmail.com


💕 Let’s Stay Connected

📺 YouTube
📘 Facebook
📸 Instagram
📌 Pinterest