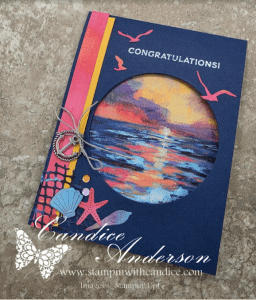
Reverse Masking with Dies: Get More Creative Uses from Your Dies

Sometimes all you need for a little creative inspiration is a good technique!

Recently, I was looking through some of my older blog posts when I came across a reverse masking technique that my upline, Brandi Barnard, had shared. It had been a while since I had played with this technique, and seeing it again inspired me to pull out my dies and give it another try.

I shared just how easy this technique is during my Monday Live, along with several different samples showing just how versatile it can be.
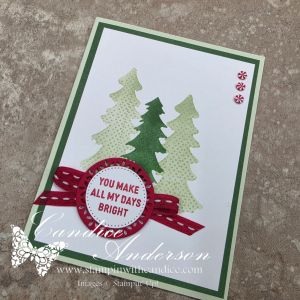
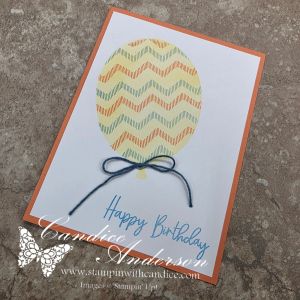
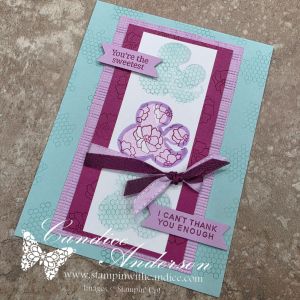
What Is Reverse Masking with Dies?

The idea behind this technique is simple. Instead of using a die as it was originally intended—to cut out a shape—you use the negative opening created by the die as a mask.

Place the mask over your cardstock and then stamp through the opening using an image that may be completely unrelated to the die itself. Background stamps, textures and smaller repeating images are especially fun for this technique.

I also used blending brushes to add color inside the masked area. This helps define the shape and gives you even more options for changing the finished look.

What I love most is that it gives you another way to use dies you already own. The same die can create a completely different look depending on the stamps, colors and techniques you use inside it.

I shared four different samples during my Live, but the possibilities really are endless. Take another look through your dies—you may be surprised by how many shapes would work perfectly for reverse masking!


Main Products & Colors Used

🌲 Tree Card
Products: Holly Jolly Branches Bundle & Bordered in Beauty Stamp Set
Colors: Real Red, Garden Green & Soft Sea Foam

🎈 Balloon Card
Products: Balloon Fest Bundle & Bordered in Beauty Stamp Set
Colors: Timid Tiger, Azure Afternoon & Daffodil Delight

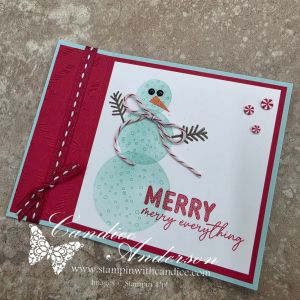
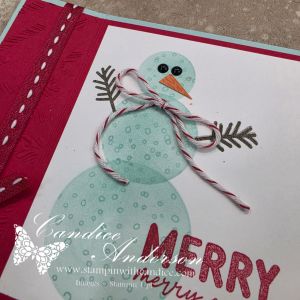
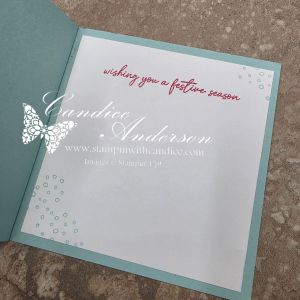
⛄ Snowman Card
Products: Stylish Shapes Dies & Holly Jolly Branches Stamp Set
Colors: Real Red, Pool Party, Timid Tiger & Early Espresso

& Ampersand Card
Products: Extraordinary Life Bundle & Banner Sayings Stamp Set
Colors: Pool Party, Berry Burst & Fresh Freesia

🎥 Be sure to watch the replay below to see the technique in action and get a closer look at all four samples.

As you can see, this technique works with so many different shapes and styles. Once you start looking at your dies as masks instead of just cutting tools, you open up a whole new set of creative possibilities!


Looking for even more inspiration? Check out the original post I mentioned during my Live for even more fabulous ideas using this reverse masking technique.


Now I challenge you to pull out your dies and look at them a little differently. What die in your collection would make a great reverse mask?

And remember to join my Stampin’ Fun with Candice Facebook group and share your creations with us. I’d love to see what you come up with—and your project just might inspire someone else to give this technique a try! 🦋

No matter where your creative journey takes you, I’m so glad you’re here. Let’s learn, create, connect, and grow together—one project at a time. 🦋

A beautifully crafted Christmas card featuring a window scene that displays a peaceful nativity setting on one side, while the inside is adorned with cozy holiday elements like hanging stockings and warm colors.

💕 Let’s Stay Connected

📺 YouTube 📘 Facebook 📸 Instagram 📌 Pinterest


Easy Gift Card Holder Fun Fold

Monday’s Live was another Make It With Me Monday, and this month I featured an easy-to-create fun fold gift card holder.

What I love most about this design is just how versatile it is! You can use virtually any Designer Series Paper, stamps, dies, punches, or accessories you already have to completely change the look. And because the gift card is tucked right inside, it’s the perfect gift and card all in one.


Creating the Basic Gift Card Holder

The basic layout starts with a standard 8-1/2″ x 11″ piece of cardstock.

Cut the cardstock lengthwise at 4-1/4″, giving you a piece measuring 4-1/4″ x 11″. Score at 5-1/2″ to create your standard card fold.

To create the gift card pocket, cut 1″ in from one end. Fold this section inward and adhere only along the bottom and outside edge, leaving the inside open so you can slide your gift card into the pocket.

It really is that easy!

All of the designs I shared this week open lengthwise, but don’t let that limit you. You can easily turn the design to create a horizontal card or move the gift card pocket to the opposite side.

I’ve actually used this basic idea before with stamped designs rather than Designer Series Paper. You can check out some of those older projects here: See my previous gift card holder projects


One Layout, Lots of Possibilities

For Monday’s Live, I created my project using the Spooktacular Designer Series Paper for a fun Halloween version. I also shared four additional samples to show just how different this same layout can look when you change the paper, colors, and embellishments.

That’s one of my favorite things about finding a good layout—you don’t have to reinvent the wheel every time you sit down to create. Save the basic design and pull it out whenever you need a quick birthday, thank-you, holiday, congratulations, or just-because gift.

Be sure to watch the replay to see exactly how the card comes together and pick up a few of my tips and tricks along the way.


Find More Inspiration in My Creative Resource Library

My Free Tutorial Library is continually growing as I add new content, but I’m also building it into a resource that helps you quickly find past projects I’ve shared on my blog, YouTube, and social media—all together in one easy-to-find place.

Want access? It’s easy! Join my Creative Resource Community. Along with access to the Free Tutorial Library, you’ll join my email list and receive my newsletter with updates on new tutorials, classes, creative inspiration, and more.

However you choose to be creative, I hope you’ll continue to allow me to inspire you along your creative journey. 🦋

Learn • Connect • Create • Grow

A beautifully crafted Christmas card featuring a window scene that displays a peaceful nativity setting on one side, while the inside is adorned with cozy holiday elements like hanging stockings and warm colors.

💕 Let’s Stay Connected

📺 YouTube 📘 Facebook 📸 Instagram 📌 Pinterest

DIY Spooktacular Gift Bag Tutorial for Unique Halloween Treats

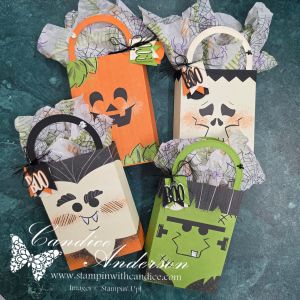
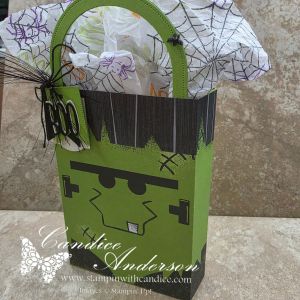
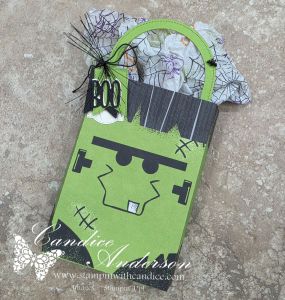
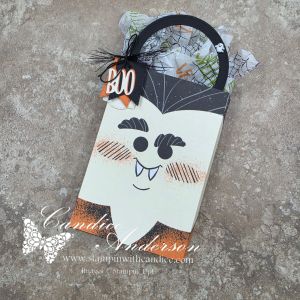
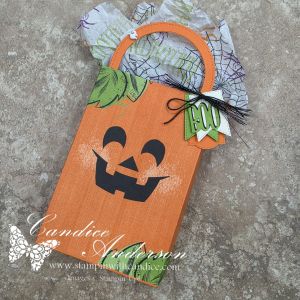
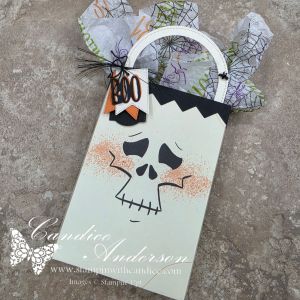
When I first saw the Spooktacular 6″ x 6″ Designer Series Paper, I just knew I had to have it! It was one of the first things from my wish list that I ordered. Of course, it took me a little while to actually find the time to create with it—but it was definitely worth the wait!

I knew I wanted to create some kind of fun Halloween gift box using those adorable monster faces. As I started playing around with the paper and experimenting with different ideas, I actually came up with this gift bag completely by accident.

And I absolutely fell in love with it! 👻🎃

I love how the angled sides let you see even more of that cute Designer Series Paper, while the coordinating handle, layered BOO tag, wispy ribbon, and stamped tissue paper add all those little finishing touches. And because each sheet features a different monster, you can create a whole collection of bags, each with its own personality!

You love it too, right?

And if you don’t already have the Spooktacular Designer Series Paper, I have a feeling it’s going to be on your wish list after seeing these!


Ready to Make Your Own?

I’ve made it easy for you with my Spooktacular Gift Bag Tutorial.

For just $7, you’ll receive a 5-page downloadable PDF tutorial complete with:

  • Step-by-step instructions and photos
  • Cutting and scoring measurements
  • Complete supply list
  • Helpful tips for assembling and embellishing your bag
  • A video tutorial so you can follow along with me from start to finish

Need Supplies?

Want to create the bags but you’re missing some of the supplies? I’ve made that easy too!

Use my Stampin’ Up! project link to see the products I used and add only the items you need directly to your shopping cart.

I Can’t Wait to See Yours!

One of my favorite things about sharing my projects is seeing how they inspire your creativity. Change the colors, embellishments, tags, or treats and make these little bags your own!

When you create your Spooktacular Gift Bag, be sure to tag me when you share it. I always love seeing what my projects have inspired you to create.


No matter where your creative journey takes you, I’m so glad you’re here. Let’s learn, create, connect, and grow together—one project at a time. 🦋

A beautifully crafted Christmas card featuring a window scene that displays a peaceful nativity setting on one side, while the inside is adorned with cozy holiday elements like hanging stockings and warm colors.

💕 Let’s Stay Connected

📺 YouTube 📘 Facebook 📸 Instagram 📌 Pinterest

Peek-a-Boo Scenic Coast Fun Fold Tutorial

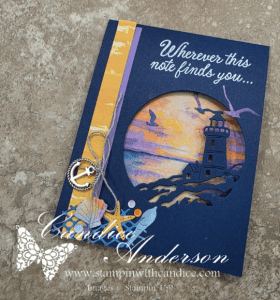
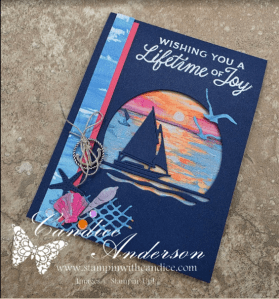
A few weeks ago, I shared this easy peek-a-boo fun fold during my Monday night live featuring the beautiful Scenic Coast Suite. After receiving several requests for the measurements and instructions, I finally had a chance to put together a complete tutorial!

There are two things I especially love about this card. First is the peek-a-boo feature. The opening creates a beautiful frame that lets you showcase both the Designer Series Paper and the coordinating die-cut images.

The second is how I used the Designer Series Paper for the die cuts themselves. By strategically cutting the 6″ × 6″ paper, I was able to take advantage of the colors and details already in the artwork, giving the die-cut images extra dimension, texture, and interest.

And the best part? This fun fold looks impressive but is surprisingly simple to create!

Take a Closer Look

Check out this quick video for a closer look at all three versions of the Peek-a-Boo Scenic Coast Fun Fold.

Want to Make One?

I’ve put everything together in one convenient resource so you can recreate the project at your own pace.

Your Peek-a-Boo Scenic Coast Fun Fold Tutorial includes:

  • Step-by-step online instructions with photos
  • Complete materials and cutting guide
  • Downloadable and printable PDF tutorial
  • Full video tutorial
  • Complete project supply list
  • Helpful tips for creating all three variations

Get the Complete Tutorial for Just $7

Once your purchase is complete, you’ll receive immediate access to the tutorial page, where you can follow the instructions online, download your printable PDF, or craft along with the video.


Already Have the Tutorial?

Need supplies to create your own Peek-a-Boo Scenic Coast Fun Fold?

Click the Shop Now button below to view the complete project supply list. From there, you can select the items you need, add them to your cart, and continue shopping for anything else on your wish list.


Looking for More Creative Inspiration?

Be sure to join my email list! Subscribers receive access to my Free Tutorial Library, filled with projects, ideas, and resources to help you keep creating.


No matter where your creative journey takes you, I’m so glad you’re here. Let’s learn, create, connect, and grow together—one project at a time. 🦋

A beautifully crafted Christmas card featuring a window scene that displays a peaceful nativity setting on one side, while the inside is adorned with cozy holiday elements like hanging stockings and warm colors.

💕 Let’s Stay Connected

📺 YouTube 📘 Facebook 📸 Instagram 📌 Pinterest

Create Stunning Christmas Cards: CASE Techniques

This week’s Global Design Project challenge, #GDP560, is another fun CASE the Designer challenge, featuring Charlet Mallett!

I love CASE challenges because there are so many different directions you can take the inspiration. You can focus on the colors, layout, technique, or even just one little element that catches your eye.

For my card, I chose to focus on Charlet’s background technique and a similar layout, but gave it a Christmas twist using the Pretty Poinsettia Bundle. 🎄

I absolutely love how the soft background adds interest without competing with that gorgeous poinsettia. It really helps the rich colors and dimension of the flower pop!

That’s one of my favorite things about CASEing another designer—you can start with the same inspiration and create something completely your own. ❤️

Want to See How It Comes Together?

Check out my reel for a quick recap of how to create this stunning card!

Then use these quick tips when creating your own:

  • Create your own stencil. Cut the leaves from a thick piece of paper. I used one of the cardboard backers from a Designer Series Paper pack. Keep an extra piece handy to cover any open areas as you move the design around your background.
  • Start with watercolor paper. For the best results with this background technique, watercolor paper gives you a little more freedom to work with the water and ink.
  • Make your own color spritz. Add a few drops of reinker to a color spritzer along with water to create the soft background color.
  • Add some splatters. A Water Painter makes it quick and easy to add those little splatters of color that give the background even more interest.
  • Give your poinsettia dimension. Ink the edges of the poinsettia petals and leaves, then gently curl them with a Bone Folder before assembling. This adds beautiful depth and texture.
  • Customize your Rhinestones. Use Stampin’ Blends to add color to your Rhinestones so they coordinate perfectly with your project.

Want to create your own?
Click here for a complete list of the products I used and an easy way to place your order.


No matter where your creative journey takes you, I’m so glad you’re here. Let’s learn, create, connect, and grow together—one project at a time. 🦋

A beautifully crafted Christmas card featuring a window scene that displays a peaceful nativity setting on one side, while the inside is adorned with cozy holiday elements like hanging stockings and warm colors.

💕 Let’s Stay Connected

📺 YouTube 📘 Facebook 📸 Instagram 📌 Pinterest

July Paper Pumpkin Meets a Sketch Challenge

For this week’s Global Design Project Sketch Challenge #GDP558, I was inspired by my July Paper Pumpkin kit. This month’s kit featured easy-to-create easel cards, and I absolutely fell in love with the flowers, sentiments, and coordinating add-on dies. They were the perfect combination for bringing this week’s sketch to life.

I decided to stick with the same beautiful color palette from the kit: Hydrangea Hue, Timid Tiger, Melon Mambo, Darling Duckling, and Old Olive. I love how bright and cheerful these colors are together. While the Paper Pumpkin cards used softer tones, I created a similar look by stamping some of my images at full strength and others stamped off for a lighter shade.

Creating the Floral Panels

The sketch featured four rectangles separated by narrow spaces, so I reached for the Rounded Rectangle Punch to create my four panels.

I started with Basic White cardstock, stamping the leaves in Old Olive around the corners before adding flowers in Melon Mambo and Timid Tiger (stamped off). My goal was to create a floral frame around each rectangle while leaving the centers clean and open.

Next came my favorite part—adding dimension!

Using the coordinating add-on dies, I cut flowers from Hydrangea Hue, Timid Tiger, and Darling Duckling, along with leaves in Old Olive. Instead of leaving the leaves attached to their stems, I snipped them apart and tucked them throughout the design anywhere I wanted a little extra greenery.

Several of the flowers were popped up with Stampin’ Dimensionals for added depth. I even allowed some of the flowers to extend past the edges of each panel before trimming them flush once everything was adhered. This helps create the illusion that the floral arrangement continues beyond the edges.

The finished panels were attached to a 3¼” × 5″ piece of Basic White cardstock using additional Dimensionals.

Adding the Sentiment

For the greeting, I stamped “hooray” in Melon Mambo on Basic White cardstock and carefully fussy cut it. The “it’s your day!” sentiment was stamped in Timid Tiger and cut using the Triple Banner Punch.

To pull everything together, I wrapped Crisp Cantaloupe Ribbon around the center of the card and tied it with White Baker’s Twine.

One thing I love about Stampin’ Up! products is how well many of the colors coordinate, even when they aren’t exact matches. The Crisp Cantaloupe ribbon paired beautifully with the softer stamped-off Timid Tiger images and tied the entire card together.

Creating the Easel Card Base

The card base is Hydrangea Hue cardstock, cut to 11″ × 4¼” and scored at 5½” and 2⅛” to create the easel fold.

I wanted to recreate the subtle plaid background from the Paper Pumpkin cards, so instead of embossing with the Forever Plaid 3D Embossing Folder, I tried a different technique.

I inked the embossing folder, laid my cardstock onto the inked surface, and rolled over it with my Stampin’ Brayer. This transferred the plaid pattern without adding texture, which kept the fold nice and smooth while still giving me the look I wanted.

To finish the front, I adhered only the bottom portion of the white panel to the lower section of the card base so the easel mechanism could function properly.

Finishing the Inside

For the inside, I added a 3¾” × 5″ piece of Basic White cardstock.

I stamped the grid image three times in Timid Tiger, then stamped the “hugs & wishes” sentiment in the same color and punched it out with the Triple Banner Punch.

I attached the banner with Stampin’ Dimensionals, allowing it to act as the stopper that holds the easel card upright—just like the original Paper Pumpkin design.


Final Thoughts

This was such a fun card to create, and I know I’ll be reaching for these stamps and coordinating dies again soon. It’s always exciting to take inspiration from one project and transform it into something completely new.

Check out this sneak peek of what’s to come!


No matter where your creative journey takes you, I’m so glad you’re here. Let’s learn, create, connect, and grow together—one project at a time. 🦋

A beautifully crafted Christmas card featuring a window scene that displays a peaceful nativity setting on one side, while the inside is adorned with cozy holiday elements like hanging stockings and warm colors.

💕 Let’s Stay Connected

📺 YouTube 📘 Facebook 📸 Instagram 📌 Pinterest