Boo Banner Class Kit

🎃 Introducing My First Kit-in-the-Mail Class!

I’m so excited to introduce my very first Kit-in-the-Mail Class, featuring the adorable Spooktacular Designer Series Paper from Stampin’ Up!

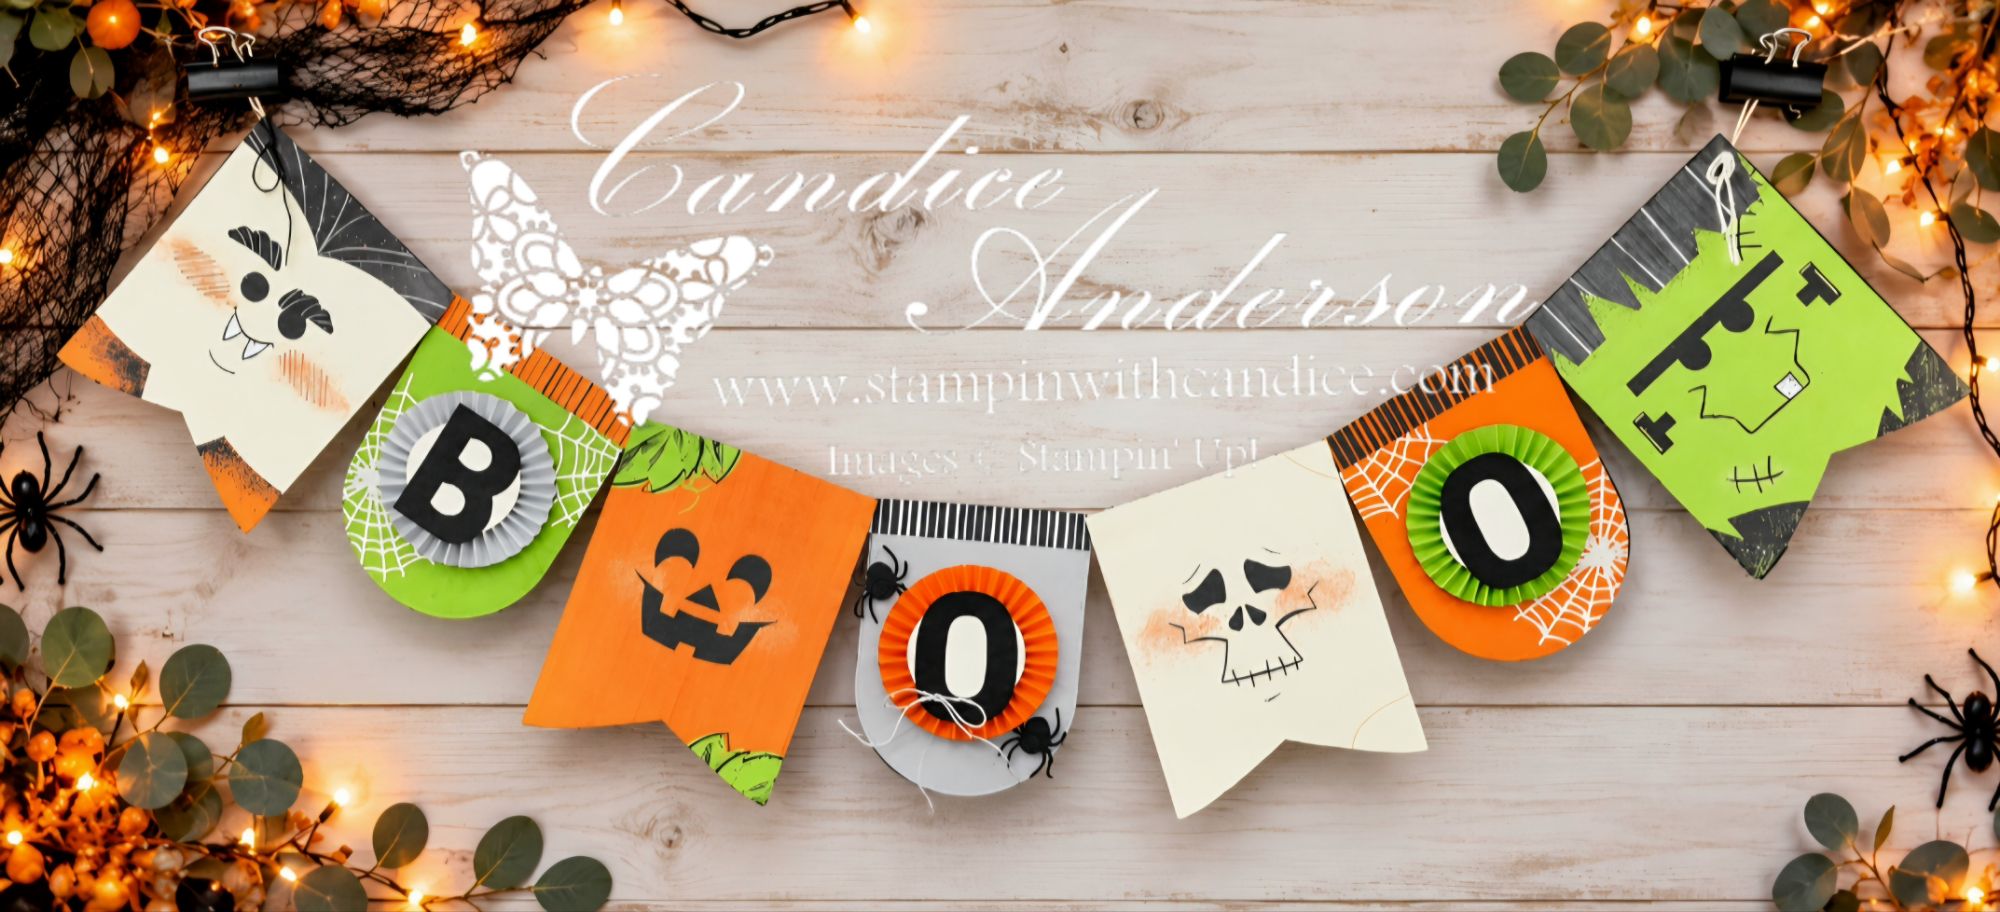
How cute is this Halloween BOO Banner? With its playful monster faces, colorful rosettes, and festive details, it’s a fun decoration you can bring out year after year!

I’ve designed this class with three different ways to participate, so whether you love doing everything yourself or prefer having all the prep work done for you, there’s an option to fit your crafting style.

Unfortunately, putting this class together took a little longer than I anticipated, and the Spooktacular Designer Series Paper has now sold out! But here’s the good news! I still have some on hand, so I’m able to offer a limited number of BOO Banner Class Kits while supplies last! If you’ve been wanting to create this adorable Halloween decoration, don’t wait too long to grab yours!

🎨 Choose Your Way to Create!

Option 1 — Tutorial Only | $7

Already have the supplies and love creating at your own pace? This option is for you!

The BOO Banner features the Spooktacular Designer Series Paper, Web of Fun Dies, Every Day Arches Dies, Party Banner Dies, and Party Alphabet Dies, along with a few other crafting essentials.

Your tutorial includes:

  • Step-by-step assembly instructions
  • Complete cutting directions and measurements
  • Full materials and supply list
  • Full-color instructional photos
  • Private video tutorial walking you through assembly
  • Immediate access so you can create whenever you’re ready!

The PDF includes everything you need to prepare your pieces, while the video walks you through putting your banner together.

cards
Powered by PayPal

IMPORTANT: Once your payment is complete, you will automatically be redirected to your tutorial access page, where you’ll find the PDF instructions and private video. Be sure to save or bookmark this page so you can return to it anytime!


Option 2 — FREE Tutorial with a $35 Order

Already have some of the supplies but still have a few things on your wish list?

Place a qualifying $35 order through my Stampin’ Up! website, and I’ll send you the complete BOO Banner Tutorial as my thank-you!

And here’s the best part: You can order anything you want! Your purchase doesn’t have to include the products used in this project.

Simply place your order and complete the tutorial request form. Once I’ve verified your qualifying purchase, I’ll send you the link to access your tutorial.

Also remember there are Stampin’ Rewards!

If you haven’t already, be sure to create your Stampin’ Up! customer account. Qualifying orders of $20 or more earn 10% in Stampin’ Rewards to use toward future purchases!

Want an even better deal?

With a qualifying $75 order, you can also purchase October’s Product of the Month for just $5, while earning your BOO Banner Tutorial FREE!

That’s a fun way to treat yourself to something new while getting a little extra creative inspiration!
REQUEST YOUR FREE TUTORIAL – In the message section please include the tutorial name and your qualifying order number. Once I’ve verified the order I will email you the link to the tutorial.

← Back

Thank you for your response. ✨


Option 3 — Boo Banner Class Kit + Tutorial | $27 + Shipping

Love the project but don’t want to spend time cutting, scoring, and preparing all those little pieces?

Let me do the prep work for you!

Your BOO Banner Class Kit includes the prepared paper pieces and embellishments needed to assemble your own festive Halloween decoration.

Your kit includes:

  • All cardstock and Designer Series Paper pieces, precut and ready to assemble
  • All die-cut and punched pieces
  • Prescored pieces for creating the decorative rosettes
  • Baker’s Twine and decorative elements
  • Complete PDF tutorial with measurements and instructions
  • Access to the private assembly video

All you’ll need to provide is a bone folder, scissors and adhesives!

No special dies, punches, or scoring tools are required to complete the kit.

⏰ Limited-Time Class Kit! – US Customers only

Because the Spooktacular Designer Series Paper is sold out, the physical kits will only be available for a limited time.

Order by October 16, 2026, or while supplies last!

Shipping is additional.

cards
Powered by PayPal

IMPORTANT: Once your payment is complete, you will automatically be redirected to your tutorial access page, where you’ll find the PDF instructions and private video. Be sure to save or bookmark this page so you can return to it anytime!


✂️ BOO Banner Supply List

Ready to gather your supplies and start creating?

I’ve included the complete list of products used for this project below.

Items marked with an asterisk (*) are included or already prepared for you when you purchase the Class Kit + Tutorial.

Click Here to Shop the BOO Banner Supplies!

Paper

  • Spooktacular 6″ × 6″ Designer Series Paper *
  • Granny Apple Green Cardstock *
  • Smoky Slate Cardstock *
  • Pumpkin Pie Cardstock *
  • Very Vanilla Cardstock *
  • Basic Black Cardstock *

Adhesives

  • Hot Glue
  • Stampin’ Dimensionals
  • Multipurpose Liquid Glue
  • Mini Glue Dots

Accessories

  • Essentials Baker’s Twine *

Tools

  • Bone Folder
  • 1/4″ Hole Punch *
  • Scissors
  • Simply Scored Scoring Tool *
  • 2″ Circle Punch *
  • Party Banner Dies *
  • Party Alphabet Dies *
  • Web of Fun Dies *
  • Everyday Arches Dies *

Class Kit Reminder: If you’re purchasing the complete kit, you won’t need the specialty cutting tools listed above. All the paper pieces will be prepared for you!


👻 Looking for Even More Spooktacular Inspiration?

If you love this adorable Halloween paper as much as I do, I’ve got even more creative ideas to share!

Be sure to check out my Spooktacular Gift Bag Tutorial, featuring this same Designer Series Paper, along with the fun gift card holder.
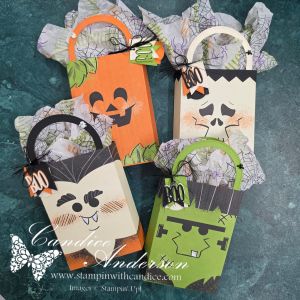
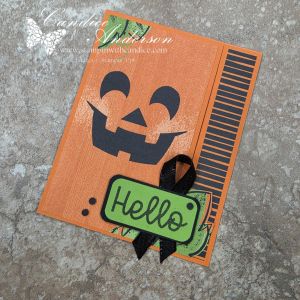
There are so many ways to use this paper, from cards and gift packaging to festive home décor!

I hope this new Kit-in-the-Mail Class inspires you to create something fun for Halloween. I’m excited to offer another way for us to Learn, Connect, Create, and Grow together!

Happy Stamping!

A beautifully crafted Christmas card featuring a window scene that displays a peaceful nativity setting on one side, while the inside is adorned with cozy holiday elements like hanging stockings and warm colors.

💕 Let’s Stay Connected

📺 YouTube 📘 Facebook 📸 Instagram 📌 Pinterest

Cut, Shake & Share: Valentine Treat Ideas with Heart Gusseted Treat Bags

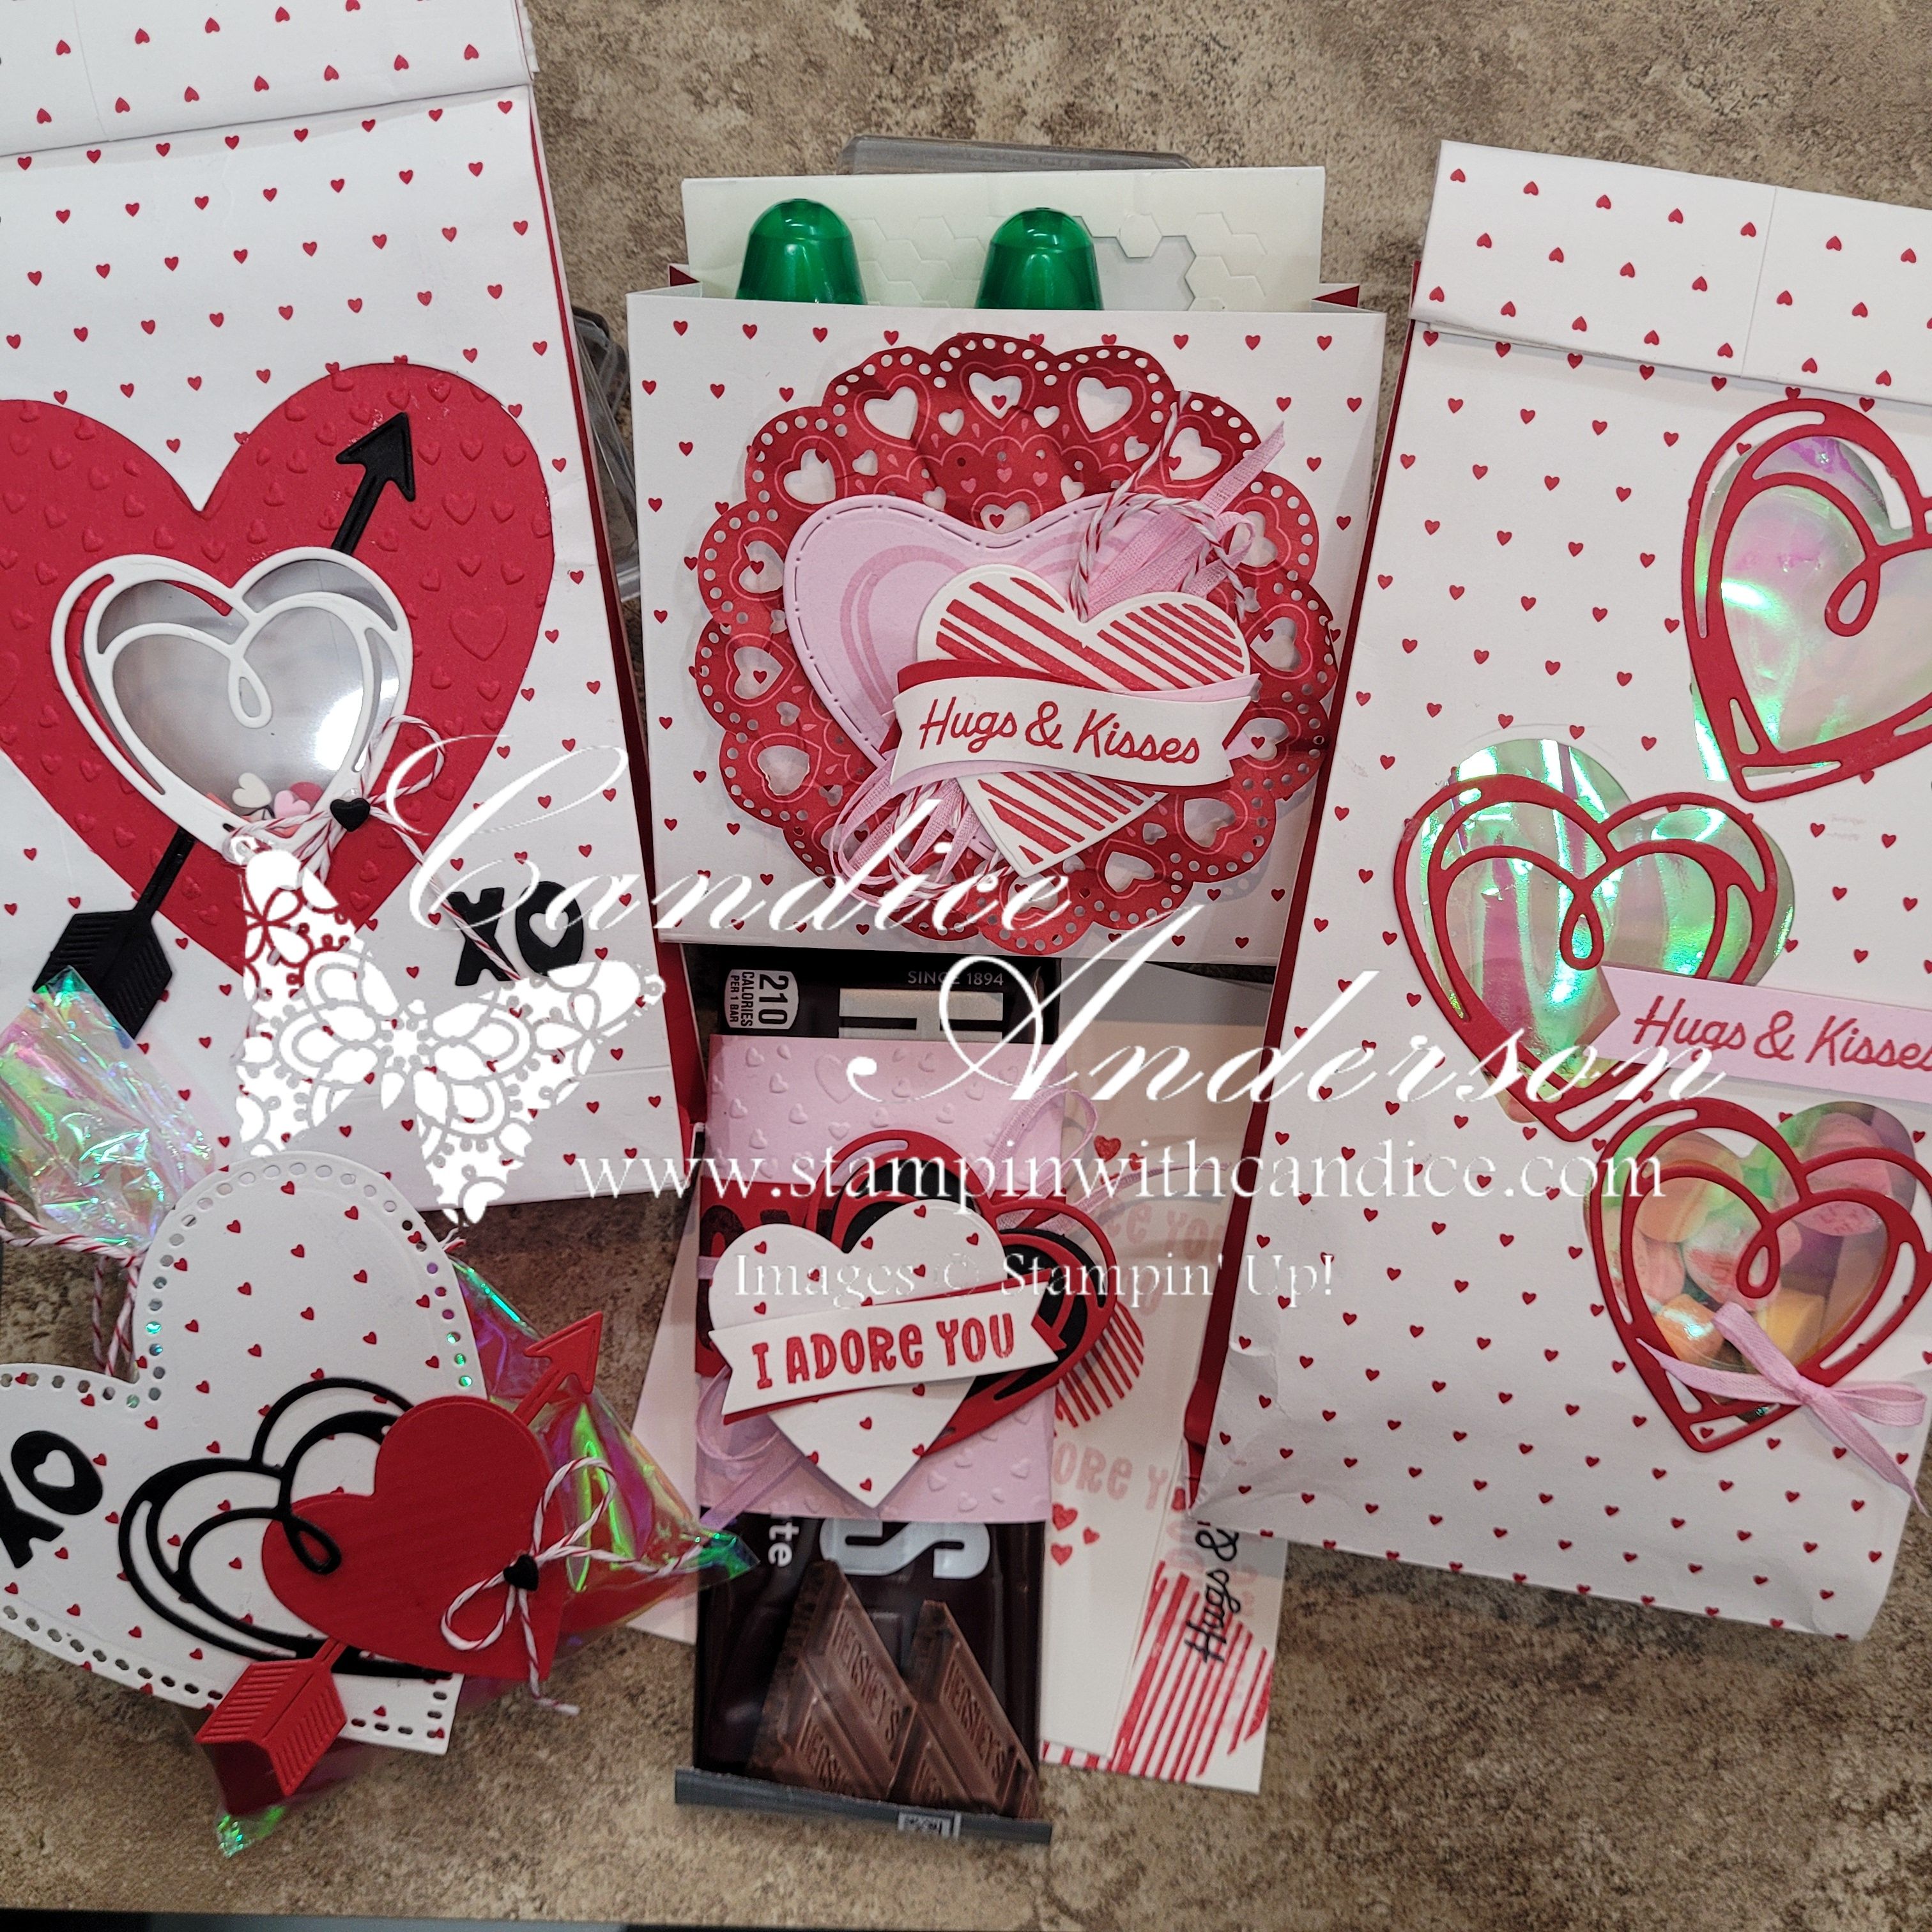
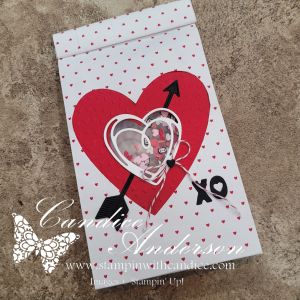
Last week on my live, I shared several fun ideas using the Heart Gusseted Treat Bags (#167073). I posted about the project I created during the live, but then realized I never shared the other projects—so today I’m fixing that!

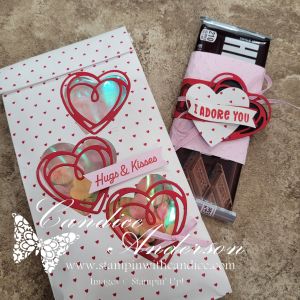
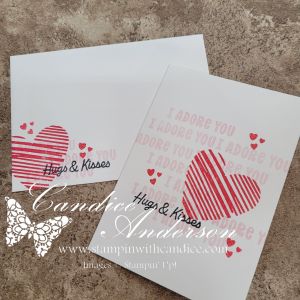
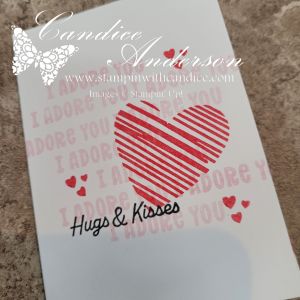
A variety of decorated gift bags with heart designs, featuring messages like 'Hugs & Kisses' and 'I Adore You'. The bags are embellished with red and pink colors, and some contain chocolates and other small gifts.

These four additional projects all feature cutting a window into the treat bags using the Endless Love Dies (#167061), then using the die-cut heart from the bag on a coordinating project. It’s such a fun way to stretch your supplies and get multiple projects from one idea.

Helpful Tips Before You Cut

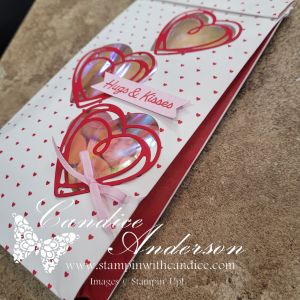
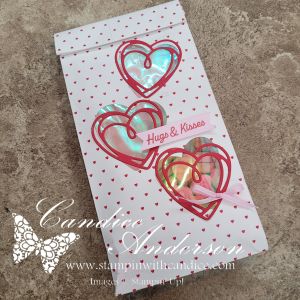
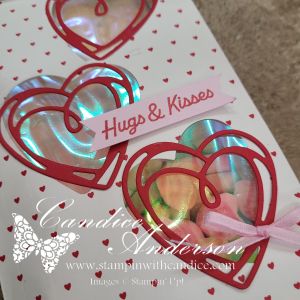
A handmade greeting card featuring three red heart cutouts with a transparent background, displaying colorful sequins inside, and the text 'Hugs & Kisses' on a pink ribbon.

Be sure to watch the video where I share tips on how to avoid cutting through the sides of the bag. For this technique, you’ll want to use the Mini Cutting Plates (#151004) and place one inside the bag, so you’re only cutting through a single layer.

If you’d like your bag to stand up like mine, score the bottom of the bag at 1/2″, then fold that section to the inside to create a flat base.


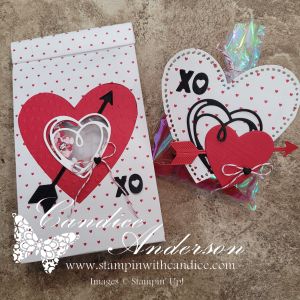
Project One – Large Heart Window Shaker

For my first project, I used the large heart die to cut a window in the bag. I then cut a smaller heart from Real Red cardstock and embossed it with the Hearts of Love 3D Embossing Folder (#167071).

To create the shaker:

  • I used a 3″ x 3″ Flip Flap (#166514)
  • Filled it with the Loose Valentines Assortment (#167074)
  • Attached it to the back of the embossed red heart
  • Then adhered everything to the inside of the bag behind the window

I finished the bag with additional die cuts and Real Red Baker’s Twine (#164051).

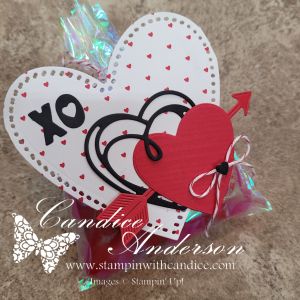
For the coordinating project, I used the heart cut from the treat bag along with extra die cuts and twine then attached them to an Iridescent Treat Bag (#166204)—quick, easy, and adorable.


Project Two – Filigree Hearts & Shimmery Window

For the second project, I cut the smaller hearts and layered them with the filigree heart dies.

To create a shimmery window:

  • I cut open an Iridescent Treat Bag (#166204)
  • Adhered it to the inside of the gusseted treat bag

For the greeting, I used the Three Banner Punch (#167050) for a quick and easy sentiment. The final touch was Bubble Bath 1/8″ Faux Linen Ribbon (#167075)—the perfect delicate accent.

Coordinating Candy Bar Treat

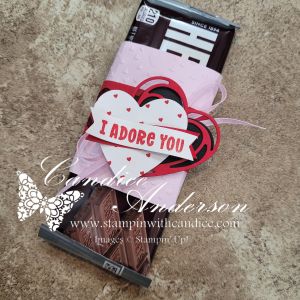
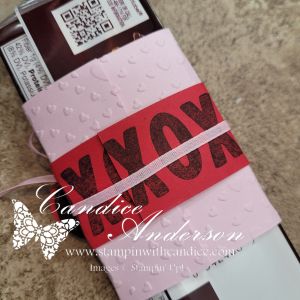
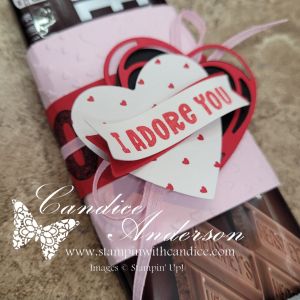
To coordinate, I layered one of the hearts cut from the treat bag onto additional die cuts. I embossed Bubble Bath cardstock, wrapped it around a candy bar, and added:

  • A strip of Real Red cardstock stamped with XO in black
  • A big, beautiful bow made from the Bubble Bath Faux Linen Ribbon

Quick, easy, and super cute!


Any of these projects would make a perfect Valentine treat for someone special, and they’re a great way to get even more value from your Heart Gusseted Treat Bags.

💖 Remember: You can purchase all of the products used for these projects on my website. I appreciate your support.


A beautifully crafted Christmas card featuring a window scene that displays a peaceful nativity setting on one side, while the inside is adorned with cozy holiday elements like hanging stockings and warm colors.

Please feel free to contact me if you have any questions.

Contact me today to place your order!
435-232-2655 Cell ( Call or Text)
andersoncandice@hotmail.com


💕 Let’s Stay Connected

📺 YouTube
📘 Facebook
📸 Instagram
📌 Pinterest

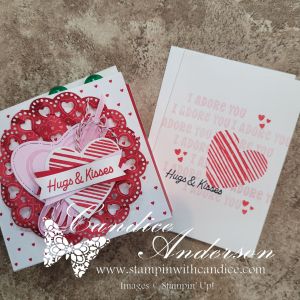
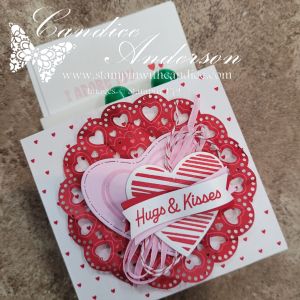
From Treat Bag to Box: My Favorite Heart Gusseted Treat Bag Project

Monday night on my live, I shared multiple projects using the Heart Gusseted Treat Bags (#167073), and I had so much fun playing with these bags and seeing just how many ideas I could come up with. 💕

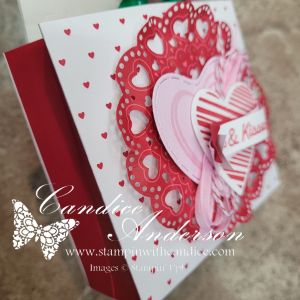
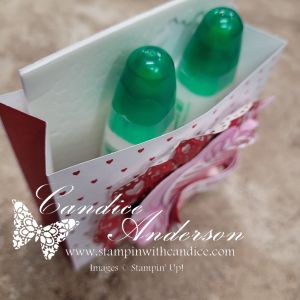
My live video featured my favorite project.. This little box is relatively simple to make, and I love how versatile it is—plus, one bag makes TWO boxes, which is always a win!

Box Instructions

Start with one Heart Gusseted Treat Bag:

  1. Cut off the top folded portion of the bag.
    • Measure 9-1/4″ up from the bottom and cut.
  2. Trim the bottom so the bag measures 9″ total.
  3. Cut the bag in half at 4-1/2″.
  4. Score the bottom at 3/4″.
    • Be sure to flip the piece so you get a good score on both sides.
  5. Cut the corners on the bottom of each piece up to the 3/4″ score line.
    • You should now have two red sections and two white sections.

Box Base (for Support)

  • Cut a piece of chipboard to 4″ x 1-1/4″
    • I used chipboard from my Paper Pumpkin kits.
  • Cover with Real Red cardstock, also 4″ x 1-1/4″.
  • Adhere to the bottom of the inside of the box for extra stability.

Decorating Details

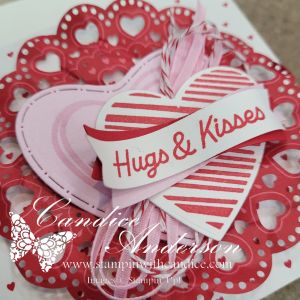
A close-up view of a decorative Valentine's Day card featuring layered hearts in shades of pink and red, with a ribbon that reads 'Hugs & Kisses'. The background includes a lace-like doily pattern.

Decorate your box as desired! For my sample, I used:

  • Lovely Doilies #167104
  • Endless Love Stamp Set #167055
  • Endless Love Dies #167061
  • Bubble Bath Ribbon #167075
  • Real Red Baker’s Twine #164051

Colors: Real Red, White, & Bubble Bath

✨ Perfect Fit: This box fits our Note Cards (#159232) perfectly, making it ideal for a sweet Valentine note or gift enclosure.

The simple card design tucked inside the box was inspired by Heidi Collins, keeping the look clean, classic, and easy to recreate.

✨ Bonus: This project is the perfect fit for this week’s Global Design Project challenge – Hearts #GDP531! 💖

Be sure to check out my video to see just how easy this project is to create, along with the other fun ideas I shared. I’ll be posting more details on the remaining projects later this week, so be sure to tune back in! 💕


A beautifully crafted Christmas card featuring a window scene that displays a peaceful nativity setting on one side, while the inside is adorned with cozy holiday elements like hanging stockings and warm colors.

Please feel free to contact me if you have any questions.

Contact me today to place your order!
435-232-2655 Cell ( Call or Text)
andersoncandice@hotmail.com


💕 Let’s Stay Connected

📺 YouTube
📘 Facebook
📸 Instagram
📌 Pinterest

Quick and Easy Treat Holders

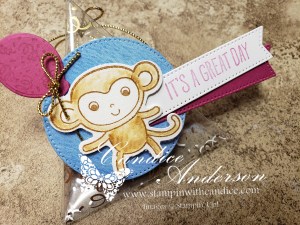
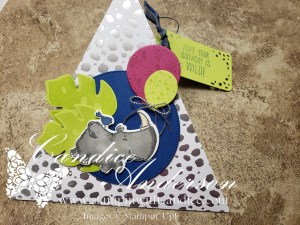
Can you believe the month is already over? That means tomorrow May 1st is the last day to order retiring products. This is my last post featuring retiring products. I’ve also received my pre-order items so I thought I would share a variety of quick and easy treat holders that feature retiring product, new product and online exclusives.

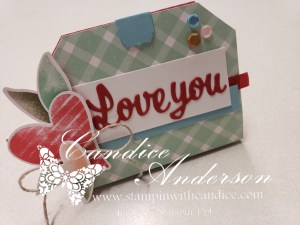
I created these cute gift holders around Valentine’s for my open house. I also wanted to create a project that I could send to people that weren’t able to attend in person. Since it’s hard to send them stamps I decided to go with a project that was made with dies and punches. You’ll notice that both are similar; however, the punched one I punched the images directly from the designer series paper.

  • 160390 – Country Floral Lane Suite Collection (R) (M)
  • 160383 – Country BouQuet Bundle (R) (M)
  • 160377 – Country Bouquet Stamp Set (C) (M)
  • 160382 – Country Bouquet Punch (C) (M)
  • 160386 – Real Red & Burlap Ribbon Combo Pack (C) (M)
  • 160387 – Pastel Adhesive- Backed Sequins (C) (M)
  • 160388 – Country Gingham 6×6 DSP (R) (M)
  • 160375 – Country Floral Lane 12×12 DSP (R) (M)
  • 158885 – Best Label Punch (C)
  • 104199 – Linen Thread (C)
  • 152698 – Love you More Than Dies (R)
  • Colors – Sweet Sorbet (C), Mint Macaron (R), Balmy Blue (C), Garden Green (C), Blushing Bride (R), Real Red (C), Basic White (C)

(R) Retiring, (C) Carrying Over, (M) Found in the Mini Catalog

Here’s a quick picture of the measurements so you can make your own treat holder.

First I need to give a quick shout out to Craft with Jayne as she shared the triangle treat holder and I just had to give it a try. These two projects feature the retiring country gingham DSP that I love along with the Flowers of Friendship stamp set and dies.

  • 155358 – Flowers of Friendship Stamp Set (R)
  • 155373 – Flowers & Leaves Punch (R)
  • 160388 – Country Gingham 6×6 DSP (R) (M)
  • 159183 – Stylish Shapes Dies (C)
  • 152525 – Lovely You Stamp Set (R)
  • 154289 – Opal Rounds (R)
  • 155475 – Baker’s Twine Essentials Pack (C)
  • 159200 – Sweet Sorbet 1/8″ Metallic Woven Ribbon (C)
  • 158133 – Soft Succulent 1/2″ Satin Shimmer Ribbon (R)
  • 154893 – Petal Pink Stampin’ Blends Combo Pack (C)
  • 155521 – Soft Succulent Stampin’ Blends Combo Pack (C)
  • Colors – Petal Pink (C), Soft Succulent (R), Sweet Sorbet (C), Basic White (C), Basic Black (C)

(R) Retiring, (C) Carrying Over

Here are the measurements to create these easy gift holders. Remember that you are scoring not cutting to make this project. The measurement listed here are for the smaller treat box. If you watch my video below you can see the difference is size between the larger Rhino box and smaller Monkey box.

Now for a little bit of fun. I wanted to make a quick video so I could show you how easy these are to make, but I wanted to make it using new product so I had a little bit of fun with my pre-order. I will admit I did use one retiring product on these projects and that is the DSP for the Rhino project since I thought it worked so well with image. The Rhino’s are part of the online exclusive Rhino Ready Stamp Set and the large leaves are as well. The rest you will find in the new catalog and will be available to purchase on May 2, 2023.

Check out my video to see how fast and easy these projects are to make.


Please feel free to contact me if you have any questions.

Order online
Click on the shop now button.
Contact me today to place your order
or book your party!
435-232-2655 Cell ( Call or Text)
andersoncandice@hotmail.com Please feel free to contact me if you have any questions.

Love Cats Stamp Set

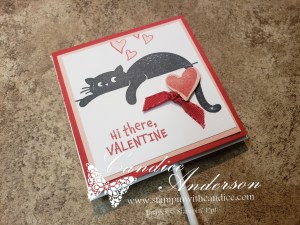
Today I thought I would jump over to a stamp set from the mini catalog that is retiring. Just a reminder that while some of the items in the mini catalog will be carrying over many are retiring with the main catalog so be sure to get your favorites be for they are gone. My daughter is super sad to see this stamp set go as she is a huge cat fan. I need to give the creativity of these cards to her. She wanted to stamp with me one day so I had her pick things out and help to figure out how to stamp them. I guided her a bit as she is only 11 but overall they were mostly her creations. I think she did a great job.

  • 160410 – Love Cats Stamp Set (R) (M)
  • 159190 – Heart Pearls (R)
  • 156485 – Black & White 1/4″ Gingham Ribbon (C)
  • 155714 – Polished Pink 3/8″ Open Weave Ribbon (R)
  • 152709 – Rectangular Postage Stamp Punch (R)
  • 149643 – Brick & Mortar 3D Embossing Folder (R)
  • Colors – Polished Pink (R), Basic Black (C), Basic White (C)

(R) Retiring, (C) Carrying Over. (M) Found in the Mini Catalog

I bought the set specifically so she could use it for her valentine’s. We played around with a couple of ideas, ended up doing the project on the right which was attaching the image to one of our 3×3 envelopes. Before attaching it we punched a small hole in the bottom that we could put a sucker stick through. One of the things I loved about this project is that we used the stamparatus to make it easy for her to stamp the same image over and over again. I’m really sad that this tool is leaving as I haven’t had much of a chance to share it, but it sure can come in handy.

  • 160410 – Love Cats Stamp Set (R) (M)
  • 160386 – Real Red & Burlap Ribbon Combo Pack, Red (C) (M)
  • 160382 – Country Bouquet Punch (C) (M)
  • 160377 – Country Bouquet Stamp Set (C) (M)
  • 160383 – Country Bouquet Bundle (R) (M)
  • 159233 – Basic White 3″X3″ Envelopes
  • Colors – Blushing Bride (R), Real Red (C), Basic Black (C), Basic White (C)

(R) Retiring, (C) Carrying Over. (M) Found in the Mini Catalog


Please feel free to contact me if you have any questions.

Sale-a-bration mini treat bag

Here’s a quick and easy treat bag you can create with our sale-a-bration products.  I’ve used the best day ever stamp set, paper and ribbon to create it.  I loved the tag idea featured in the sale-a-bration catalog and it was easy to add to the treat bag.  It’s hard to see in the picture but I used one more sale-a-bration product.  Do you know what it is?  I used the Daffodil Delight Blendabilites Markers to color the rhinestone yellow.  I love that you can use the Blendabilites to color on many of our embellishments and other products to change the color or give it a fun different look.

Sale-a-bration mini treat bag

Here’s a quick list of supplies

  • Daffodil Delight Assortment Blendabilities Marker #139926 FREE (SAB) or #130998 $11.95
  • Best Day Ever Accessory Pack #138634 FREE (SAB)
  • Best Day Ever Designer Series Paper #138633 FREE (SAB)
  • Best Day Ever Stamp Set #139091 Wood #139094 Clear 3139149 Photopolymer FREE (SAB)
  • Markers- Coastal Cabana, Crushed Curry & Calypso Coral
  • Rhinestone Basic Jewels #119246 $4.95
  • Angled Tag Topper Punch #133323 $22.95
  • Mini Treat Bag Thinlits Dies #137547 $39.95
  • Big shot Die Cutting Machine #113439 $99.95
  • Magnetic Platform #130658 $39.95
  • Paper Snips #103579 $9.95

Remember you can earn a FREE Sale-a-bration (SAB) item for every $50.00 you spend.  This fun project features 4 SAB items one you can purchase as well.  That means with a $150 order you can get everything you need to make this project plus earn hostess benefits along with the SAB products.  Remember you can order online anytime or contact me to order.

Tag SignatureOrder online 24/7
Contact me to order or book your party today!
435-245-5321 Home
435-232-2655 Cell (Text)
andersoncandice@hotmail.com