Important MDS information

I’m still really sad about MDS being discontinued.  Remember today is the last day that you can order and of the downloads before they are gone.  Also remember to make sure you download your downloads and save them by June 9th.

Below is some information that Stampin’ Up! has provided us with about a program that you can use by the same developer, this program will allow you to print your projects.  There is also download information.  If you have any questions please feel free to contact me.

Tag SignatureOrder online 24/7
Contact me to order or book your party today!
435-245-5321 Home
435-232-2655 Cell ( Call or Text)
andersoncandice@hotmail.com
 

Now is your last chance to get Stampin’ Up! downloads and print products at the discounted prices. Everything in the My Digital Studio product line is available for 30 percent off until the end of day on June 2. See the spreadsheets of retiring MDS products here:

As a general reminder:

  • June 2 is the last day to buy downloads or place print orders with the 30 percent discount. After June 2, Stampin’ Up! will no longer sell anything related to the My Digital Studio product line.
  • On June 2, all Online Store categories will be replaced with new categories in support of the 2015-2016 annual catalog. The new categories will contain new and carryover items in the 2015-2016 annual catalog. All other items, including the MDS software and digital downloads, will be searchable and orderable, but not categorized.
  • June 9 is the last day that Stampin’ Up! will support the My Digital Studio product line. After June 9, all of the MDS websites will be taken down. That list includes MyDigitalStudio.net, related content on the stampinup.com demonstrator website, the download manager, YouTube videos, Facebook, and Pinterest.
  • Make sure that you download and back up your digital downloads and software before June 9. For help with backing up files, see MyDigitalStudio.net/backup.
  • All of Stampin’ Up!’s digital downloads will be discontinued, including everything related to MDS, convention and leadership theme songs, photos, class recordings, and all of our other online classes. You will want to make sure to back up all of your digital download files before the cutoff on June 9.
  • Our MDS playlist of YouTube videos on the Stampin’ Up! channel will be available (for the foreseeable future) via the following link: https://www.youtube.com/playlist?list=PLB85C76B5B74DB19A

MyMemories Suite Offer

Software

We have worked with excellent partners to make the My Digital Studio product line. We’re pleased to announce that StoryRock, the partner who worked with us to develop the MDS software, has made an offer to Stampin’ Up!’s customers and demonstrators. Some MDS users may know that the original MDS software was based on StoryRock’s award-winning MyMemories Suite software. While the two softwares have diverged over the years, there are still many similarities–which we feel confident will enable MDS users to experience an easy transition to MyMemories Suite.

MyMemories version 6 software is normally available for $39.99 USD, but StoryRock has cut the price to $19.99 USD for anyone who purchases the software via this special offer. See more details about the offer here.

Print

Starting on June 3, StoryRock will make a number of additional print products available through the latest version of the MyMemories software. Stampin’ Up! has worked with StoryRock to introduce some of our most popular print products, like additional card, photobook, and calendar options and sizes. We will post a detailed list of those products and StoryRock’s prices on MyDigitalStudio.net on June 3.

Artwork

While Stampin’ Up! will not sell any digital downloads after June 2, we have reached an agreement with StoryRock to offer a limited number of our existing digital downloads for sale via a Stampin’ Up! section of the MyMemories.com online store. You can expect to see a limited selection of digital downloads appearing on the MyMemories.com online store over the next few months. The price for downloads through the MyMemories.com online store may vary, but it will definitely be in your best interest to purchase the downloads available through Stampin’ Up! at a 30 percent discount until they are no longer available after June 2.

This content will not be new to you, but it will give you and your customers the opportunity to catch additional digital downloads you may have wanted and missed while our digital downloads were available for sale. You will not receive commissionable sales for purchases made for print products or for any of the artwork available in the MyMemories.com online store.

Do I need to switch to MyMemories Suite?

Stampin’ Up! will no longer support the MDS software after June 9, 2015. MDS will continue to work on existing computers for the foreseeable future. However, you will no longer be able to print directly from MDS after June 2, and it is very probable that the software will not work with the upcoming Windows PC and Mac operating systems. It is also possible that other critical component updates like Java may cause the software to stop working as intended.

In short, if you would like to continue with digital design on a supported platform, we recommend that you switch to the latest version of MyMemories Suite. MyMemories Suite consistently rates very high, we know and recommend the developers, and as we have mentioned, it is very similar to MDS. Stampin’ Up! will not provide support for switching your MDS projects and files over to MyMemories Suite, but StoryRock will be more than happy to help.

TGIF Challenge

I recently found a fun new group on Facebook that has a great blog.  You can check out their blog here http://tgifchallenges.blogspot.com/.  They are featuring fun challenges that their designers participate in and we can participate in the fun as well.  So I thought this would be a great way to challenge me a little as well.  Here was the first challenge.

I had so much fun with the challenge the I actually created 3 projects.  So I thought I would share all three.  I really do love how well these colors work together.

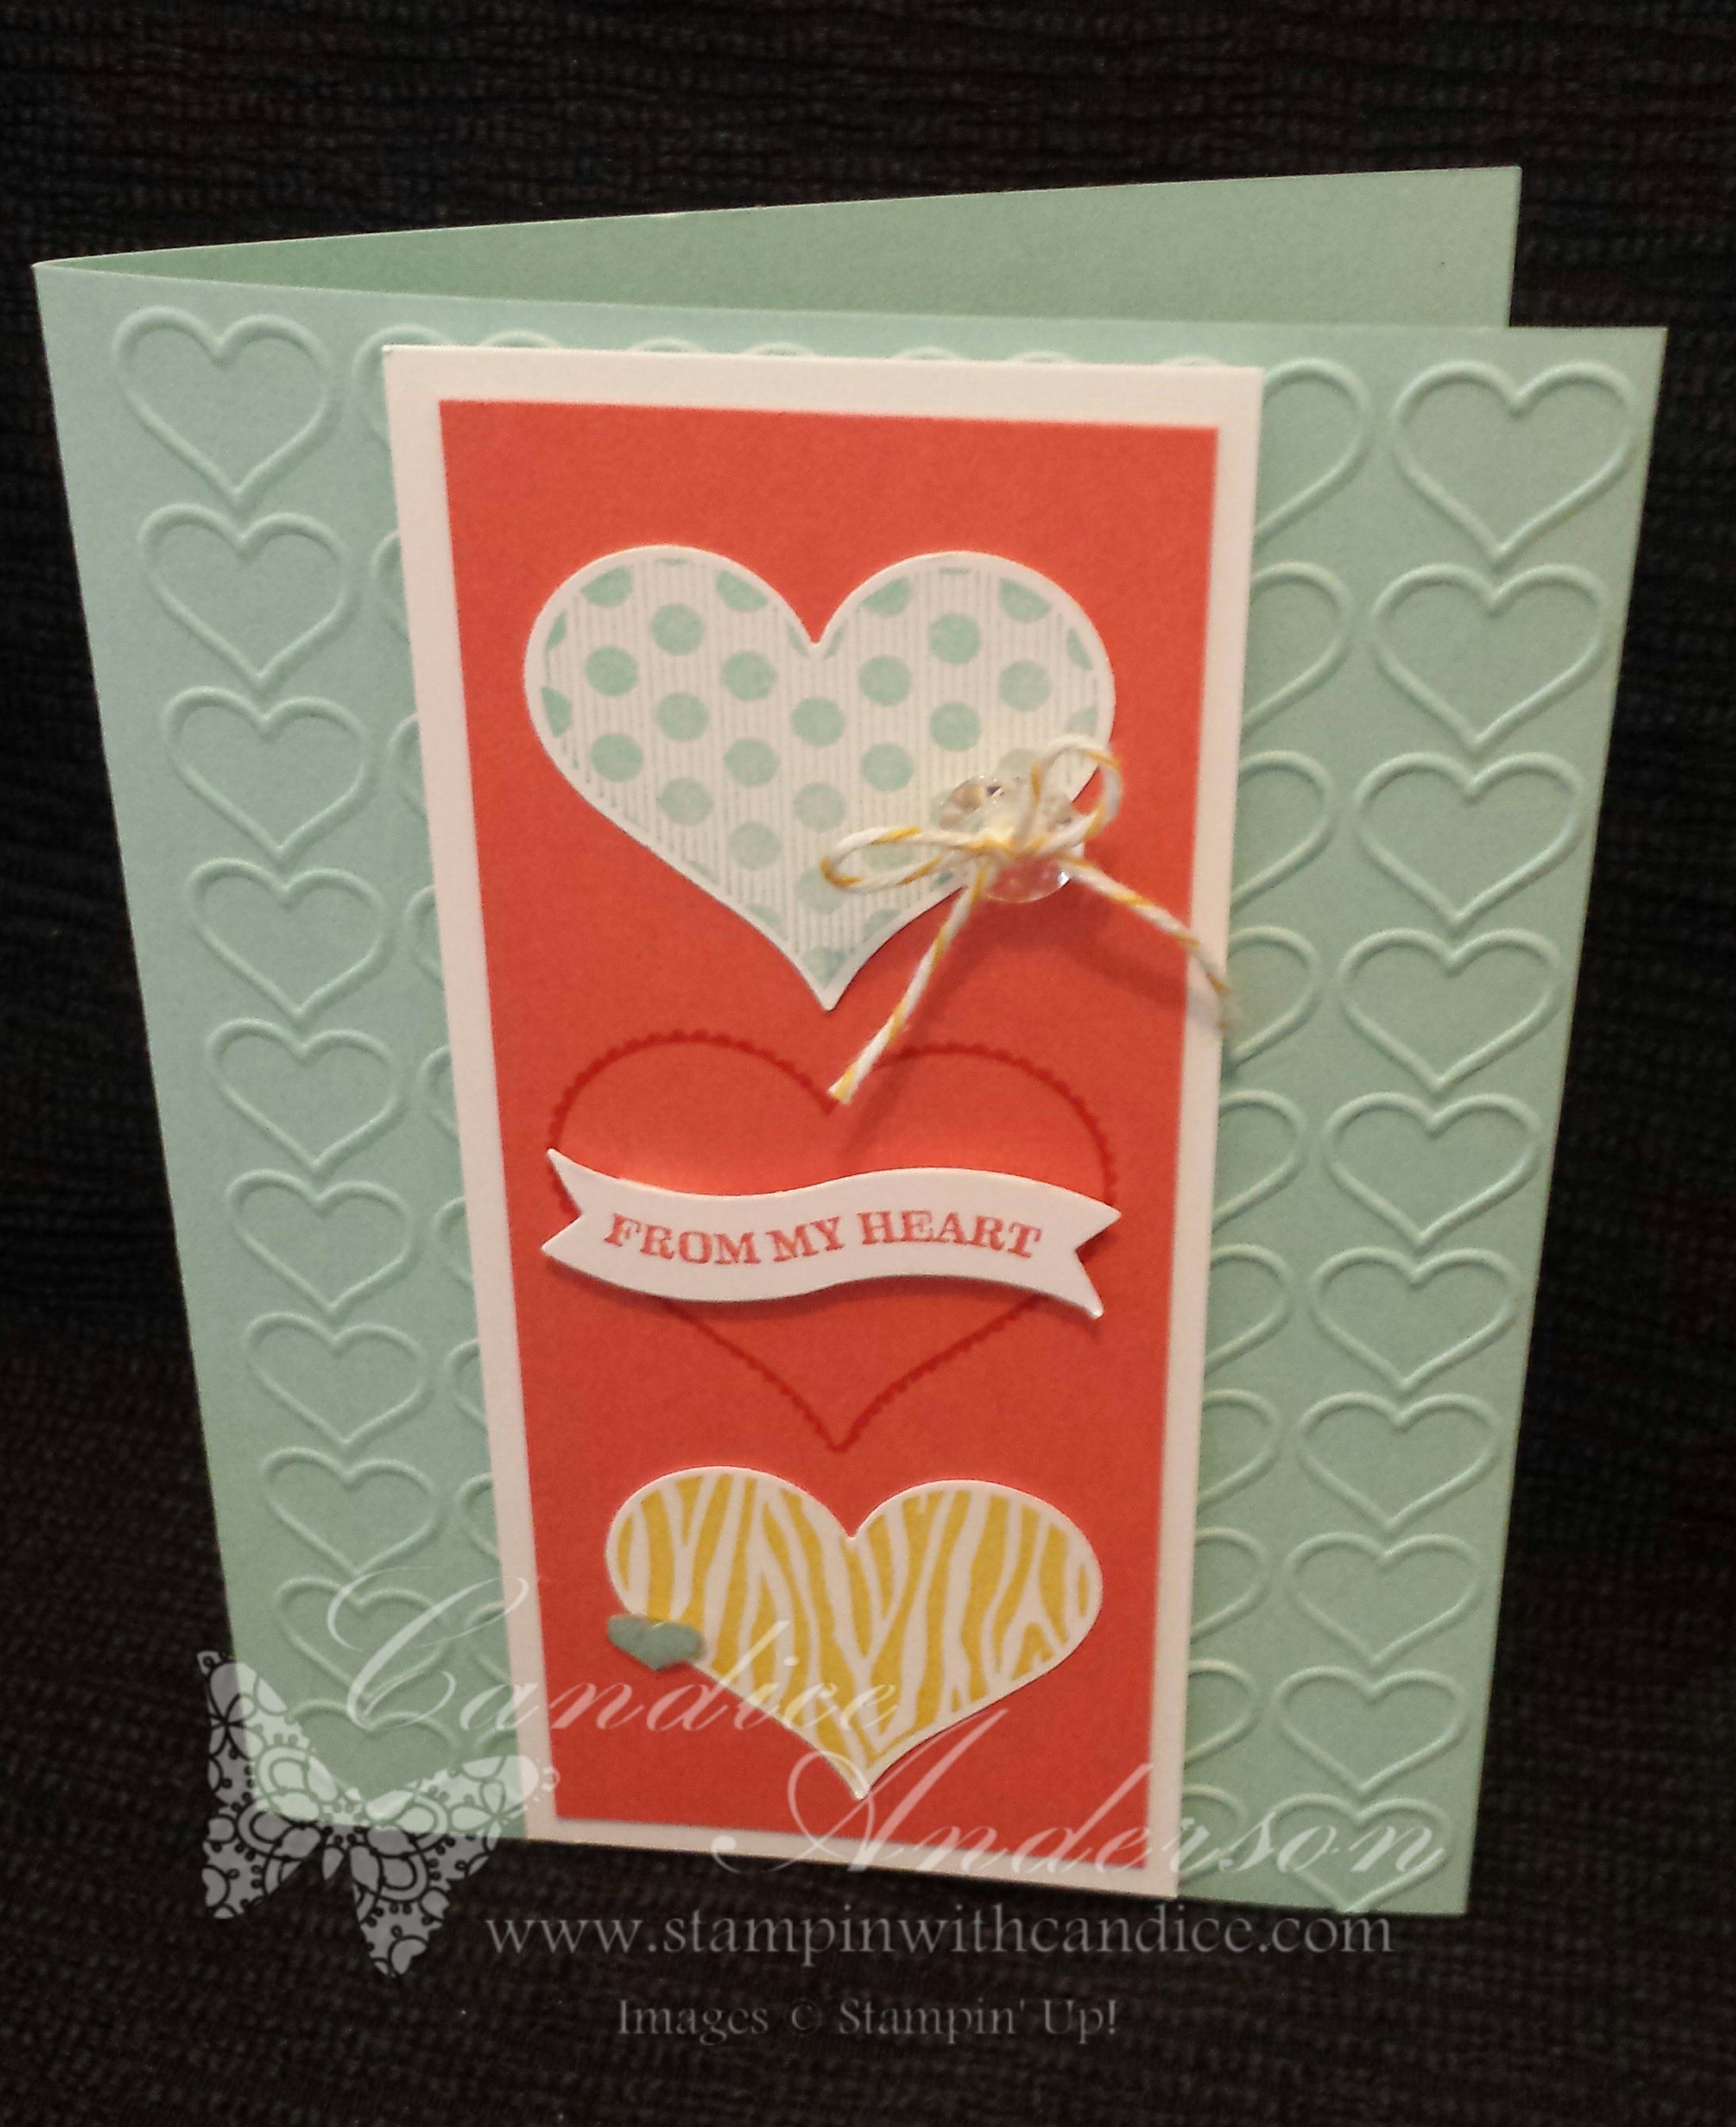
Heart Card TGIF challenge

I really love how this one turned out.  I liked the card with just the hearts but I really loved it when I added the little extra touches like the buttons with ribbon and the heart bubble.

Here’s a quick list of supplies:
#137364 Happy Heart Texture Impressions Embossing Folder $7.95
#113439 Big Shot Die-Cutting Machine $99.95
#134586 Crushed Curry Bakers Twine $2.95
#127555 Vintage Faceted Designer Buttons $5.95
#133786 Sweetheart Punch $15.95
#137415 Confetti Heart Border Punch $21.95
#137856 Itty Bitty Accents Epoxy Stickers $3.95

Stamps:
Groovy Love
#134243 Wood $24.95
#134246 Clear $17.95

Thanks Card TGIF Challenge

This was the second card I made and probably my favorite.  I just love how it turned out.  So just a note the feathers on this card are included in the carry over items from the Holiday Catalog.  They are not listed in the new catalog so I’m not sure they will continue to carry over.  That means if you didn’t get them already and love them like I do be sure to get them now.

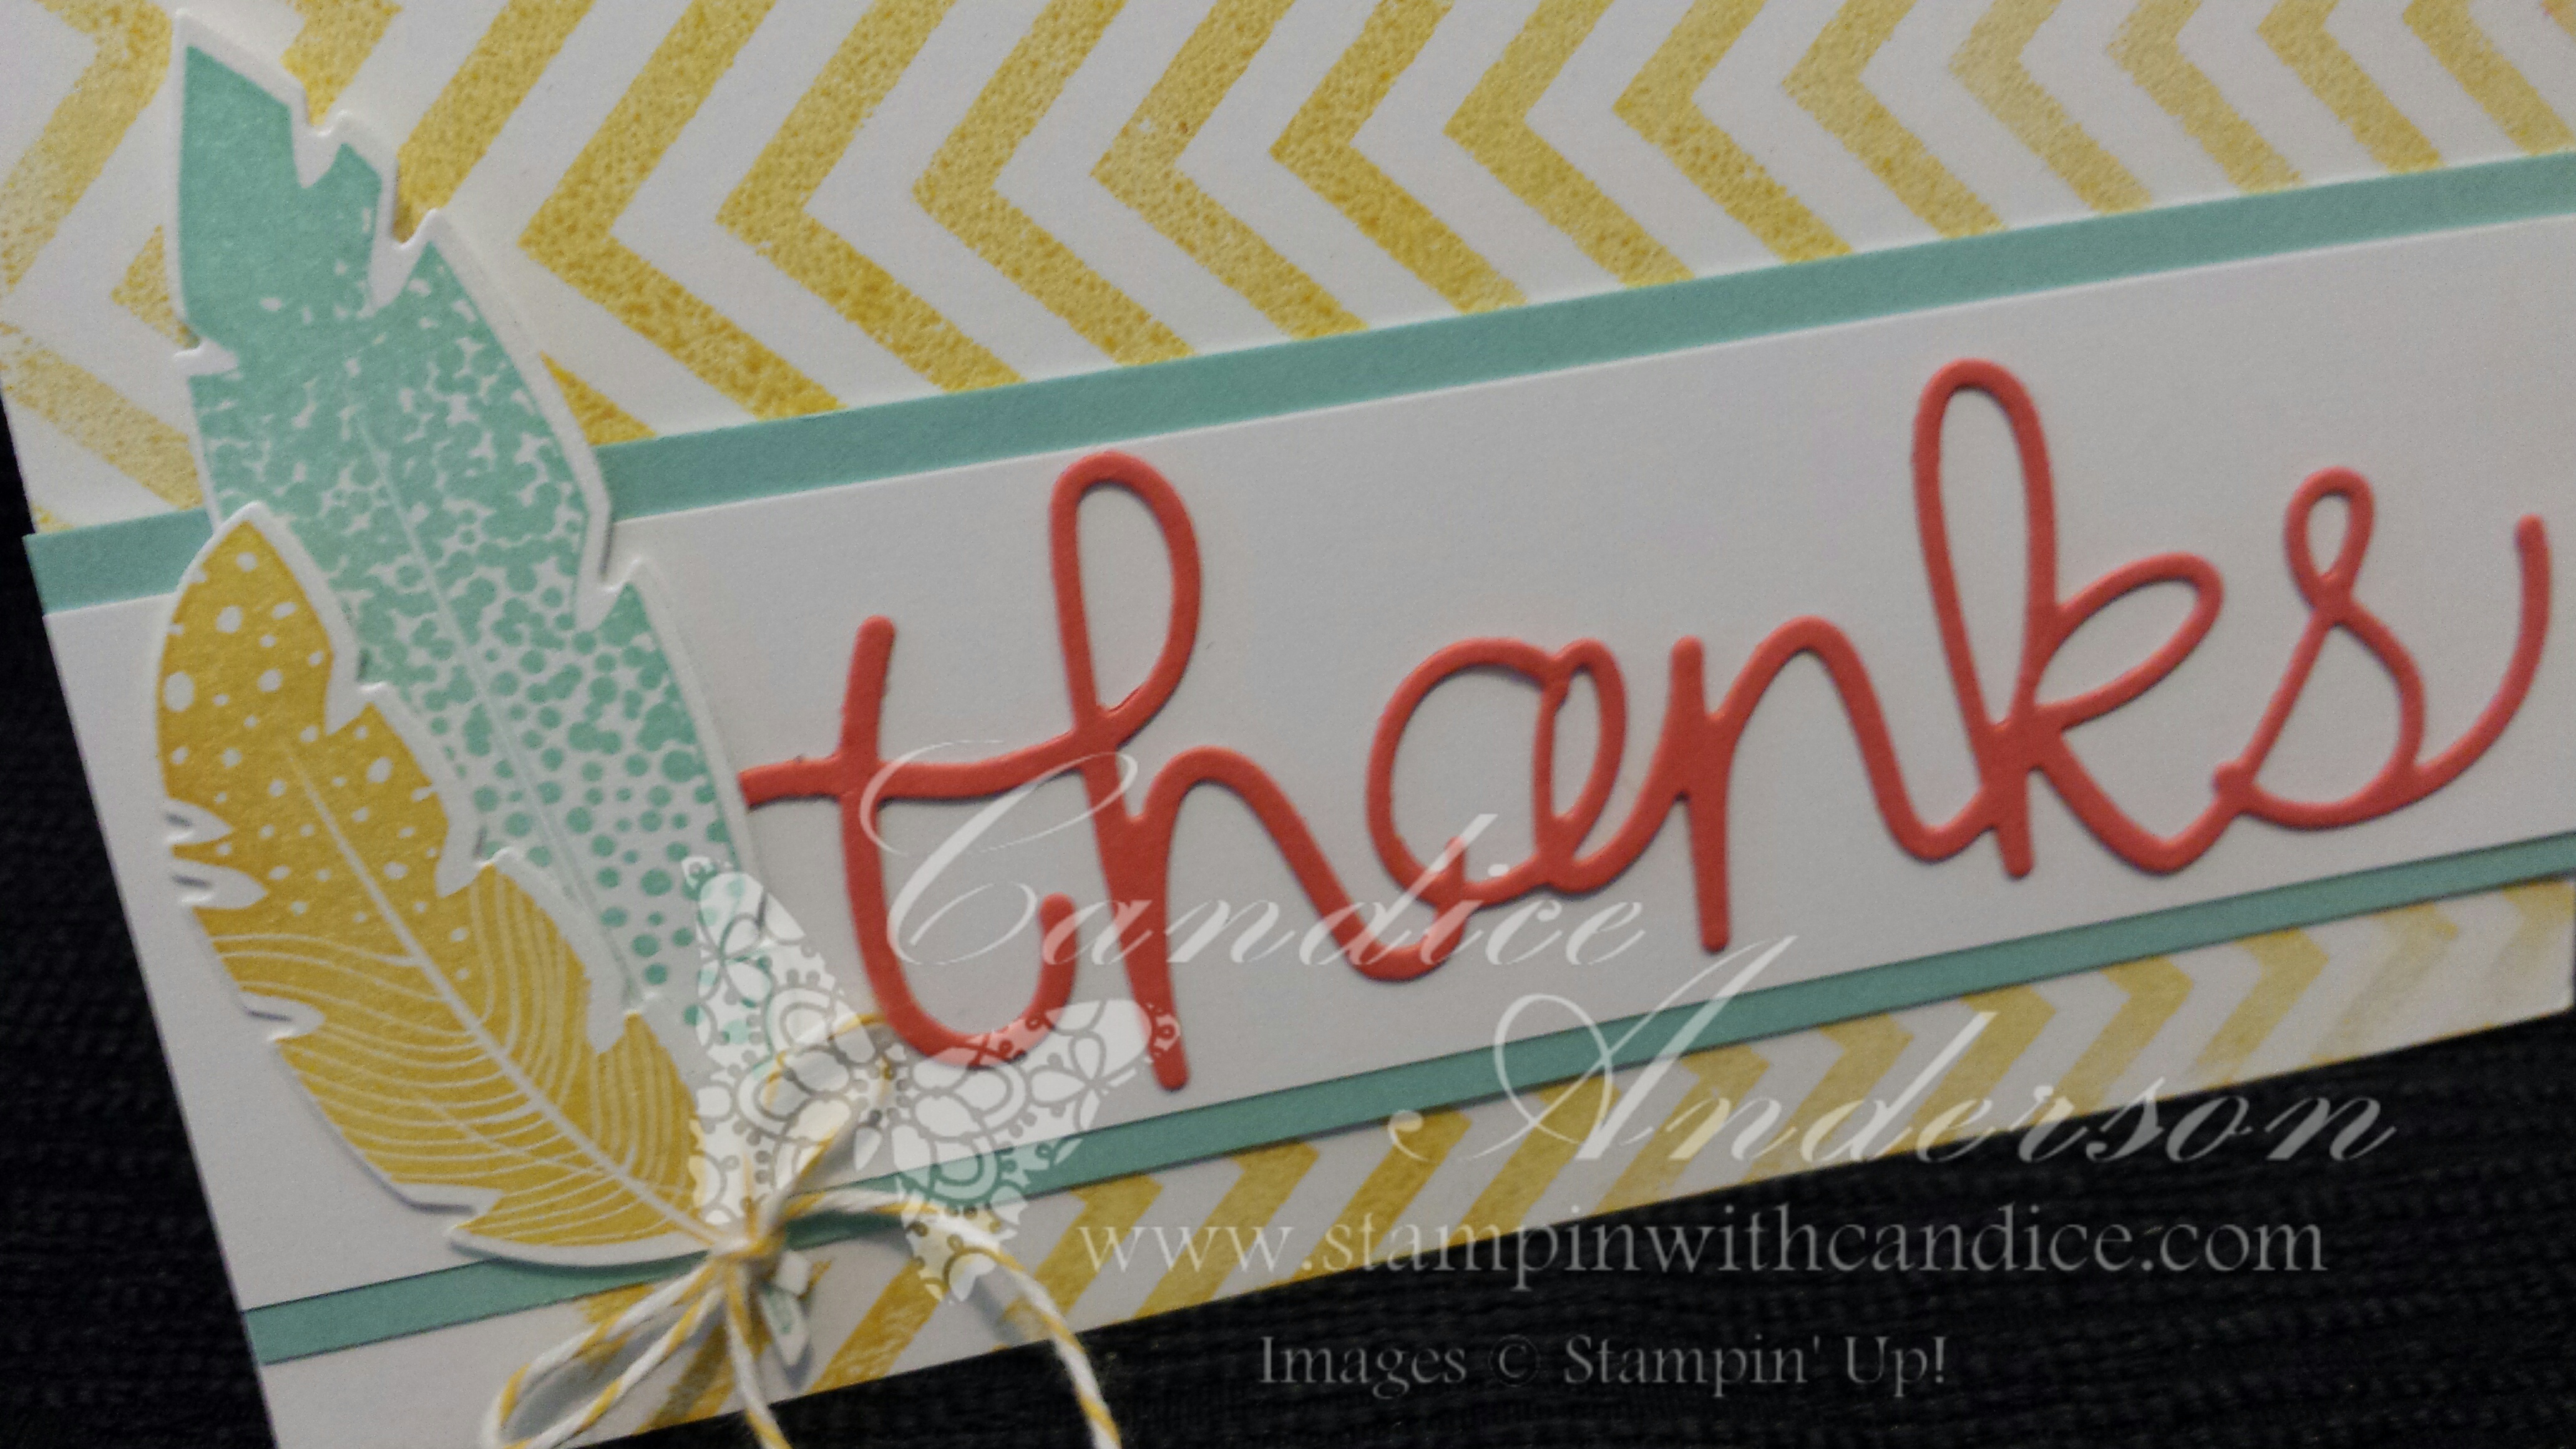
Thanks Card TGI Challenge Close Up

Here’s a little closer look at the feathers and the words.  I really love how it looks.  One quick note on the background.  I stamped off first before stamping my white card-stock so that it would be a bit lighter.

Here’s a quick list of supplies:
#113439 Big Shot Die-Cutting Machine $99.95
#135852 Feathers Framelits Dies $12.95
Available as a bundle with the stamp set
#137363 Hello You Thinlits Dies $24.95
#134586 Crushed Curry Bakers Twine $2.95

Stamps:
Four Feathers
#135050 Wood $13.95 Bundle #137629 $22.75
#135053 Clear $10.95 Bundle #137630 $20.25

Positively Chevron (Background Stamp)
#130496 Wood $17.95
#130499 Clear $13.95

So my last project I thought it would be fun to use these colors to create my own Project Life card for my page.

Project Life Page TGIF Challenge  The one thing about project life is that it’s hard to get a good picture when the pages are in the page protector.  I actually attached the extra elements to the page protector instead of the actual pictures so I couldn’t take the pictures out for the picture.

Project Life card TGIF Challenge

I took out the center card and took a close up picture so you could see how easy it was to make this simple card for this page.  I used one of the grid cards to make it easy for journaling.  I love this stamp set and punch for Project life it just works so well with everything.  Remember this awesome stamp set and punch is on the retired list so be sure to get them before they are gone for good.

Here’s a quick list of supplies:
#129964 Essentials Hardware Clips $5.95
#133781 What’s Up Punch $16.95
#135294 Variety Pack 12 x 12 Project Life Photo Pocket Pages $135294 $6.95
#136528 Project Life 4 x 3 Grid Cards $3.95
#134586 Crushed Curry Bakers Twine $2.95

Stamps:
What’s Up?
#134267 Wood $20.95
#134270 Clear $15.95

I hope you have enjoyed the cards I made with this challenge.  I enjoyed making them and sharing them with you.  I’d love to see your creations please feel free to share them on my Facebook page. #TGIFC01

Tag SignatureOrder online 24/7
Contact me to order or book your party today!
435-245-5321 Home
435-232-2655 Cell ( Call or Text)
andersoncandice@hotmail.com
Are you following me on Pinterest?

I try to post my projects on Pinterest but I also love to pin other great projects.  Be sure to follow me on Pinterest so you can have access to these great ideas plus quick access to my projects.

Tag SignatureOrder online 24/7
Contact me to order or book your party today!
435-245-5321 Home
435-232-2655 Cell ( Call or Text)
andersoncandice@hotmail.com
Stampin’ Up! Butterfly Dies Card

I was so excited to share this card with you and the day after I made the video I found out that Stampin’ Up! was discontinuing the blendabilities line due to inconsistency in manufacturing of the product.  I’m so sad that his product is no longer available as I absolutely love it.  In fact I only had one more color to get.  I truly hope and pray that they will be able to find a manufacture that can produce the quality the Stampin’ Up! desires so we can have these fabulous markers back.

I still wanted to share this card with you as you could still make it using the awesome Butterfly cards however you just wouldn’t have the fun effect that I added on the butterfly.  Just a note you can use our Stampin’ Write markers however you need to make sure they dry really well (they can smear some maybe even after drying) and they are quite as bold.

First here is the card.

Butterfly Die Card

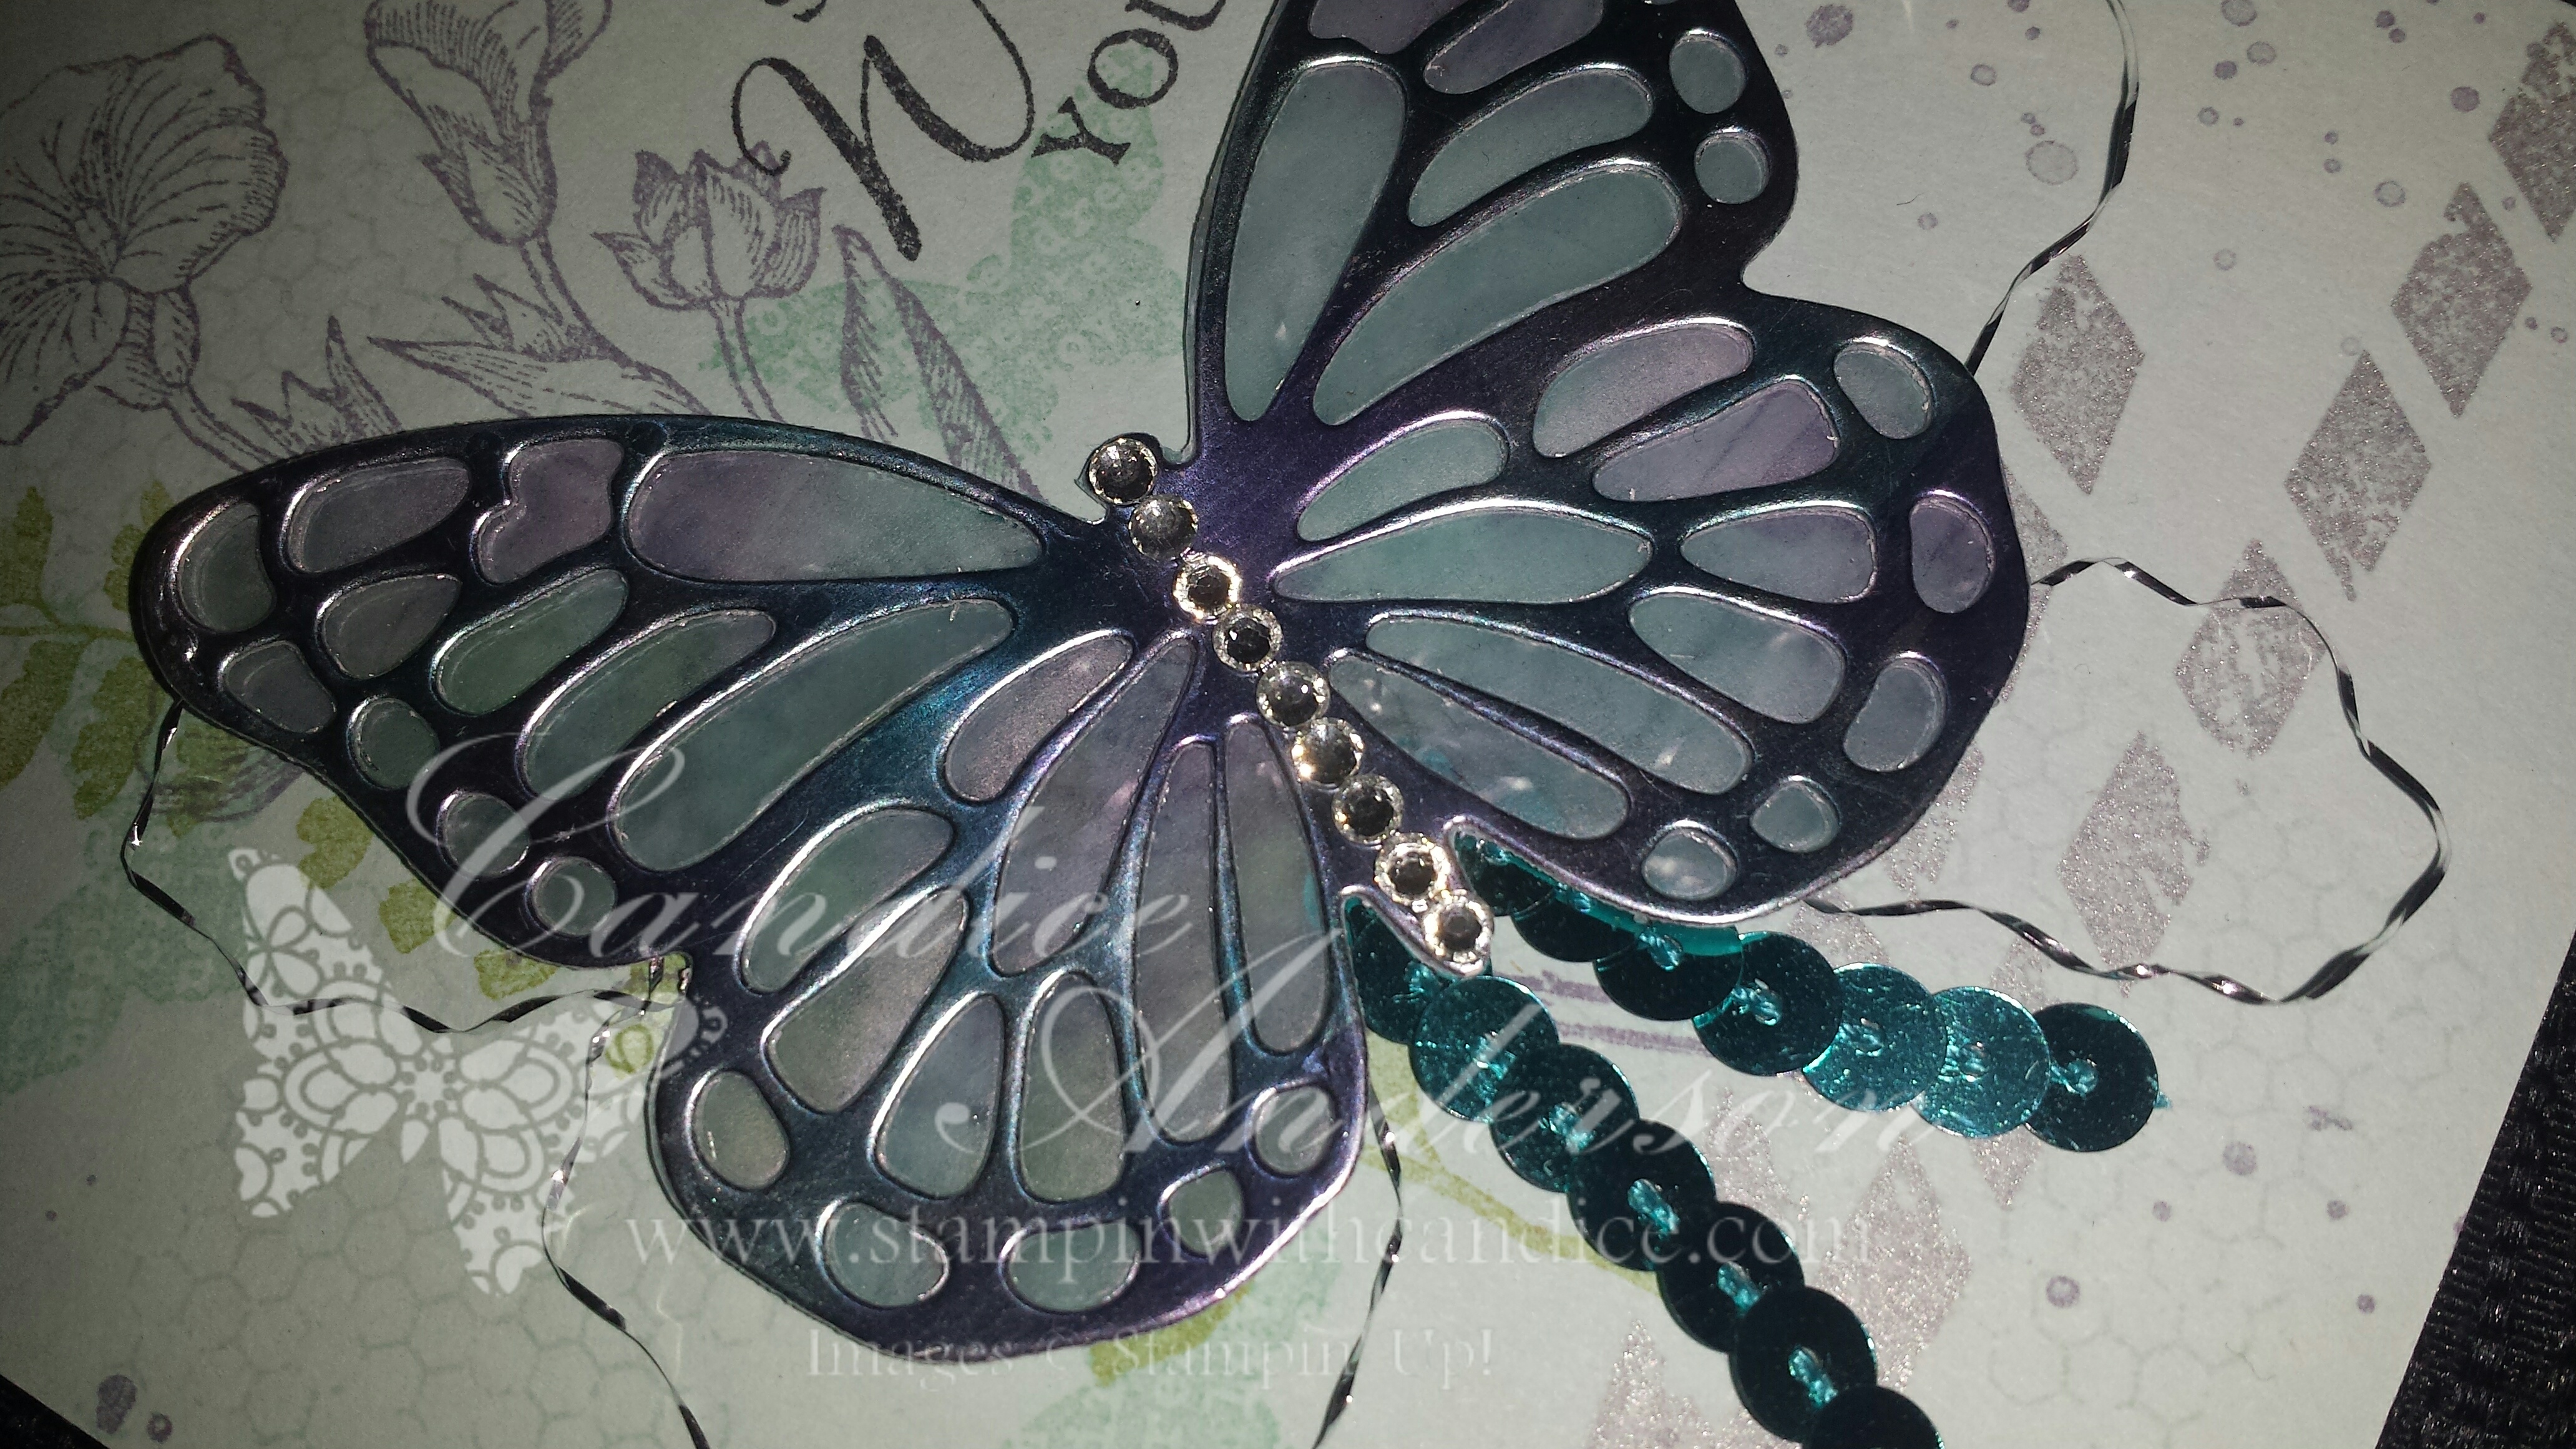
Here is a close up of the butterfly.  I created the fun effect on the butterfly with the Blendabilites.  You can check out all the details in the video below.


Close up of butterfly

Here’s the video of how I created the metallic colorful butterfly and other details.  Below is a list of products needed.

  • Paper:
    Card Base- Soft Sky #131203 $6.95
    Butterfly-
    Silver Foil #132178 $3.95
    White Vellum #101856 $6.50
  • Ink Colors:
    Soft Sky #131181 $5.95Pear Pizzazz #131180 $5.95
    Wisteria Wonder #126985 $5.95
    Pool Party #126982 $5.95
    Black Memento Pad #132708 $5.95
    Silver Pad #132142 $9.95
  • Big Shot:
    Big Shot Die Cut Machine #113439 $99.95
    Magnetic Platform #130658 $39.95
    Butterflies Thinlits Dies #137360 $24.95
  • Stamp Sets:
    Butterfly Basics:
    Wood #138813 $47.95
    Clear #138816 $35.95
    Photopolymer #137154 $23.95
    Gorgeous Grunge:
    Wood #13514 $24.95
    Clear #130517 $17.95
  • Accessories:
    Silver Metallic Baker’s Twine #132976 $3.50
    Rhinestone Basic Jewels #119246 $4.95
    Bermuda Bay Sequin Trim #137910 $4.95
    Mini Glue Dots #103683 $4.95
  • Blendabilites: (Sorry no longer available)
    Bermuda Bay
    Wisteria Wonder

Please feel free to comment if you have any questions.  Thanks so much for checking out my post.  Have a Stamptastic Day!

Tag SignatureOrder online 24/7
Contact me to order or book your party today!
435-245-5321 Home
435-232-2655 Cell ( Call or Text)
andersoncandice@hotmail.com


Sale-a-bration mini treat bag

Here’s a quick and easy treat bag you can create with our sale-a-bration products.  I’ve used the best day ever stamp set, paper and ribbon to create it.  I loved the tag idea featured in the sale-a-bration catalog and it was easy to add to the treat bag.  It’s hard to see in the picture but I used one more sale-a-bration product.  Do you know what it is?  I used the Daffodil Delight Blendabilites Markers to color the rhinestone yellow.  I love that you can use the Blendabilites to color on many of our embellishments and other products to change the color or give it a fun different look.

Sale-a-bration mini treat bag

Here’s a quick list of supplies

  • Daffodil Delight Assortment Blendabilities Marker #139926 FREE (SAB) or #130998 $11.95
  • Best Day Ever Accessory Pack #138634 FREE (SAB)
  • Best Day Ever Designer Series Paper #138633 FREE (SAB)
  • Best Day Ever Stamp Set #139091 Wood #139094 Clear 3139149 Photopolymer FREE (SAB)
  • Markers- Coastal Cabana, Crushed Curry & Calypso Coral
  • Rhinestone Basic Jewels #119246 $4.95
  • Angled Tag Topper Punch #133323 $22.95
  • Mini Treat Bag Thinlits Dies #137547 $39.95
  • Big shot Die Cutting Machine #113439 $99.95
  • Magnetic Platform #130658 $39.95
  • Paper Snips #103579 $9.95

Remember you can earn a FREE Sale-a-bration (SAB) item for every $50.00 you spend.  This fun project features 4 SAB items one you can purchase as well.  That means with a $150 order you can get everything you need to make this project plus earn hostess benefits along with the SAB products.  Remember you can order online anytime or contact me to order.

Tag SignatureOrder online 24/7
Contact me to order or book your party today!
435-245-5321 Home
435-232-2655 Cell (Text)
andersoncandice@hotmail.com

Stampin’ Up! Mini Treat Bag Box

Today I want to share with you a project that I’m so excited about.  I absolutely love the new Mini Treat Bag from Stampin’ Up! and I wanted to have a little fun with it.  I’ve heard of others turning it into a box so I decided to give it a try.  It turned out so cute and I used it as my swap during Leadership this last week.  While I was creating all my swaps I decided that I was going to make my first ever Stampin’ With Candice video.  I hope that is will be the first of many.

So first I’m going to share the cute project with you and find a few pictures of putting the project together.  Then I’ll share the video with you and last I’ll share a list of supplies so you can create one yourself.

So I love Valentines and choose that as my team.  The current occasions catalog has so many great Valentines products.

Mini Treat Bag Box Valentine

Here’s my video.  Please don’t laugh.  It’s my first one and I’m still learning.  I hope that it will help you to get an idea of how easy this box is to create.  I started taking pictures and decided that the video would be easier.  I hope you enjoy it and if so please like and share it.  Thanks


Here’s a list of supplies and the pieces that you will need to create your box.

Mini Treat Bag Box Pieces

  • The front & back is cut using a 5 1/2 x 4 1/4 piece.  (you’ll need 2)  Be sure to line up the edge with the bottom and the side where the score line is.
  • You’ll need 2 pieces 2 x 5 1/2 for your sides.  Score them at a 1/2″, 1″ and 1 1/2″.  Then score the bottom at 4 3/4.  You will cut out the center section as shown.  Fold and attach the bottom using a mini glue dot.Mini Treat Bag Box Sides
  • You’ll also need a piece for the bottom.  It is 3 1/2″ x 3/4″.

Here are the supplies if you want to create the front the same as mine.

  • Stamps Snuggles & Smooches #140326 $15.95
  • Mini Treat Bag Framelits Dies #137547 $39.95
  • Circle Collection Framelits Dies #130911 $26.95
  • Big Shot Die Cutting Machine #113439 $99.95
  • Magnetic Platform #130658 $39.95
  • Happy Heart Textured Impressions Embossing Folder #137364 $7.95
  • Rose Coral Colorbox Chalk Ink #138091 $5.95
  • Real Red Classic Ink Pad #126949 $5.95
  • Smoky Slate Stampin’ Blendabilities #131005 $11.95
  • Simply Pressed Clay #130685 $6.95
  • Alphanumeric Mold #137854 $9.95
  • Blushing Bride 3/4″ Chevron Ribbon #130013 $8.95
  • Blushing Bride Baker’s Twine #134575 $2.95
  • Gold Sequin Trim #132983 $4.95
  • Blushing Bride 1/4″ Cotton Ribbon #134558 $5.95
  • Basic Black Baker’s Twine #134576 $2.95
  • Real Red 1/4″ Cotton Ribbon #134563 $5.95
  • Tea Lace Paper Doilies #129399 $2.95
  • Silver Glimmer Paper #135314 $4.95
  • Real Red 8 1/2″ x 11″ Cardstock #102482 $6.95
  • Blushing Bridge 8 1/2″ x 11″ Cardstock #131198 $6.95
  • Chalkboard Paper #137786 $7.95
  • Basics Hodgepodge Clips #133765 $6.95
  • Crystal Effects #101055 $6.25
  • Vanilla Shimmer Smooch Spritz #118772 $4.95
  • Mini Glue Dotes #103683 $4.95
  • Stampin’ Dimensionals #104430 $3.95
  • Multipurpose Liquid glue (Tombow) #110755 $3.95
  • Stampin’ Trimmer #126889 $29.95
  • Banner Punch #133519 $12.95
  • Bone Folder #102300 $6.95
  • Paper Snips #103579 $9.95

Just a few quick notes on the front of the Valentines box.

  • Be sure to run your front and back pieces through with the embossing folder before you begin to assemble your box
  • The Love is stamped then cut out with the tag die that came with the treat bag.  I just cut the end off.  Afterwards I covered it in Crystal Effects and let it dry completely before attaching to the front.
  • I used a 1/4 of the Tea Lace Paper Doily and scrunched it to fit the love.
  • The Flower like image is stamped in Rose Coral Colorbox ink on the Chalkboard paper and then cut out with the circle framelits.
  • I used the medium Gray Smoky Slate Blendabilites marker to color on the gold sequines to turn them silver.
  • After forming your heart with the simply pressed clay I sprayed it with Vanilla Shimmer smooch and let dry.  Then I used a needle to thread the bakers twine through it and tied a bow.
  • I used the Banner Punch and went through the top to only punch the edge of the Silver Glimmer paper to create the banner.
  • The Silver Glimmer Paper and the Chevron Ribbon are attached to the back of the Chalkboard Circle.  This is glued onto the box with Tombow Multipurpose Glue.
  • I attached the Tea Lace to the love with Tombow and then attached the love to the Chalkboard Circle with dimensionals.  I also used dimensionals to attach the clay heart.

I really hope you enjoyed this project.  Please let me know if you have any questions.  I’d love to hear your comments.  Also please feel free to share with your friends.  I’d love to see your box creations.  Please feel free to share them on my facebook page.

Tag SignatureOrder online 24/7
Contact me to order or book your party today!
435-245-5321 Home
435-232-2655 Cell (Text)
andersoncandice@hotmail.com