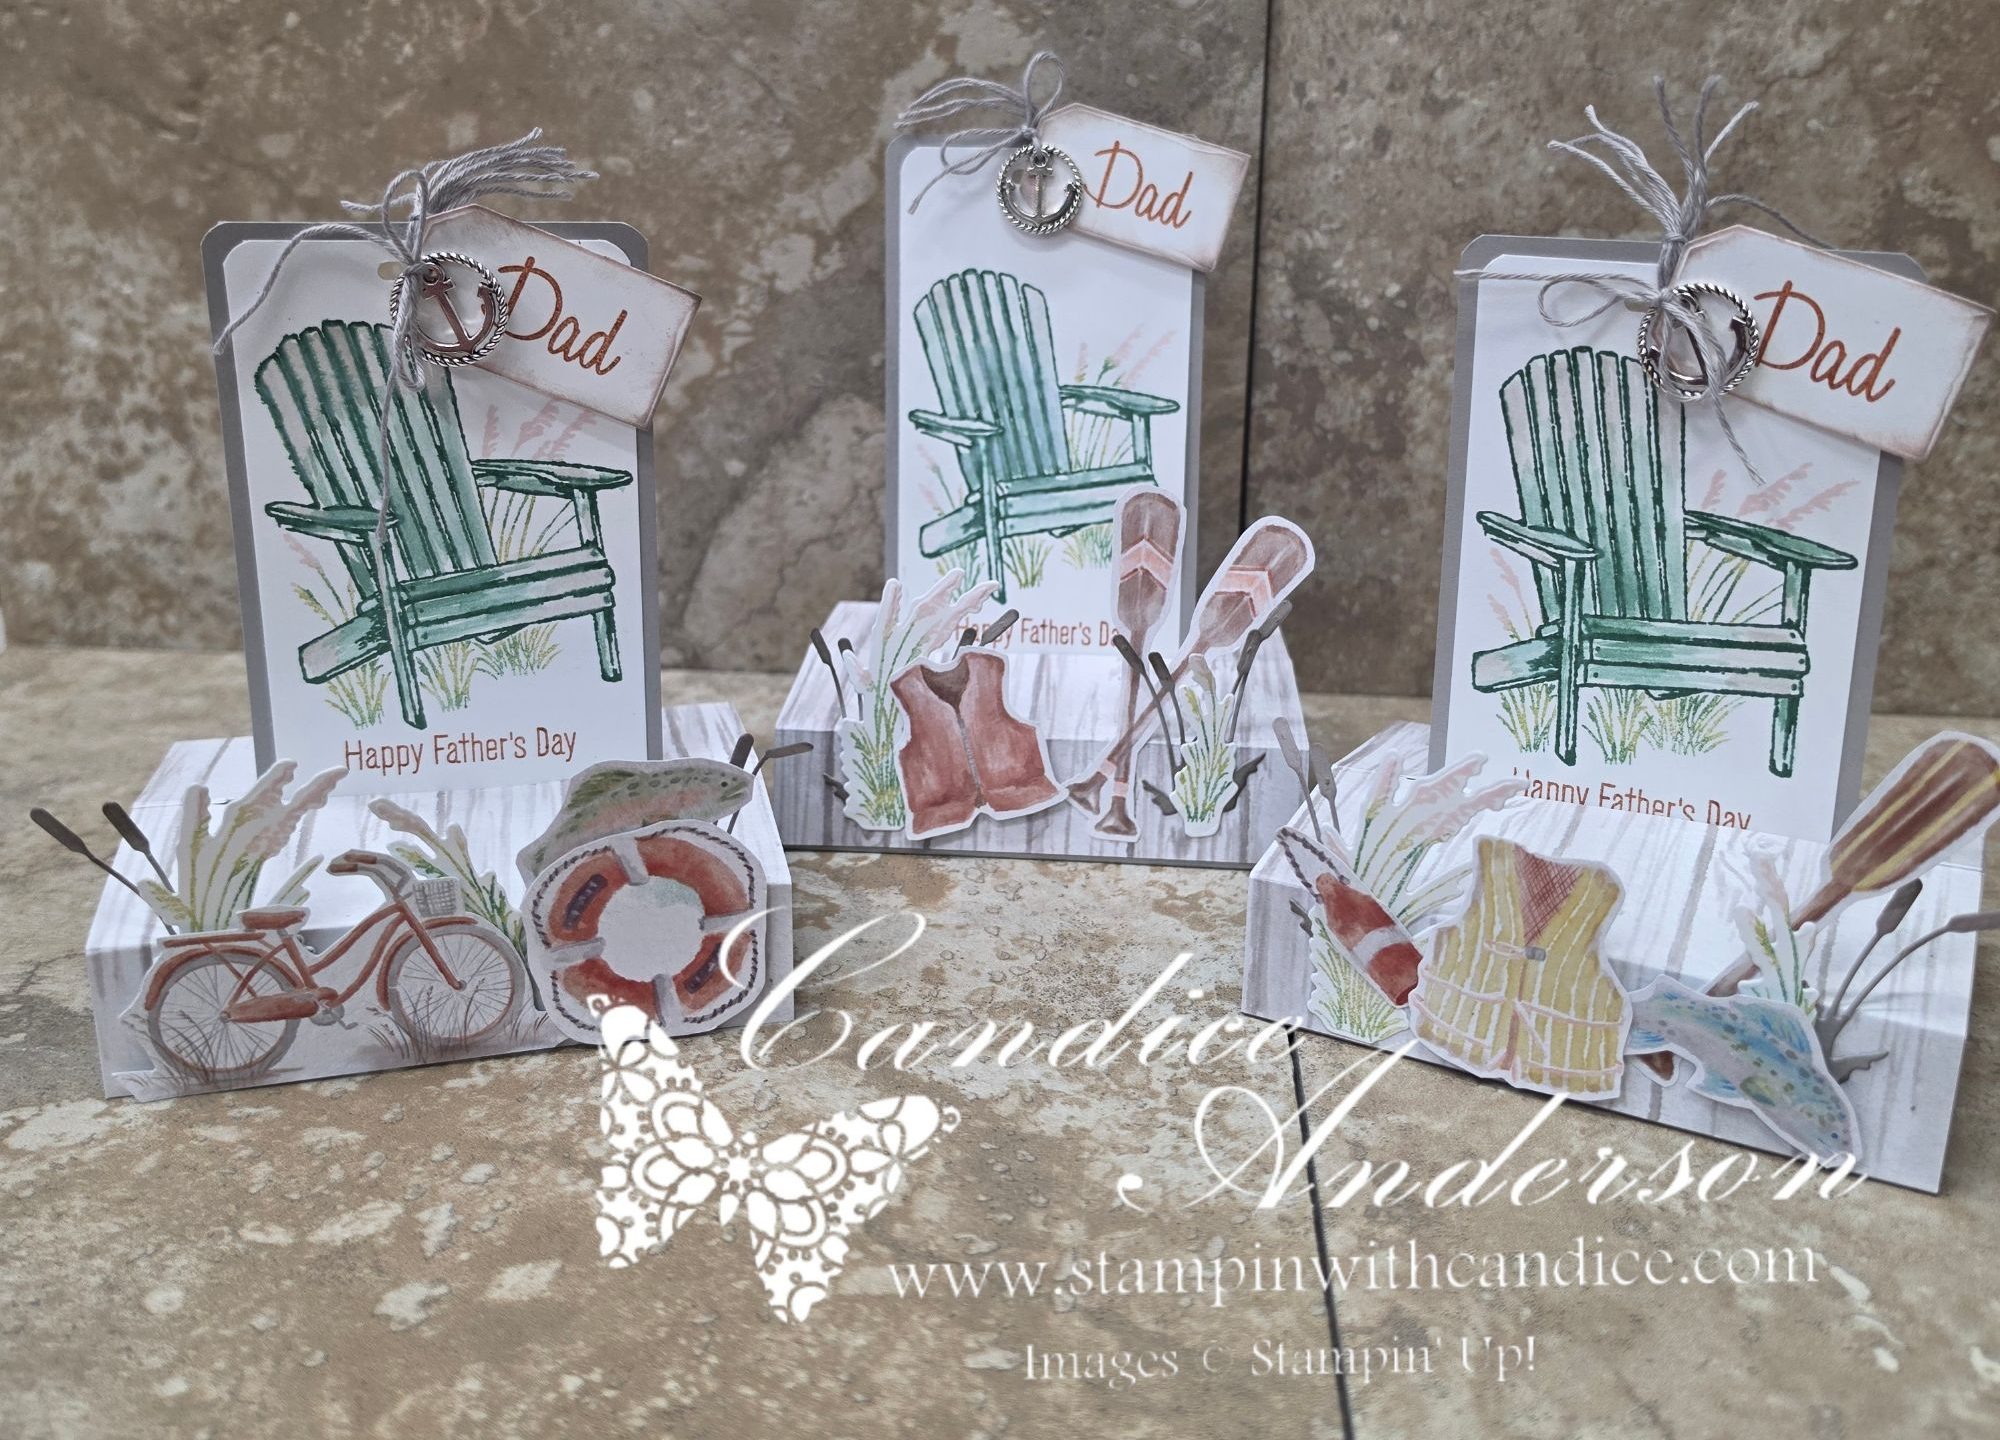
Thank you for purchasing the Waterside Retreat Pop-Up Father’s Day Card Tutorial.
Included with your purchase are:
- Step-by-step written instructions
- A downloadable PDF tutorial
- Access to the private video tutorial
I hope you enjoy creating this fun interactive card. If you have any questions about the project or run into any issues, please don’t hesitate to contact me. I’m always happy to help.
If you need any of the supplies used in this project, you can find them in my online store or contact me for assistance with your order.
Thank you again for your support and for allowing me to be part of your creative journey.
Happy Stamping!

Supplies Needed
Stampin’ Up! Products
- Waterside Retreat Suite Collection (#167932)
Includes Designer Series Paper, Stamp Set, Dies, and Anchor Trinkets - Rounded Rectangle Punch (#167880) (or a corner rounder)
- Hole Punch Assortment (#165409) (or any hole punch)
- Water Painters (#168253)
- Masking Paper (#155480)
- Bordering in Beauty Dies (#167556)
(You may substitute another tag die or punch, or create your own tag.) - Paper Trimmer (#152392) for cutting and scoring
- Baker’s Twine Essentials Pack (#155475)
- Sponge Daubers (#133773)
Cardstock
- Gray Granite
- Basic White
Ink Colors
- Gray Granite
- Old Olive
- Peaceful Pine
- Barely Blush
- Cajun Craze
Adhesives
- Multipurpose Liquid Glue (#110755)
- Mini Stampin’ Dimensionals (#144108)
Optional Substitutions
Feel free to substitute similar punches, dies, or embellishments from your collection to customize your project and make it uniquely yours.
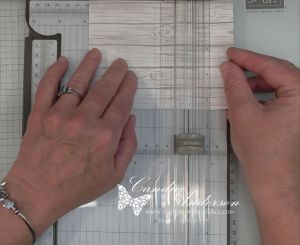
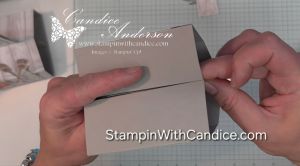
Cutting & Preparation
- Cut a piece of Gray Granite cardstock to 4-1/4″ x 11″. Score on the 11″ side at:
- 1″
- 2-3/4″
- 3-3/4″
- 5-1/2″
- 7-1/4″
- 8-1/4″
- 10″

Note: You will cut along the 5-1/2″ score line in a later step.
- Cut a piece of the Waterside Retreat Designer Series Paper (worn wood pattern) to 4-1/4″ x 5-1/2″. Be sure the wood grain runs in the long direction of the paper.
Score the DSP on the 5-1/2 end (going across the grain) at:
- 1″
- 2-3/4″
- 4-1/2″
- Cut a piece of Gray Granite cardstock to 5″ x 2-3/4″.
- Cut a piece of Basic White cardstock to 4-3/4″ x 2-1/2″.
- From a scrap of Gray Granite cardstock, die cut the solid weeds.
- From a scrap of Basic White cardstock, die cut the tag and the detailed weeds (after stamping). Set aside for stamping and assembly.
- Choose images from the Designer Series Paper for the front of the card and fussy cut them.
Once all pieces are cut and prepared, you’re ready to begin creating your card.
Stamping & Coloring
Be sure to watch the accompanying video tutorial to see the special stamping and coloring techniques used on this project. https://youtu.be/Wk1a_NzgTvk
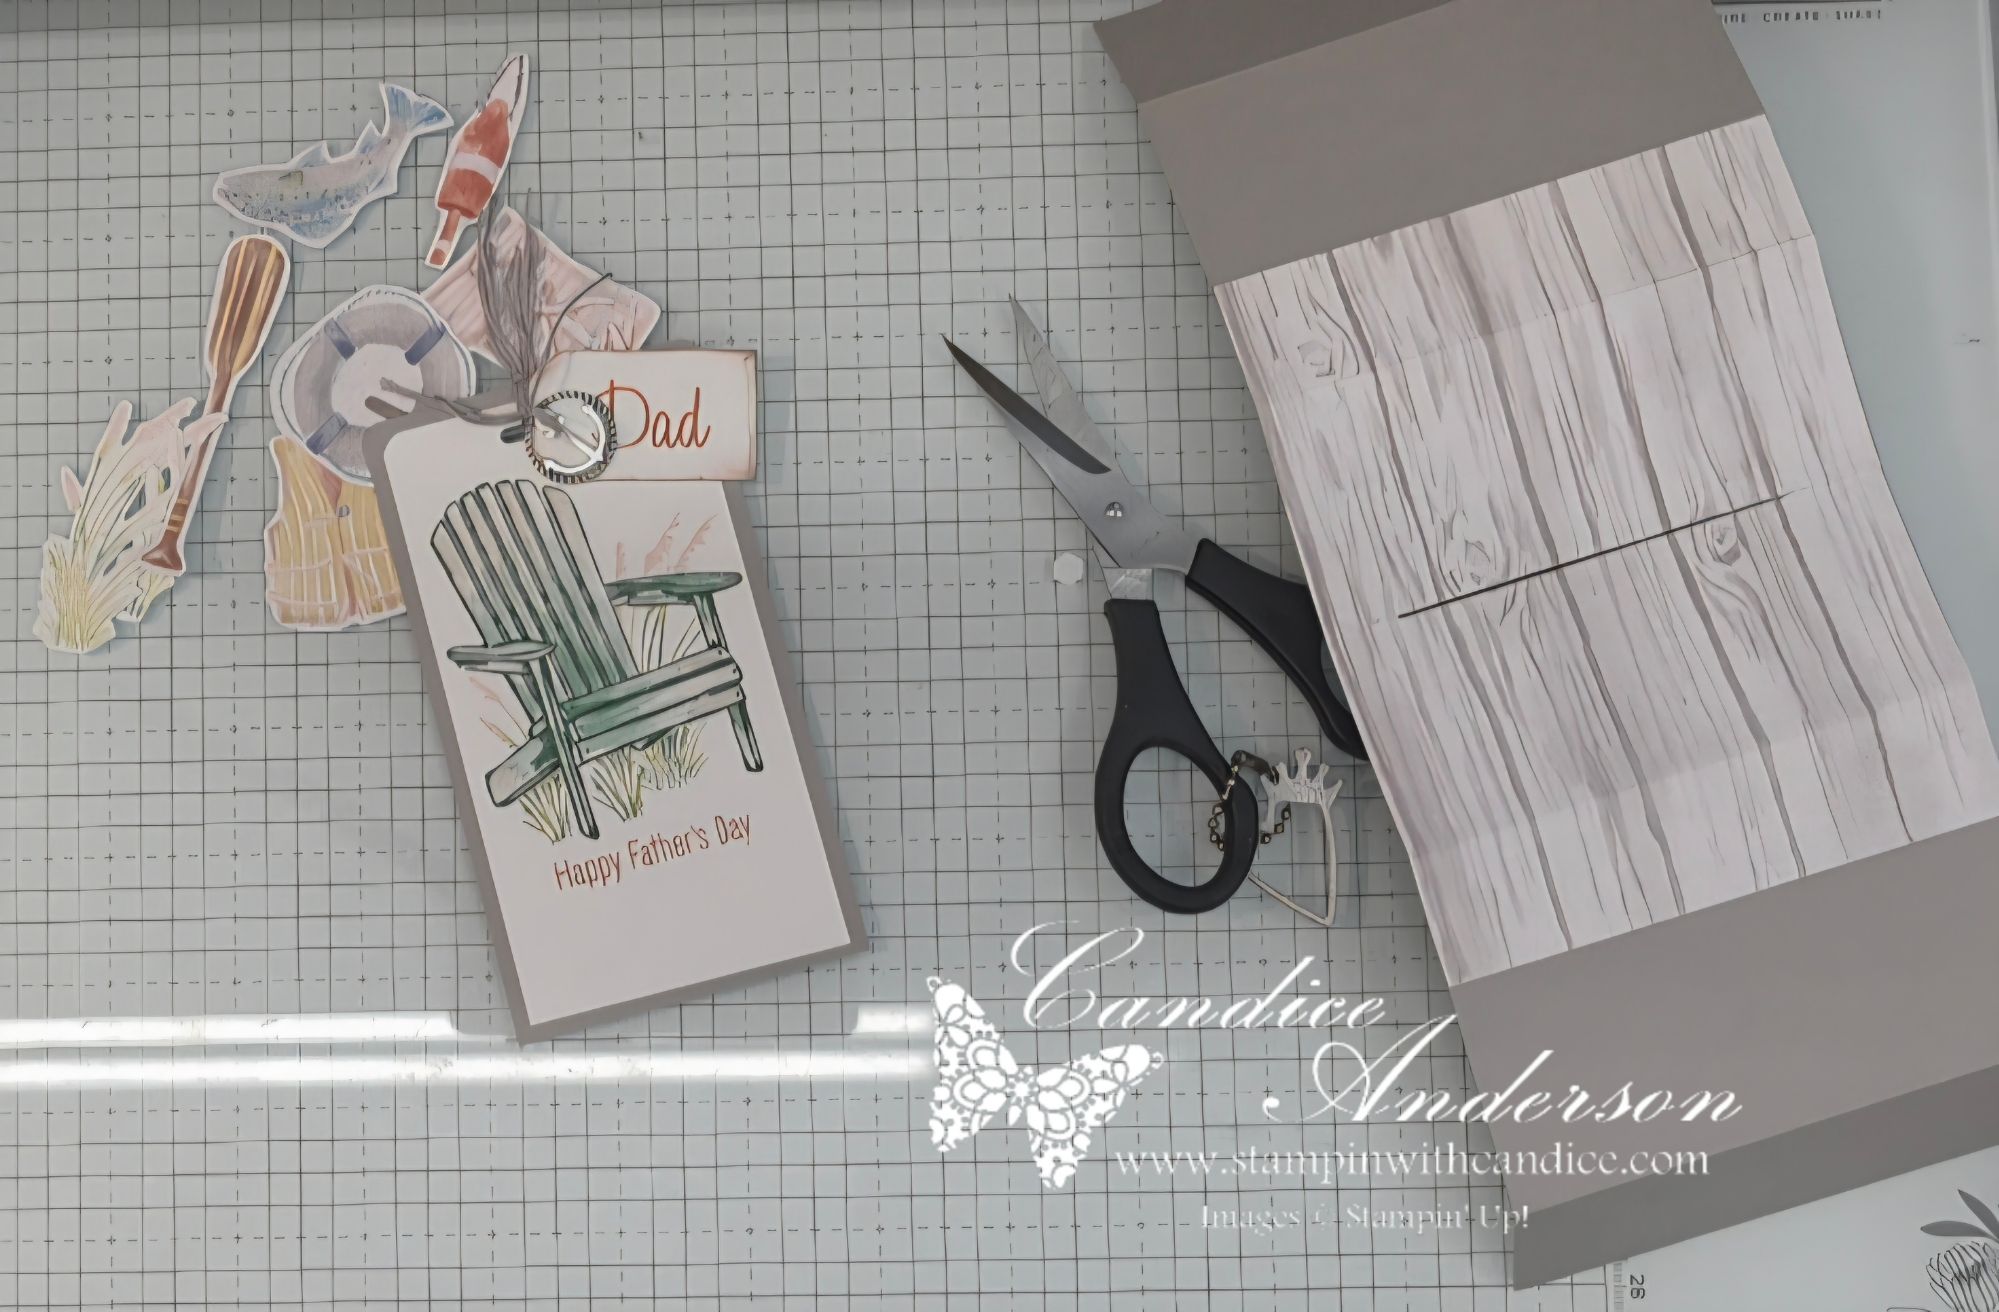
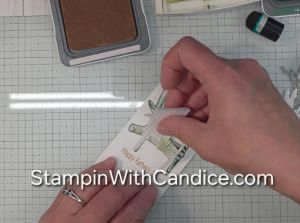
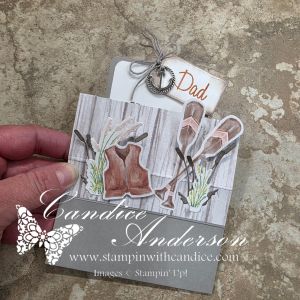
- Stamp “Dad” onto the die-cut tag using Cajun Craze ink.
- Stamp “Happy Father’s Day” in Cajun Craze ink near the bottom of the
4-3/4″ x 2-1/2″ Basic White piece. Position the cardstock vertically with the long side running up and down. Place the sentiment approximately 1″ from the bottom edge. - Stamp the Adirondack chair above the sentiment using Peaceful Pine ink.
- Using a Water Painter, pick up a small amount of Gray Granite and Peaceful Pine ink and add color to the chair to create a weathered appearance.
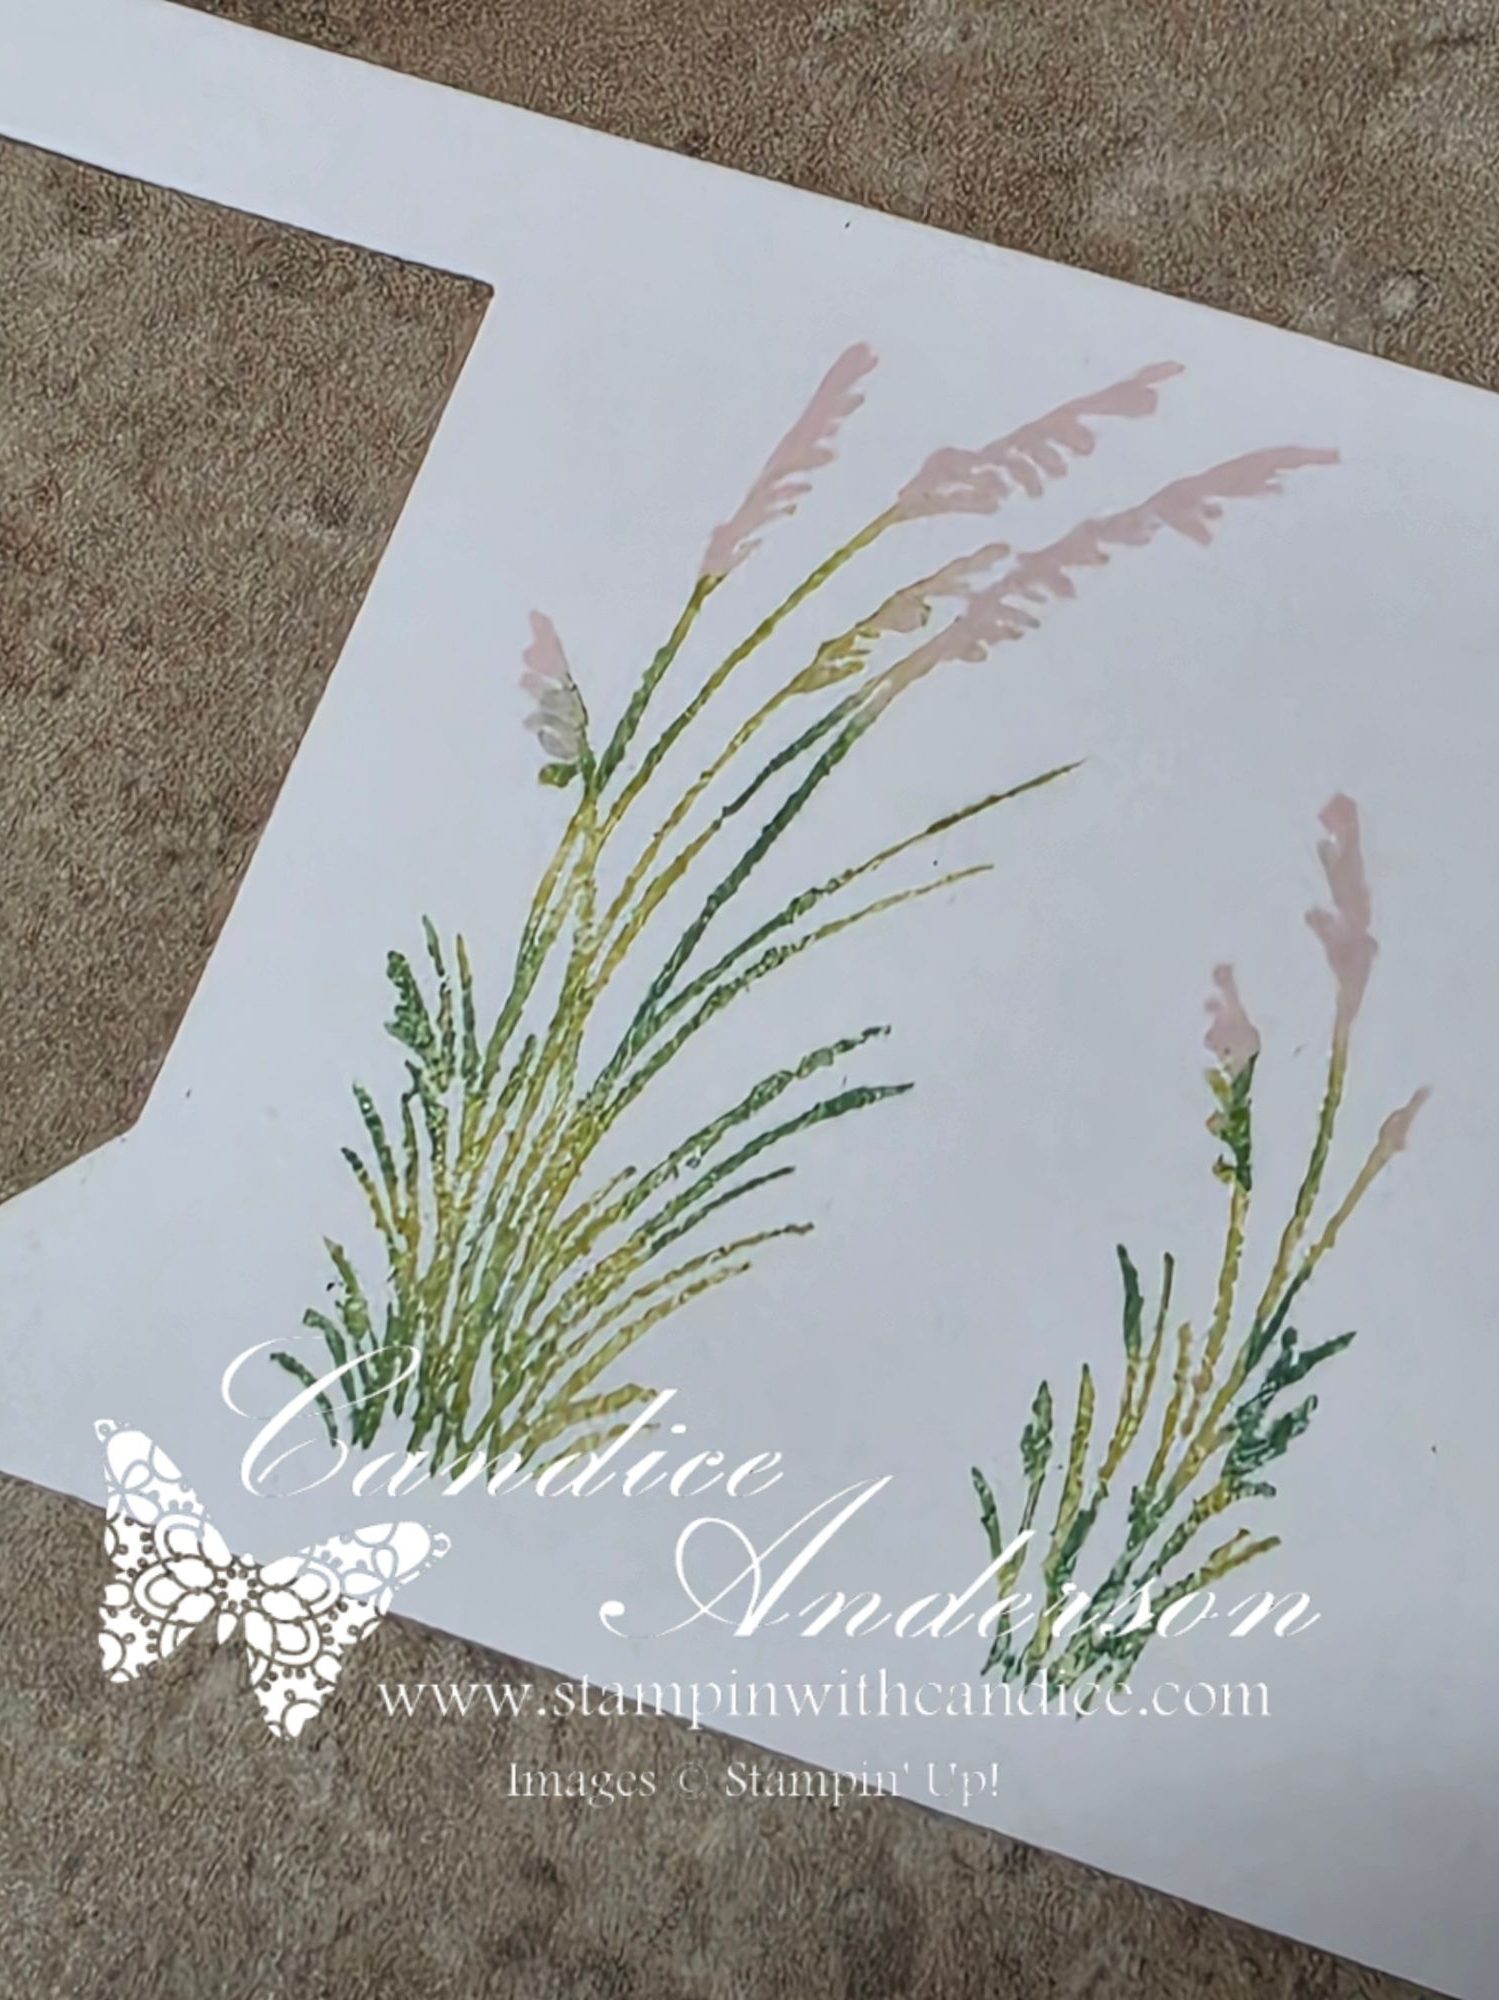
- Ink the weed image with Barely Blush. Before stamping, use Sponge Daubers to add Old Olive and Peaceful Pine ink to the lower portions of the image. Stamp onto the white cardstock and cut with the dies.
Creating the Masked Scene
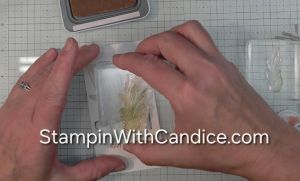
- Stamp the Adirondack chair onto a piece of Masking Paper.
- Carefully fussy cut around the image.
- Place the mask directly over the stamped chair.
- Stamp the weeds over the masked chair using the same coloring technique.
- Remove the mask. The weeds will now appear behind the chair, creating depth in the scene.
Finishing the Stamping
- Using the ink pad directly to the paper, lightly add Barely Blush and Gray Granite ink around the edges of the Dad tag.
- Apply the same colors to the edges of the Gray Granite die-cut weeds to add additional depth and dimension.
Set all stamped and colored pieces aside for assembly.
Assembly Instructions
For the best results, be sure to watch the accompanying video tutorial for additional tips and a visual demonstration of the assembly process. https://youtu.be/Wk1a_NzgTvk
Create the Pull Tab
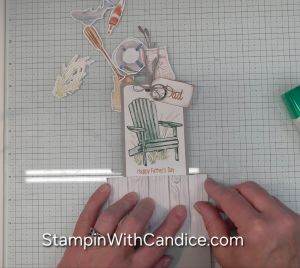
- Attach the stamped Basic White panel to the 5″ x 2-3/4″ Gray Granite mat.
- Punch a hole at the top of the panel.
- Thread several strands of Gray Baker’s Twine through the hole and tie securely.
- Use the twine to attach the Dad tag and the Anchor Trinket.
- Add a Mini Stampin’ Dimensional behind the tag to help keep it facing forward and to allow the bottom to slide up underneath the tag.
Prepare the Card Base
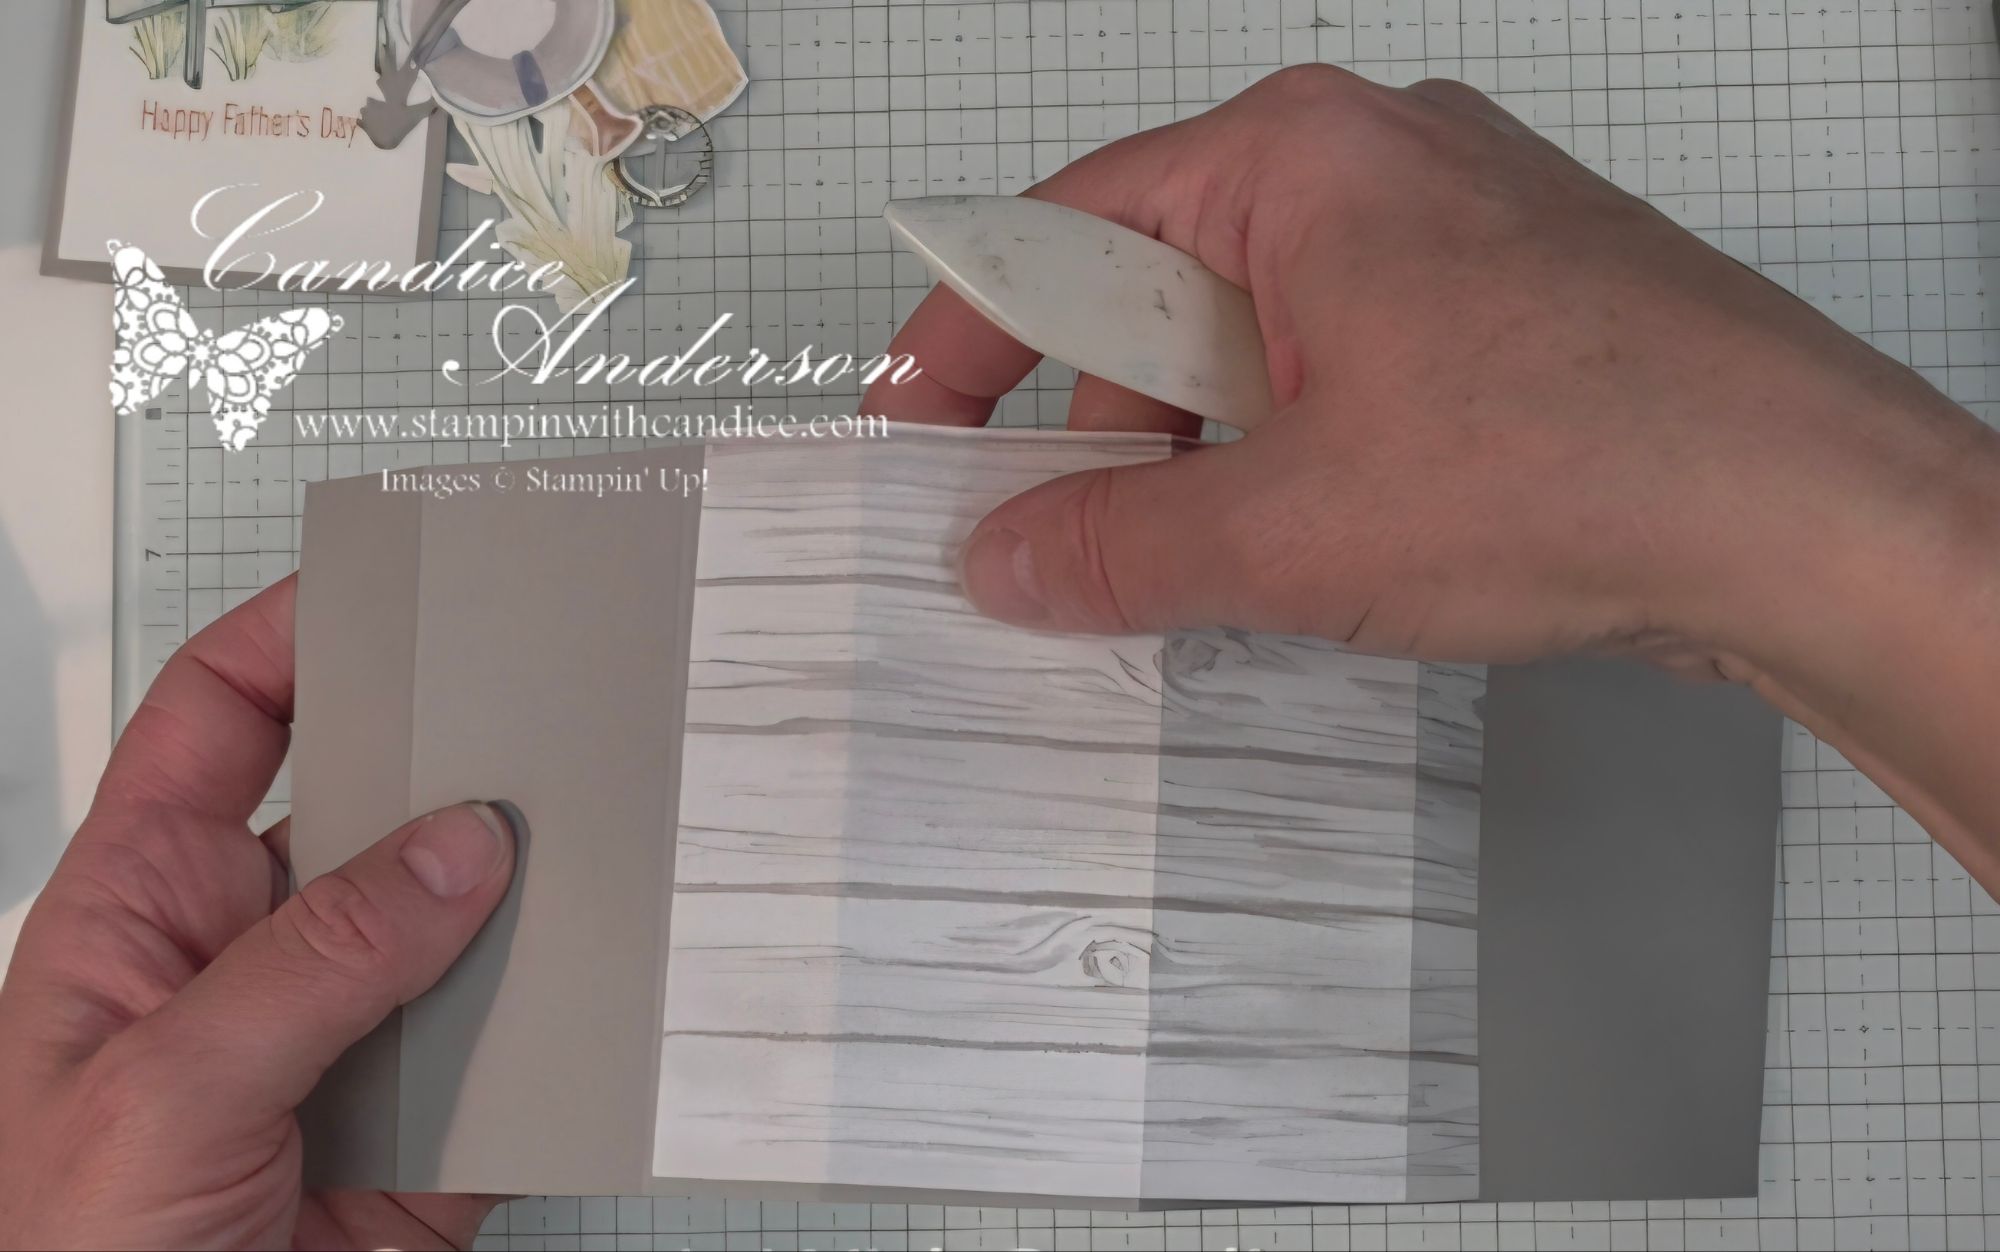
- Attach the wood-grain Designer Series Paper to the center section of the card base, matching the score lines.
- Place the card base into your paper trimmer at
the 5-1/2″ score line. - Cut a slot approximately 3-1/4″ wide, leaving about 1/2″ on each side.
- To make the slot slightly wider for smoother movement, cut just to one side of the score line and then repeat on the opposite side.
- Use Paper Snips to trim the ends of the slot on both sides. This creates a slightly larger opening and allows the pull tab to slide more easily.
Tip: Watch the video tutorial for a close-up demonstration of creating the slot.
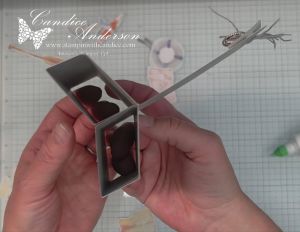
Assemble the Mechanism
- Fold the card base on all score lines, folding each score in the same direction.
- The bottom of each side will create a 1″ section. Fold these sections inward toward the center.
- Apply Multipurpose Liquid Glue to the outside of one 1″ section.
- Before adhering the two 1″ sections together, slide the stamped pull-tab piece through the slot.
- Position the pull-tab section between the two 1″ tabs and then adhere the tabs together.
- Test the movement before the glue fully dries. You may need to gently work the folds in both directions to help the card collapse and stand properly.
Finish the Card
- The completed card should fold flat for mailing.
- When the card base is held and the Dad pull tab is pulled upward, the card should pop up into a standing display.
- Attach the stamped weeds, die-cut weeds, and fussy-cut Designer Series Paper images to the front 1″ section of the card.
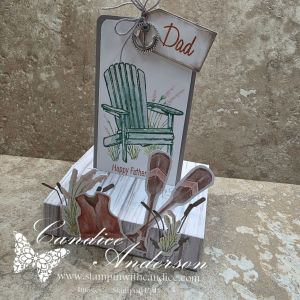

Important: Only adhere these elements to the front 1″ section. Do not attach them to the moving portion of the card or the mechanism will not function properly.
- Add any final embellishments and adjust the layers as desired.
Your Seaside Escape Father’s Day Card is now complete and ready to give!
If you need any of the supplies used in this project—or want to browse the newest Stampin’ Up! products—you can order anytime at:

Thank you again for supporting my small business and for being part of this creative community. Your encouragement and enthusiasm make all of this possible. Please contact me if you have any questions.
Happy crafting,
Copyright Notice
The artwork, stamps, images, and product designs used in this project are © Stampin’ Up!
This tutorial, project design, written instructions, photographs, and video content are © Candice Anderson, StampinWithCandice.com.
This tutorial is for personal use only and may not be copied, reproduced, redistributed, sold, or taught as your own without the express written permission of Candice Anderson.
