Retiring List and Color Refresh

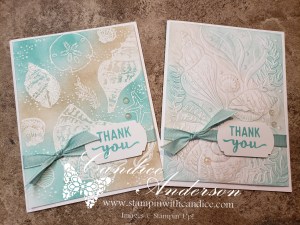
It’s that time of year again when sadly we must say good-bye to many favorite Stampin’ Up! products to make room for new ones. In addition to our traditional retiring list we will also be experiencing a color refresh. That means that we are saying good-bye to some of the current Stampin’ Up! colors, saying Hello to returning in-colors and getting the chance to experience new colors in our line.

Attached are the retiring lists for both the current catalog and the mini catalog. I encourage you to order early as items are while supplies last and colors will go quickly. Remember you can order online at candiceanderson.stampinup.net. If you order is less than $150 I encourage you to use the hostess code listed on the top right. If you are over $150 enjoy your hostess benefits. Thank you for your order. I appreciate your support.

2022-2023 Annual Catalog Retiring List
2023 Mini Catalog Retiring List


Please feel free to contact me if you have any questions.

I’m super excited for the the colors and well as the returning in-colors. Check out this video for more information.


Please feel free to contact me if you have any questions.

Order online
Click on the shop now button.
Contact me today to place your order
or book your party!
435-232-2655 Cell ( Call or Text)
andersoncandice@hotmail.com Please feel free to contact me if you have any questions.

Dual Embossing Techniques

Today I wanted to share a video where I show you how to create a similar card using two different types of embossing techniques. I’ve created the cards using a wet embossing technique called emboss resist and a dry embossing technique where the ink is applied to the embossing folder. What is cool about this technique is that I used the same process on both cards to get a different yet similar look. Which look is your favorite.

Click here for a list of supplies and measurements.


Order online
Click on the shop now button.
Contact me today to place your order
or book your party!
435-232-2655 Cell ( Call or Text)
andersoncandice@hotmail.com Please feel free to contact me if you have any questions.

Class Crazy

I have so many class ideas and not enough time to do them so I thought I would do a poll and see what classes you (my wonderful customers) would be most interested in.  I really need your help with this so please participate.  To make it a little more fun I’ve decided to add an incentive.  I just love our new Mini Catalog so I’m going to give you your choice of Stamp Set from the Mini Catalog for 1/2 price.

Here’s what you need to do.  Vote on your favorite Classes.  You can choose as many as you would like.  You can also add in one that you’d like to see.  Then vote on the best days for classes.  Once you have voted go to the comments section and add your name and e-mail address. 

I will keep this poll open until the end of September.  I will also keep it at the top of my blog so remember to scroll down for new posts.  I will draw a winner the first week of October.  You will be notified by e-mail as well as posted on my site.  Good luck and thanks for your help. 

You can see more information about each class underneath the poll.

Here is a description of what types of this will be included in the classes.  Actual projects and costs will be determined after I choose the classes.  I’ve included pictures if I had one.

Halloween Haunts-  Come and make some fun Halloween Decorations and treat holders.  These treat holders are great for those special kids (or people) in your life.

6x6-recipie-bookCooking Up Some Fun-  In the past this has been one of my most popular classes.  This is my 6×6 cookbook class.  You make 20 fun pages filled with recipes.

Christmas BookCrazy for Christmas-  This class is designed to help you with all those fun Holiday Gifts.  Save some money this year by making a hand crafted gift from the heart.  I will have lots of gifts ranging in prices.


My Boys Camping Pg 2009 Digital Diva’s-  Come and learn all the great things you can do with our new “My Digital Studio.”  This program will be available October 1st.  There’s so much it can go.  I’ve been taking certification class so I can give you al those fun tips.  This is a great class to learn all the fun you can have with this great program.  


Christmas OrnamentsChristmas Card Marathon- Get a head start on your Christmas Cards.  I will have several designs for you to choose from.  You pick the cards and I’ll cut everything.  Then all you need to do is come and make them.  You’ll be ready to go before you know it.


Fall into Fall-  Get your home ready for fall with this fun class full of fall decorations and great ideas for Thanksgiving fun.

countdownSpice up the Holidays-  All of us love Holiday Decor and what’s more fun then when you create your own.  This class will focus on fun projects for your home for the holidays.  They also make great gifts.


Bear Best Bears-  Come and check out our new build a bear products.  We have great stamp sets as well as new die cuts.  Come and make some fun  projects using these great products.

Faith Hope Love FrameSeason of Change-  I love this frame and the words.  The frame is a floating frame so the images can be easily changed.  You will stamp backgrounds for several seasons.


Year in a glance- Come and make fun scrapbook pages for your year.  You will make 12 double page layouts (one for each month.)  This is a fun way to celebrate your year.

Girls Getaway- Do you need a weekend off with the girls where you can just scrap and have fun.  That’s what his is all about.  Take some time out and relax while having fun crafting.

Calendar Countdown-  I just love our 6×6 desktop calendars.  This project is what got me started as a Stampin’ Up! demonstrator.  They are so fun to have on your desk.  They also make great gifts for those you love.

Blank-  Fill in your own idea of what you think would be a great class.  Please be sure to send me an e-mail or leave me more information in the comment section.

Thanks again and good luck.

Signature

FREE 2009 Spring/Summer Catalog

The new Spring/Summer 2009 idea book and catalog is almost here.  Click here to find out how to get yours FREE.

Novemberfest Winners Update

I’ve finally got my post caught up and realized I still have a few unclaimed prizes for the Novemberfest winners.  I’m sure most of you have lost your tickets so I decided to just draw out some name.  Here are the winners.  Please contact me by e-mail andersoncandice@hotmail.com  to arrange to pick up your prize.  Congratulations!

nf-grand-prizeGrand Prize- Britnee Sheffield from Hyde Park


nf-gift-aGift A- Denise Allen from Cove


nf-gift-cGift C- Lisa Riby from Logan

Technique Tuesday 12-30-08

I made this card at several parties and other events this holiday season.  I thought it was really fun.  I actually put the rub-on on vellum paper and turned it backwards so the rub-on faced my real red paper. 

merry-card-rub-onsRub-ons are so great and easy to use.  On thing to be carefull of is that you keep the backer pieces with them.  It is very easy to let them slip and then your rub-on gets stuck to somthing and ruined.

When I use my rub-ons I cut out just the part I want with scissors.  That way I don’t accidentally press some of the other rub-ons onto my excess paper.  If possible only cut the front page and leave the back protection page.  I’ve found it’s easier to keep your rub-ons together if the back piece is full.  If necessary you can attach the two un-used pieces together with a paper clip.

Once you have decided which rub-on to use gently and carefully place it over your desired paper.  Make sure it is where you want it before you press it down.  Then lightly rub over it.  Use your Popsicle stick to rub over each part. I’ve found that it’s easiest to start in the center and work my way out.  Be careful of the edges if you go to fast you can catch them and rip back the rub-on. 

Carefully pull up the rub-on on one side making sure that each piece is completely down.  If a part isn’t stuck just lay it back down and rub over it again until it’s stuck.  Then remove your paper and your done.

I love rub-ons because they can go on any smooth surface.  I’ve put them on Glass, Plastic, Paper and more.  You can even put them right on the picture its self.

The other fun part of this card is hard to see.  The square frame is covered in whisper white craft ink and then left to dry.  Once dry I covered it with a thin layer of tombow multipurpose glue then sprinkled on dazzling diamonds glitter.  It really makes the card sparkle.  This is the same technique Stampin’ Up! uses in the Country Living Ornament Collection.

So go ahead and try one of our great rub-ons today.

Click here to see more weekly Challenge Projects