Love Cards

Here’s yet another card that was inspired by Pinterest.  I saw this card and thought I think I can create that using Stampin’ Up! products.  So here’s a link to the original card and of course here’s mine.  Tell me what you think.

Love U Card

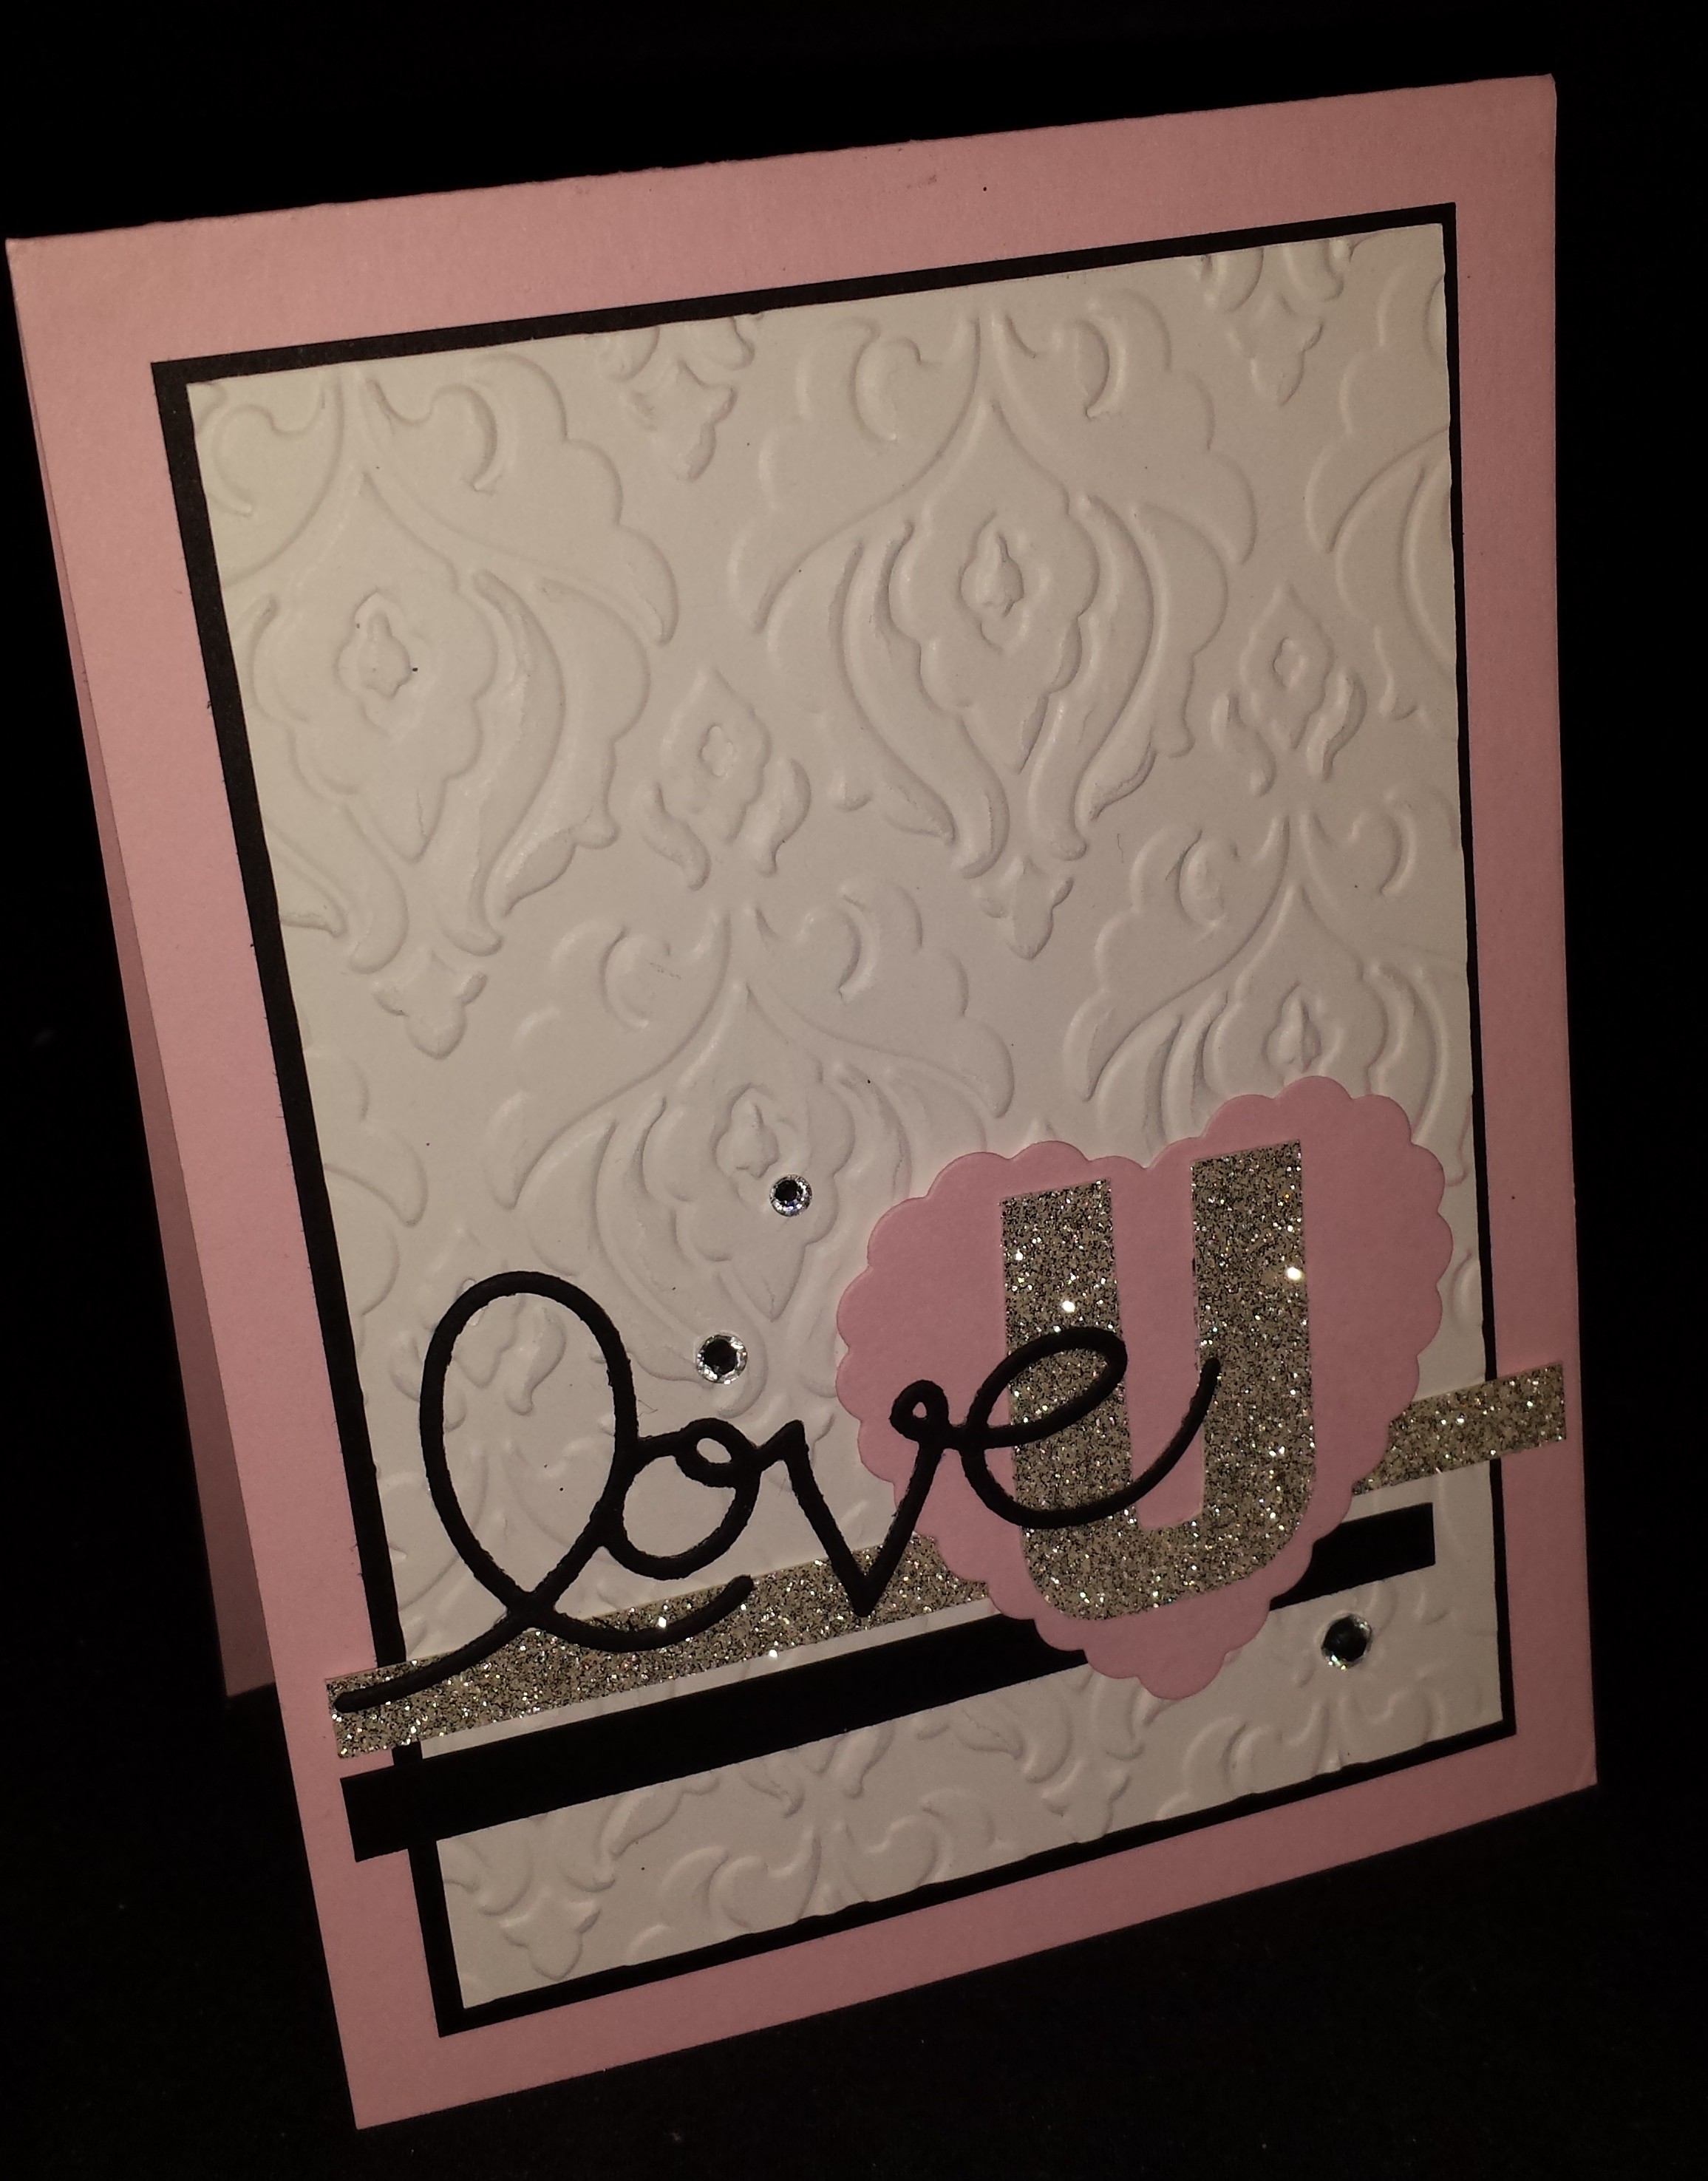
Yes I know I used the retired expressions Framelit again.  Sorry I just love this die and can’t let it go.  I hope Stampin’ Up! considers adding it to the main catalog.  Just a note I hand drew the U and cut it out since I didn’t have anything that would make that shape U.

Heart Love Card

I also loved the reverse impression that you get when you cut out the Framelit so I decided to start playing with it a bit and see what I could come up with for a card using it.  Here’s my design.  Tell me what you think.  I personally love both of them.

Tag SignatureOrder online 24/7
Contact me to order or book your party today!
435-245-5321 Home
435-232-2655 Cell (Text)
andersoncandice@hotmail.com

Products used:

Colors:
Pink Pirouette, Basic Black & Whisper White

Stamps:
En Français
Wood- #128562 $17.95
Clear- #127790 $13.95

Big Shot:
Magnetic Platform #130658 $39.95
Beautifully Baroque Embossing Folder #130917 $7.95
Hearts Collection Framelits Die #125599 $26.95
Hearts a Flutter Framelits Die #130159 $24.95
Expressions Thinlites Dies- Retired

Others:
Whisper White 3/8″ Taffeta Ribbon #109070 $6.95
Rhinestone Basic Jewels #119246 $4.95
Silver Glimmer Paper #124005 $4.95
Small Heart Punch #117193 $5.95
Silver Metallic Encore Pad #132142 $9.95

Gold Love Card

I’ve noticed that Gold is really popular right now in terms of paper crafting so I wanted to give it a try and see what I could come up with.  I also love the new Photo-polymer sets and wanted to try them out some too.

Gold Love Card

So this card is pretty simple, but I like how it turned out.  I used the gold encore pad with the gold embossing powder to really make the gold sparkle.  I also used the gold pad to ink the baker’s twin.  I think the new gold baker’s twin in the occasions catalog would look awesome, but I didn’t have any to give it a try.  I did however have the gold paper that I used for the hearts and the background.

Tag SignatureOrder online 24/7
Contact me to order or book your party today!
435-245-5321 Home
435-232-2655 Cell (Text)
andersoncandice@hotmail.com

Products used:

Colors:
Gold & Whisper White

Stamps:
Photopolymer Set
CountlessSayings 1  #135892 $13.95

Big Shot:
Perfect polka Dots Embossing Folder #117335 $7.95

Others:
Whisper White Baker’s Twine #124262 $2.95
Small Heart Punch #117193 $5.95
Gold Foil Sheets #132178 $3.95
Gold Metallic Encore Pad #132141 $9.95
Gold Stampin’ Emboss Powder #109129 $4.75

Fun Christmas Picture Ornament

I’m serving in our ward nursery and we wanted to make a cute gift that the kids could give their parents for Christmas.  My daughter just happens to be one of our cute nursery kids.  The ornament turned out so cute that I just had to share them with you.

20140110_162844

First this is the front with the darling picture of my daughter.  Thanks to technology it was easy to take pictures of the kids with my phone each week.  Then I used My Digital Studio to get them the perfect size and to change them all to sepia to match the ornaments better.

I used the scallop circle die to cut out a piece of card board (Of course I had plenty from the back of our great products.  I save all of them they are so great for many projects.)  I covered the chipboard with a piece of Old Olive paper cut out with the scallop circle die and embossed with the pedals of plenty embossing folder.  The chocolate chip background and the picture were cut out using the circle thinlits.  I finished it off with the fun thinlit Merry.  (Just a tip if you use wax paper.  Wax side towards the paper.  The paper will come out nice and easy without tearing.)20140110_162907

This is the cute back side.  We had each child stamp their hand print and we added a name a date.  I even made a few with pictures of Jesus in case we had a few visitors.  (So glad I did since we had 2.)  The parents loved them.  I love how it looks I my tree.

20140110_174617

I finished it off by making custom sized envelopes with our Envelope punch board.  We had the kids color them to make them extra special.  Then we tied them shut with a quick ribbon and added a tag.  I love love love the new scalloped tag topper punch in the occasions mini.  It made it so easy to add Christmas tags to these and all my Christmas presents.  (Just a note the stamp set is an old Christmas tag set the I love to use every year.  It makes tags so easy and I never run out.)

Personally I love having ornament that are pictures of my kids.  It’s so fun to get them out as see them every year.  Hopefully you are inspired to make a cute ornament for your tree next year using some of our great products mixed with your imagination.

Tag Signature

Products used:

Colors:
Cherry Cobbler, Old Olive, Very Vanilla, Chocolate Chip

Big Shot Items:
#1113468 Scallop Circle Bigz Die $19.95
#130911 Circles Collection $26.95
#116824 Petal-a-Plenty Embossing Folder $7.95
#132171 Expressions Thinlits Dies $24.95

Ribbons:
#120992 Cherry Cobbler Seam Binding $6.95
#123124 Early Espresso Baker’s Twine $2.95

Others:
#133324 Scalloped Tag Topper Punch $22.95
#133774 Envelope Punch Board $19.95

Thank You card

Over the weekend I went to a Stampin’ Up! Training meeting with my awesome up-line and group.  These events are always filled with friends, great training and fun projects that I will be sharing with you.  However we also usually have a card swap and contest.  I was so excited to find out that I won second place with my Thank You card.  So I just had to share it with all of you.  You may notice that some of it looks familiar.  I took the tag from my Zucchini from the other day and created a card.  Hope you enjoy it.

Thank You Card

Materials used:

Colors-  Crumb Cake, Crushed Curry, Old Olive, Baked Brown Sugar, Early Espresso, Cajun Craze

Stamps-

Off the Grid, Gorgeous Grunge, Lots of Thanks, Magnificent Maple*

Accessories-

Early Esspresso Core’dinations Cardstock w/ Sanding System, Woodgrain Embossing folder w/ Big Shot, Linen Thread, 1-1/4″ Burlap Ribbon, Stampin’ Sponges, Stampin’ Distress Tool

A Little Thank You Tag

I had the opportunity this week to go down to Stampin’ Up! and help the advisory board with a project.   I wanted to take them a little gift just to say “thank you.”  I had lots of zucchini thanks to awesome Dad so I decided to make little zucchini breads with this cut tag.  I love how they turned out and it was so fun to share them with the hard working team.  I used the leaf from the holiday catalog along with a thank you set and the grunge set from the maim catalog.

image

image

I challenge you to brighten someones day with a fun hand crafted gift.  These simple tags were so quick but very much appreciated.

Can you guess what’s staying and what it going?

This is a card made by a friend of mine at a recent Stampin’ Up! event that I went to.  I just love it.  The products she used are in the current spring catalog.  Can you guess which ones will be going into the new catalog.  Leave your guess in the comments section and I will pick one random winner and send them a gift.  Guesses must be made by May 30th.

Oh Hello Card

Products used:

Oh, Hello Stamp Set
130730 Wood $25.95
130733 Clear $18.95

Paper Doilies
129399 Tea Lace $2.95

Framelits
129381 Ovals Collection $26.95

5/8″ Flower Trim
126869 Vanilla $6.95

Simply Scored
126192 Borders Scoring Plate $14.95
122334 Scoring Tool $26.95

Baker’s Twine
125572 Lucky Limeade $2.95

Colors-
Lucky Limeade, Calypso Coral, Island Indigo, So Saffron

5-May