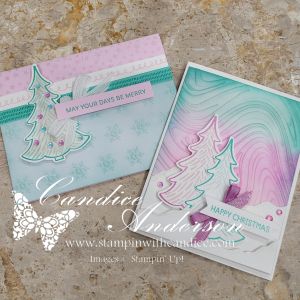
Silly Deer Mishaps + Paper Pumpkin Fun
Today’s challenge theme brought together two fun ideas: festive flora and oh deer—and that instantly reminded me of this month’s Paper Pumpkin kit and its adorably silly deer mishaps. The original kit was designed to create cute tags and gift boxes, but you know me… I couldn’t resist turning those tags into full cards!


The TGIFC551 Sketch Challenge (even though it’s finished now) was the perfect layout inspiration. I loved the balance and simplicity of the sketch, and it translated beautifully to both tag designs in the kit.
Transforming the Tag into a Card
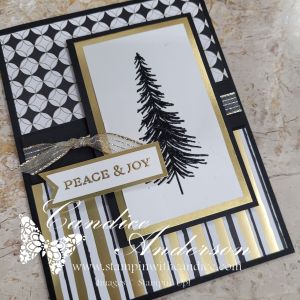
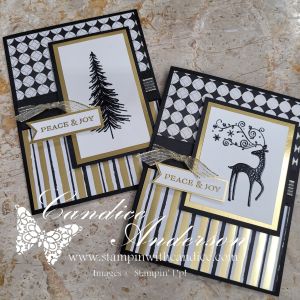
To bring out the playful “oh deer!” vibe, I reached for one of my favorite retired sets: Cookie-Cutter Christmas (#142043) with the coordinating punch. That sweet little deer was exactly what the project needed.
I added a festive pop using the Real Red Shiny Ribbon (#165876)—a tiny bow with a big holiday statement!
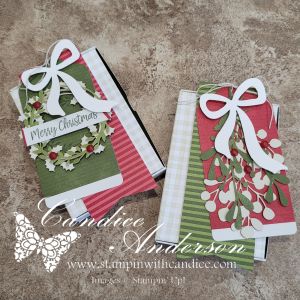
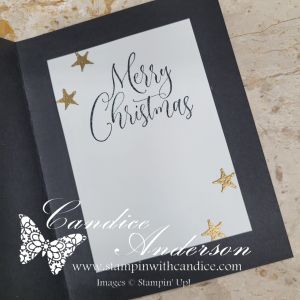
For the card base, I stamped the Linen Background Stamp (#167107) to add soft texture without overwhelming the design. It really ties everything together and gives the card a more polished look.
The end result?
A fun, festive, simple-to-create card that came together quickly and still feels special and works for both the challenges.
Bonus Card!


Since I loved the layout so much, I used the second tag design from the kit to create an additional card using the same sketch. Paper Pumpkin always makes it so easy to branch out and try new ideas—whether you follow the directions as-is or grab your supplies and create something entirely different.
Why I Love Paper Pumpkin
These kits are truly creativity sparkers:
✨ Quick projects
✨ Beautiful designs
✨ Endless alternate possibilities
And you never miss out when you’re subscribed!
Be sure to sign up so you always get your kit—
or even better, save on prepaid subscriptions starting December 1st!


👉 You can shop current Stampin’ Up! supplies and tools here:
Shop with Me Here

Please feel free to contact me if you have any questions.
Contact me today to place your order!
435-232-2655 Cell ( Call or Text)
andersoncandice@hotmail.com
💕 Let’s Stay Connected
📺 YouTube
📘 Facebook
📸 Instagram
📌 Pinterest
#StampinWithCandice #StamperCandi #ACardADayInNovember2025 #30DayChristmasCardMakingChallenge #ChristmasCards #HandmadeCards #CreativeTechniques #HolidayCrafting #cardmaker #cardmaking #christmascards #handmadecards #papercraft #sketchchallenge #christmaschallenge