Let is Snow Card

20140206_081143

This is what I woke up to this morning.  Almost a foot of snow and still snowing.  Just in case you are wondering here in Northern Utah the kids still went to school.  I’ve heard it takes 2 feet to get a snow day.

20140206_081136

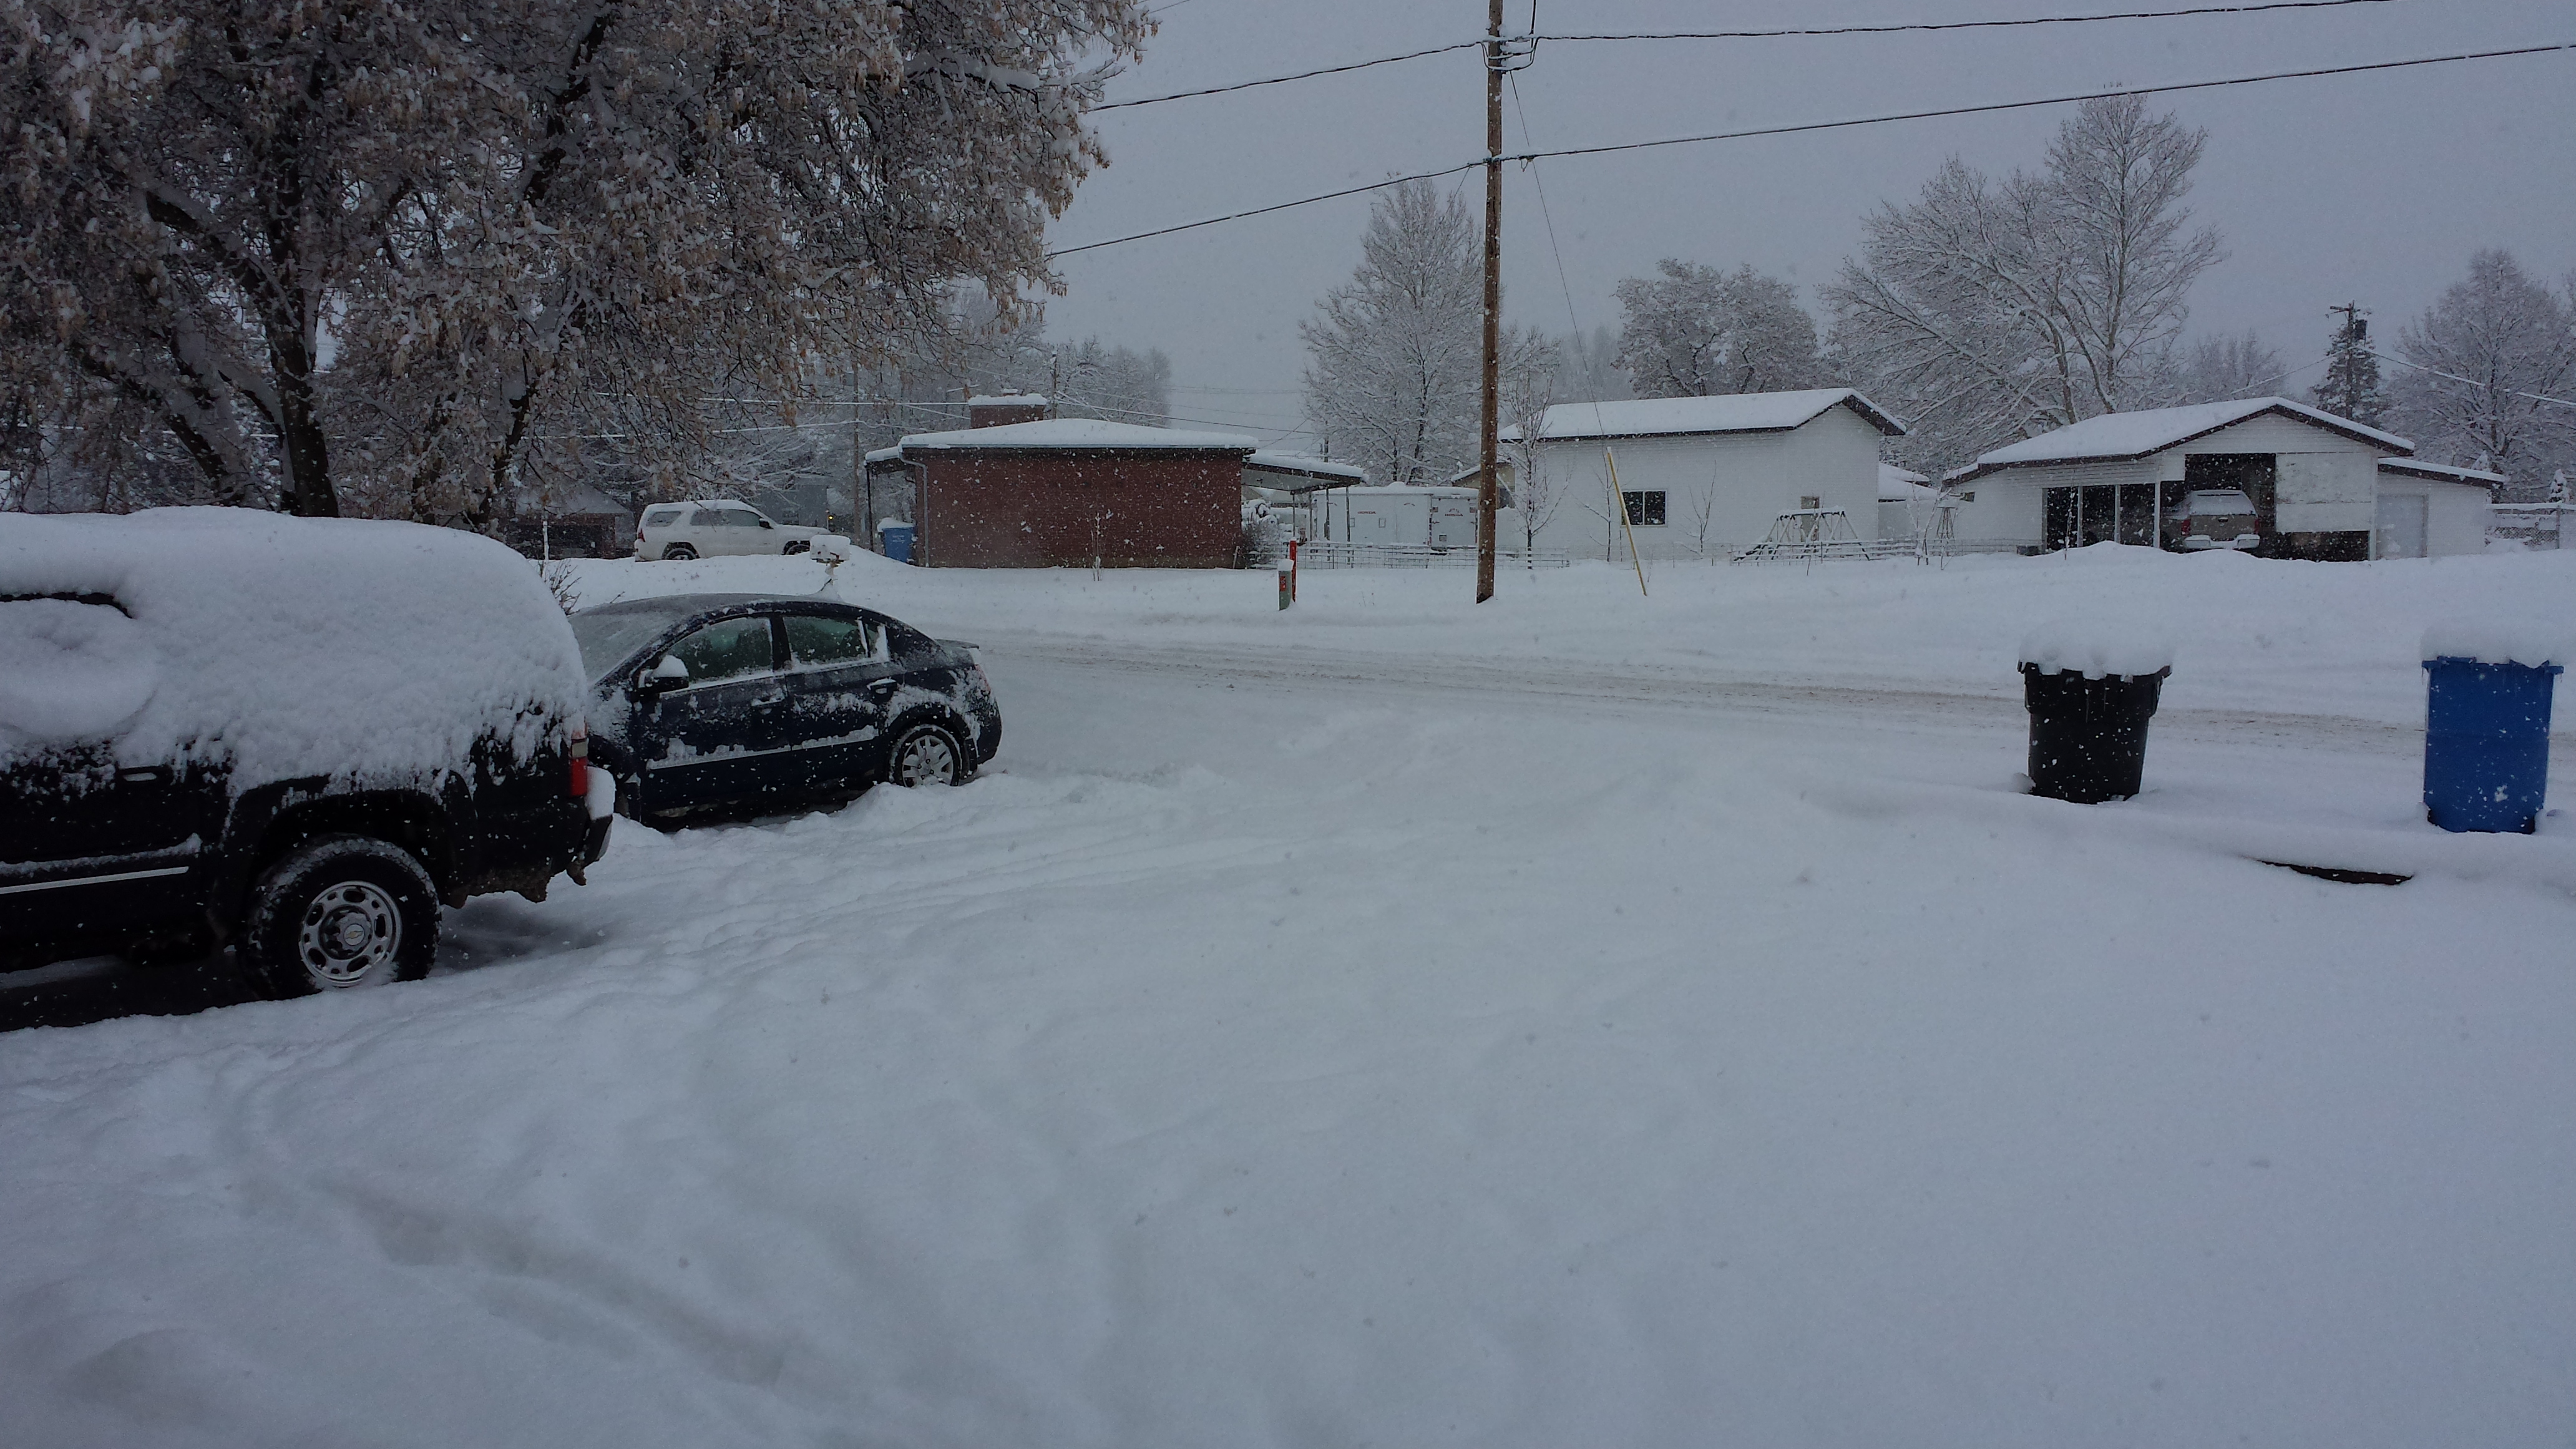
Yes clearing off the card to get to work was lots of fun.  Thankfully I get to stay home in my nice warm house since it’s my day off.  Hopefully I don’t have to go rescue my husband.  He took the car over the mountain so we shall see.

20140206_081207

You can see a little better how much snow there is on the untouched swing set.

So in light of all the snow I thought that my Let is Snow card would be the perfect throw back Thursday.  This is another card that I created for Artisan a couple years ago, but apparently never shared.

Let it Snow Card - Front

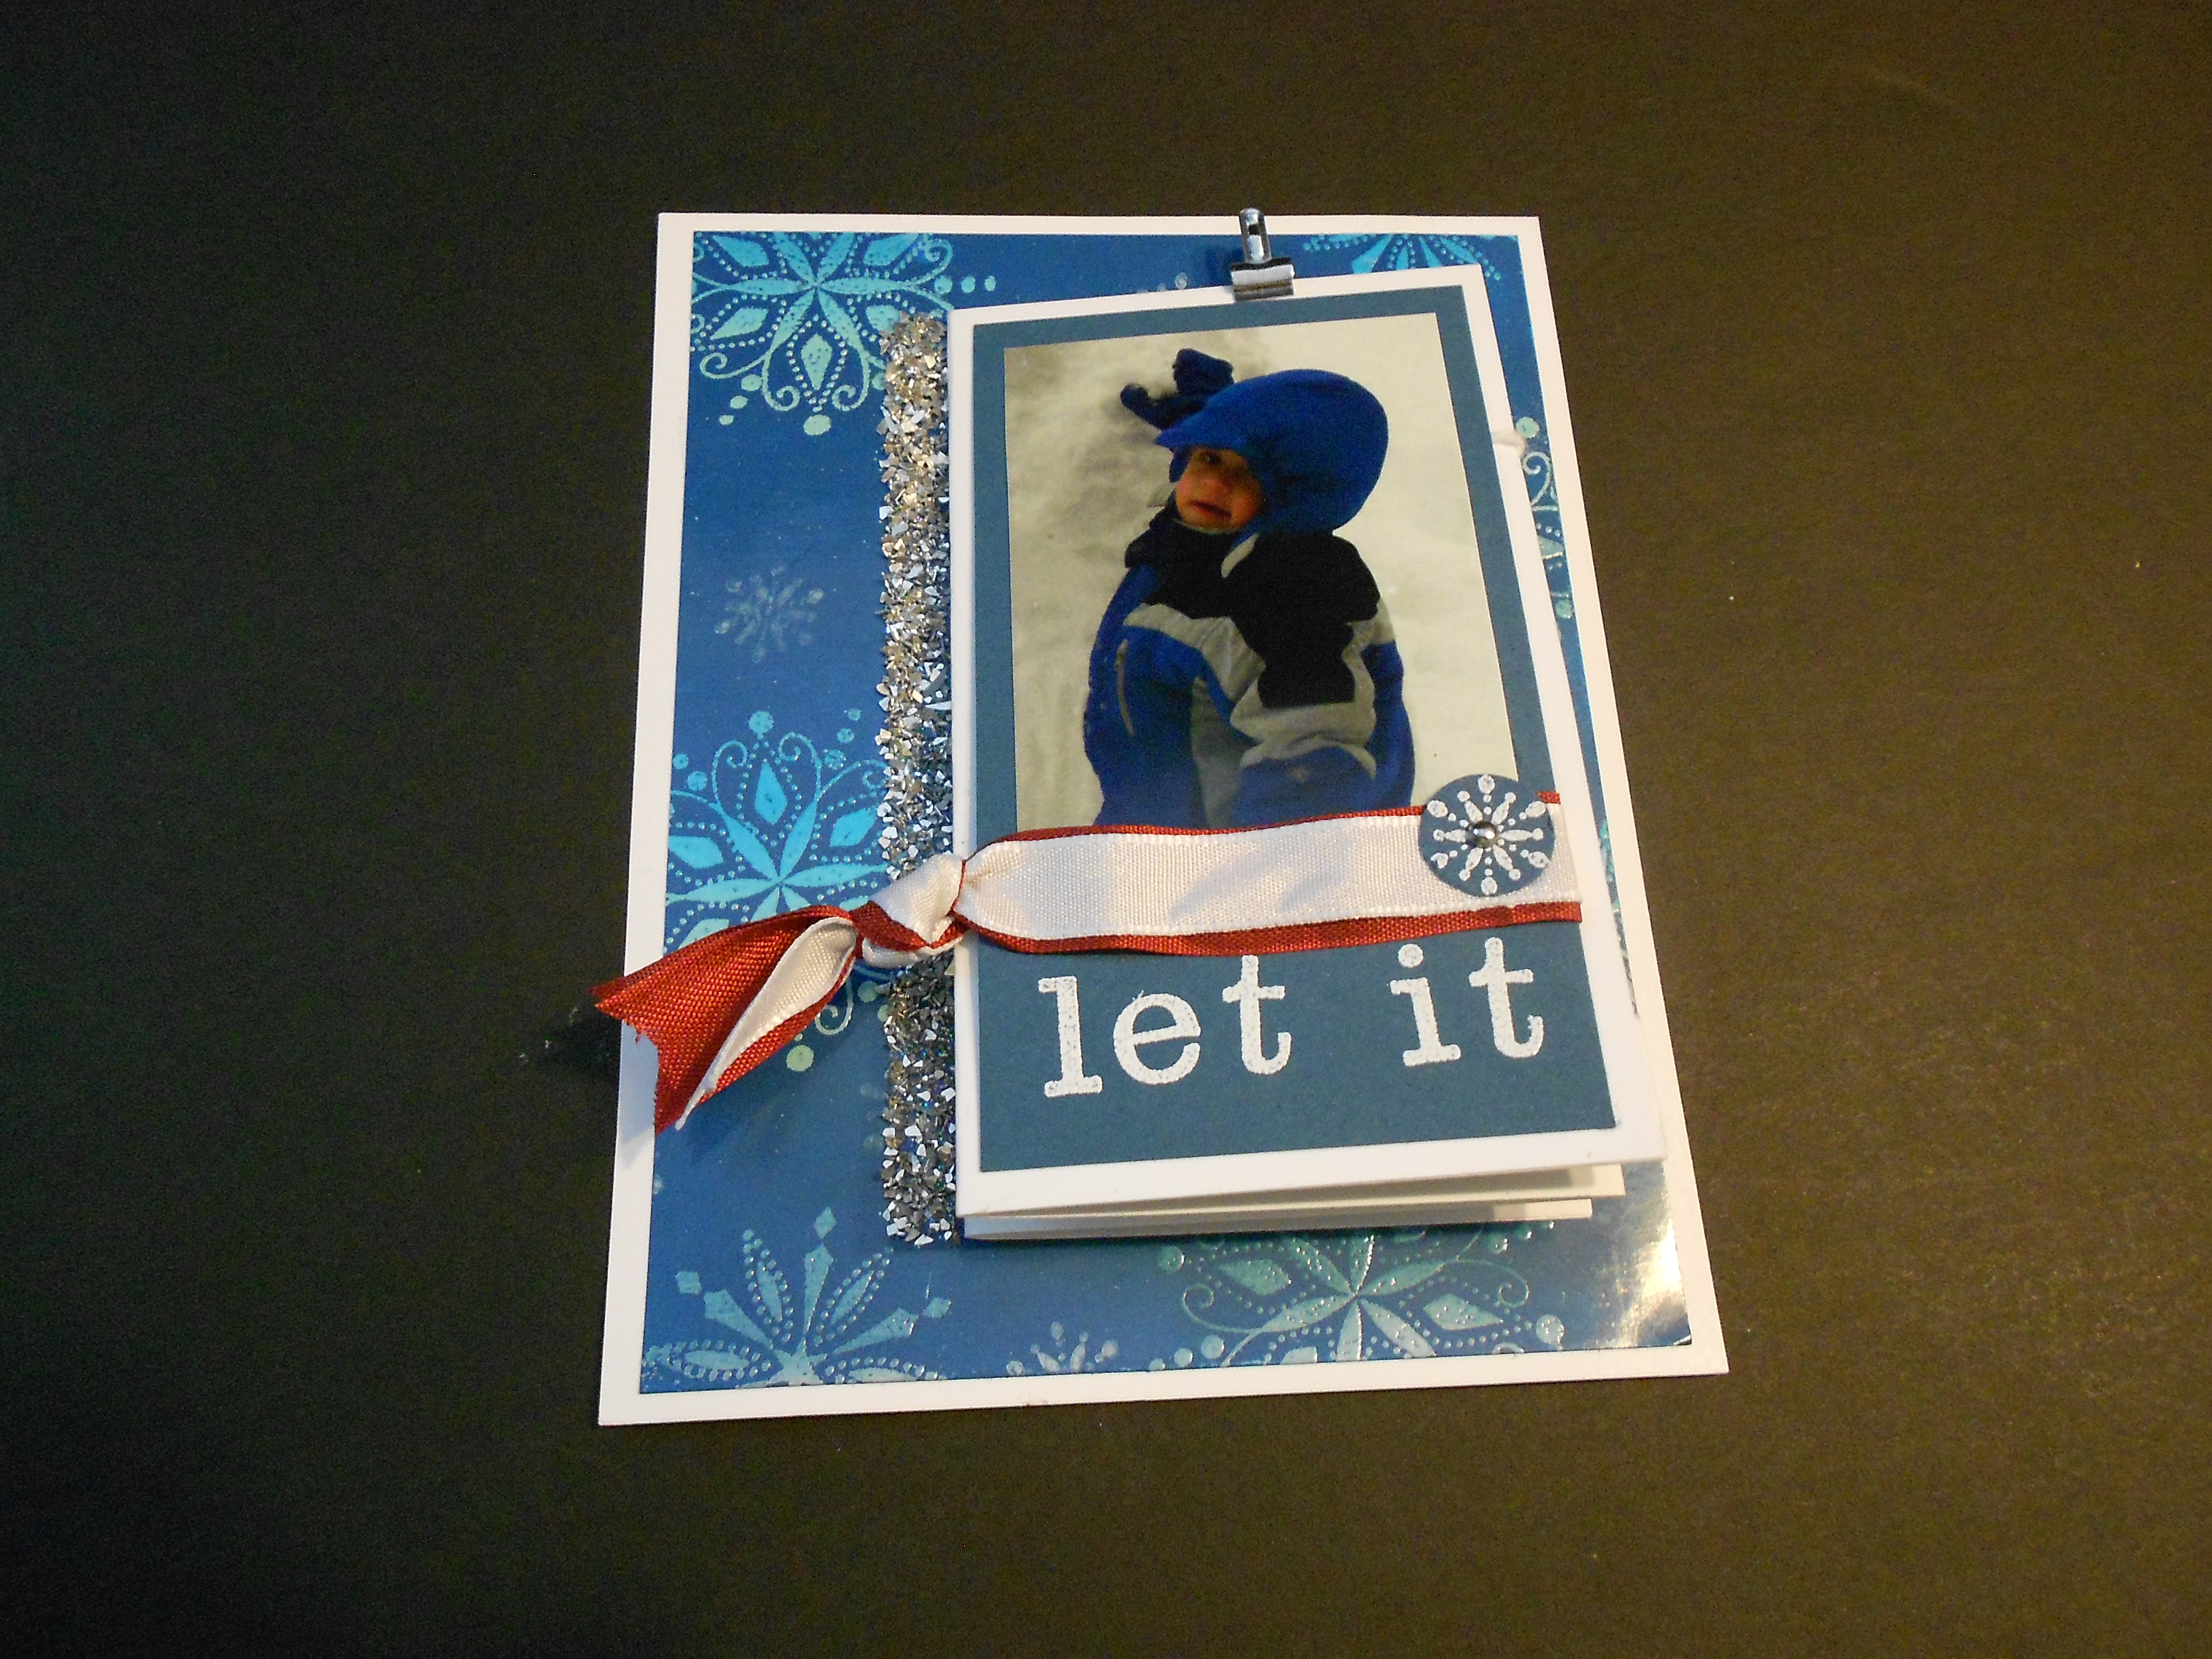
So this is the front of the card.  This card is very unique and different.  Personally I love it.  So The card base is just a regular card.  I can’t remember if it opened or not, but I think it did so you could write a message inside.  The blue background is a fun technique.  I used the white glossy paper that I wish we still sold.  I took a baby wipe and put three dots of reinker in different colors going across the wipe then I wiped it on the glossy cardstock to give it kind of a rainbow look.  Once that was dry I inked my snowflake with versamark and stamped my snowflakes then embossed them with clear embossing powder.  I then used a dark blue reinker and a sponge to sponge over the top so the snowflakes were the only think to show the lighter colors.  The embossing powder resists the ink so you can see the colors underneath.

Let it Snow card- Layers

This card has some fun layers to it.  I folded a white paper.  I believe that it’s a 4 1/4 tall by 11 scored at 2 3/4 on each side and 5 1/2.  Then folded accordion style.  I attached a piece of sticky strip along the side where it was being attached and covered it with the Silver Glass Glitter.  This isn’t the best picture, but it gives you an idea of how the card folds up.

Let it Snow card- opening

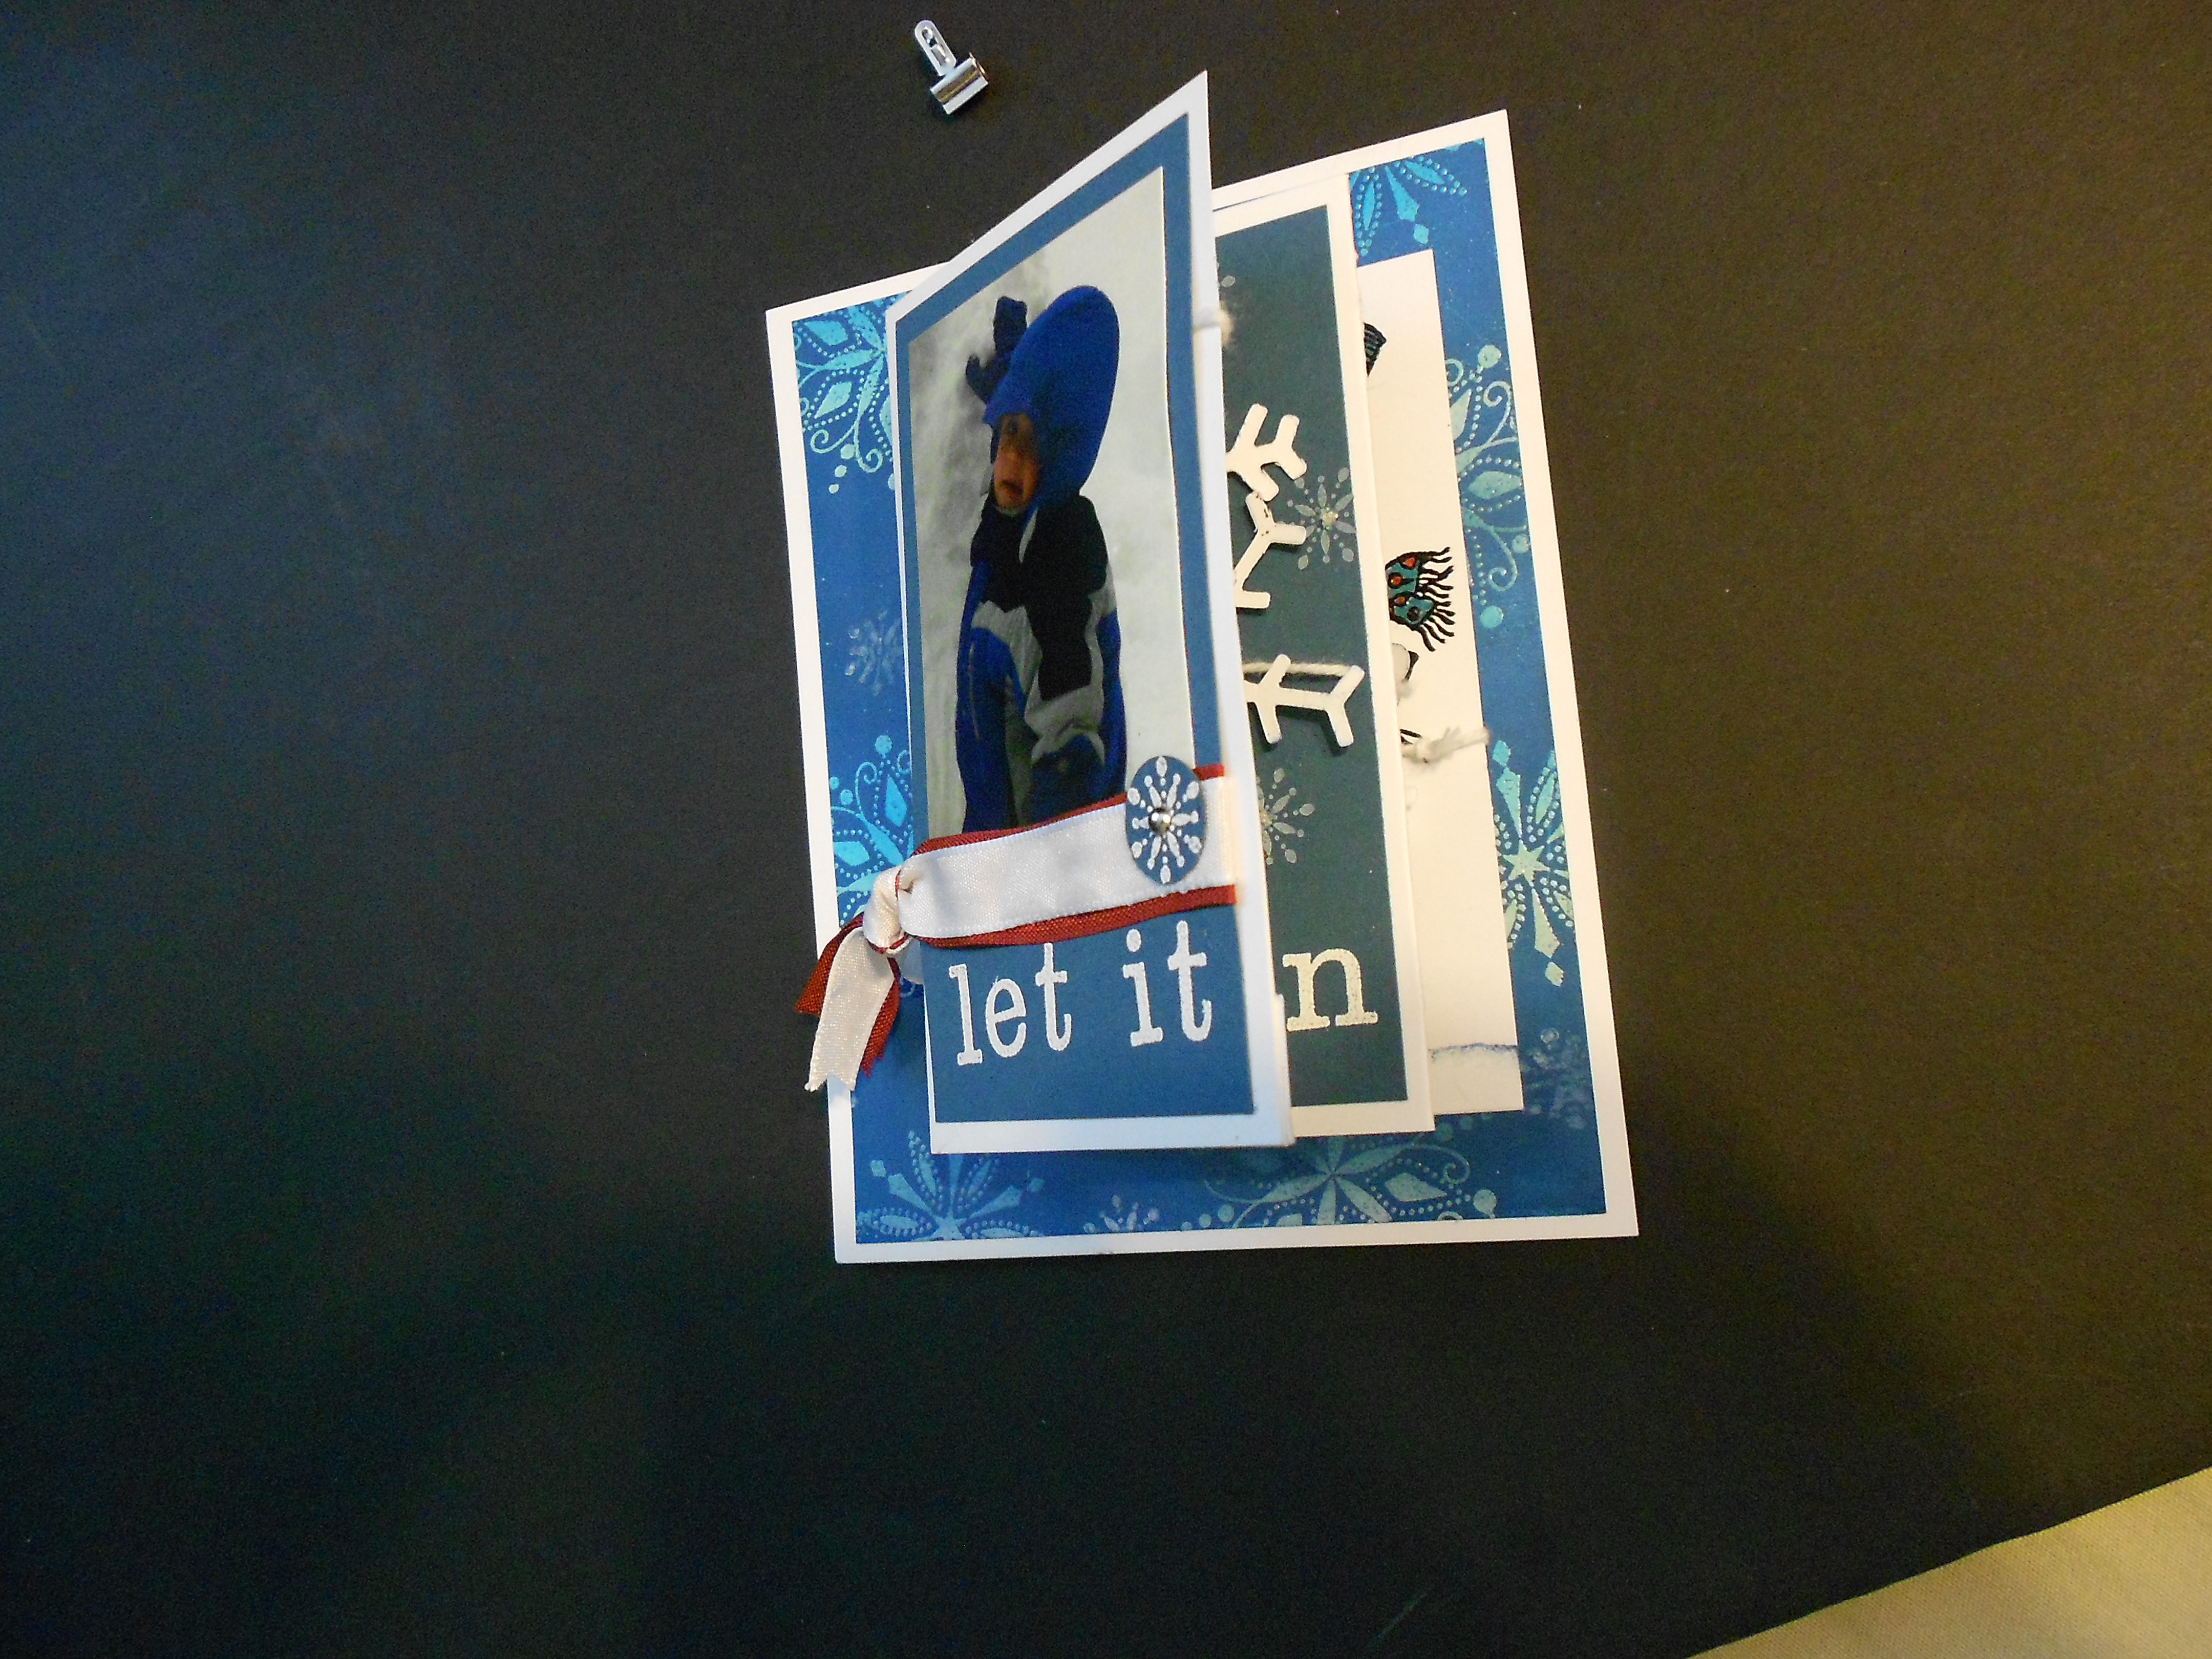
So this the the card as it’s opening up. Of course the front is a darling picture of my son playing in the snow.  I used a mini clip to hold it shut when you aren’t opening it.

Let it Snow Card- Partial open

As it starts to unfold you can start to see the magic int he card.  I used the Snow Much Fun set that is now retired to create a fun winter seen.

Let is Snow card- Opened

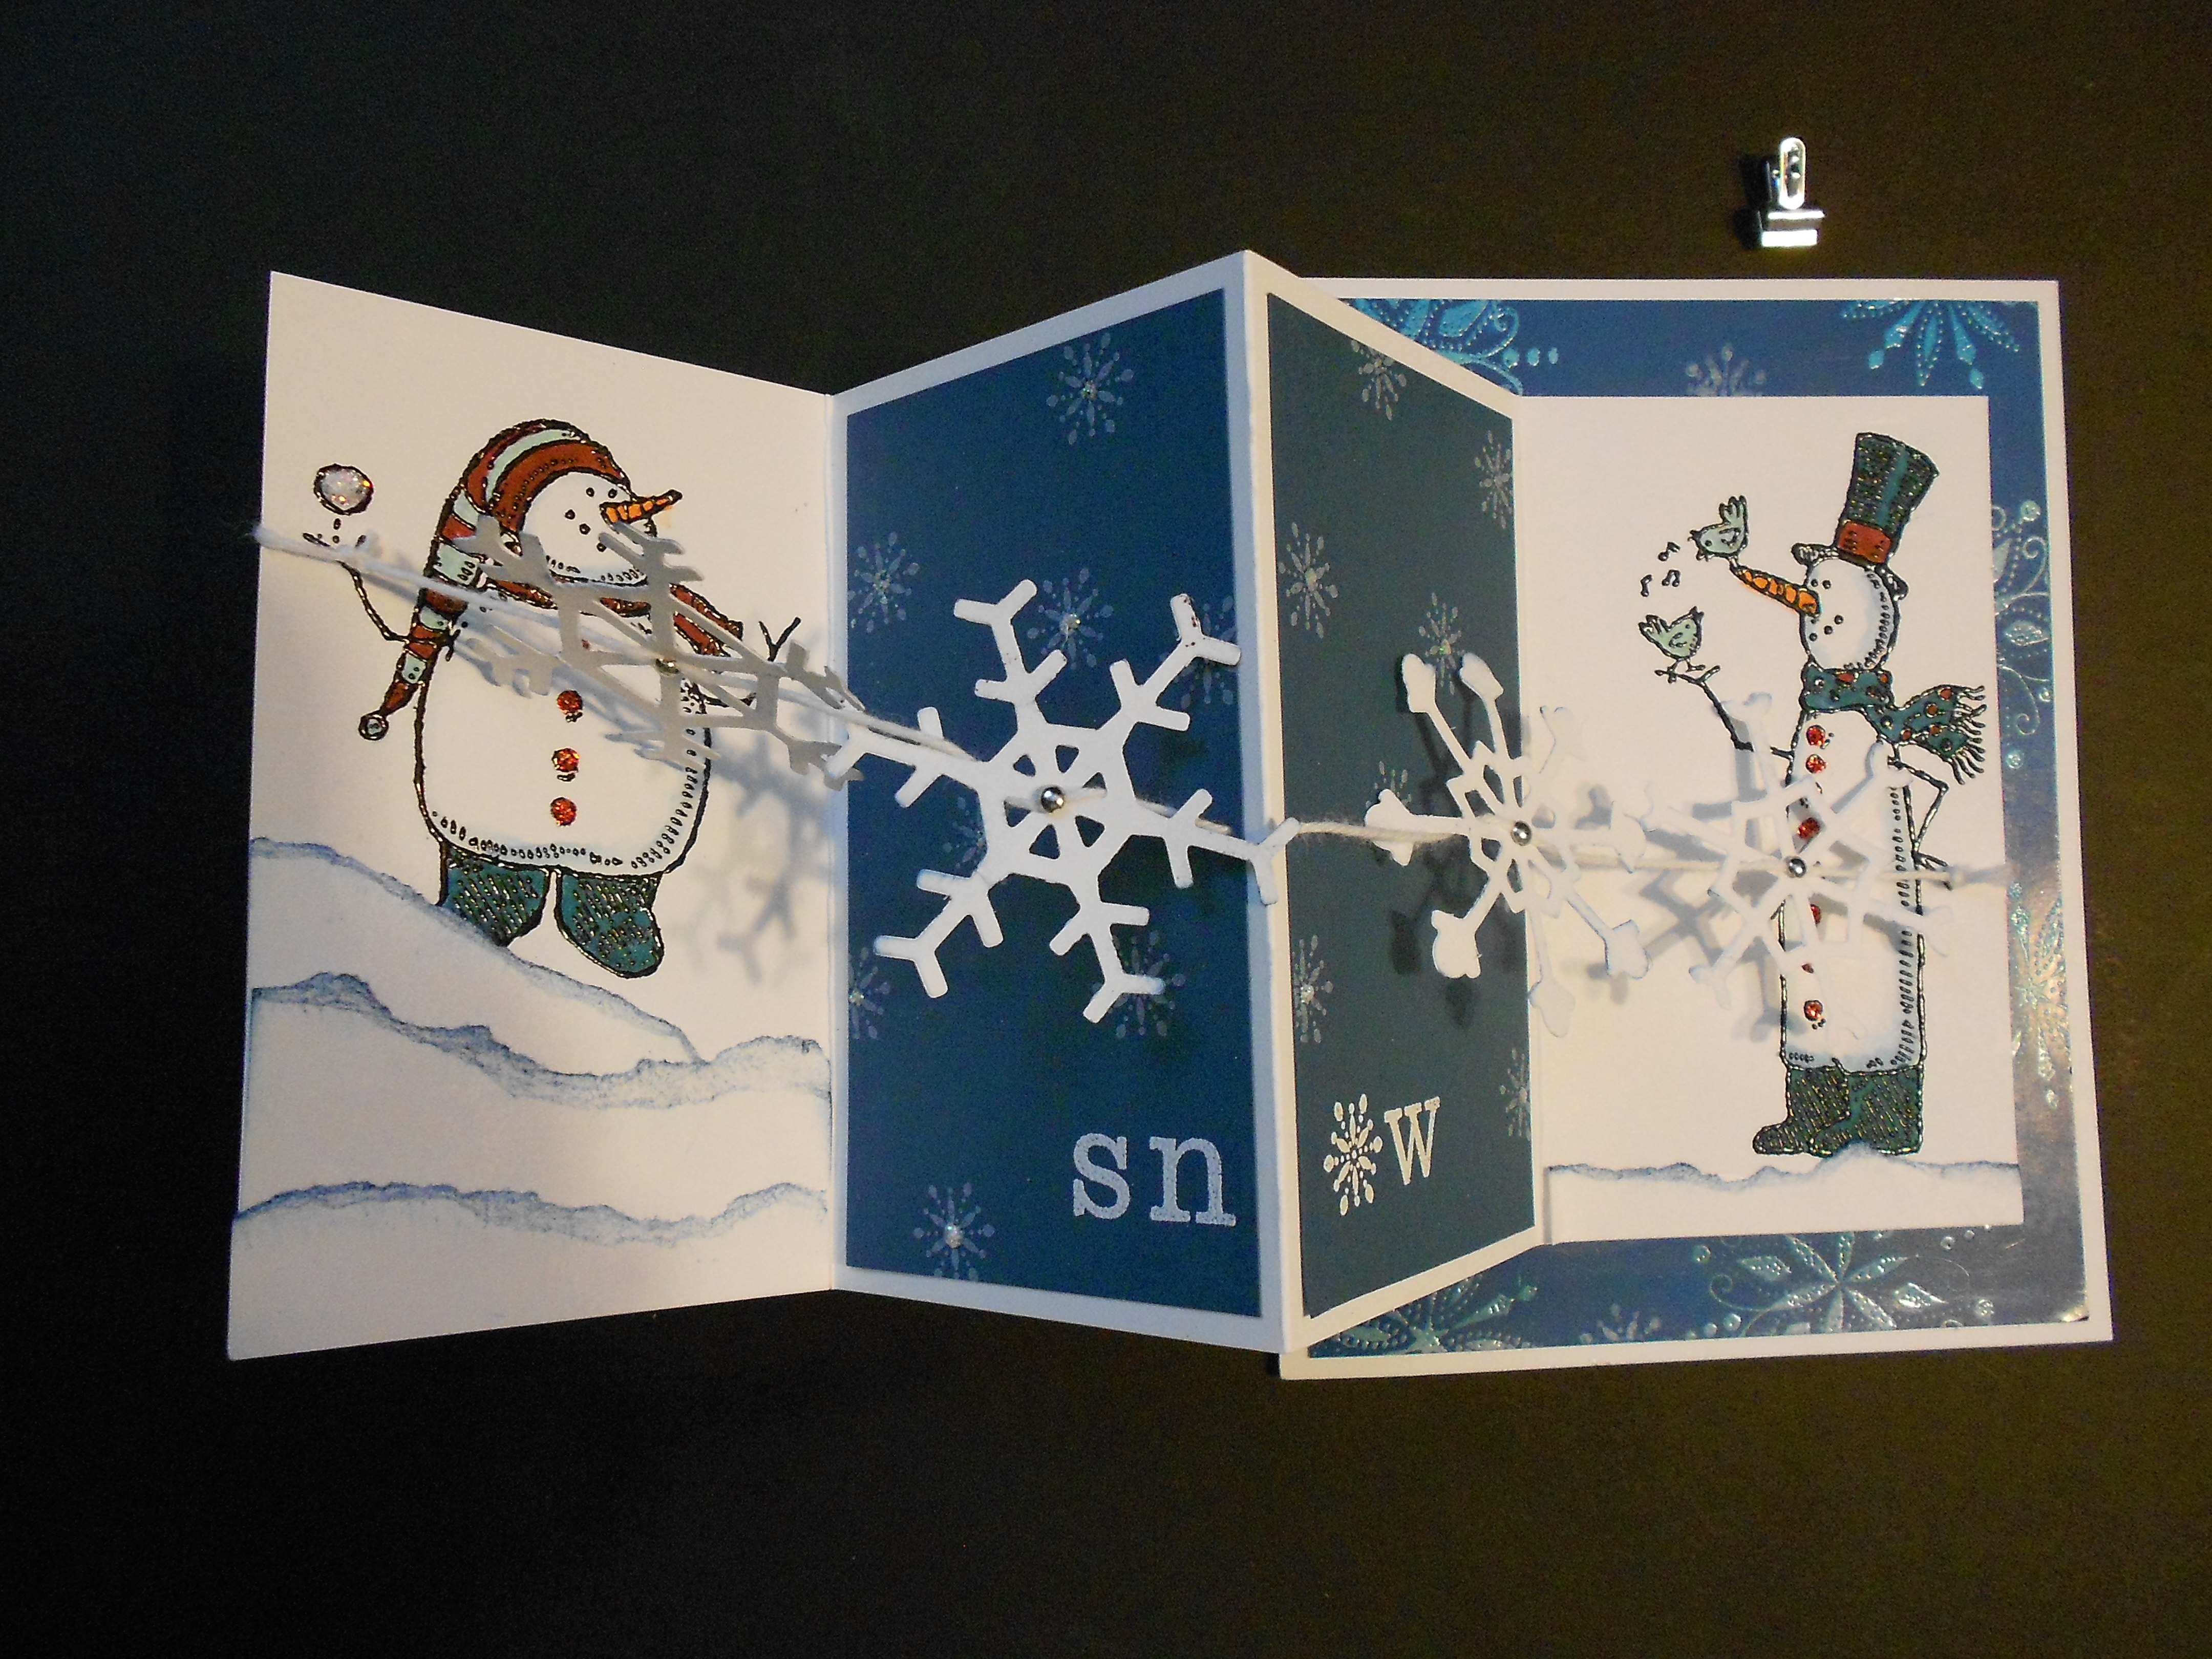
Here’s the finished card all opened.  My favorite part is the snowflakes that are attached to some bakers twine.  The snow men are stamped and embossed with black embossing powder before they are colored.  It’s kind of hard to see but I also used  some of the Dazzling Details on the snow ball and sides of the snowmen to make them sparkle.  The snow is stamped in white and embossed with white embossing powder to make it pop.

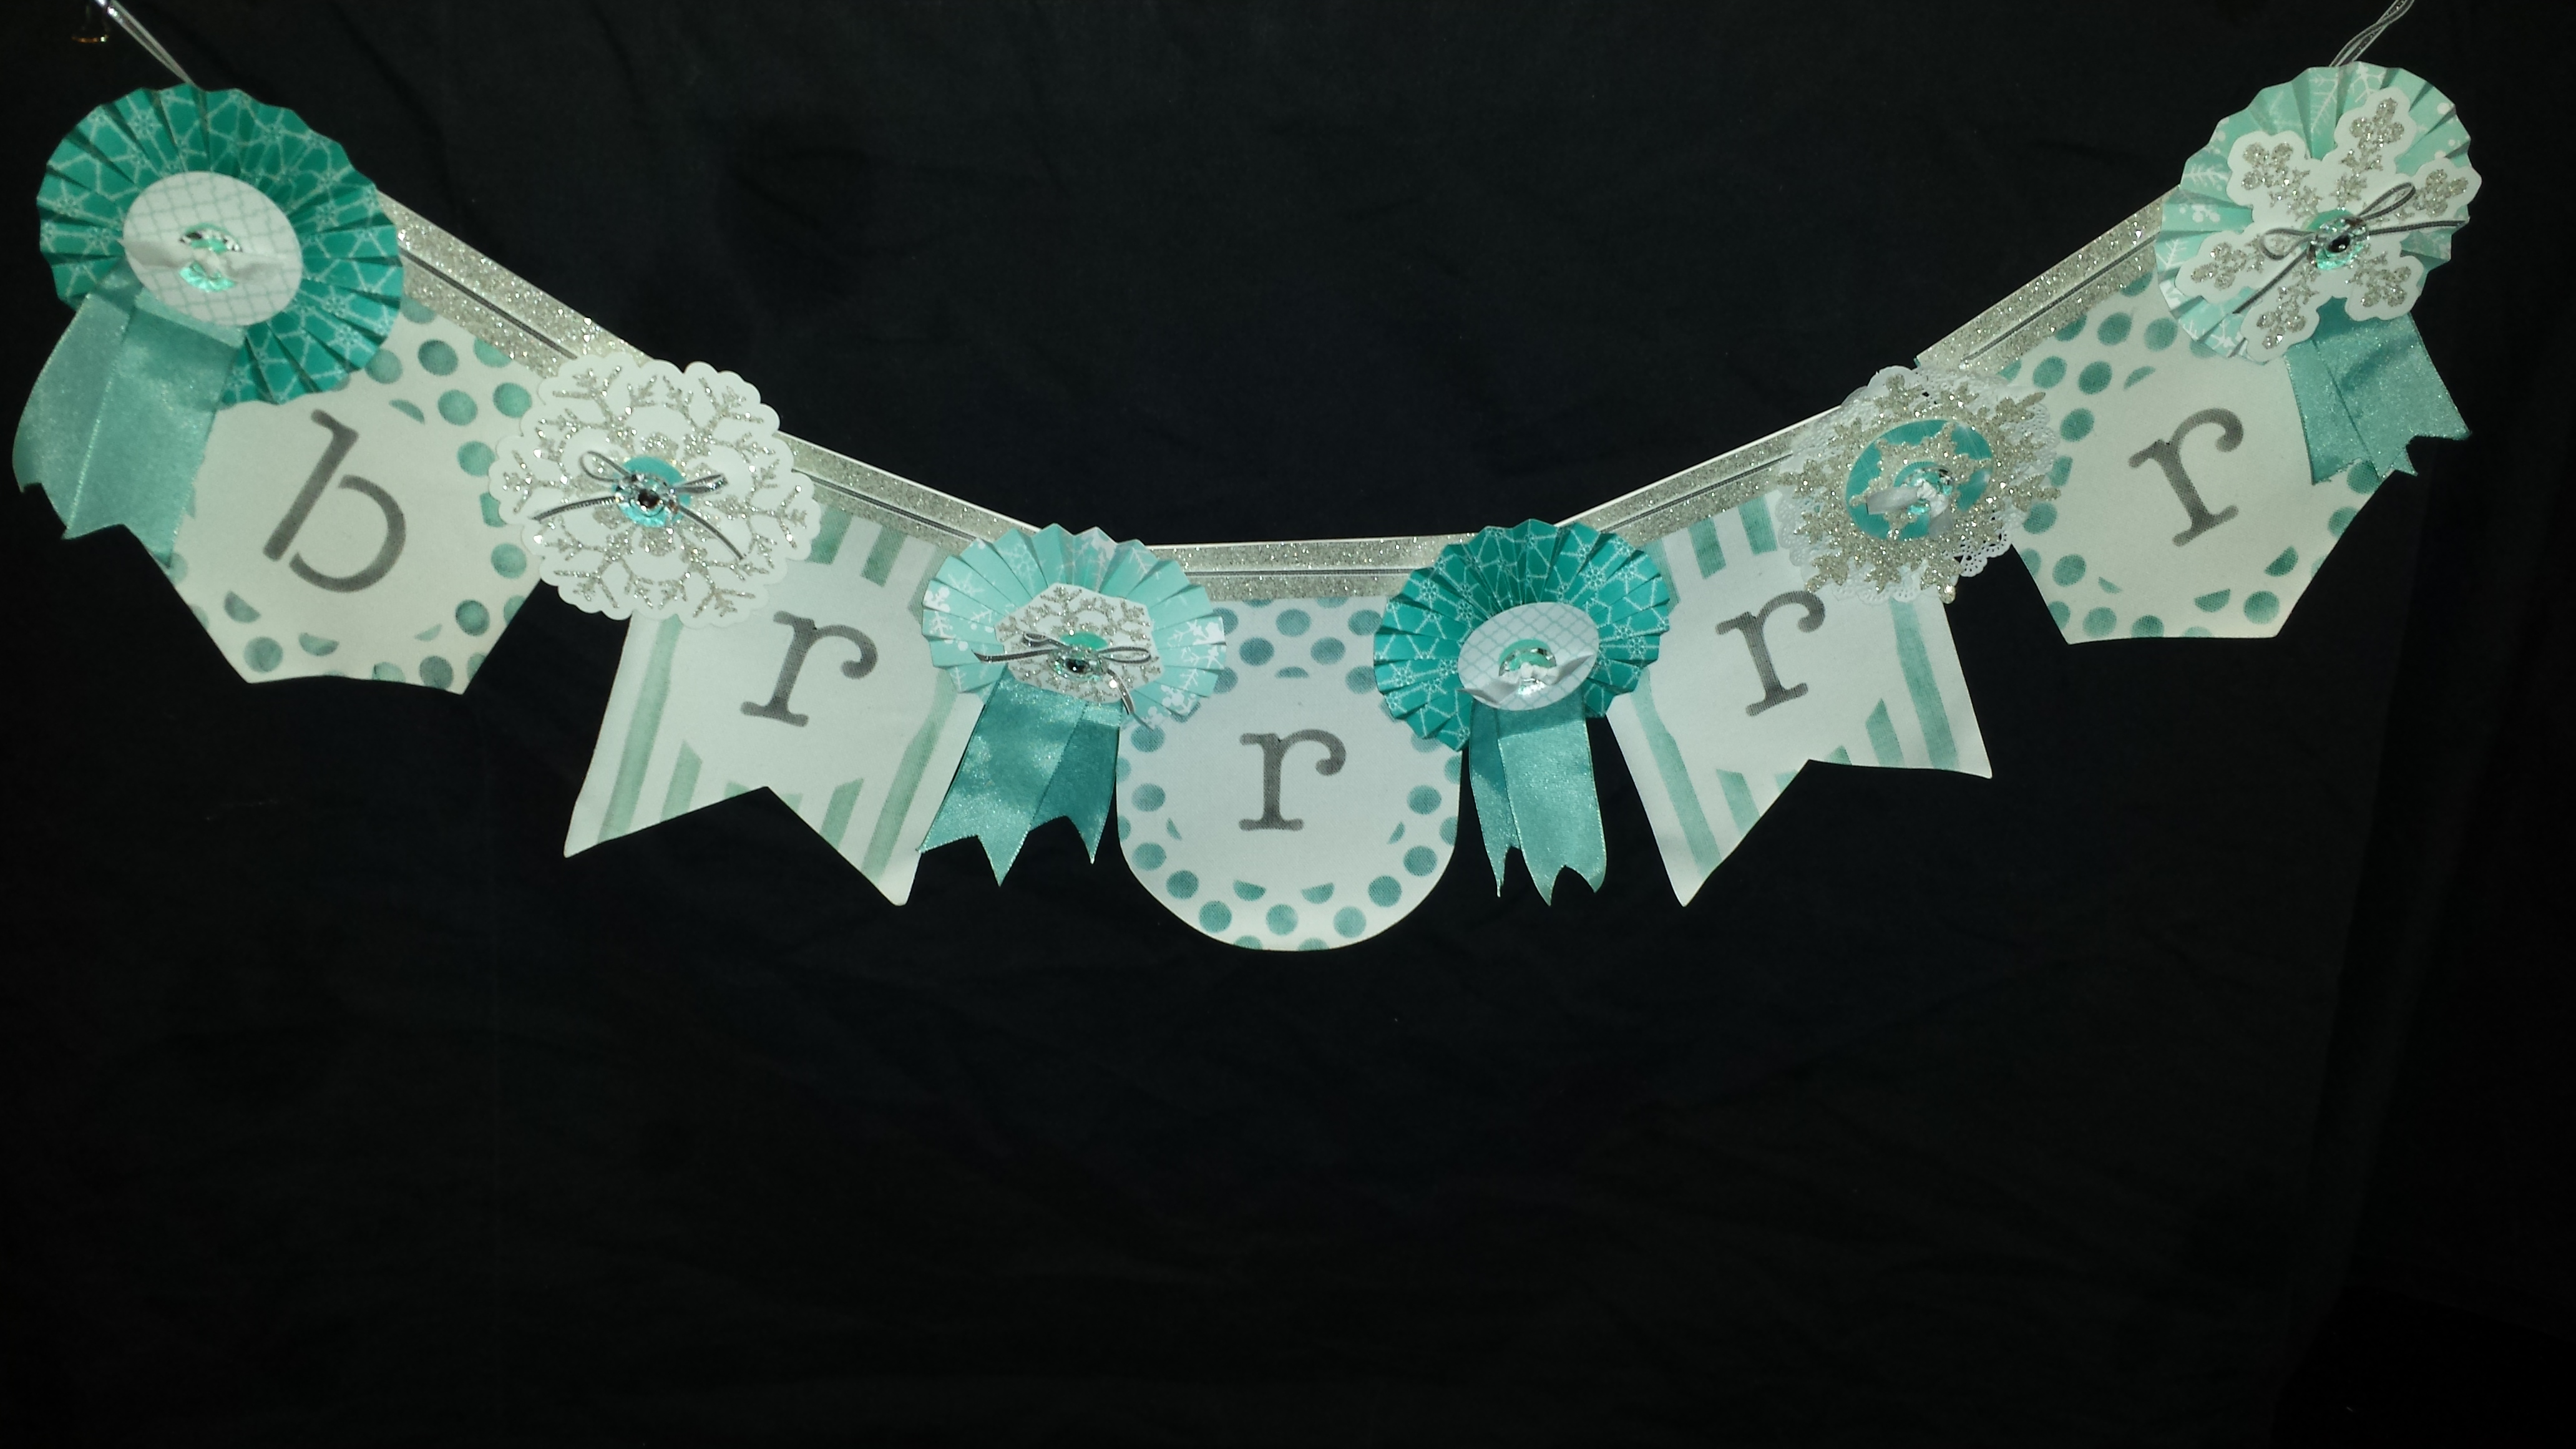
Hopefully I’ve inspired you to think outside of the box a bit.  Here’s one more piece of inspiration.  This is a wall hang I made using the same technique that I used on the background of my card.

Let it Snow wall hang

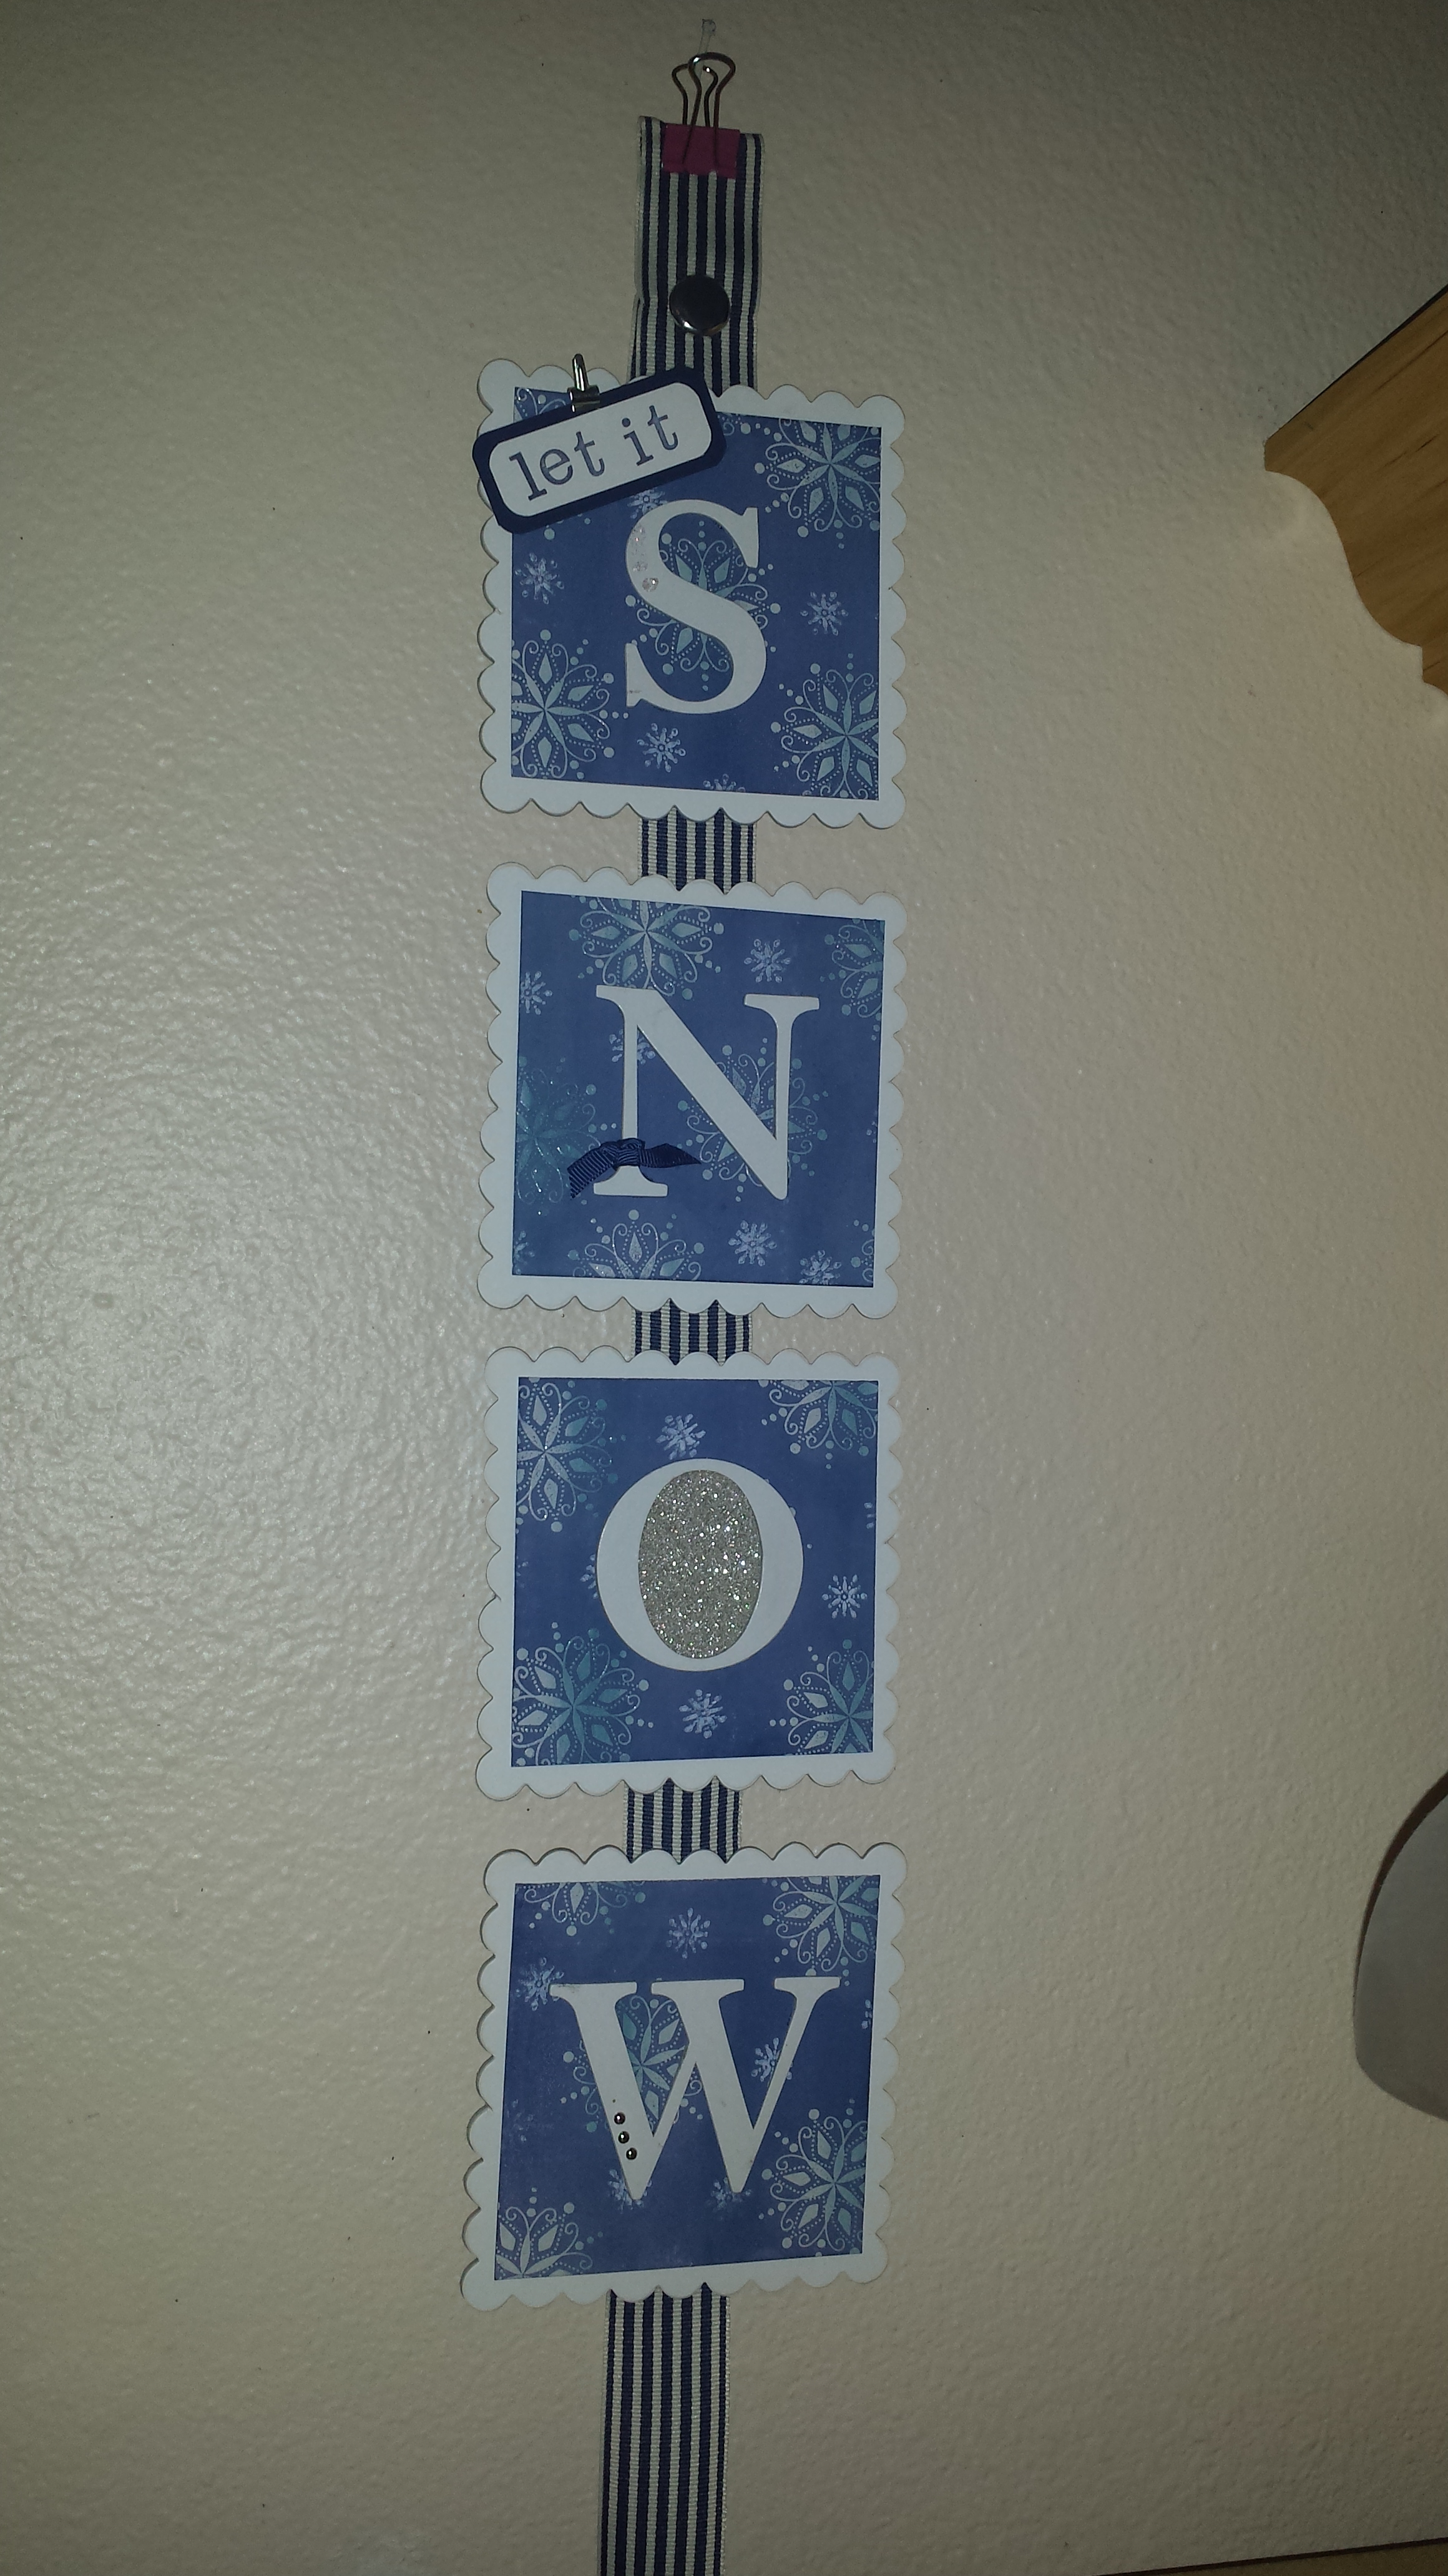
I used the scallop square die and the alphabet die to cut out the background and the letters.  Both were cut with chipboard and covered in white cardstock.  I hang this one up every year.  I still love it.

Tag SignatureOrder online 24/7
Contact me to order or book your party today!
435-245-5321 Home
435-232-2655 Cell (Text)
andersoncandice@hotmail.com

Dinosaur Punch Art

I’ve been seeing throw back Thursday on Facebook a lot and I thought it would be fun to do it on my blog.  I’m not sure that Thursday will always be a throw back, but I’ll try.  If you are like me you keep stamps, punches and even paper that you love even though you can’t by them anymore.  So I figure why not share some fun ideas to do with them.  Maybe I’ll even make some new projects using retired products.  Who knows.  So now lets get on with the project because hey that’s the fun part right?

Dino Chart

Every year Stampin’ Up! has a contest called the Artisan Design contest.  I’ve entered many years, while I’ve never won I’ve had my projects shown at Convention and I’ve enjoyed creating them.  It does however make me sad to give them away.  Some of them I’ve re-created and some I’m still planning on it.  This is one of the still planning on it projects.  Hopefully before my little boy grows out of dinosaurs.  I think this was the hardest one to give away and I wish I had it still.  It was also quite big so I actually took it to Stampin’ Up! (Good thing I live close.)

Dino Chart Top

This is the top of the chart.  I used MDS to create all the pictures for the chart.  I changed them all to Sepia so they would match and added a fun background.  I also added the age and height.  He was only 5 when I made the chart so I left spots to add more pictures over the years.  I attached twigs to the top to hang it with.  Of course the top picture is when he was born.  So cute.

Bird Dino

Here’s a better picture of the bird Dino.  All of the dino’s are made using punch art and shapes from the big shot.  Can anyone guess where I got my inspiration for my characters.  Yep “Land Before Time.”  You can also see the close up of the texture on the letters.  I cut them out of chip board and paper, then glued the textured paper to the clipboard.

Green Dino

Next is my green Dino working his way up the mountain.  The mountain is just created by tearing up paper and crumbling it up then smoothing it out.  I used the directly to paper technique to add texture.  (That’s where you just take the ink pad straight to the paper to highlight the texture and edges.)

Brown Dino

Here’s the brown Dino.  I think I actually used the leave die to make the splotches on his back.  You’ll noticed I also added some grass to the mountain by just tearing up paper and snipping the edges.

Orange Dino

This one wasn’t really in the movie, but I wanted one more to work with the spacing.  I think he turned out cute.  He also had to be orange because that’s my son’s favorite color.  The ruler was created by using the simply scored tool.  I placed a cardboard so I would know how far to score each section so they stayed even.  Then I flipped it over and used a sponge to highlight the marks and added the numbers with the calender set.


T-Rex Dino

Of course we had to have the T-Rex at the bottom chasing the little Dino’s up the chart.  I left space on the side so that I could mark the height and write the date.  My son was very disappointed that I gave away the T-Rex.  That’s his favorite Dino.  Just posting about this makes me want to re-create it.

I hope you have enjoyed my throw back Thursday.  As you can see I really do love punch art.  It’s so fun to see what you can create using our awesome punches.  Especially something they weren’t designed for.

Tag SignatureOrder online 24/7
Contact me to order or book your party today!
435-245-5321 Home
435-232-2655 Cell (Text)
andersoncandice@hotmail.com


Be my Valentine

I’m totally in love with these valentine kits.  I seriously had so much fun making them.  The kit comes with 12 bags, tags and twine like what you see on the right.  I had fun using all kinds of different tags to create 6 different tags.

20140110_155910

I’m thinking this would be a fun class.  Would you be interested?

We love Valentine’s Day! And why wouldn’t we? It’s a chance for us to say “I love you.” And it doesn’t just have to be about romantic love. This holiday is a time to share the love with anyone and everyone. We’re here to help you prepare with the A Whole Lot of Love products.

Dates: Available December 1-January 27 or while supplies last.

The fine print: These are exclusive products that will not be available after the promotion. No limits on this promotion.

 Item  Description  Price
 131850  Love You More Stamp Set (Wood)  $21.95
 131853  Love You More Stamp Set (Clear)  $16.95
 134611  Follow My Heart Stamp Set (Wood)  $15.95
 134614  Follow My Heart Stamp Set (Clear)  $11.95
 134617  Flowerfull Heart Stamp (Wood)  $9.95
 Item  Description  Price  Includes
 134610  Sweetheart Treat Bags  $4.95  12 heart sacks, 12 die-cut labels, 12 pre-cut pieces of  Pool Party Baker’s Twine
 132162  Monster Hugs Boy  $5.95  18 boy monsters, 18 googly eyes, 18 adhesive hearts
 132163  Monster Hugs Girl  $5.95  18 girl monsters, 18 googly eyes, 18 adhesive hearts
 134609  Sweet Sayings Cards and Envelopes  $5.95  12 printed card bases, 12 envelopes (four Real Red, four Pool Party, four Crisp Cantaloupe)

Check out the flyers for more info.

Order online 24/7

Contact me to order or book your party today!
435-245-5321 Home
435-232-2655 Cell (Text)
andersoncandice@hotmail.com

Tag Signature

Fun Christmas Picture Ornament

I’m serving in our ward nursery and we wanted to make a cute gift that the kids could give their parents for Christmas.  My daughter just happens to be one of our cute nursery kids.  The ornament turned out so cute that I just had to share them with you.

20140110_162844

First this is the front with the darling picture of my daughter.  Thanks to technology it was easy to take pictures of the kids with my phone each week.  Then I used My Digital Studio to get them the perfect size and to change them all to sepia to match the ornaments better.

I used the scallop circle die to cut out a piece of card board (Of course I had plenty from the back of our great products.  I save all of them they are so great for many projects.)  I covered the chipboard with a piece of Old Olive paper cut out with the scallop circle die and embossed with the pedals of plenty embossing folder.  The chocolate chip background and the picture were cut out using the circle thinlits.  I finished it off with the fun thinlit Merry.  (Just a tip if you use wax paper.  Wax side towards the paper.  The paper will come out nice and easy without tearing.)20140110_162907

This is the cute back side.  We had each child stamp their hand print and we added a name a date.  I even made a few with pictures of Jesus in case we had a few visitors.  (So glad I did since we had 2.)  The parents loved them.  I love how it looks I my tree.

20140110_174617

I finished it off by making custom sized envelopes with our Envelope punch board.  We had the kids color them to make them extra special.  Then we tied them shut with a quick ribbon and added a tag.  I love love love the new scalloped tag topper punch in the occasions mini.  It made it so easy to add Christmas tags to these and all my Christmas presents.  (Just a note the stamp set is an old Christmas tag set the I love to use every year.  It makes tags so easy and I never run out.)

Personally I love having ornament that are pictures of my kids.  It’s so fun to get them out as see them every year.  Hopefully you are inspired to make a cute ornament for your tree next year using some of our great products mixed with your imagination.

Tag Signature

Products used:

Colors:
Cherry Cobbler, Old Olive, Very Vanilla, Chocolate Chip

Big Shot Items:
#1113468 Scallop Circle Bigz Die $19.95
#130911 Circles Collection $26.95
#116824 Petal-a-Plenty Embossing Folder $7.95
#132171 Expressions Thinlits Dies $24.95

Ribbons:
#120992 Cherry Cobbler Seam Binding $6.95
#123124 Early Espresso Baker’s Twine $2.95

Others:
#133324 Scalloped Tag Topper Punch $22.95
#133774 Envelope Punch Board $19.95

Spookacular October

20131014_192357

Spooktacular October

Come make a cute Spooky Banner and other cute Halloween gifts for your little ghouls.
Times:

October 24th

Click on times to RSVP
10:00 am – 1:00 pm
5:30 pm- 8:30 pm
See below for projects and prices

20131019_171117

Spooky Banner $20 —-See below about the special on the banner
Purse $2.00
Witch’s Broom Card $2.00
Halloween Squash Photo Book $3.00
Spider & Frankenstein Candy Toppers $1.00 pair

Most projects I have product on hand, but if you would like to make the Spooky Banner please let me know ASAP as I will need to order the product for this.

If you can’t make it and would still like to order the kits to stamp and make at home please let me know I would be happy to do that as well.

—–Banner Special

There are 6 Banners in my package
Each Banner is $20 when you do all 6 you will get them for the reduced price of $100.00 That’s one banner for free.

20131014_192357

20131019_171136

20131019_171219

20131019_171333

I will also be making

XO XO XO

Family

If you would like to create them at home you can get the add on kit for the letters & backgrounds for $10.  You will also need inks and sponge daubers.  I will have a special package available for these as well if you need them.


A Little Thank You Tag

I had the opportunity this week to go down to Stampin’ Up! and help the advisory board with a project.   I wanted to take them a little gift just to say “thank you.”  I had lots of zucchini thanks to awesome Dad so I decided to make little zucchini breads with this cut tag.  I love how they turned out and it was so fun to share them with the hard working team.  I used the leaf from the holiday catalog along with a thank you set and the grunge set from the maim catalog.

image

image

I challenge you to brighten someones day with a fun hand crafted gift.  These simple tags were so quick but very much appreciated.