On the 6th day of Christmas . . .

The Stampin’ Santa gave to you a really fun Candy Gift Box.
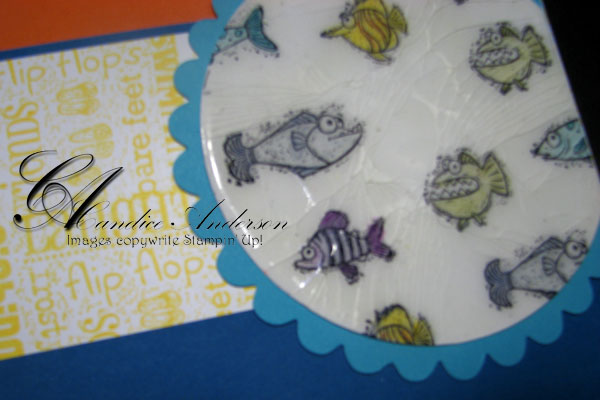
So I saw this idea on my friend Patty’s blog and just had to try it.  It’s made with our thick window sheets.  I simply cut out the box using our fancy favor’s box die and my Big Shot.  Then  I I embossed it with the Petals-A-Plenty Impressions Folder from the Holiday Mini.

The only trick is you need to cut your box now too 11″ instead of 12″.  Then you can emboss from each end (you roll it through twice.)

Can I just say I love my Big Shot.  Remember there are lots of great dies on sale right now.  Even if you don’t have the Big Shot yet.  You could start getting your dies and have all the cute ones when you get your Big Shot.  You could even use my Lay-a-Way program.

To order call me at 435-245-5321 (Home) or 435-232-2655 (Cell & Messages.)  E-mail me at andersoncandice@hotmail.com.  Order on-line at www.candiceanderson.stampinup.net. Click on the shop now in the upper right hand corner.

Remember to check out my 12 Days of Christmas sale for all the great deals.  Plus the 12 Days of Holiday Sale that Stampin’ Up! is offering on fun dies for the Big Shot.

Have a Happy Holiday!

April Club- Just Beachy

April '09 FishThis post is a little late, but I thought you would like to see the fun projects we did for club in April.  I featured the fun Just Beachy set from the mini catalog and showed them how to do the cracked Glass technique.  I love this technique it looks so cool and is actually really easy to do.I got this fun idea from Kelly.  You can check out her blog here:   http://stampinparadise.blogspot.com.  I changed it a bit. 


April '09 Fish Close UpI thought if you are really different than maybe you would be a different color.  I don’t know if you noticed it but this fish is the only one in the set that goes the other way.  Here is a close up of the cracked glass.

April '09 BeachHere is the scrapbook page that I came up with using the card as my inspiration.  I love how simple it is, but it has just a fun summer feel.  We colored the fish with the watercolor wonder crayons and a aqua painter.

April '09 B-dayThis is the second card that my card group made.  I totally cased it from a blog, I tried to find it again so I could tell you who, but I couldn’t.  I changed the saying in the center, but the rest is basically like hers.  I thought it was a really cute card.  The size is actually 5×5 go go in our 5 1/2 x 5 1/2 envelops.  The fish are punched out with the 1 1/4″ Square Punch and then sponged with the pacific point.


April '09 B-day InsideWe stamped Happy Birthday from the $10.00 and under page on the inside.  Of course we used Whisper White craft in so that it would show up.


Matchbox Thank You BoxesSince I had also just got the Matchbox die of course we had to try that out as well.  Here is our fun projects using the match box die and the designer series paper from the mini catalog Walk in the Park.


Items Featured:
*115123 Walk in the Park DSP $9.95
114486 Birthday Wish $6.95
*113796 Just Beachy $25.95
*113837 Lazy Days Jumbo Wheel $8.50
100477 Glassy Glaze Emboss Powder $4.75
* indicates item is in the Spring Occasions Mini Catalog.

Click here to start placing your on-line order.  Click on the “Shop Now” in the top right corner.

Thrifty Thursday 3-19-09

Thrifty Thursday is all about cost efficiency.  What I love about this card is it uses the products that come in the standard starter kit.  Remember you can get started as a Stampin’ Up!® demonstrator for three easy payments of $67.00.  Click here for more details.  The starter kit has over $335.00 worth of product in it for just $199.00.

I  really like this card beacuse it’s simple and easy to change the thanks-flower-normalcolors.  The flower can be stamped or you can create any color by stampin’ it in VersaMark® and then using the Stampin’ Pastels® to add color.  I recommend using the sponge daubers for this technique because it is easy and fast but you can also use q-tips.  I really love the Stampin’ Pastels because they give you all the 48 colors plus 3 neutral colors for less than $25.00.  It’s really the best way to get all of our colors to start off with and they are so easy to use.

thanks-flower-dressed-upOne of the other things I love about this card is it’s so easy to dress it up.  Here I have stamped the back ground (sorry it’s hard to see) with the little flower in the set and then I also added some ribbon along the top.  Any white ribbon is great to start with because it goes with pretty much everything plus you can dye it to match your colors.  If you would like to learn how to use our great chalks or to dye ribbon I would love to come to your home and show you and your friends how.  Just give me a call and we can set up a date 435-245-5321.

One last thing that I love about this card is the saying.  It comes from fundamental phrases.  This stamp set is so versital.  I has many different sayings.  You could make up a bunch of these cards in different colors without the saying and then just choose the appropriate saying when you need it.  It’s so simple and easy.  You don’t need to run to a store every time you need a quick card.

Products Used:
105542 Stampin’ Pastels $24.95
102283 VersaMark Pad $7.50
114319 Whisper White Organza Ribbon $5.95 (add on)
114968 Fundamental Phrases $37.95
111626 Eastern Blooms $21.95

Colors- Green Galore, Gable Green, Pink Passion, Whisper White

Wacky Wednesday 3-18-09

OK I decided to put these in Wacky Wednesday because I’m a day late for St. Patrick’s Day. 

leprechaunI made this cute little guy for my “Discover the Green Night” for decorations.  I had a bunch spread out on the table.  They also a fun treat because they are on a peppermint patty.  I got the idea Samantha Parisi.  She has some amazing punch art on her blog  www.rubberstampingdiva.com.  You can check out her blog for all the details on how to make them.

pot-of-goldWhat is a Leprachaun with out his trusty pot of gold.  Samantha is just so clever.  It’s this just so cute.

lucky-me-heartsAt the event we had the chance to make this fun card.  It was designed by a member of our group.  My up-line has a wonderful blog that is available to our group only.  This is just one of the many benefits for joining our group as a Stampin’ Up!® demonstrator.  If you want to learn more you can check out my “Join me” section or give me a call at 435-245-5321.  I love to talk to you more about this wonderful opportunity. 

lucky-me-hearts-closeYou have to check out the fun details on this card.  We stamped the hearts with VersaMark® and then embossed them with clear embossing powder.  I just love how it sparkles.

Product Used:
114618 Ribbon Bundle- SAB
114674 Delicate Dots DSP- SAB
113788 Polka Dot Punches- SAB
113144 Clear Rhinestone Brads $10.95
113693 Full Heart Punch $15.95
101618 Crimper $19.95
109130 Clear Stampin’ Emboss Powder $4.75
102197 Powder Pals® $19.95
100005 Heat Tool $29.95
115044 Pinch Proof $22.95
102283 VersaMark Pad $7.50

Colors- Close to Cocoa, So Saffron, Whisper White, Certainly Celery, Garden Green

Click here to start placing your on-line order.  Click on the “Shop Now” in the top right corner

Click here to see more weekly Challenge Projects

Technique Tuesday 3-17-09

I have often been asked how I get my knots so nice.  I will have to confess when I first started I turned to my up-line all the time for help.  Now after a thousand swaps or so I can finally tie a good knot.  I thought that maybe if I showed you step by step it would help. 

ribbon-step-1I think the biggest thing that helps me is I usually tie the knot when it is still connected to the roll of ribbon.  This makes it easy to always tie it correctly because I only have one end of the ribbon to work with. 

Step 1- So first I place my ribbon under the idem I am going to tie the knot on.

ribbon-step-2Step 2- Next I cross the two pieces of ribbon. As you can see the roll of ribbon is now on the left side and the end I am tying with is crossed over to the right.


ribbon-step-3Step 3- Next you want to fold the lose end over the top and under the end attached to the roll.


ribbon-step-4Step 4- Now fold down the end attached to the roll.  Now both ends of the ribbon should be facing down.  The loose end is on the right side and the attached end is on the left side.


ribbon-step-5Step 5-  Fold the lose end up across the attached end.


ribbon-step-6Step 6- Tuck the lose end under the attached end.


ribbon-step-7Step 7- Your finished knot.  I believe this is called a square not, but I’m not sure.  You think I would know since I have 4 boys and they are in scouts.  I have found that when I tie a knot like this the ends both go down.  If I want them to go up I just tie it upside down.  On of the keys to a perfect knot is to keep the ribbon nice and flat through each step.   

ribbon-finishedHere is the finished project.  I hope that this helps you in tying the perfect knot.  Remember that it also takes practice so just keep on tying.

sab-bunny-cardHere is another sample of the same card with a different picture and saying.  I got this card idea from Becky Roberts blog.  You can check it out here www.inkingidaho.blogspot.com.

Products Used:
114674 Delicate Dots DSP- SAB
113788 Polka Dot Punches- SAB
114618 Ribbon Bundle- SAB
109043 Scallop Circle Punch $15.95
104401 1-3/8″ Circle Punch $15.95
104403 1-1/4″ Circle Punch $15.95
114968 Fundamental Phrases $37.95 (Card 1)
*113822 Eight Great Greetings $27.95 (Card 2)
114974 A Good Egg $23.95 (Card 2)

Colors- Chocolate Chip, So Saffron, Certainly Celery, Whisper White, Basic Black, Pretty in Pink, Bashful Blue, Sahara Sand

* indicates it is from the Occasions Mini Catalog

Click here to start placing your on-line order.  Click on the “Shop Now” in the top right corner

Click here to see more weekly Challenge Projects

Marevelous Monday 3-16-09

little-bird-cards-holderAt our meeting on the 13th we were each asked to bring a 3D project.  I took my game night score keeper.  Then we drew names to trade with.  I was very excited to get this project.  It is from my friend Megan Dunn.  You can check out her blog at www.welldunnideas.blogspot.com.  This fun little box holds 4 cards with envelops. 

little-bird-cardsI love that she embossed the little birds.  The cards are so simple and so fun.  I really like them.  I just might have to get this stamp set now.  This set also matches the good friend stamp set.

Products Used:
112157 Baja Breeze Patterns DSP $9.95
112091 Scallop Edge Punch $15.95
109043 Scallop Circle Punch $15.95
104401 1-3/8″ Circle Punch $15.95
104403 1-1/4″ Circle Punch $15.95
109047 3/16″ Corner Rounder $6.95
101930 Clear Stampin’ Emboss Powder $4.75
102197 Powder Pals® $19.95
100005 Heat Tool $29.95
113204 Cheep Talk $26.95
So Saffron Ribbon (SAB)
    Can also use 113699 So Saffron 1/2″ Striped Grosgrain Ribbon $7.95

Colors Used- Baja Breeze, Chocolate Chip, Whisper White, So Saffron

Click here to start placing your on-line order.  Click on the “Shop Now” in the top right corner

Click here to see more weekly Challenge Projects