Day 21 – Santa β€œDon’t Stop Believin’”

Rockin’ Santa & Snow Globe Dreams (with a Grinch-Inspired Twist!)

Today’s challenge theme was Santa β€” Don’t Stop Believin’, and my mind went in a dozen different directions before I landed on the perfect idea. Those of you who know me well know that I am a huge Grinch fan. (Yes… he even has his own dedicated section of my Christmas dΓ©cor!)

There’s a classic image of the Grinch holding a Christmas ornament, and I thought, How perfect would that be for this theme? So I decided to recreate that scene using our amazing Stampin’ Up! products.

Once the idea hit, the wheels started turning fast.

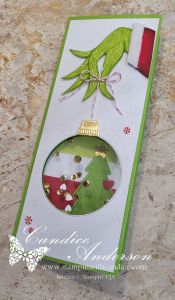
To really bring the magic to life, and because I love pushing the boundaries of our products, I decided to take it up a notch and turn it into a snow globe shaker card using my Flip Flap Technique (which I’m still claiming as my own unless someone can show me otherwise πŸ˜‰). This time, I added an extra twist β€” slimline card, giving me plenty of room for the full Grinch-inspired scene.

And yes… the moment you step outside the β€œintended use” of our products, things get creative fast. This card is no exception! Let’s just say… this card was an adventure!


πŸŽ„ Creating the Ornament

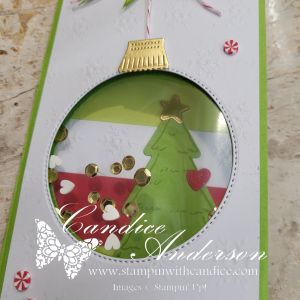
The ornament was actually the easy part!

  • Stylish Shapes Dies (#159183) for the circle
  • Gold Foil Sheets (#132622) for the topper
  • Topper from Ornamental Christmas (#166000)
  • Cherry Cobbler Baker’s Twine (#164051) for the hanging string

Simple, classic, and instantly recognizable.


πŸ’š Crafting the Grinch’s Hand

This was where things got… creative.

No die gave me exactly what I wanted, so I sketched the Grinch’s hand by hand (pun intended πŸ˜‰) and cut it from Lemon Lime Twist cardstock.

To add the Grinch’s signature β€œfur,” I stamped one of the leaf images from the Cheers & Sips set (#165588) in Granny Apple Green. The texture was perfect!

Then I added:

  • Granny Apple Green Stampin’ Blends for outlining
  • Blending Brush for shading
  • A hand-cut β€œSanta sleeve” in Real Red, brushed with black ink
  • And the perfect finishing touch β€” Fluffy Trim Ribbon (#165849) for the cuff

This combination brought the Grinch’s hand to life exactly the way I pictured it.


❄️ The Background & Final Touches

For the snowy scene, I used the gorgeous Silent Snowfall Specialty DSP (#166062) and added sparkle with a touch of Wink of Stella on the snowflakes.

A few Real Red & White Peppermint embellishments (#164050) tied the festive vibe together.


🌟 Creating the Slimline Flip Flap Shaker

This shaker section was the fun part!

How I Built It:

  • Cut Granny Apple Green cardstock to 7″.
  • Score at 3-1/2″.
  • Trim 1/16″ off one side.
  • Fold in half.
  • Layer the snowflake DSP on top.
  • Die-cut through all three layers at the same time using the Stylish Shapes circle.
    • You may need to run it through more than once, but cutting all layers together guarantees perfect alignment.

With the leftover piece of cardstock, I scored it again at 3-1/2″, leaving a 1/2″ tab to connect both pieces.

For this card I used the 3×3 Flip Flaps (#166514). There are multiple different sizes and the one you use will depend on how big your cutout is.

Here’s a quick video of how to assemble it.

Shaker Fillers:

  • Loose Gold Sequins (#165267)
  • White hearts from the Loose Valentine’s Assortment (#167074)β€”a fun sneak peek from our January 2027 Mini preorder!

Everything was sealed together using Tear & Tape.

Important Tip:

Always plan what the interior will look like through the window.
Whatever you stamp inside becomes part of the scene!


πŸ’¬ Interior Details

Because you definitely can’t put a standard β€œMerry Christmas” in a Grinch-inspired snow globe card… πŸ˜„

I used the Mini Alphabet Dies (#162934) to create my own custom sentiment. Pairing these dies with Adhesive Sheets (#152334) is a must β€” instant letter stickers for easy placement!

To finish the little interior scene I used:

  • Pine Tree Trimmings Stamps (#166040)
  • Pine Tree Trimmings Dies (#166046)
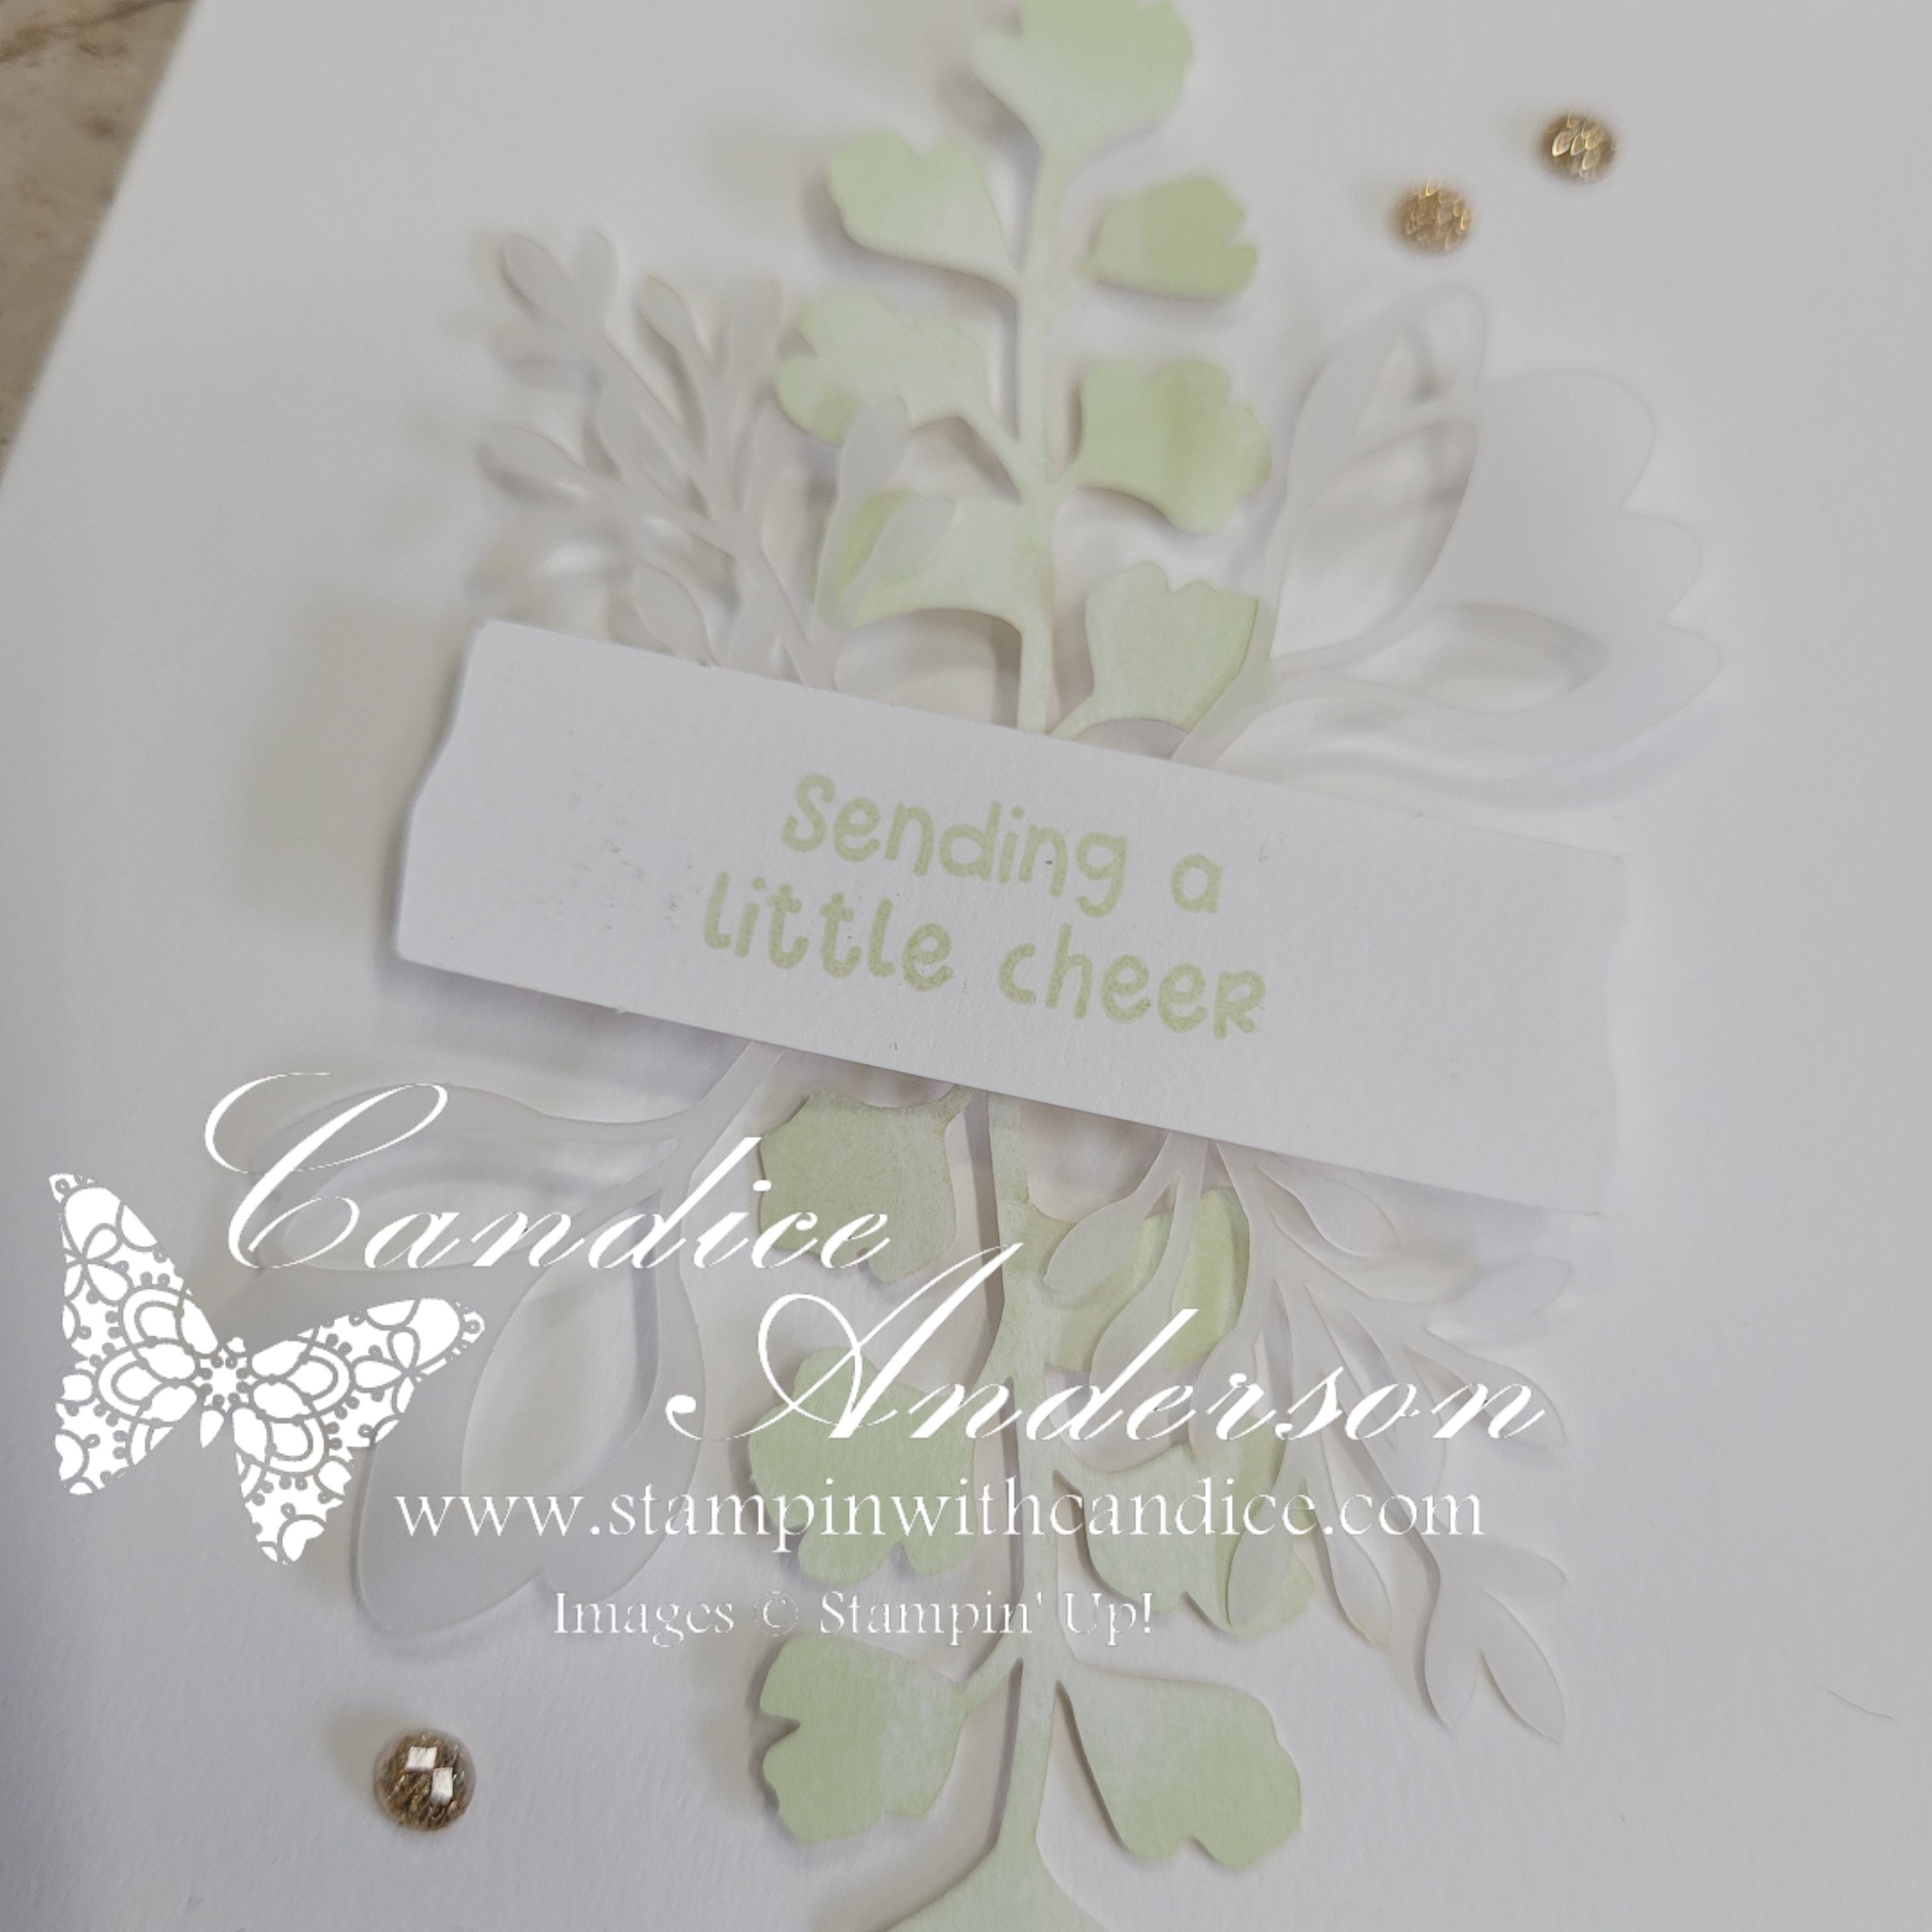
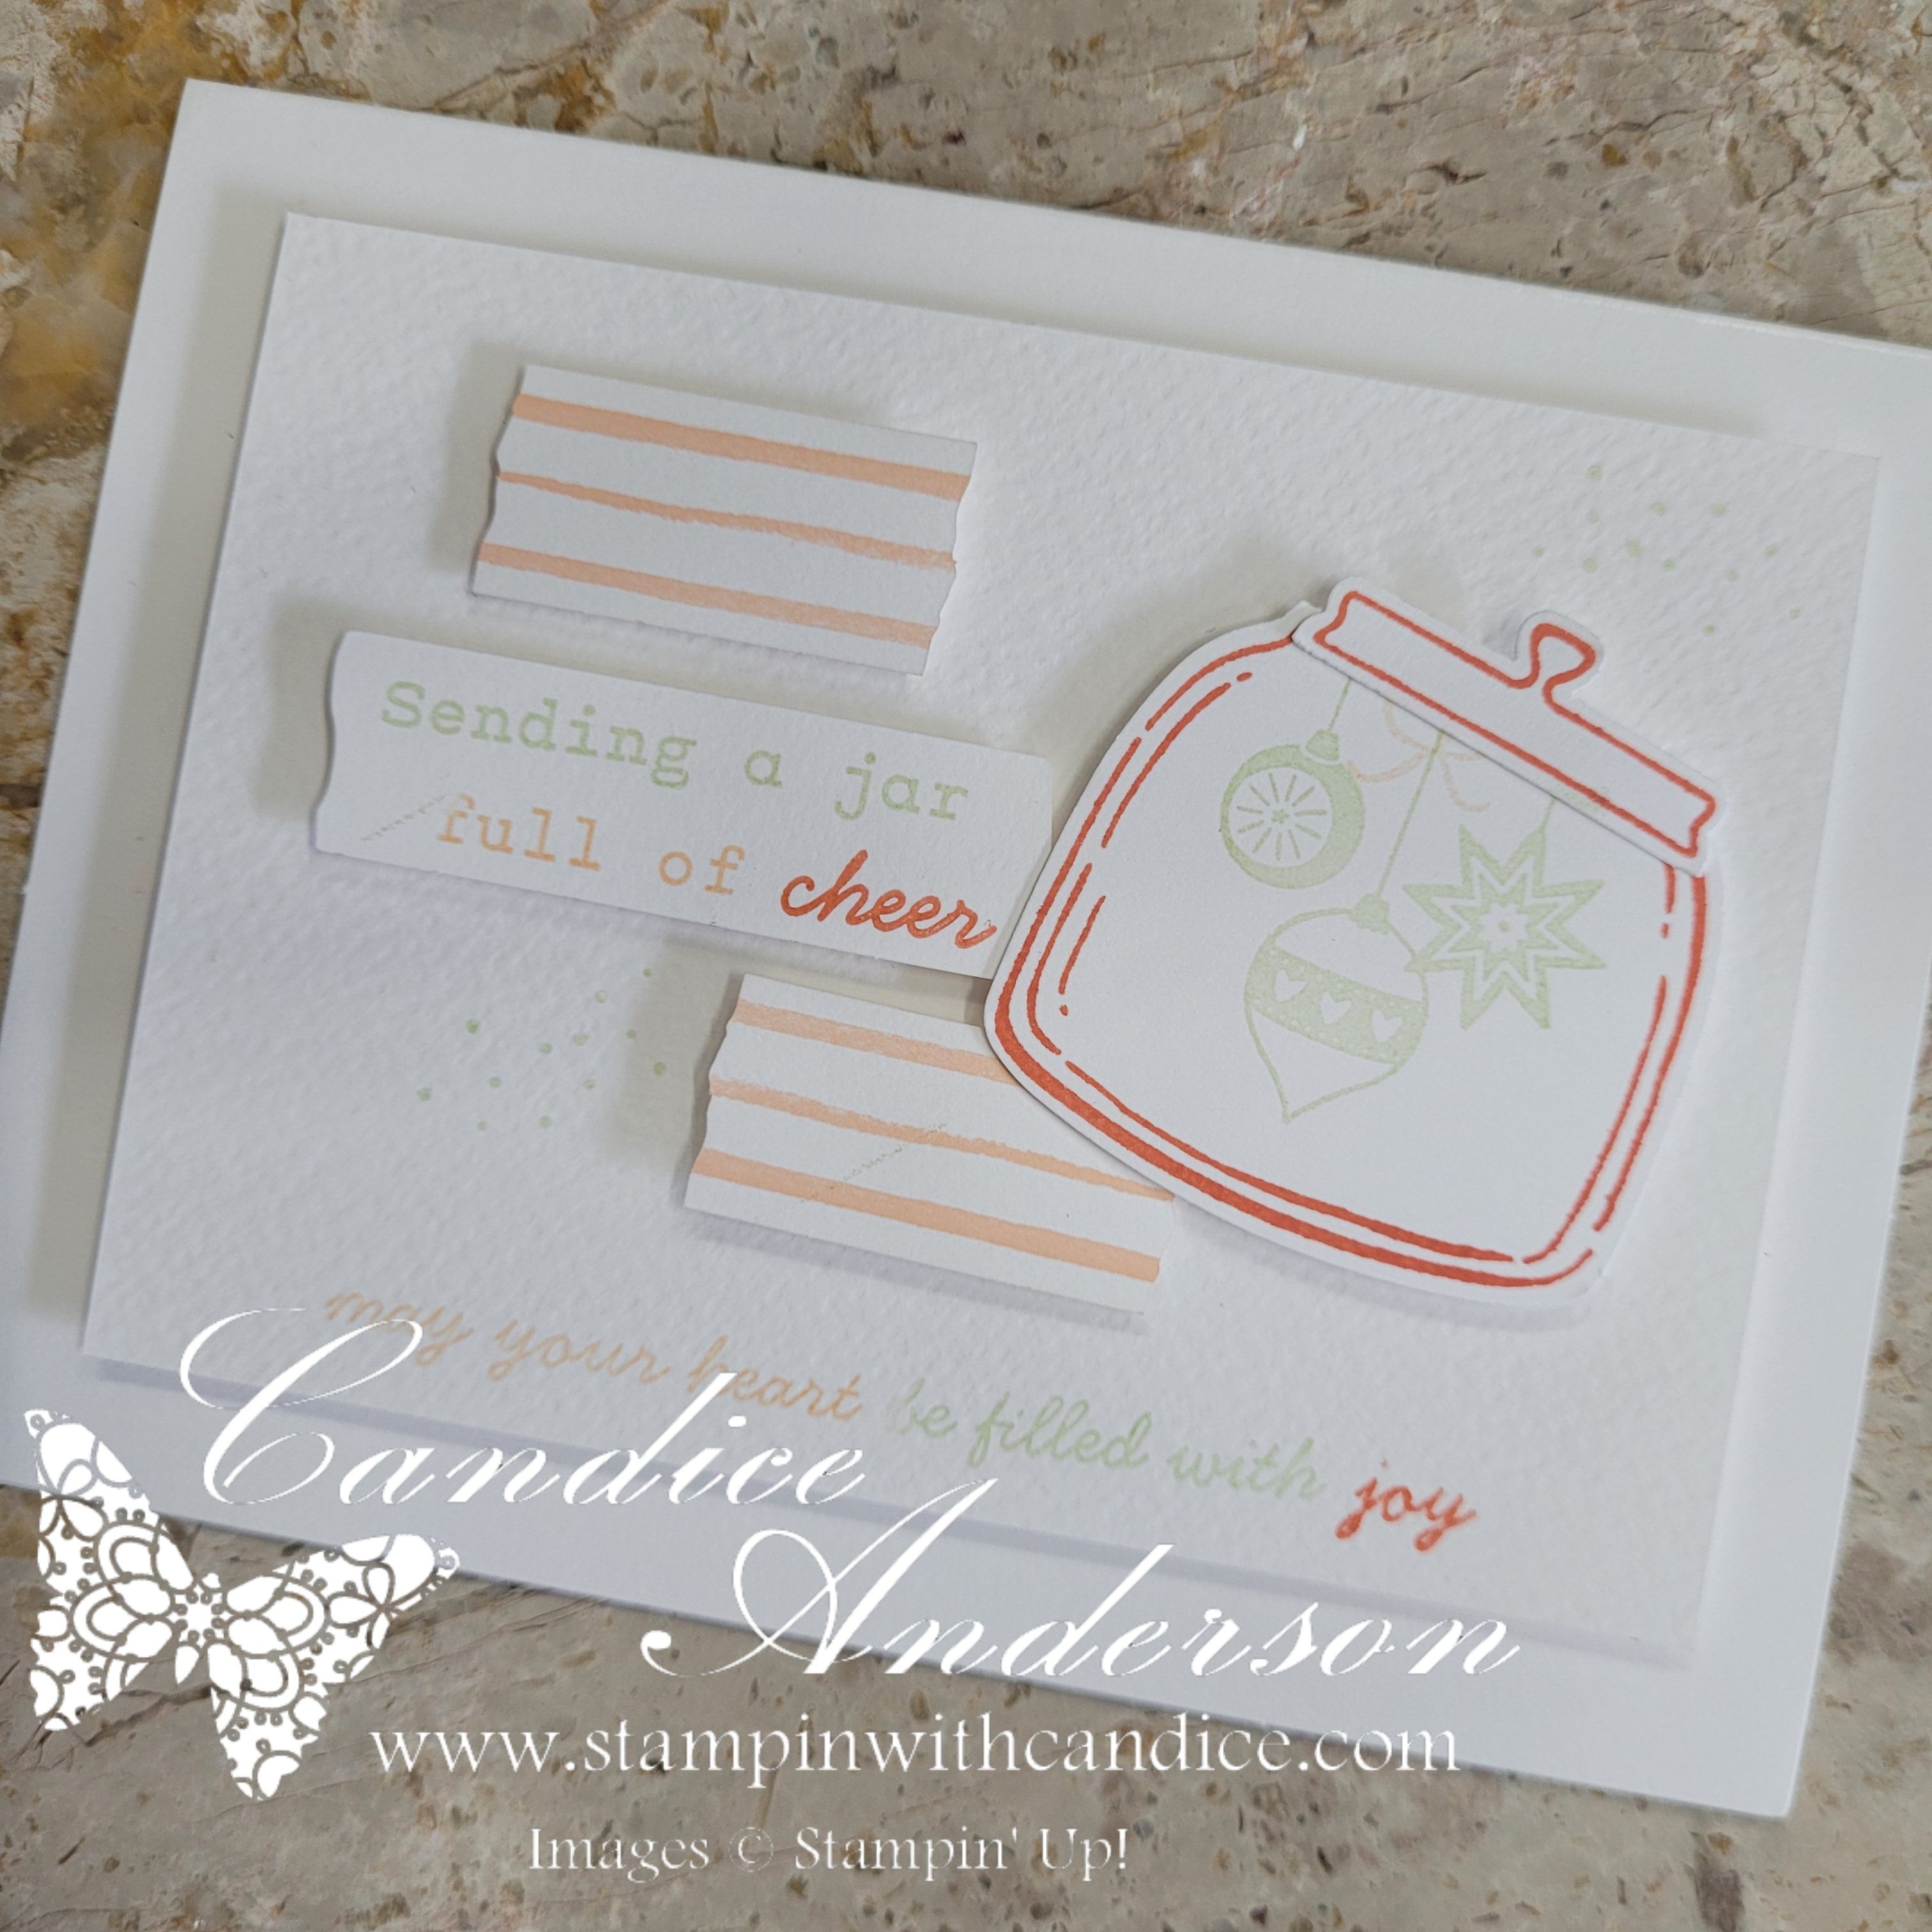
  • A Little Cheer (#166121)
  • Jar of Joy (#166176)
  • And to complete it all, a sweet little heart from the Darling Dinos Dies (#164734)

Many elements shows through the shaker window, adding a beautiful layered effect.


❀️ The Finished Look

This card was definitely on the advanced end of the crafting spectrum, but the result is exactly the whimsical, storybook look I hoped for. A little Santa magic, a little Grinch mischief, and a whole lot of creativity.

It’s playful.
It’s nostalgic.
It’s unexpected.
And it absolutely makes me smile.

Sometimes the β€œbig idea” cards are the ones that make you stop, smile, and believeβ€”and this one did exactly that for me.


πŸ‘‰ Want to recreate it? You can shop current Stampin’ Up! supplies and tools here:
Shop with Me Here

A beautifully crafted Christmas card featuring a window scene that displays a peaceful nativity setting on one side, while the inside is adorned with cozy holiday elements like hanging stockings and warm colors.

Please feel free to contact me if you have any questions.

Contact me today to place your order!
435-232-2655 Cell ( Call or Text)
andersoncandice@hotmail.com


πŸ’• Let’s Stay Connected

πŸ“Ί YouTube
πŸ“˜ Facebook
πŸ“Έ Instagram
πŸ“Œ Pinterest

#StampinWithCandice #StamperCandi #ACardADayInNovember2025 #30DayChristmasCardMakingChallenge #ChristmasCards #HandmadeCards #CreativeTechniques #HolidayCrafting #cardmaker #cardmaking #christmascards #handmadecards #papercraft #sketchchallenge #christmaschallenge

Day 20 – Blessings of the Season

Scripture-Based Messages + Color Challenge #4

Today’s project blended two beautiful inspirations: Blessings of the Season, which called for scripture-based messages paired with gentle imagery, and Color Challenge #4 featuring the Concord & 9th palette of Nectar, Eucalyptus & Blueberry.

To coordinate with Stampin’ Up! colors, I selected Petal Pink, Soft Sea Foam, and Misty Moonlightβ€”a soft and elegant combination that worked perfectly with the peaceful feel of the theme.


Simple, Elegant & Meaningful

For this card, I kept the design very simple to allow the scripture and imagery to shine.

I reached for the Gift of Joy Stamp Set (#169238) and used the lovely three-step flower images. The layered stamping made it easy to incorporate all three challenge colors while still keeping the design airy and light.

For my sentiment, I chose a scripture greeting from the retired Blessings of the Season set (#139919). After stamping, I die-cut it using the Textured Notes Dies (#165555) and then matted it with Petal Pink for just a touch of warmth.


Connecting the Details

To pull the design together, I stamped the flower images in opposite cornersβ€”top and bottomβ€”creating a natural frame for the sentiment.

Then came one of my favorite parts: using a Blender Pen and a ruler to draw a soft dashed border connecting the two floral corners. Such a simple technique, but it adds so much charm! Once the entire panel was complete, I cut around it for a polished look.

For the background, I added a layer of Soft Sea Foam stamped with the brand-new Lasting Linen stamp (#167107). This subtle texture gives the finished card a gentle richness without overpowering the simplicity.


The Finished Card

The final result is simple, elegant, and filled with meaningβ€”a quiet, beautiful design built around scripture, soft florals, and one of my favorite color combinations this season.

I love how this one turned out, and I can’t wait to try it again with different sayings in the center. It would be so easy to switch it up for birthdays, sympathy, encouragement, or even a simple β€œthinking of you.”

Sometimes the simplest layouts are the most versatile.

πŸ‘‰ You can shop current Stampin’ Up! supplies and tools here:
Shop with Me Here

A beautifully crafted Christmas card featuring a window scene that displays a peaceful nativity setting on one side, while the inside is adorned with cozy holiday elements like hanging stockings and warm colors.

Please feel free to contact me if you have any questions.

Contact me today to place your order!
435-232-2655 Cell ( Call or Text)
andersoncandice@hotmail.com


πŸ’• Let’s Stay Connected

πŸ“Ί YouTube
πŸ“˜ Facebook
πŸ“Έ Instagram
πŸ“Œ Pinterest

#StampinWithCandice #StamperCandi #ACardADayInNovember2025 #30DayChristmasCardMakingChallenge #ChristmasCards #HandmadeCards #CreativeTechniques #HolidayCrafting #cardmaker #cardmaking #christmascards #handmadecards #papercraft #sketchchallenge #christmaschallenge

Day 19 – Hope & Light Meets North Pole Workshop?

Today’s Christmas Challenge brought two themes that couldn’t be more different: Hope and Light and North Pole Workshop. Instead of trying to force both themes into one design, I decided to lean into the contrast and create two separate cardsβ€”each with its own mood and message, but both built using the same layout and the same product focus:
Watercolor Pencils (#161700 & #149014) paired with Water Painters (#168234).

This turned out to be such a fun creative experimentβ€”one layout, two techniques, and two completely different looks!


The Shared Layout

To keep a unified feel between the two designs, I started with a simple, versatile layout:

  • Horizontal card base: 8-1/2″ x 5-1/2″, scored at 4-1/4
  • Accent strip behind the focal point: 1-3/4″ x 5-1/2″
  • Focal image panel: Die-cut using the Textured Notes Dies (#165555) β€” a perfect little frame for any image
  • Layered background: 4-1/2″ x 4-1/4″ with the sentiment stamped along the bottom

It’s an easy formula that works for just about any stamp set or technique, which made it perfect for today’s theme split.


⭐ Card 1: North Pole Workshop

For my first card, I reached for a fun retired favoriteβ€”Christmas Crowd. It’s full of cheerful, whimsical North Pole characters, and it was the perfect set for a bright, playful look.

Technique: Coloring In the Image

For this card, I used the watercolor pencils in the most traditional wayβ€”coloring the entire image before blending it out slightly with my Water Painter. This gave everything a soft yet vibrant finish without overwhelming the line art.

Finishing Touches:

  • Cherry Cobbler Baker’s Twine (#164051)
  • Real Red & White Peppermint Embellishments (#164050)

These little elements really pull together that Santa’s-workshop, peppermint-candy vibe.


⭐ Card 2: Hope & Light (Silent Night Style)

For the second theme, I chose the retired Come to Bethlehem (#120591) setβ€”a beautiful, solid-image stamp that has always felt powerful and peaceful to me.

Technique: Background Shading with Watercolor Pencils

Since the main image is a silhouette, I used the watercolor pencils differently for this card. Instead of coloring in the image, I lightly shaded a glowing backdrop behind the figures. With a soft wash from the Water Painter, it created a beautiful halo of color that makes the silhouette pop.

Finishing Touches:

  • Black Baker’s Twine (#155475)
  • Rhinestone Basic Jewels (#144220)

A little sparkle keeps the β€œlight” theme present while keeping the card simple and serene.


⭐ The Result: One Layout, Two Techniques, Two Totally Different Looks

It always amazes me how using the same basic card design can produce completely different moods depending on the stamp set, colors, and technique.

  • North Pole Workshop β†’ bright, fun, colorful
  • Hope & Light β†’ soft, meaningful, peaceful

Both simple.
Both beautiful.
And both incredibly easy to create with supplies you already have.

πŸ‘‰ You can shop current Stampin’ Up! supplies and tools here:
Shop with Me Here

A beautifully crafted Christmas card featuring a window scene that displays a peaceful nativity setting on one side, while the inside is adorned with cozy holiday elements like hanging stockings and warm colors.

Please feel free to contact me if you have any questions.

Contact me today to place your order!
435-232-2655 Cell ( Call or Text)
andersoncandice@hotmail.com


πŸ’• Let’s Stay Connected

πŸ“Ί YouTube
πŸ“˜ Facebook
πŸ“Έ Instagram
πŸ“Œ Pinterest

#StampinWithCandice #StamperCandi #ACardADayInNovember2025 #30DayChristmasCardMakingChallenge #ChristmasCards #HandmadeCards #CreativeTechniques #HolidayCrafting #cardmaker #cardmaking #christmascards #handmadecards #papercraft #sketchchallenge #christmaschallenge

Day 18 – Silent Night & Sketch Challenge #4

Today’s Christmas Challenge theme was Silent Night paired with Sketch Challenge #4, and the moment I saw the sketch I knew exactly what I wanted to reach forβ€”the brand-new Swirled Designs Stamp Set (#167030) and Dies (#167032). The stars in this bundle are absolutely stunning, and they instantly sparked the perfect β€œsilent night sky” idea.

Creating the Silent Night Background

I started with a Balmy Blue card base to give everything that crisp winter feel. For the next layer, I added Night of Navy, embossed with the So Swirly Embossing Folder (#163791). This folder adds such beautiful depth and movementβ€”perfect for creating the look of a quiet, swirling night sky.

To bring in that magical Christmas sparkle, I die-cut the large star from the Peaceful Garden Glimmer Paper (#165929). The shine is subtle but so elegant, and it really helps the star take center stage.

Sentiments with a Twist

For the greeting, I reached for the Jar of Joy Stamp Set (#166176) and used the β€œmay your heart be filled with joy” sentimentβ€”except I masked off the word joy to better fit the sketch. I stamped and heat-embossed it in silver, then punched it out with the Triple Banner Punch for a clean finish.

To complete the sentiment on the inside, I added the word β€œMagic” from the Light & Wonder Stamp Set (#165756) along with a few coordinating stars. It ties everything together so nicely.

Ribbon Tip You’ll Want to Try

You might notice the ribbon on the card looks extra thinβ€”here’s a fun trick! I used the Misty Moonlight Silver-Edged Ribbon (#165931) and simply cut off the silver edge so I could use it like baker’s twine. It adds just a touch of sparkle without overwhelming the design. Such an easy way to stretch your ribbon and get more looks from one spool!

Trying an Alternate Version

After finishing the first card, I wasn’t completely sure how I felt about the open center of the star, so I decided to try a second version. For this one, I traced the die onto a piece of Basic White cardstock and brushed it with Wink of Stella to create a soft sparkle behind the die-cut star. Once I layered the star over it, the whole look felt a bit more full and defined.

I used the same ribbon-cutting technique but added Balmy Blue Sheer Ribbon (#165767) behind the star as well. I even repurposed the extra little silver strips I trimmed awayβ€”perfect for accenting the sentiment!

For a final magical touch, I flicked my Wink of Stella across the Night of Navy embossed layer to create a splattered starlight effect. It’s such a simple technique, but it brings everything to life.

Which Version Do You Prefer?

Now the real question… Which one do I like better? Honestly, I’m still torn! The open star has a clean elegance, but the filled-in version has a soft glow that I really love.

I’d love to hear your thoughtsβ€”tell me in the comments which one speaks to you!

πŸ‘‰ You can shop current Stampin’ Up! supplies and tools here:
Shop with Me Here

A beautifully crafted Christmas card featuring a window scene that displays a peaceful nativity setting on one side, while the inside is adorned with cozy holiday elements like hanging stockings and warm colors.

Please feel free to contact me if you have any questions.

Contact me today to place your order!
435-232-2655 Cell ( Call or Text)
andersoncandice@hotmail.com


πŸ’• Let’s Stay Connected

πŸ“Ί YouTube
πŸ“˜ Facebook
πŸ“Έ Instagram
πŸ“Œ Pinterest

#StampinWithCandice #StamperCandi #ACardADayInNovember2025 #30DayChristmasCardMakingChallenge #ChristmasCards #HandmadeCards #CreativeTechniques #HolidayCrafting #cardmaker #cardmaking #christmascards #handmadecards #papercraft #sketchchallenge #christmaschallenge

πŸ‘Όβœ¨ Day 17 – Caroling Crew & Joy to the World

Day 17 paired Caroling Crew with Joy to the World β€” and these two themes came together perfectly!

Originally, I planned to pull out an older stamp set for this challenge… but the creative spark took over again, and I ended up making some holiday punch/die art magic instead. And honestly? I think you’re going to love what came out of this one!

I started by looking through my current sets for unexpected shapes and pieces I could repurpose. My eyes kept returning to the Bee My Valentine Stamp Set and matching punch β€” specifically the bee wings. And then it hit me…

✨ Angel wings!

From there, the ideas flowed as I searched my stash for more pieces to build a sweet holiday angel. Here’s everything I used and how I transformed each element:


πŸ‘Ό Angel Punch-Art Breakdown

Bee My Valentine Stamp Set (#162546) + Punch (#162553)

  • Bee Body (Head): Stamped in Petal Pink on white cardstock – be sure to cut off the stinger.
  • Bee Wings (Angel Wings): Pool Party stamped on white β€” stamped off for the base, full strength for the outline + Wink of Stella for shimmer
  • Bee Wings (Hair): Punch only (no stamping) –
    • Early Espresso cardstock
    • You will need a total of 7
    • One will be punched with the Bee Body to create bangs with the heart arches on the inside.
  • Eyes: Created by masking the bee’s smile stamp to isolate the smile only for the β€œeye” shapes

Swirled Designs Dies (#167032)

  • Halo: Small oval cut in Gold Foil Sheets (#132622)

Ornamental Christmas Dies (#166000)

  • Dress: Christmas tree die (I used the shorter one with double flares) cut from Peaceful Garden Glimmer Paper (#165929)

Alphabet Γ  La Mode Dies (#160750)

  • Mouth: Inside cut of the number β€œ6” (cut from black cardstock)

Gift of Joy Stamp Set (#169238)

  • Garland: Stamped in Pool Party + Wink of Stella, trimmed to size
  • Hands: Petal Pink stamped on white β€” created using the inside of the ornament stamp, cut apart
  • Song Book: Stamped in Versamark and heat-embossed in gold on Gold Foil Sheets (#132622), trimmed and scored down the center to give it dimension

Sentiment

  • β€œMerry” and β€œChristmas” stamped in Azure Afternoon
  • Punched with the Three Banner Punch (#167050)
A layout of various punched and stamped elements for a holiday angel project, including parts labeled for the bee body, halo, mouth, garland, and more, showcased on a white sheet.

🌟 Background Details

  • Everyday Arches Dies (#164629):
    • Main arch in Balmy Blue, embossed (I used the retired Merry Melody #156392) and brushed lightly with white ink
    • Larger white arch behind for a layered frame
  • Card Base: Azure Afternoon
    • Background stamped with the leaf-fill image from Gift of Joy to add depth
  • Ribbon: Sheer Balmy Blue Ribbon (#165767)
  • Adhesives: Lots of dimensionals + mini glue dots to build the layered angel

The result?
✨ A super fun, whimsical work of art that brings both joy and creative surprise to the holiday season.

If you want to see exactly how I created this angel step-by-step, join me LIVE tonight β€” 11/17/25 at 7:30 PM MST on YouTube or Facebook!

πŸ‘‰ A full replay will be linked afterward if you can’t join live.


πŸ‘‰ You can shop current Stampin’ Up! supplies and tools here:
Shop with Me Here

A beautifully crafted Christmas card featuring a window scene that displays a peaceful nativity setting on one side, while the inside is adorned with cozy holiday elements like hanging stockings and warm colors.

Please feel free to contact me if you have any questions.

Contact me today to place your order!
435-232-2655 Cell ( Call or Text)
andersoncandice@hotmail.com


πŸ’• Let’s Stay Connected

πŸ“Ί YouTube
πŸ“˜ Facebook
πŸ“Έ Instagram
πŸ“Œ Pinterest

#StampinWithCandice #StamperCandi #ACardADayInNovember2025 #30DayChristmasCardMakingChallenge #ChristmasCards #HandmadeCards #BeeMyValentine #PunchArt #AngelCard #CreativeTechniques #OrnamentalChristmas #GiftOfJoy #PeacefulGarden #EverydayArches #HolidayCrafting #JoyToTheWorld #CarolingCrew #StampinUp

πŸͺ✨ Day 16 – Peace on Earth Meets Cookie Exchange

Day 16 definitely stretched my creativity! Peace on Earth and Cookie Exchange aren’t themes you’d normally see together… but one of our amazing Stampin’ Up! kits made pulling them together surprisingly simple.

Day 16 definitely stretched my creativity! Peace on Earth and Cookie Exchange aren’t themes you’d normally see together… but one of our amazing Stampin’ Up! kits made pulling them together surprisingly simple.

I decided to take the Loveliest Wishes Kit (#166284)β€”a beautiful, soft-colored non-holiday kitβ€”and challenge myself to transform it into Christmas cards. The kit includes enough supplies to make three each of three different designs, so I started by creating the cards exactly as intended. They’re simple, easy, and so much fun to put together!

I love the soft color palette in this kit, so next I grabbed the A Little Cheer Stamp Set (#166121) and the coordinating dies (#166123) and began the holiday transformation. My personal challenge was to use only the paper that came in the kit, so I:

  • Stamped on the extra paper pieces
  • Used greetings in other languages and stamped on the back
  • Punched images from the kit’s pre-printed elements

Because the coordinating kit colors are Soft Sea Foam and Petal Pink, converting these beautiful cards into sweet Christmas designs was simple and natural. The leaf designs were perfect for the Peace on Earth theme, and the β€œHappy Christmas” card with the punched images gave me instant cookie vibes for the Cookie Exchange challenge.


🍬 Round Two – Jar of Joy Remix

I still had one more set of card bases left, so I grabbed the Jar of Joy Stamp Set (#166176) and coordinating punch (#165506). This time, I added a pop of Calypso Coral to brighten things up.

Fun fact:
πŸ‘‰ I used every single stamp in the Jar of Joy set across the three cards!
Just a note – I did use and extra piece of white paper to stamp and punch the jars; however, you could use the extra white piece that is used to pop on the images on the ornament Jar card and instead place the images directly on the card base.

I had so much fun stamping the greetings in multiple colorsβ€”just clean the stamp in between and keep going! This round, I was able to blend the Peace on Earth leaves with the cookie-inspired images to create a card that feels both peaceful and sweet.


πŸ’‘ Final Thoughts

Our kits are already fun, simple, and beautifully designed just the way they areβ€”but with a little creative magic and imagination, they can become so much more.

I would LOVE to see what you create with your kits!
Come share your creativity and inspire us in my group:
πŸ‘‰ Join my Facebook group:
https://www.facebook.com/groups/753759767970609


πŸ‘‰ You can shop current Stampin’ Up! supplies and tools here:
Shop with Me Here

A beautifully crafted Christmas card featuring a window scene that displays a peaceful nativity setting on one side, while the inside is adorned with cozy holiday elements like hanging stockings and warm colors.

Please feel free to contact me if you have any questions.

Contact me today to place your order!
435-232-2655 Cell ( Call or Text)
andersoncandice@hotmail.com


πŸ’• Let’s Stay Connected

πŸ“Ί YouTube
πŸ“˜ Facebook
πŸ“Έ Instagram
πŸ“Œ Pinterest

#StampinWithCandice #StamperCandi #CreativeSkills #StampinUp #ACardADayInNovember2025 #30DayChristmasCardMakingChallenge #ChristmasCards #LoveliestWishes #ALittleCheer #JarOfJoy #HandmadeCards #CraftKits #KitAlternatives #PeaceOnEarth #CookieExchange #CreativeStamping #StampinKits #HolidayCrafting