Happy Mother’s Day!

I hope all of you are enjoyed your Mother’s Day.  I’m spent my Mother’s Day weekend with my husband and friends in Moab, Utah running the Red Rock Relay.  I did it last year and had so much fun.  Once again we had a great time.

Red Rock 2014

I wanted to share with you real quick the project we made last month for our monthly club.

Mother's Day Box

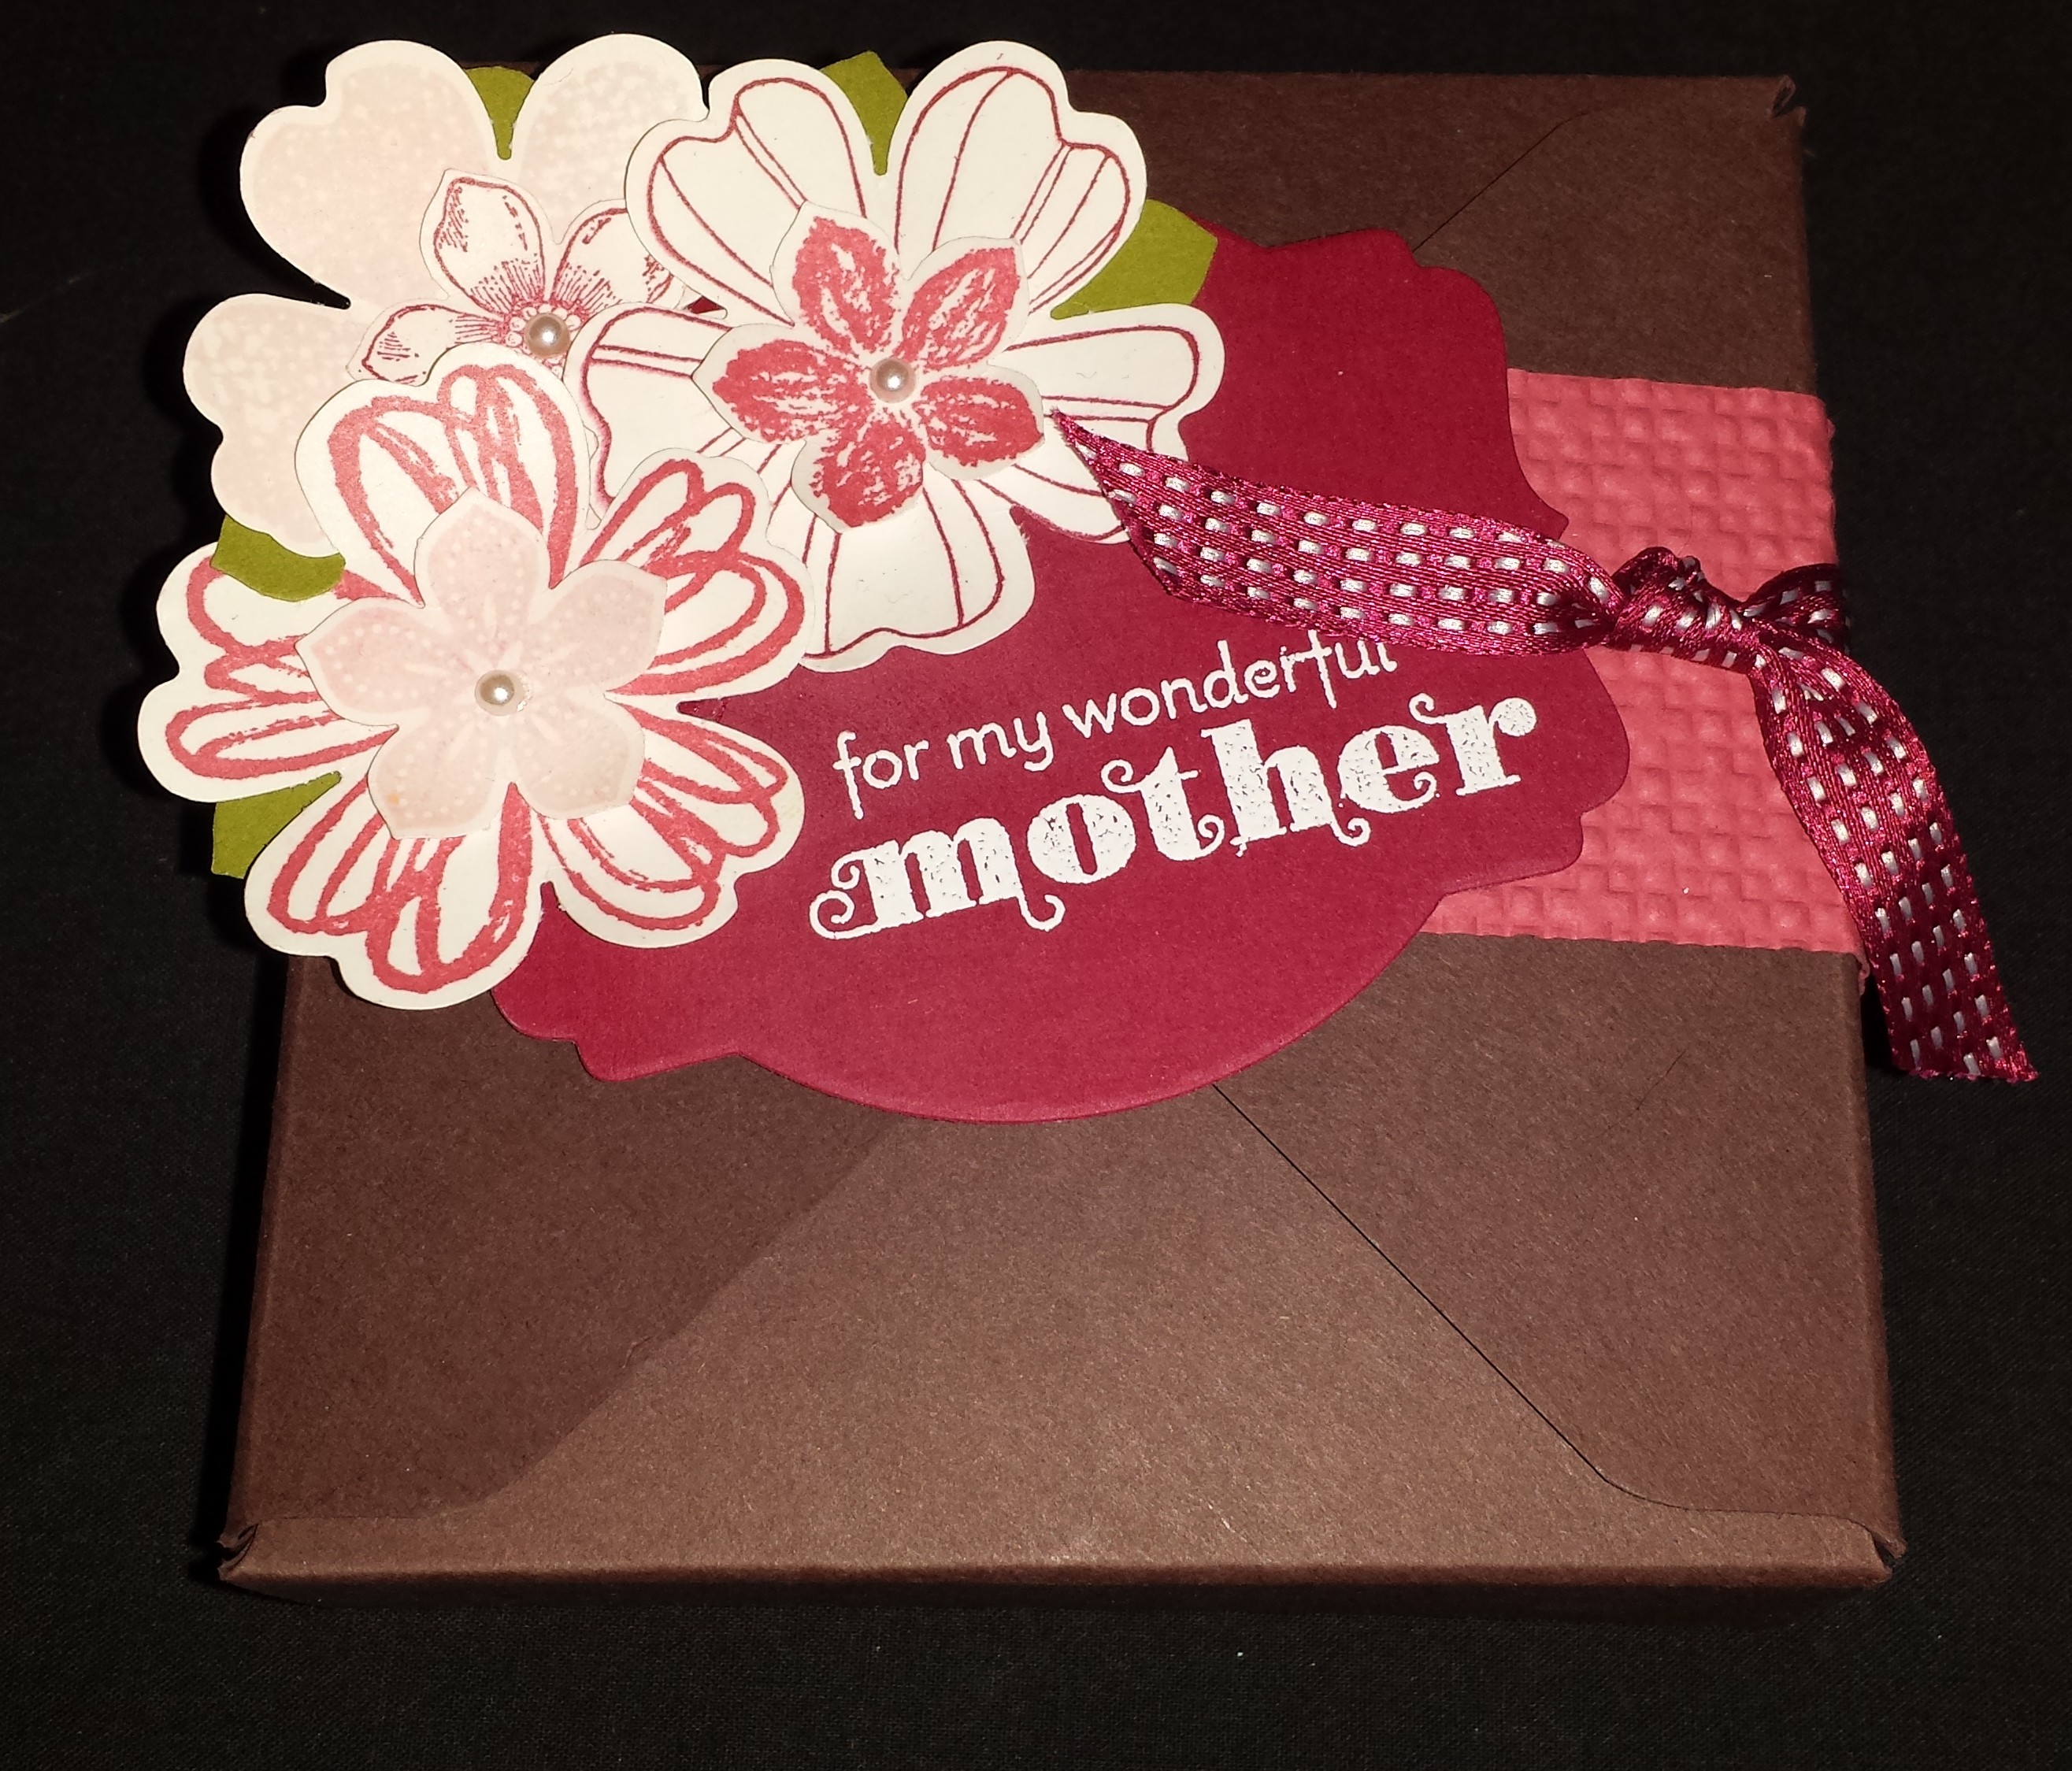
Each club member was able to make this adorable mother’s day gift box perfect for that special gift for mom.  The box was made using the envelope punch board.  Yes this board is great for so much more then just making envelopes.

Mother's Day Box Open

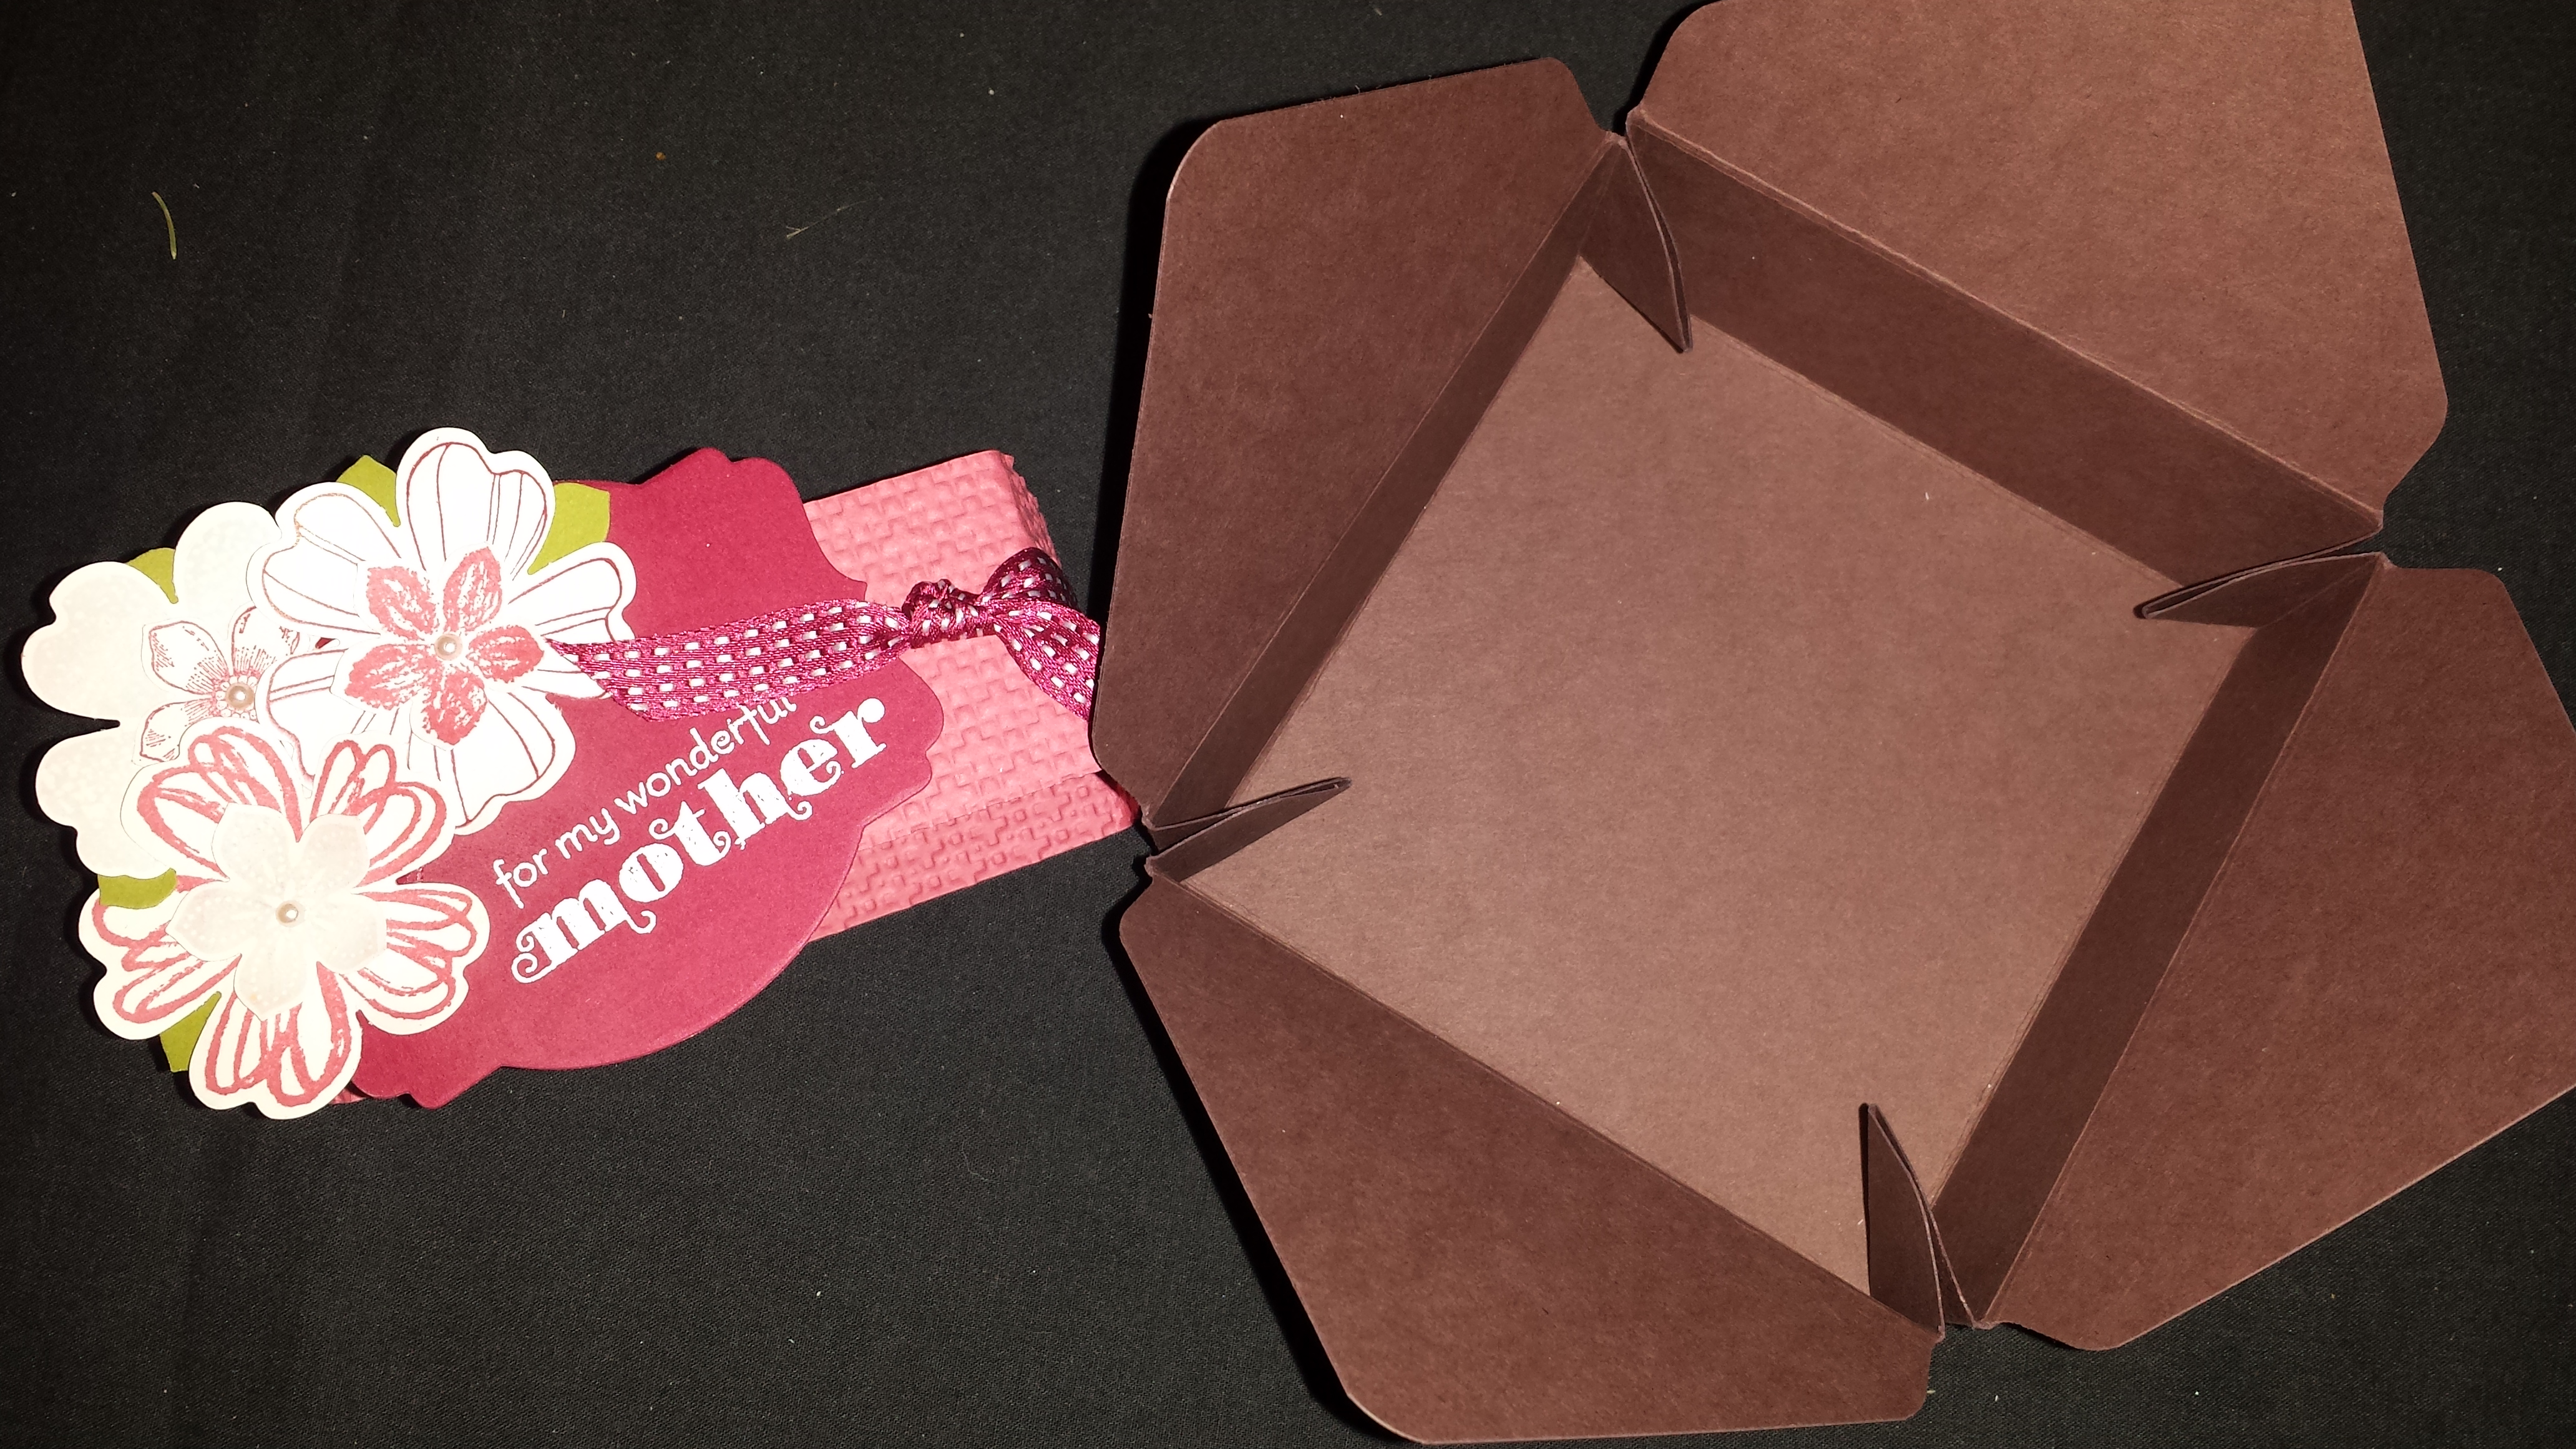
To make the box I started with an 8×8 piece of paper.  I used the punch board and lined my paper at the 5 then punched and scored.  Afterwards I moved it to the 3 and punched and scored again. I repeated this on each side of the paper.  Once I was done with that I used the corner rounder on the top to round all my edges.  Last you will want to flip the paper over and use your score board to score the center marks on each of the corners.  This is the part that you can see folded in.  This is also where I placed the glue to hold the box together.  You don’t need to do this only if you want the box to stay together withouth the belly band.  In the picture below I’ve drawn in the score lines so you can see them.

Envelope Punchboard Box instructions

I finished the box off with a fun belly band.  You’ll notice that our box matches the cute card that was available to make in the card buffet.

Mother's Day Flower Card

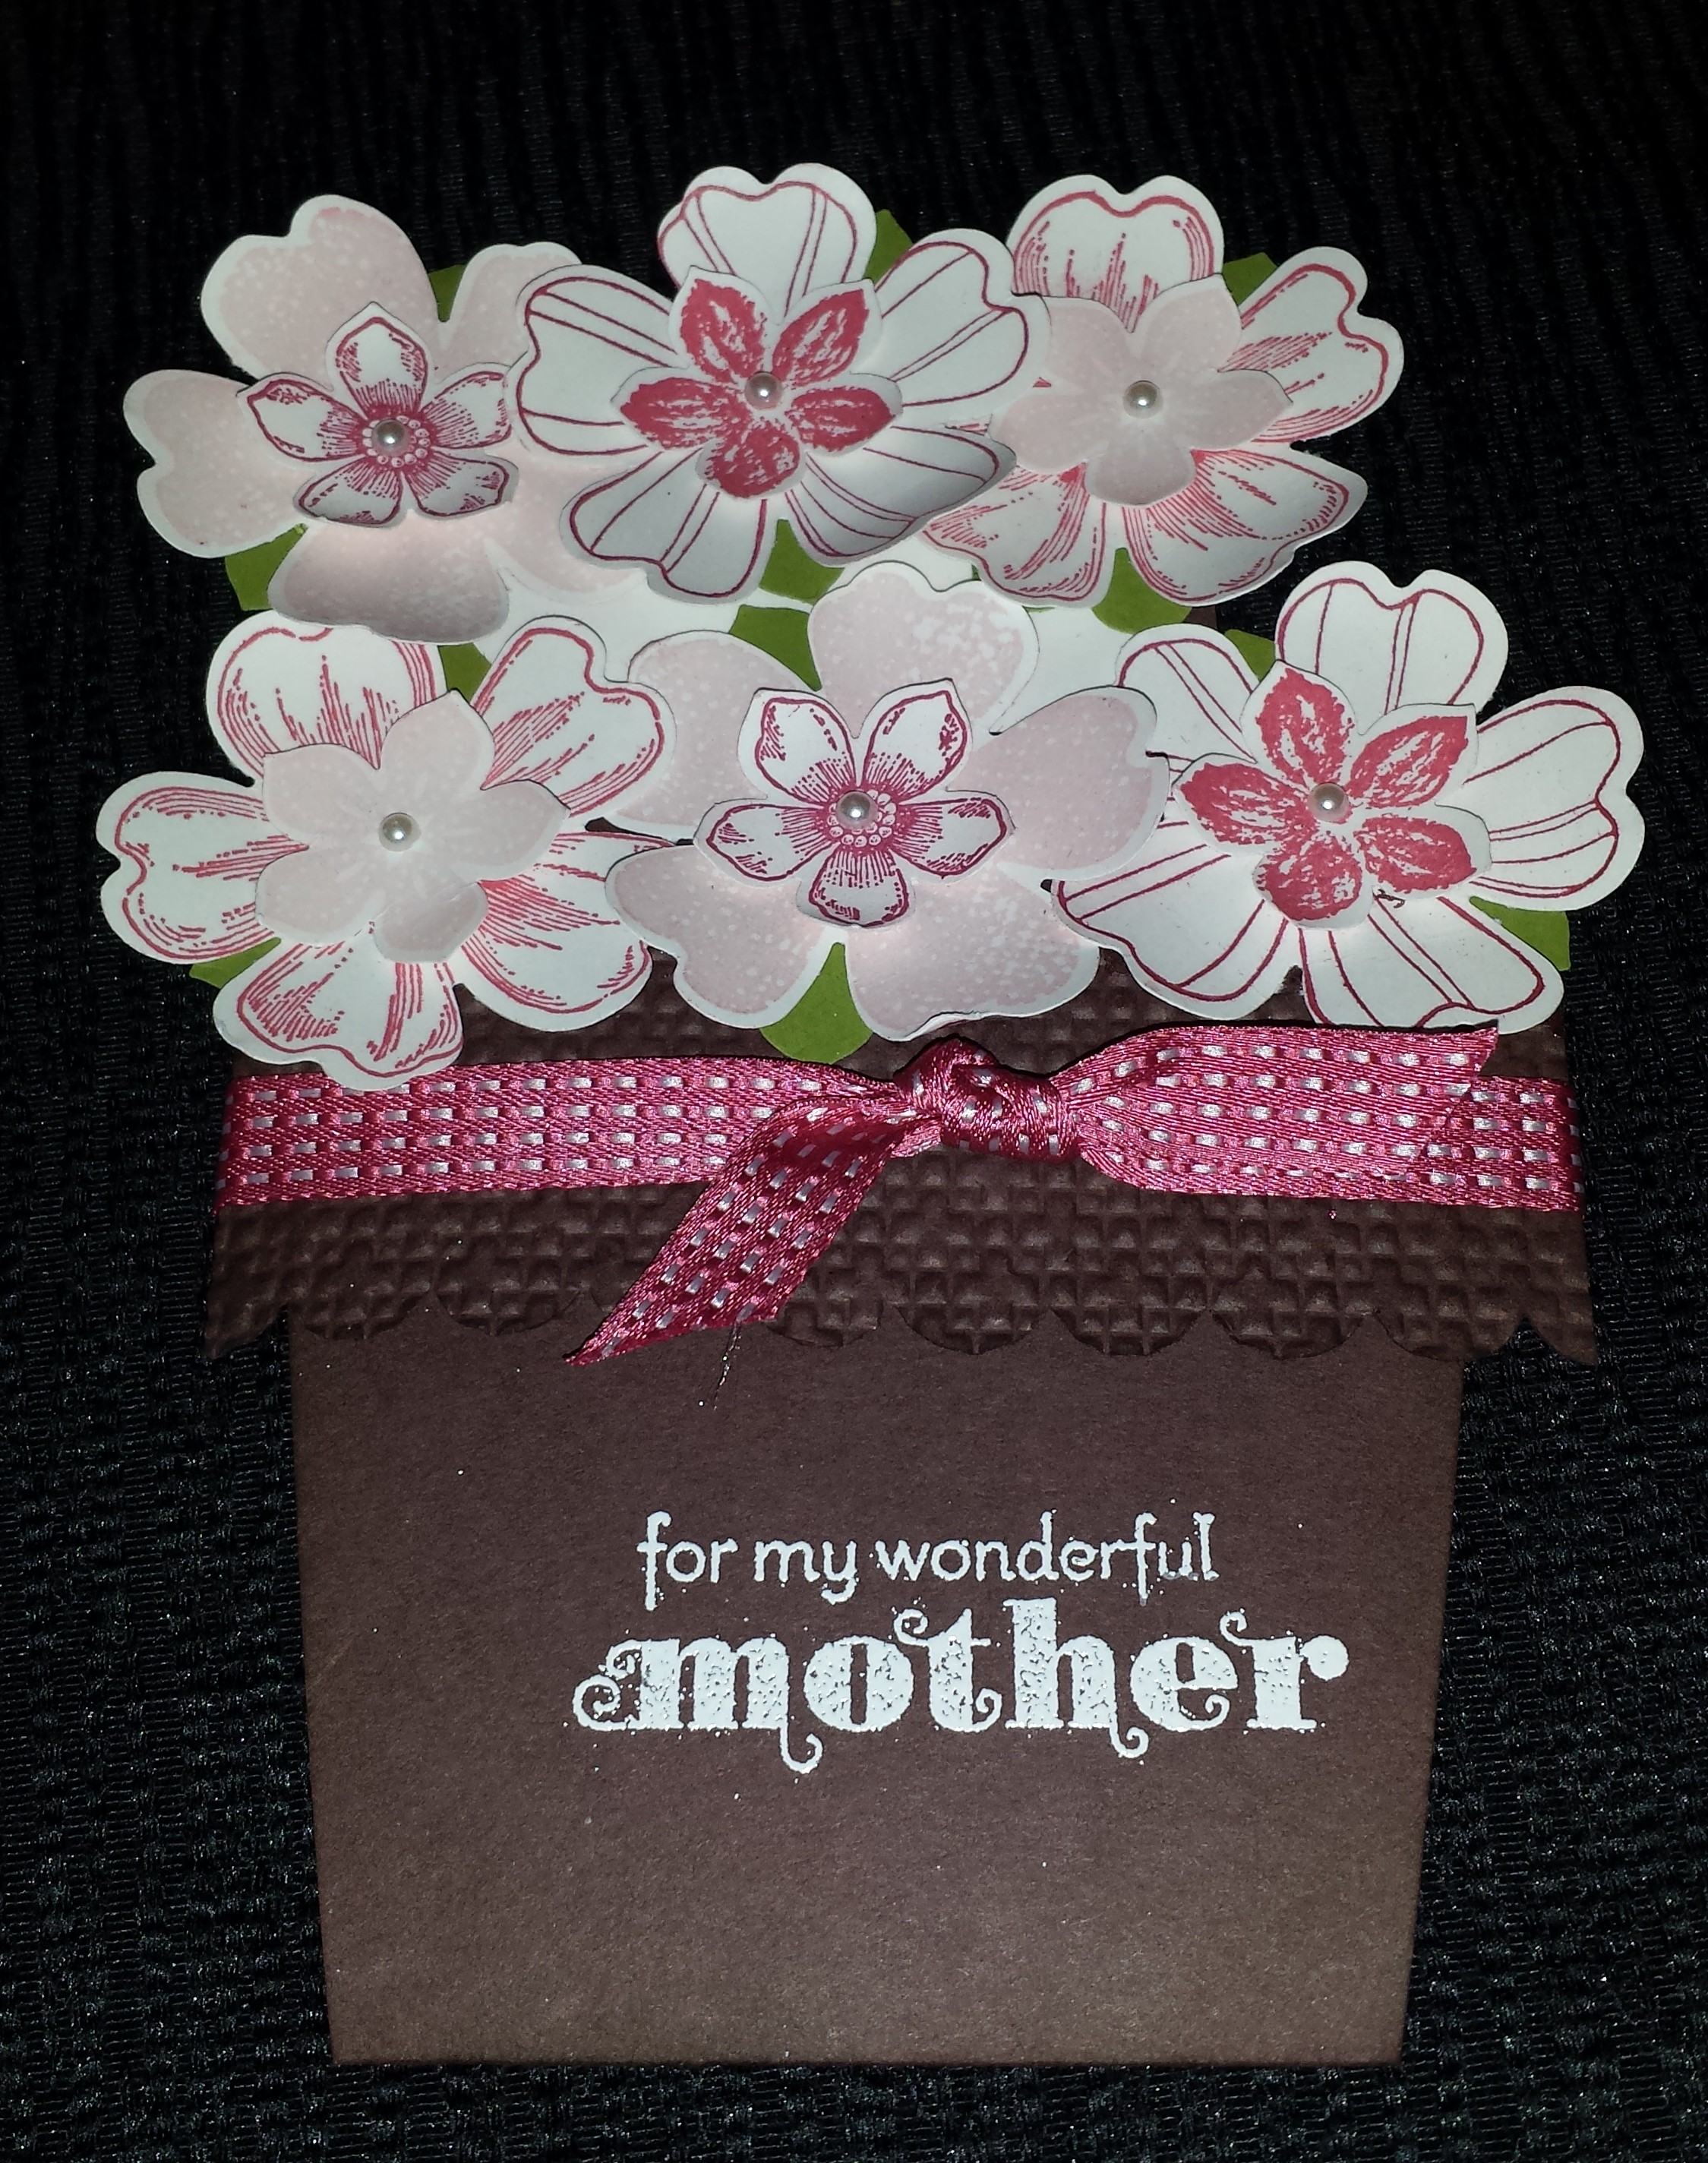
Here’s a close up of the cute belly band and the flowers that pop.  I finished the flowers off with a little pearl in the middle.  I love how they look.  Remember to use your bond folder to curl your flowers and give them more dimension.

Belly Band Flowers close up.

I hope you had fun sharing projects with your mother this mother’s day.  I love sharing handcrafted projects with my Mom as well as family and friends.

Tag SignatureOrder online 24/7
Contact me to order or book your party today!
435-245-5321 Home
435-232-2655 Cell (Text)
andersoncandice@hotmail.com

Stampin’ Supplies:

Colors:
Primrose Petals, Raspberry Ripple, Old Olive, Whisper White, Chocolate Chip, Pink Pirouette

Stamps:
Flower Shop
Wood- #130939 $23.95
Clear- #130942 $17.95

Also available as a bundle with the Pansy Punch– SAVE 15%
Wood- #132727 $33.95
Clear- #132726 $28.75

Petite Petals
Wood- #133152 $15.95
Clear- #133155 $11.95

Also available as a bundle with the Petite Petals Punch – SAVE 15%
Wood- #134821 $24.50
Clear- #134822 $21.25

Delightful Dozen
Wood- #128547 $32.95
Clear- #122652 $24.95

Big Shot:
Square Lattice Texture Embossing Folder #119976 $7.95
Deco Labels Collection #130102 $24.95

Punches:
Pansy #130698 $15.95
Petite Petals #133322 $12.95
Scallop Edge Boarder #119885 $15.95

Others:
3/8″ Stitched Satin Ribbon Raspberry Ripple #126845 $8.95
Pearl Basic Jewels #119247 $4.95
White Emboss Powder #109132 $4.75
Heat Tool #129053 $29.95
Bone Folder #102300 $6.95
Envelope Punch Board #133774 $19.95
Simply Scored Scoring Tool #122334 $29.95

Hooray for today!

Sorry I’ve been away for a bit, but if was for a great reason.  As I mentioned before my son competes in robotic competitions.  Not only did he win the state competition but it also qualified his team to compete in the World’s Competition.   We took the opportunity to go to California and support his team.  While we were there we stopped over at Disneyland for a few days since it was across the street.

I was excited to use my stampin’ talents to cheer his team on.

His team has a fun logo that they use for buttons, signs and their facebook page.  I used this logo as my inspiration for a couple of projects.

First I had to have cute nails to cheer them on.  I used “My Digital Studio” our digital paper crafting program to create my custom nail design which I was able to print through my Jamberry Nail company.  It was so easy to use all of our great punches and colors to create the same design that we used for the logo.

So first here’s the layout, all show you the finished ones in a minute.

Murphy Nail wraps

Next I wanted something special to let all of the boys on the team as well as his teacher how proud I was of all of them and how much I enjoyed cheering on their team this year.  Of course Stampin’ Up! came to the rescue again.  I made them these cute cards.  Once again I was able to use the great punches and stamps to create this fun card.  I used their logo as my inspiration.  I’ve included the button of their logo so you could see it.  All the boys loved them.  I wish that I would have thought to get a picture of all of them holding them.  I used the silver glimmer paper for the robot and I just love how it sparkles.  Who said you couldn’t have sparkle on a boys card 🙂

Hooray for today Murph-E Card

We also wanted to look unified at the event while we were cheering so we decided to have t-shirts made.  The boys would were black shirts and white ties with fedoras to all their competitions.  They felt that it was good luck as well as made them look more professional.  My husband came up with the idea to make T-shirts to match.  It think they turned out awesome, we got tons of great comments on them.  So this was the back:

Back of Murph-E shirt

I’m happy to say all of our hard work and cheering paid off as the boys were awarded the energy award for the team with the most spirit.  They went home with this awesome trophy.  There were only 5 trophy’s given in each division of 83 teams besides the winners so we were quite proud to be taking one home.  Here’s his team with the trophy in their “uniform.”  Their team was 4184E team Murph-E.

Team Murph-E

We were very excited that we were able to help cheer them on.  They did a great job and were were really proud of them.  Here we are in our matching t-shirts.  My son is the one holding the trophy.  My Mom was also able to come with us a cheer them on.

Our Family in Murph-E t-shi

I know I promised to show you the nail wraps after they were on.  So I thought what better way than to show them off with the trophy.  I also got lots of compliments on my cute nails.

Murph-E Nails

I hope you enjoyed learning a little about me and how I incoperate Stampin’ Up! into all aspects of my life.  If you would like to learn more about my son’s team Murph-E you can check out his Facebook page.   If you would like to know more about the Vex Robotics program just click here.

Once again I’m grateful for a job that allows me the opportunity to spend time with my children and to support them in their dreams.  Plus gives me a chance to treat my kids to a fun adventure.

Tag SignatureOrder online 24/7
Contact me to order or book your party today!
435-245-5321 Home
435-232-2655 Cell (Text)
andersoncandice@hotmail.com

Just one reason I love my job.

I know I’ve been a bit missing in action the last week or so, but it’s for a really good reason.   My son’s Robotics team was competing in the US open tournament in Nebraska last week.  I was able to chaperone and cheer his team on.  We are leaving again at the end of the month to cheer his team on at the World’s Competition in California.  We will also hop on over to see Mickey Mouse since he will be just across the street.

20140405_144154

I love that my job give me the time and flexibility I need to be there for my kids as well as the extra money.  This is just one of the great perks that I am able to enjoy by being a Stampin’ Up! demonstrator.  If this is something you would be interested in I’d love to talk to you and share more about our awesome program.

I’m home now and excited to play with some of my new stamps that came while I was gone so I should be posting some new projects soon.

Tag Signature
Order online 24/7
Contact me to order or book your party today!
435-245-5321 Home
435-232-2655 Cell (Text)
andersoncandice@hotmail.com

Signature Stamps in MDS

Last year my grandmother passed away and I had the opportunity to create a book for our family to remember her. My Digital Studio made this so easy. I had all our friends and family send me pictures of Grandma. Once I had those I was ready to go. I started with the template Sweet Details which comes with MDS. I made a few changes to add in additional photo boxes to fit in all those great pictures everyone sent and added words that worked well with the pictures. I also left plenty of room for signatures.

Grandma's book Front
Once I had the book ready to go I printed at a local printers and placed it in smooth sheet protectors. We took the book to the funeral and had everyone sign on the sheet protectors with a sharpie marker and write a special memory about my Grandma.

Grandma's Book Signature on page protector
After the funeral I took the book home and flipped the pages over so that all I had was the signature with a white background. I scanned these into the computer then used Photoshop to delete out the white background and turn the image into a SVG file.  SVG file is the same type of file that MDS uses to create stamps in the program. I saved all of my signatures in MDS under stamps and I was ready to go.

Grandma's book Signature on white
I added each signature to the pages. This was really nice because I was able to change the colors to make them match, re-size if needed and even move to a different page to spread things out. I also moved embellishments and pictures if necessary to make all the signatures look good with the pages and pictures.
Grandma's Book MDS screen shot
After I had everything in I was able to print the book through Stampin’ Up! to have a nice finished book. We actually printed like 15 books so that each family could have book of their own and have all the great pictures plus memories. I love it because everyone was able to have this special book instead of just one person.

Grandma's Book Finished Signatures
I think this idea is perfect for family reunions, special birthdays, weddings, graduations really just about any special occasion that many people would love to have the memory. I plan on making one for my son that is graduating this year and have friends and family write special messages. I think this would also be great if your child is part of a team like band, cheer, dance or any group they spend a lot of time with. You can create a book with pictures from the events and messages from all the participants then add it all together so everyone can have a special memory book.

.

I know this is a little advanced but I wanted to share it anyway because it just really gets me excited. If you would be interested in my creating a book like this for your event please let me know. I’d be happy to help you, or if you would like to make one of your own I’d be happy to help you with the steps as well. Hopefully you’ll find lots of great uses for this idea. I even think it would be fun to have your kids write a message each year that you could add to the family year book and have their handwriting preserved from year to year and see how it changes. If you have any questions please let me know.

Tag SignatureOrder online 24/7
Contact me to order or book your party today!
435-245-5321 Home
435-232-2655 Cell (Text)
andersoncandice@hotmail.com

Products used:

MDS Products:
My Digital Studio
Disk #130647 $19.95
Download #130646 $19.95
Free Trial #130910 $0

Downloads:
Sweet Details Photobook template- #125742 $17.95


Dinosaur Punch Art

I’ve been seeing throw back Thursday on Facebook a lot and I thought it would be fun to do it on my blog.  I’m not sure that Thursday will always be a throw back, but I’ll try.  If you are like me you keep stamps, punches and even paper that you love even though you can’t by them anymore.  So I figure why not share some fun ideas to do with them.  Maybe I’ll even make some new projects using retired products.  Who knows.  So now lets get on with the project because hey that’s the fun part right?

Dino Chart

Every year Stampin’ Up! has a contest called the Artisan Design contest.  I’ve entered many years, while I’ve never won I’ve had my projects shown at Convention and I’ve enjoyed creating them.  It does however make me sad to give them away.  Some of them I’ve re-created and some I’m still planning on it.  This is one of the still planning on it projects.  Hopefully before my little boy grows out of dinosaurs.  I think this was the hardest one to give away and I wish I had it still.  It was also quite big so I actually took it to Stampin’ Up! (Good thing I live close.)

Dino Chart Top

This is the top of the chart.  I used MDS to create all the pictures for the chart.  I changed them all to Sepia so they would match and added a fun background.  I also added the age and height.  He was only 5 when I made the chart so I left spots to add more pictures over the years.  I attached twigs to the top to hang it with.  Of course the top picture is when he was born.  So cute.

Bird Dino

Here’s a better picture of the bird Dino.  All of the dino’s are made using punch art and shapes from the big shot.  Can anyone guess where I got my inspiration for my characters.  Yep “Land Before Time.”  You can also see the close up of the texture on the letters.  I cut them out of chip board and paper, then glued the textured paper to the clipboard.

Green Dino

Next is my green Dino working his way up the mountain.  The mountain is just created by tearing up paper and crumbling it up then smoothing it out.  I used the directly to paper technique to add texture.  (That’s where you just take the ink pad straight to the paper to highlight the texture and edges.)

Brown Dino

Here’s the brown Dino.  I think I actually used the leave die to make the splotches on his back.  You’ll noticed I also added some grass to the mountain by just tearing up paper and snipping the edges.

Orange Dino

This one wasn’t really in the movie, but I wanted one more to work with the spacing.  I think he turned out cute.  He also had to be orange because that’s my son’s favorite color.  The ruler was created by using the simply scored tool.  I placed a cardboard so I would know how far to score each section so they stayed even.  Then I flipped it over and used a sponge to highlight the marks and added the numbers with the calender set.


T-Rex Dino

Of course we had to have the T-Rex at the bottom chasing the little Dino’s up the chart.  I left space on the side so that I could mark the height and write the date.  My son was very disappointed that I gave away the T-Rex.  That’s his favorite Dino.  Just posting about this makes me want to re-create it.

I hope you have enjoyed my throw back Thursday.  As you can see I really do love punch art.  It’s so fun to see what you can create using our awesome punches.  Especially something they weren’t designed for.

Tag SignatureOrder online 24/7
Contact me to order or book your party today!
435-245-5321 Home
435-232-2655 Cell (Text)
andersoncandice@hotmail.com


Thank You card from Shelli Gardner

20140127_104547

I got the most amazing surprise in the mail this weekend.  A thank you note from Shelli Gardner.  It was hand addressed by her with a message written just from her.  I was so excited and touched.  This is just one of the many reasons I love this company.  For those of you who don’t know who Shelli Gardner is let me tell you.  She is the co-founder and CEO of Stampin’ Up!  But more than that she is one of the most amazing people I have ever met.  She truly cares about everyone she meets.  She is so genuine and honest.  You just feel better being around her.  She doesn’t think of herself as anything amazing even though we all think she is.  She’s very down to earth and treats you like you are someone special.  I love going to events and listen to her speak.  I’ve had the opportunity to meet her on several occasions and she loves hearing about you and what you like.

me-shelli

This is me and Shelli at the Hawaii incentive trip I earned a while back.  One of the first times I was able to spend some time with her.  One of my most memorable experiences from a Stampin’ Up! event was when my little girl got sick at Leadership and her Husband (Sterling) and Son-in-law (Sean) helped me.  They continued to check in with me the rest of the time to make sure she was doing well and they love hearing updates about her when I see them at events.  Shelli has an amazing husband and family.  I just can’t say enough good things about them.  Now I’m sure they have their faults like all of us, but I’ve enjoyed spending time with them whenever I’ve had the chance.

DSCN0567

So you are probably wondering why I got this surprise thank you note in the mail.  Several months back I was given the opportunity to help Stampin’ Up! with a project they were doing with the Advisory Board.  The Advisory Board is a group of Stampin’ Up! demonstrators who are asked to serve for a year as advisers in helping Stampin’ Up! to know the needs of the demonstrators.  I wanted to bring a little Thank You for the opportunity to work with these amazing women.  You may remember this picture from a post a while back.

wpid-20130924_121942.jpg

I made zucchini bread and added this cute little tag.  I made one for each Advisory Board member as well as some extra for the staff who helped.  Shelli’s daughter (Sara) was also there and I was excited because I really wanted to give one to Shelli as well.  This was just a couple weeks after Shelli’s horse accident where she fell horseback riding in the Grand Canyon and was injured pretty bad.  I thought the bread would make her happy so I asked Sara to take one to her  I never expected to get anything back.  I just wanted her to know how much I appreciate everything thing she does for us and Stampin’ Up! and I wanted her to get well quickly.  It was so fun to get this thank you note and it meant so much to me.  I just goes to show that sending a hand written note especially in a hand stamped card or MDS card can mean so much.  I hope you will take the opportunity today to send a note to someone special and make their day.

Tag Signature