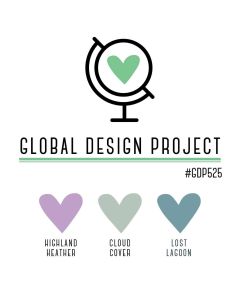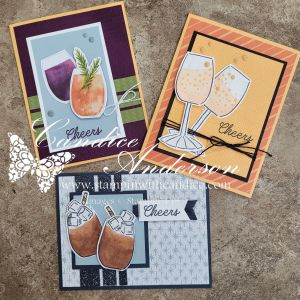
When I saw this week’s Global Design Project challenge, I knew the Cheers & Sips Suite was the perfect choice to grab. I had so much fun creating for multiple occasions—starting with some bubbly champagne, moving into a simple just because, and wrapping it up with cozy, seasonal hot chocolate.
Such a fun and versatile set! ✨
Heads up—this suite is on the Last Chance List, so be sure to grab it before it’s gone.
For each of my designs, I added a few elements outside of the Cheers & Sips Suite—things like ribbon, embellishments, and even other stamp sets. Can you spot what they were? 👀
Before I break down each card, let me first share what is included in the suite.
What’s in the Cheers & Sips Suite
Just a reminder: the stamps and dies are on the Last Chance List, but the designer paper is still available.
- Cheers & Sips Stamp Set #165588 (Last Chance)
- Cheers & Sips Dies #165593 (Last Chance)
- Celebratory Sips Designer Series Paper #165586 (Still Available)
The bundle also includes: (not used on these projects)
- Glass & Gardens Embossing Folders #165597 (Last Chance)
- Gold Striped 3/8″ Mesh Ribbon #165599
A Fun Surprise! 🥳
I entered these cards into the Global Design Project challenge and had the best surprise on Monday when I was tagged and notified that one of my designs was chosen as this week’s winner! 🎉
Can you guess which one?
Here’s a hint… it’s the one where I got a little creative. 😉

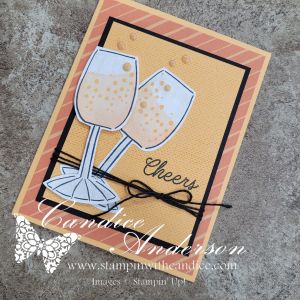
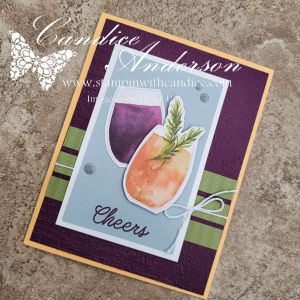
Card One – Bubbly with a Creative Twist 🥂
If you look closely at the Cheers & Sips stamp set, you’ll notice there is no stemmed wine or champagne glass. That didn’t stop me!
To create my glass:
- I used the umbrella image as the base, masking off the top portion.
- I masked the pin image to create two straight lines for the stem.
While the shape isn’t a perfect champagne flute, I still wanted that bubbly feel. To achieve that:
- I used the Beautiful Butterflies Stamp Set #164608 (Last Chance) for the tiny dot images to mimic bubbles.
Additional details include:
- Black Baker’s Twine #155475
- 2024–2026 In Color Flat Pearls #165266
- Lasting Linen Stamp Set #167107 for a subtle textured background
- Wink of Stella #141897 for sparkle (because bubbly needs shimmer!)
I kept the color palette mostly tone-on-tone with a pop of black:
- Petal Pink Stampin’ Blends #154893 for the champagne
- Peach Pie cardstock and ink
- DSP also includes Pumpkin Pie accents


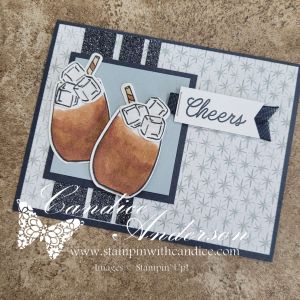
Card Two – Let the DSP Shine ✂️
For this card, I focused on using the suite itself and cut my images directly from the DSP instead of stamping.
The color combination came straight from the paper and was a little outside my comfort zone—but I loved how it turned out!
Details:
- Peach Pie card base
- Blackberry Bliss background embossed with the Exposed Brick 3D Embossing Folder #161600
- Old Olive DSP for the striped background
- White Baker’s Twine
- Cloud Cover behind the glasses
- 2025–2027 In Color Flat Pearls #165192
That brick texture adds just the right amount of interest without overpowering the design.
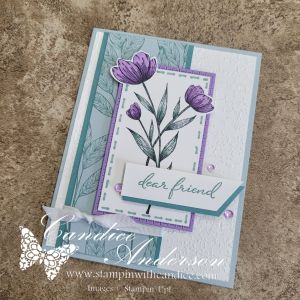
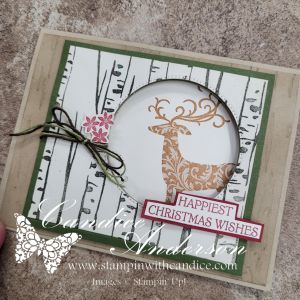
Card Three – Cozy Winter Vibes ☕
For my final card, I wanted a winter-inspired feel. The Cloud Cover DSP created the perfect backdrop.
I used a similar layout to Card Two but:
- Flipped it horizontally
- Varied the widths of the background strips
- A smaller focal square for balance
Additional elements:
- Peaceful Garden Glimmer Paper #165929 for sparkle
- Secret Sea for the background and stamping
- Neutral Stampin’ Blends for the drinks
Instead of stamping the ice cubes inside the drinks, I placed them on top. My goal was marshmallows with a touch of Wink of Stella—but my daughter said it looked more like iced coffee. ☕❄️
Honestly… either works!
Finishing touches:
- Straw from the More Than Autumn Stamp Set #164228 (Last Chance)
- More Than Autumn Dies #164075 (Last Chance)
- Secret Sea Bordered Open Weave Ribbon #166932 (available in January)
One Suite – Three Very Different Cards
Three cards.
Three completely different looks.
One versatile suite.
That’s just one more reason to grab the Cheers & Sips Suite before it’s gone. If it’s been sitting on your wish list, this is your sign. 💛
👉 You can shop current Stampin’ Up! supplies and tools here:
Shop with Me Here

Please feel free to contact me if you have any questions.
Contact me today to place your order!
435-232-2655 Cell ( Call or Text)
andersoncandice@hotmail.com
💕 Let’s Stay Connected
📺 YouTube
📘 Facebook
📸 Instagram
📌 Pinterest
#StampinWithCandice #StamperCandi #GDP527 #GlobalDesignProject #CheersAndSips #StampinUp #HandmadeCards #LastChance