Merry Christmas! 🎄
I hope you all had a wonderful holiday filled with special moments spent with family and friends. 💛
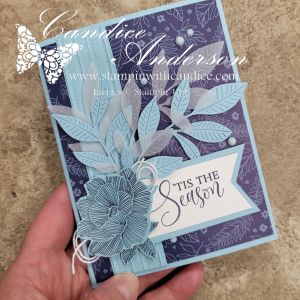
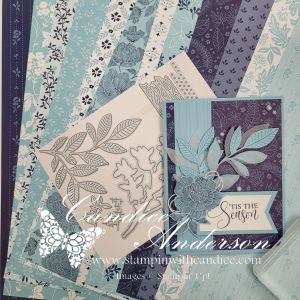
For my Monday Live, I shared an easy pop-up gift card holder that’s perfect for those last-minute gifts—or for anyone who’s just hard to buy for. I also featured this month’s Product of the Month, the True Blue Florals Designer Series Paper (#167970). You can grab this gorgeous paper for just $5 with a $75 purchase—such a great deal!
I chose to give my project a Christmas feel by using a few holiday sentiments, but this card design and layout work beautifully for any occasion. Simply swap out the greeting and embellishments, and you’re good to go.
During the live, I promised I’d share all the measurements so you can recreate this project at home—so let’s dive in!
Card Front Measurements & Supplies
- Card Base:
- Balmy Blue Cardstock – 8-1/2″ x 5-1/2″ (scored at 4-1/4″)
- Card Front Layers:
- True Blue Florals DSP – 5-1/4″ x 4″
- Balmy Blue Cardstock – 5-1/4″ x 4″
- Embossed with Lovely Striped Embossing Folder (#167179 – available in January)
- Die Cuts:
- Leaves cut from Balmy Blue Cardstock and Vellum (#167099)
- Dies: Nature’s Symphony Dies (#166925 – available in January)
- Tag:
- Basic White – 2-1/2″ x 1-1/4″, cut into a tag
- Stamped with Ornamental Christmas (#165991) in Night of Navy
- Mat: Balmy Blue – 2-1/4″ x 1-1/2″
- Embellishments:
- Flowers fussy-cut from DSP
- Muted Palette Dots (#165155)
- White Baker’s Twine (#155475)
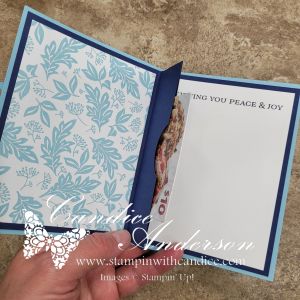
Inside Pop-Up Gift Card Holder
- Cardstock:
- Two pieces of Night of Navy Cardstock – 5-1/4″ x 5-1/4″
- Scoring:
- Score each piece at 1-1/4″
- This creates a 1-1/4″ section and a 4″ section
- Assembly:
- Attach the two 1-1/4″ sections together (top and bottom) using Tear & Tape (#154031)
- Use a circle punch to punch a small notch in the outer corner of the 1-1/4″ section
- This makes it easier to slide the gift card in and out
- Finishing the Inside:
- Left side: DSP – 3-3/4″ x 5″
- Right side: Basic White – 3-3/4″ x 5″
- Stamp with a coordinating greeting to finish the card
- Attach the the inside of card.
- Just a note they are cut so the are centered leaving an 1/8″ border. This helps pull the center apart just slightly and make it easier for the gift card to slide in and out.
Final Thoughts
This card really is super easy to make, and once you’ve made one, you’ll want to make several! It’s perfect for holidays, birthdays, thank-you cards, or any time a gift card is the perfect solution.
If you’d like extra help, be sure to check out my step-by-step video for the full walkthrough. And please—share your creations in the comments! I would absolutely love to see what you come up with.
👉 You can shop current Stampin’ Up! supplies and tools here:
Shop with Me Here

Please feel free to contact me if you have any questions.
Contact me today to place your order!
435-232-2655 Cell ( Call or Text)
andersoncandice@hotmail.com
💕 Let’s Stay Connected
📺 YouTube
📘 Facebook
📸 Instagram
📌 Pinterest
#StampinWithCandice #StamperCandi #HandmadeCards #GiftCardHolder #StampinUp #CardMaking #LastMinuteGifts #Papercrafting #DIYCards #CreativeInspiration #ProductOfTheMonth #HolidayCrafting

[…] sure to check out my blog post and video featuring this awesome paper and a quick, cute pop-up gift card holder […]