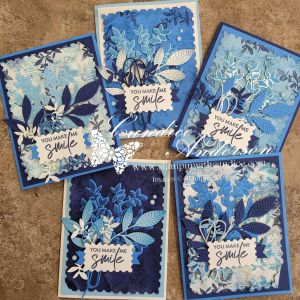
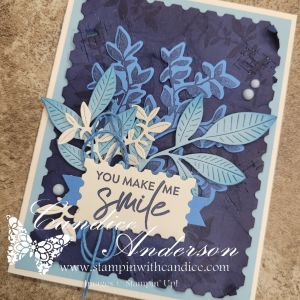
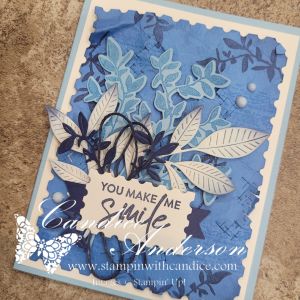
This week the Global Design Project featured another color challenge using Night of Navy, Azure Afternoon, and Balmy Blue. I briefly considered using December’s Product of the Month since those blues would have worked perfectly, but in the end I decided to do something a little different and create my own background paper.
I pulled out the Nature’s Symphony Stamp Set (#166919) and Dies (#166925) and had so much fun experimenting that I ended up mixing and matching the technique with several different background colors. Each one turned out completely unique. Can you guess which one was my original? I’ll give you a hint—it started with Very Vanilla cardstock, which I really love because it highlights the technique.

Creating the Textured Background
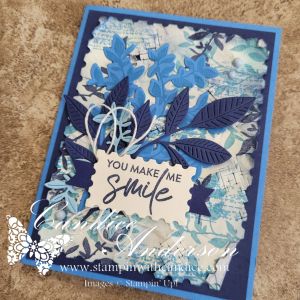
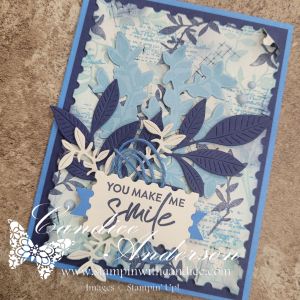
I originally planned to stamp the image and let it peek through the die-cut opening, but once I started playing, I realized I wanted even more texture. Instead, I layered stamped and die-cut elements to really build depth.
To make your own background, start with a piece of Very Vanilla cardstock cut with the second-largest die from the Perennial Postage set (#162607).
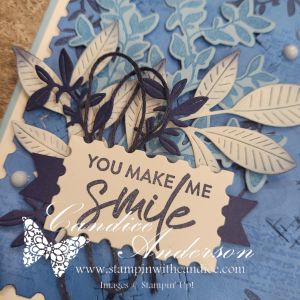
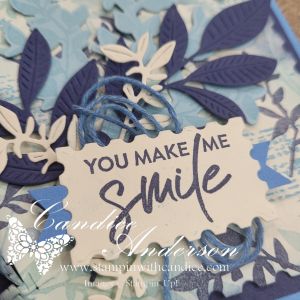
- Stamp the large leaf image randomly in Balmy Blue
- Add the textured line image in Azure Afternoon
- Finish by stamping the small leaf in Night of Navy
Now for the fun (and slightly scary) part—crumple the paper. Yes, really! Squish it up to create a rough, worn texture full of dimension. Once flattened out a bit, use Blending Brushes (#160518) with Balmy Blue and Night of Navy to add even more depth.
Adding Extra Texture
In the Nature’s Symphony die set, there’s a small die made up of hash marks. It doesn’t cut out an image—it cuts tiny hash marks creating textures instead. Run this die across your background in multiple directions. After sending it through the Cut & Emboss Machine, the paper will be flatter again, so go ahead and crumple it one more time. Be gentle—those cut areas can catch—but allow some sections to bend and open for even more interest. Add a little extra ink with your blending brushes to highlight those textured areas.

Finishing the Cards
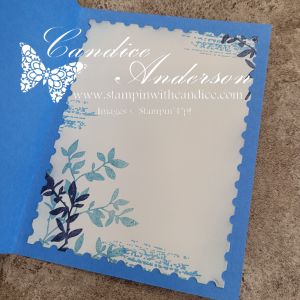
Once the background was complete, all that was left was deciding what colors to stamp and die-cut for the remaining elements. I used the same technique on multiple cardstock colors, but Very Vanilla really lets all the details shine.
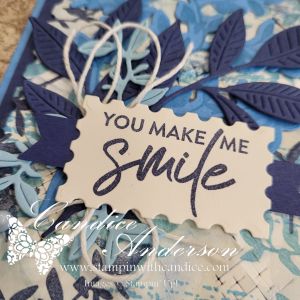
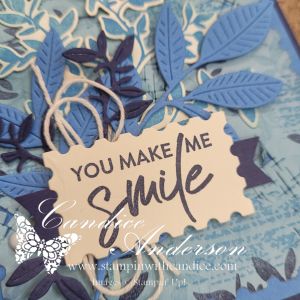
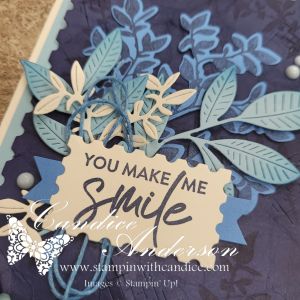
I finished each card by layering the die-cut elements, using Dimensionals behind the delicate leaf piece for added depth. A quick tip: if you cut the cardstock layer that sits behind your postage die piece to the correct size, you can die-cut one of the leaf shapes from the center first, saving cardstock before adhering it.
For the greeting, I used the second-smallest rectangle postage die, added small piece of paper that I used the Three Banner Punch #167050 to turn into a tach and finished with Very Vanilla Baker’s Twine behind it. Did you notice on some of the cards it isn’t very vanilla? I customized the twine color by brushing ink directly onto it with a blending brush—a great trick when you need ribbon in just the right shade. I always keep white or vanilla twine on hand for this reason. To finish things off, I added a touch of bling with Muted Palette Dots (#165155).
Final Result
In the end, I created five stunning cards, all using the same basic technique but each with its own unique look and feel. It may sound complicated, but it’s actually pretty easy once you try it—and I even made a hyper-speed video so you can see the whole process in action.
Which one do you think was my original? 💙
👉 You can shop current Stampin’ Up! supplies and tools here:
Shop with Me Here

Please feel free to contact me if you have any questions.
Contact me today to place your order!
435-232-2655 Cell ( Call or Text)
andersoncandice@hotmail.com

Published by